Configuring Scheduled Jobs – Part I
Introduction:
In this blog, we will be seeing Scheduled Job configuration for Data Replication using Data Director.
Scheduled Jobs comprise of two parts: the Job Header and Sub-jobs.
In the Job Header, we define different parameters for the Jobs like, Error Handling, To and From Locations, Compression Types, Scheduling details and the sub-jobs.
In the Sub Jobs, we define where to get the schemas of the table, the tables to replicate, methods of replication, filters on the data to be replicated, linked tables, etc.
References:
- LS Retail Data Director User Guide (ls-one.com)
- Isolation Levels in SQL Server – SQLServerCentral
- Distribution Sublocations, Scheduler Job Header (lsretail.com)
- Distribution Restrictions, Scheduler Job Header (lsretail.com)
Pre-requisites:
- Microsoft Dynamics 365 Business Central
- LS Data Director
Configuration:
General:
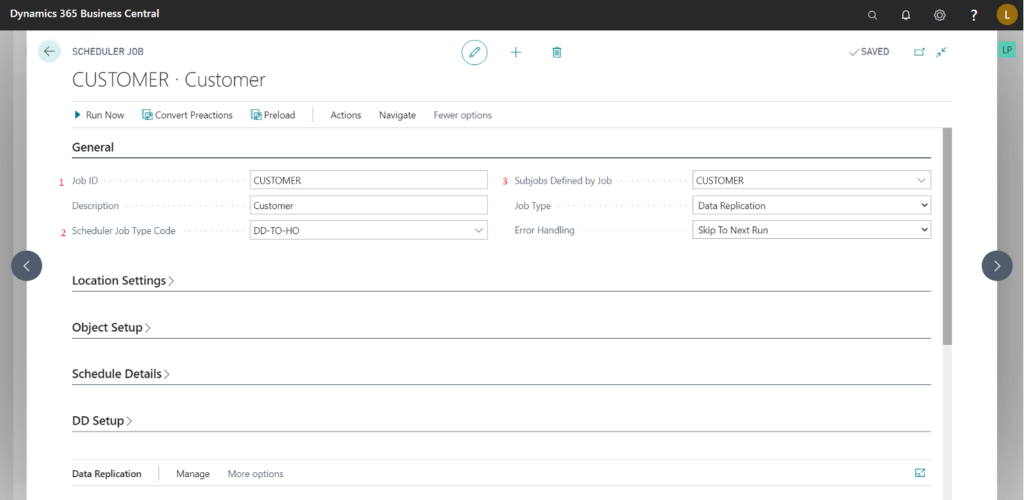
- Job ID :- A unique Identifier for this Scheduled Job.
- Scheduler Job Type Code:- It is a kind of category for this Job, we can use this category as a filter when we configure NAS Services.
- Subjobs Defined By Job:- Specifies where system is supposed to fetch sub-jobs from for this Job. Generally it is the same as “Job ID” but LS allows you to create a job with its sub-jobs defined in another job.
Location Settings:
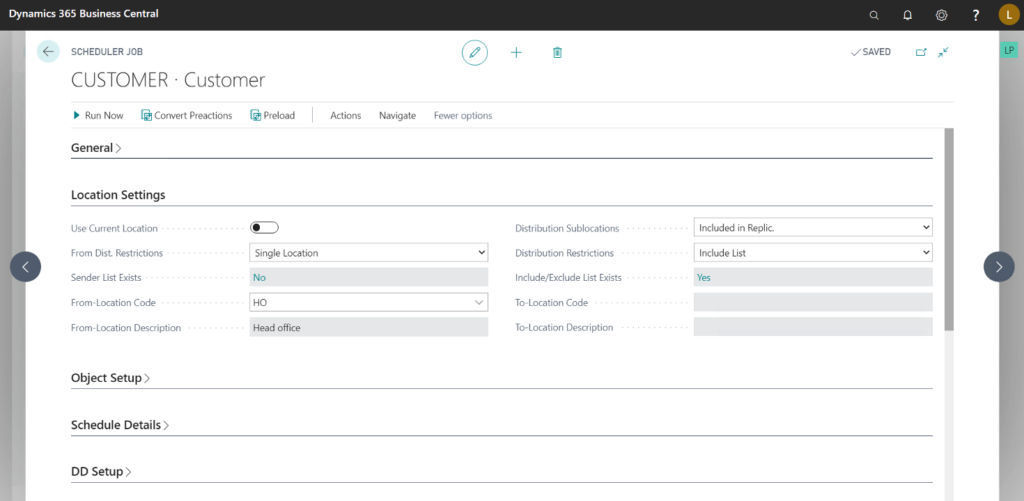
In this tab, we specify where the Data is supposed to come from and where the data is supposed to go.
There are multiple ways to configure this,
- From Multiple Locations to Single Location
- Set the “From Dist. Restrictions to “Include List”.
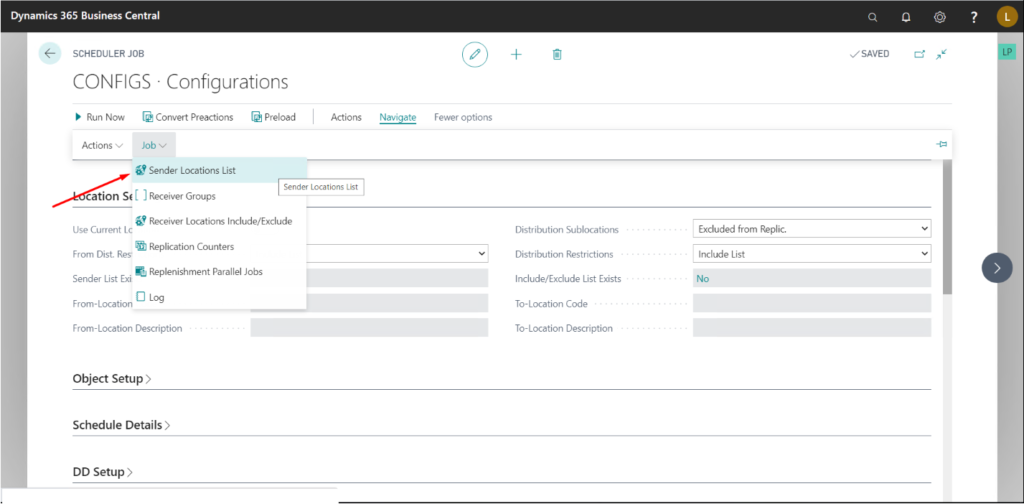
- Click on Navigate -> Jobs -> Sender Location List.
- Add all the locations that you want to pull the data from.
- Set “Distribution Restrictions” to “Single Location”
- Set the Location in “To-Location Code” field.
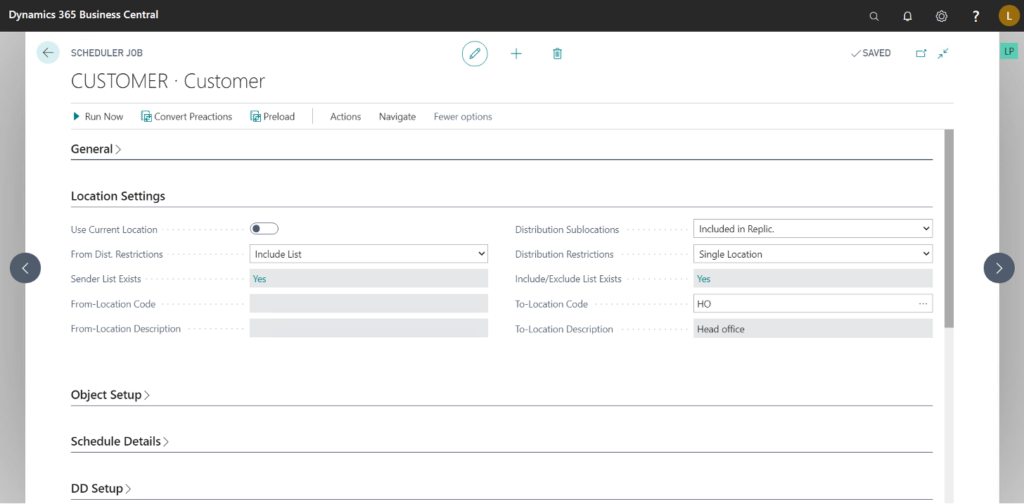
- From Single Location to Multiple Locations – This is the similar to the previous one simply reversing where we set the values.
- Set “From Dist. Restrictions” to Single Location and set the location.
- Set “Distribution Sublocations” to “Included in Replic.”, this field is used to specify whether Data should be sent to sublocations(POS Terminals) or not.
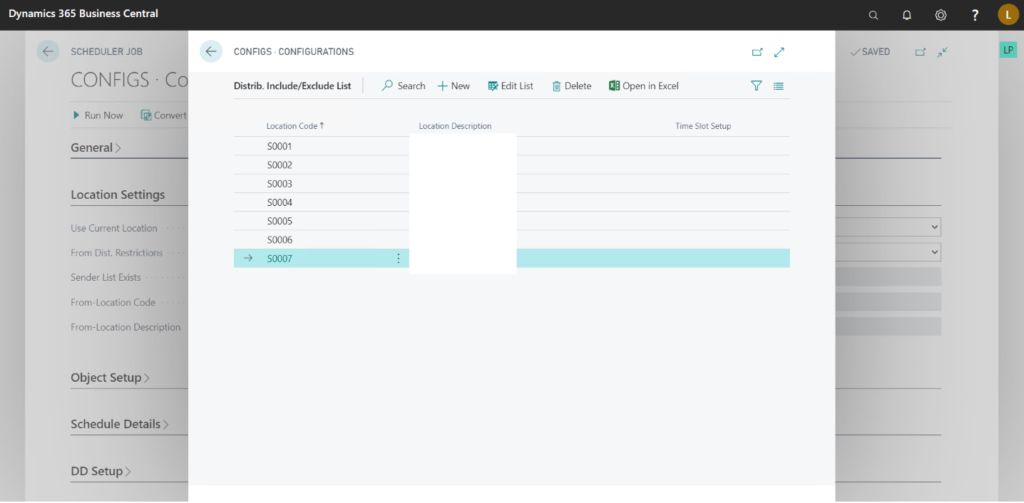
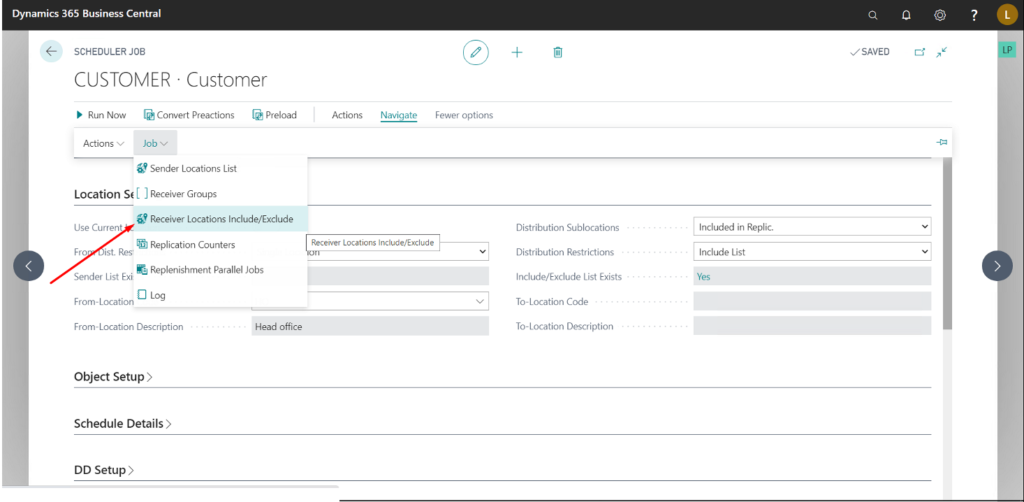
- Set “Distribution Restrictions” to “Include List” and Go to Navigate > Jobs > “Receiver Locations Include/Exclude.”
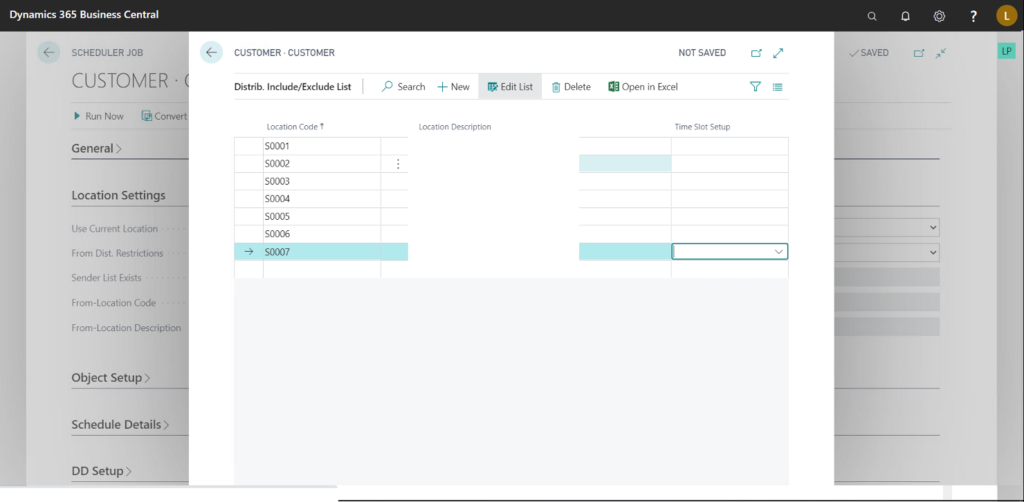
- Add all the locations you want to send the Data to.
- From Multiple Locations to Multiple Locations
- Simply set Include List on both sides and add all the locations that the data is supposed to come from and where it is supposed to go.
Schedule Details
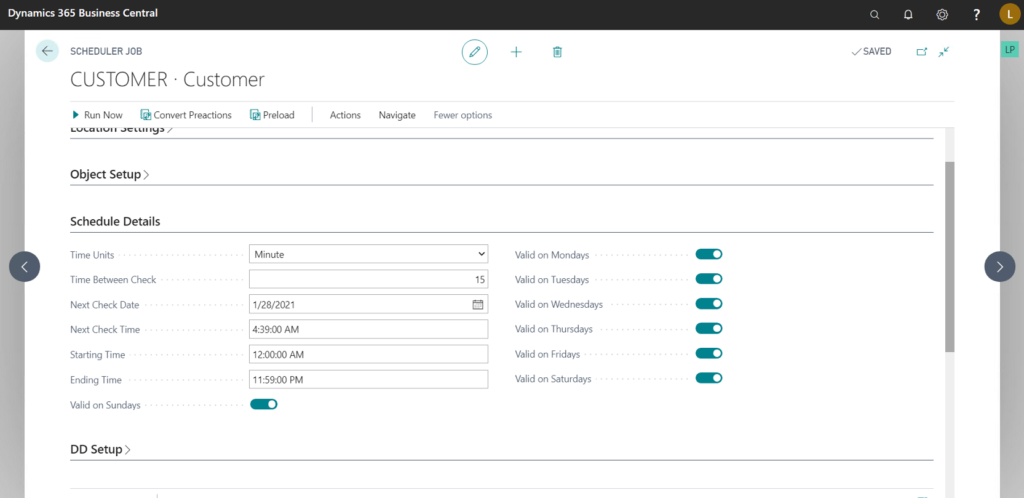
Here we specify how often this Job is supposed to run.
You can schedule the Job to run every day, hour, minute or second as per your needs.
In the above example, I have scheduled the Job to run every 15 minutes, every day.
Do note that you need to have NAS Services configured for the jobs to run automatically.
Data Replication:
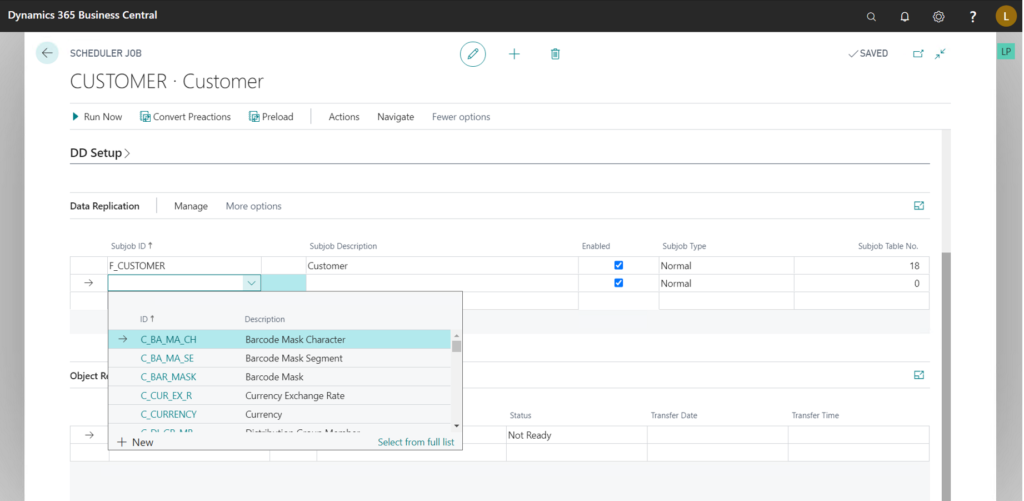
Here we have to define the “Subjobs”, which are in essence, tables which are to be replicated.
Note:- In the DD Setup tab, there are advanced settings which can be used to control the compression type and SQL Isolation levels. More information regarding that can be found in the aforementioned references.
Conclusion:
Thus, we saw how to create a Scheduled Job Header, there are a lot more things that can be done with this like, using different codeunits for Data Replication, Object Replication
Or simply running Codeunits for automating tasks.
Thanks for reading!
