MPOS to CPOS in Dynamics 365 for Retail
Hello guys,
The two types of point of sale or POS in Microsoft Dynamics 365 for Retail Management Solution are MPOS and CPOS. MPOS is Modern Point of Sale and CPOS is Cloud Point of Sale. There is no offline functionality when it comes to Cloud POS. It has a unique design that allows you to pair it up with the hardware station. The MPOS, on the other hand, is a POS app that one can access with ease on tablets, and PCs. Migrating from MPOS to CPOS is a good option because Cloud POS can run on any platform since the browser accesses the application code from the CPOS server but it can become a time-consuming task if you do not follow the standard process.
In this article, I am going to demonstrate how to change/migrate from Modern POS to Cloud POS in Dynamics 365 for Retail. Once you activate Cloud POS you can access POS directly from any web browser. However, you do need to install the Hardware station. Because CPOS runs in a browser, the application isn’t installed on the device. Therefore, CPOS can’t directly access POS hardware or work in an offline state.
Step 1:
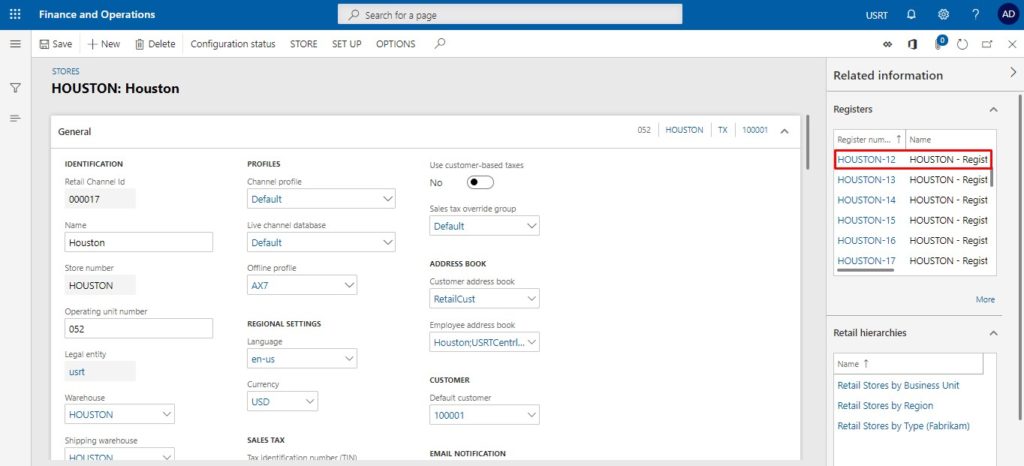
Go to all Retail stores
Step 2:
Click on the Register for which you want to change from MPOS to CPOS
Step 3:
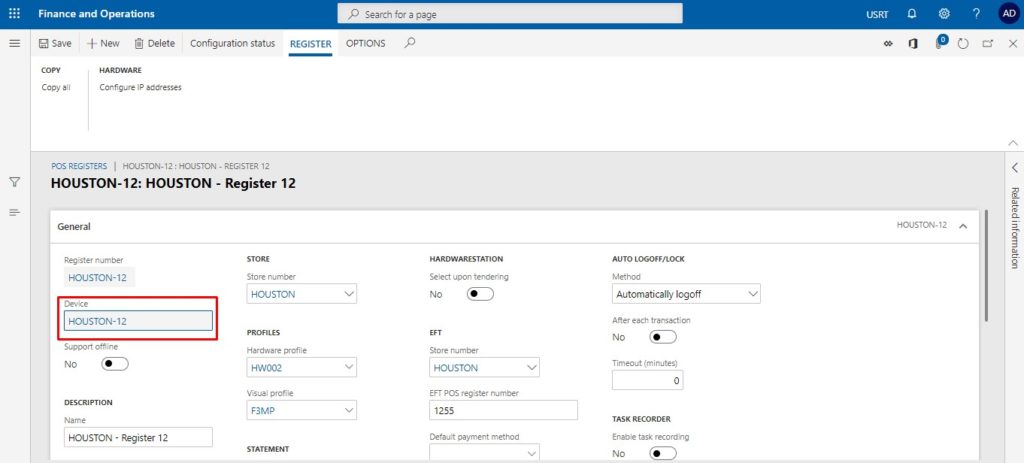
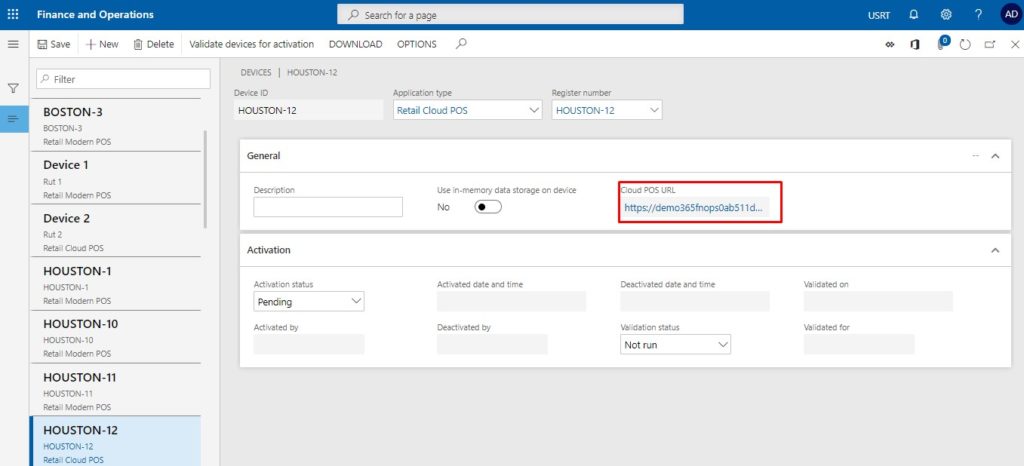
Click on the device
Step 4:
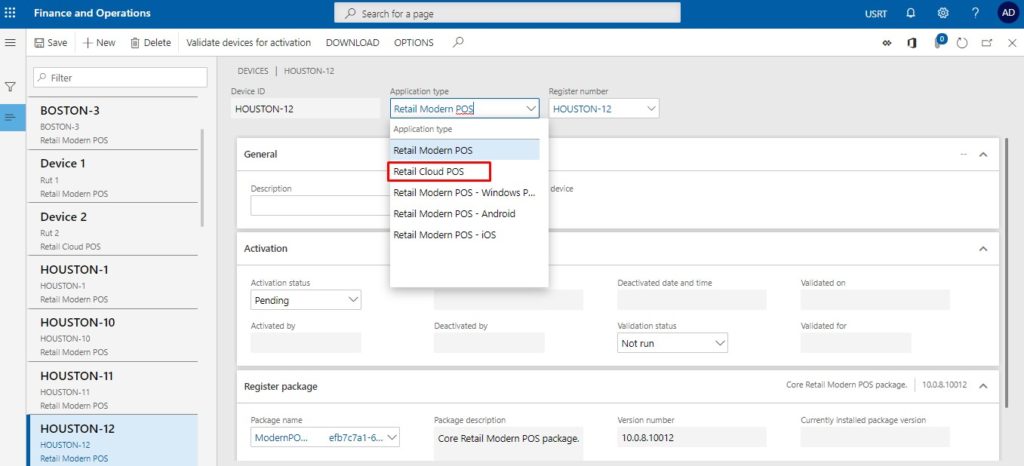
In the application type Select Retail Cloud POS
Step 5:
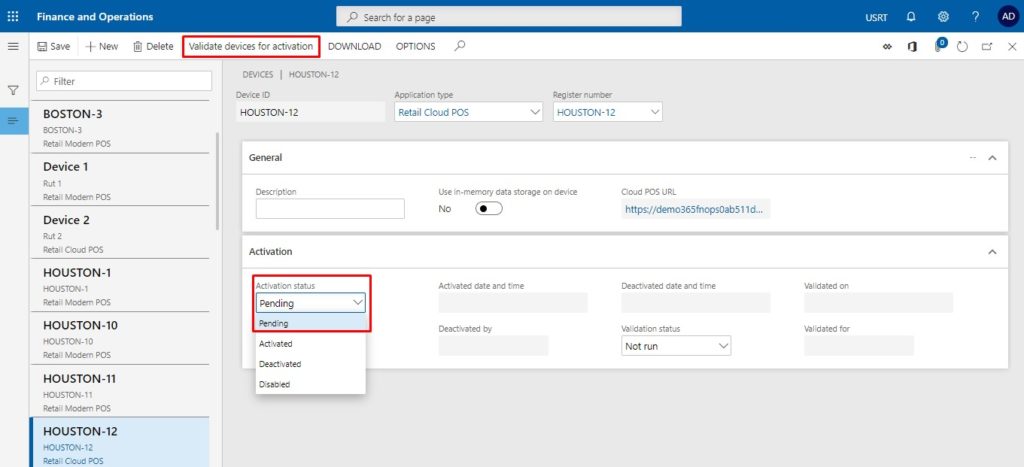
Change Activation status to Pending and click on Validate devices for activation. Click Ok for all workers
Step 6:
Click on Cloud POS URL
Step 7:
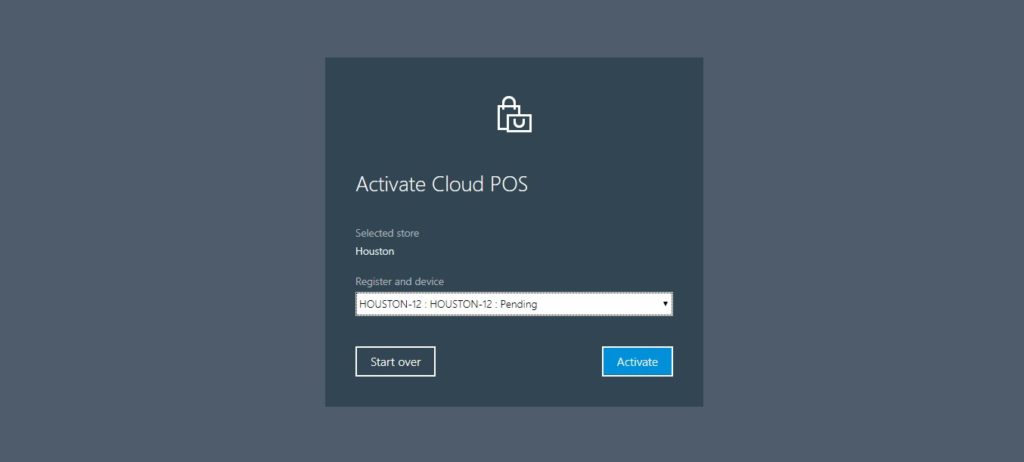
Activate it using HQ user ID and password. Select appropriate store and register that you had activated on HQ which is in pending state. If it’s in activated state then it wont reactivate.
Step 8:
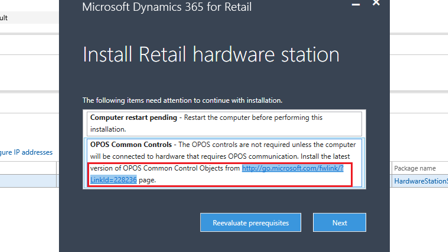
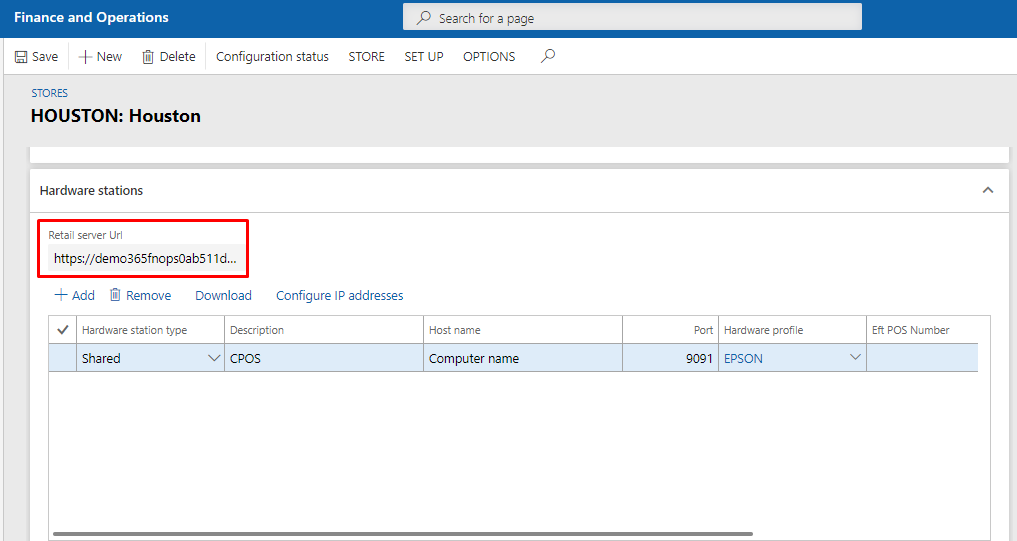
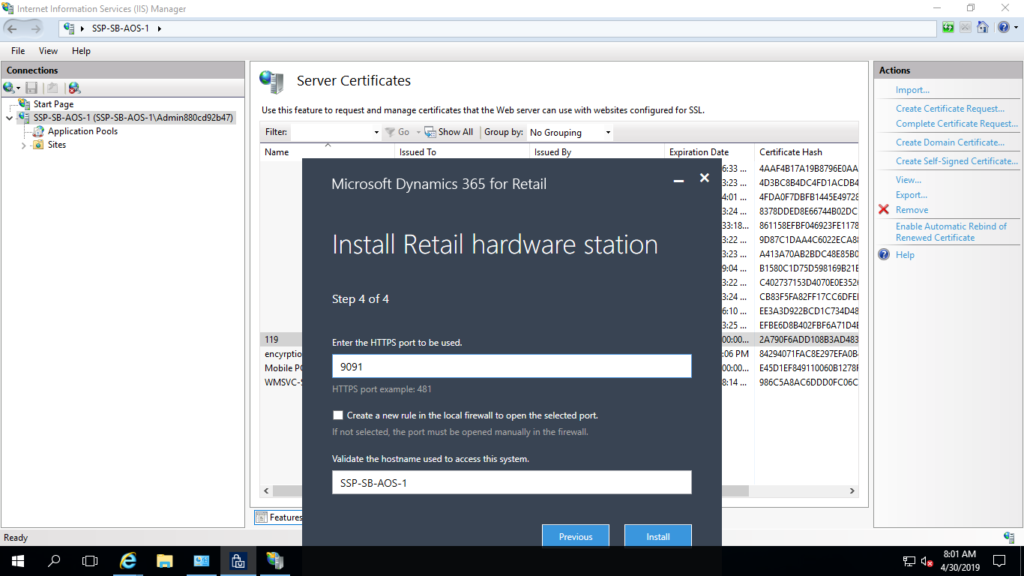
Next step is to install the Hardware station so you can connect hardware peripherals to your POS. Go to your store and scroll down to Hardware stations. Select shared. In the Hostname field enter the name of your computer(find it in system information of your system) and click on download.

Step 9:
Run the downloaded file. It may ask you to install OPOS Common control driver from the link. Download the latest one and click next.
Step 10:
Enter the Retail server URL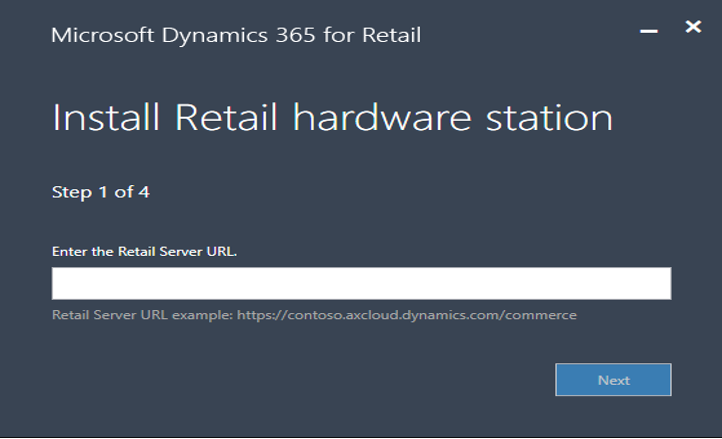
Step 11:
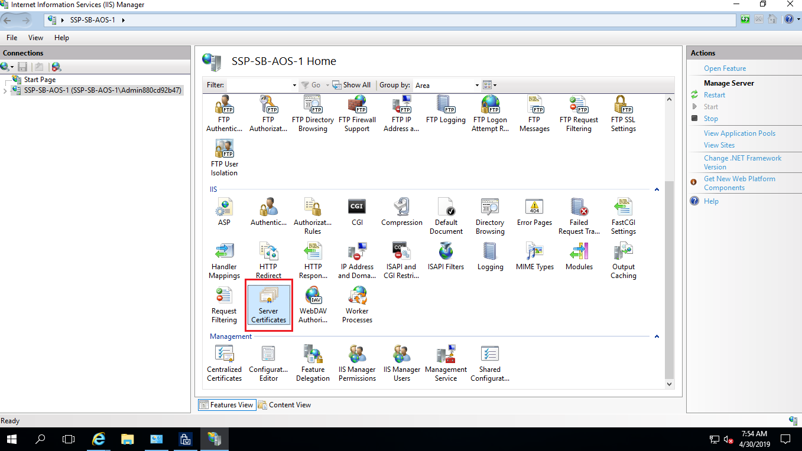
Open IIS then go to SSL certificate
Step 12:
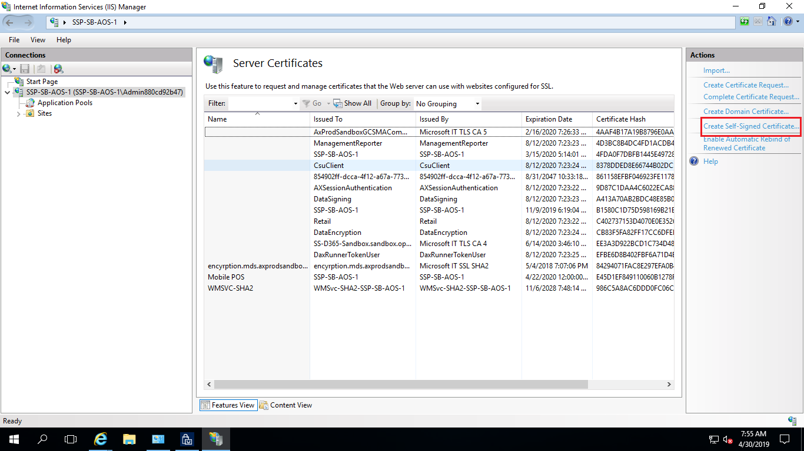
Double click on Server certificate and click on Create self signed certificate
Step 13:
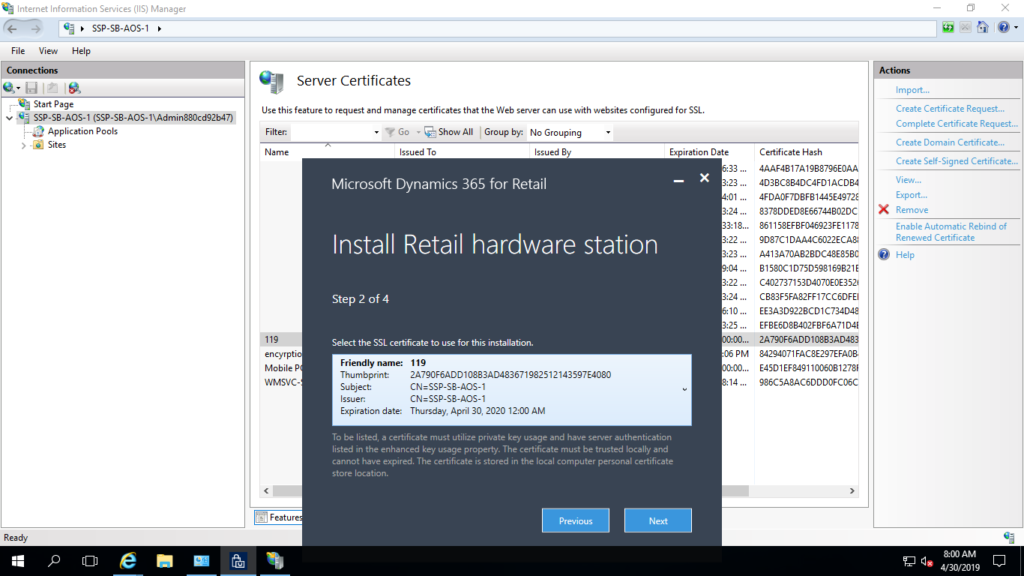
Select the SSL certificate
Step 14:
Use any of the open ports or you can use 9091
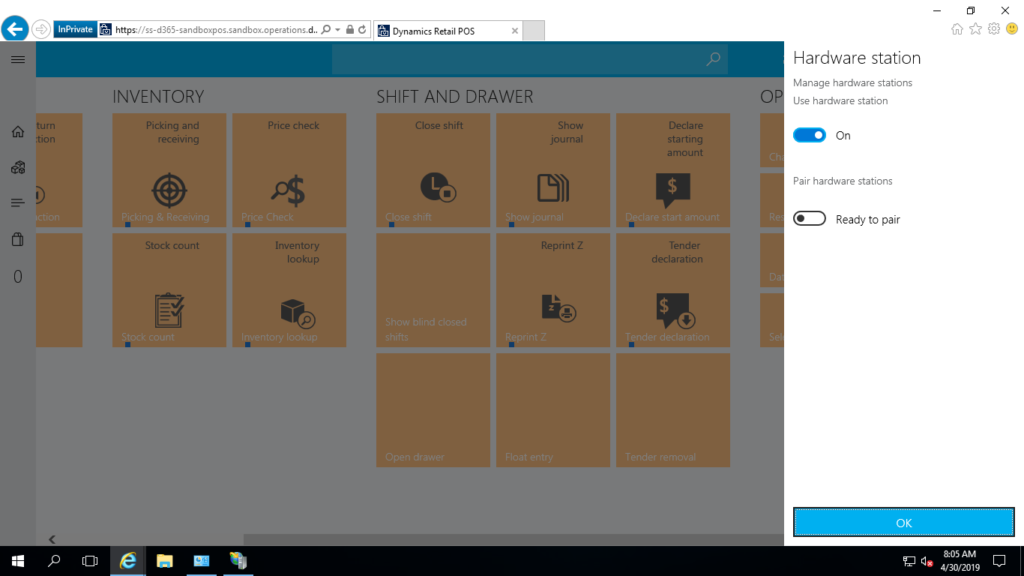
Step 15:
All the setups are done. Now go back to the POS and click on select hardware station and pair it with the hardware device
Hope this helps!
