Create surveys in Dynamics CRM 2016
Introduction
After installing the Voice of Customer solution you can create the surveys based on your requirement.
We had a requirement to create a survey for employees. Employees will fill the surveys and provide a feedback about the job satisfaction, relations with Managers, attitude towards the work environment depending on the questions specified in the surveys.
This feedback will be stored in the CRM and will be used by HR to measure the Happiness of the Employees.
According to these requirements we will create a survey.
Steps to create surveys in CRM
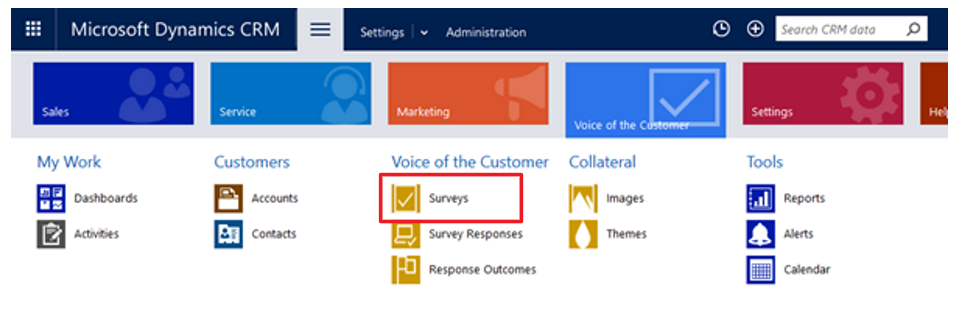
- From the menu, go to Voice of the Customer -> Surveys
- Click New.
- By default, there will be a survey created in the draft state.
- Within the survey record some of the configuration options include
- Survey close date– after which responses won’t be captured
- Restrict multiple replies– limit respondents to 1 survey post only
- Anonymous responses– responses aren’t linked to CRM contacts, leads or cases
- Use Captcha– set controls to authenticate responses
- Unsubscribe– include an opt-out option on survey forms
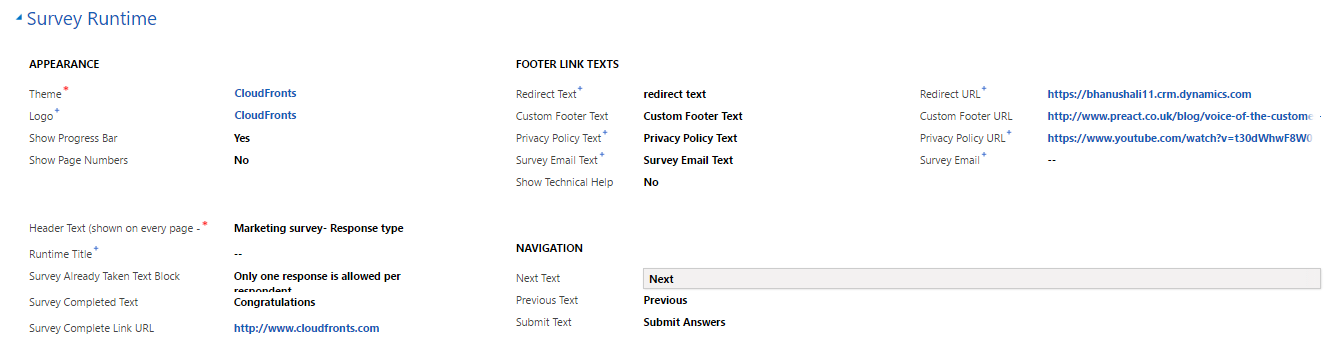
- Theme – select which survey theme record will be applied
- Progress bar & page numbers– for surveys consisting of several pages
- Footer links– including email address, privacy policy
- Navigation text– change the default next / previous options
- Email snippet– a unique survey string that will pasted into a CRM email template to direct people to the survey. This will be automatically generated by the system when a new survey is saved.
- Invitation link– rather than having the long snippet (above) exposed in the email invitation a call to action text can be applied instead e.g. Take our Survey
- Anonymous survey– if this option has been set the generic URL will be shown here for invitations
- Send email response– set an email template as an auto-responder when replies are posted

The feedback section in the Survey form categorize the survey as Feedback survey.
- Generate Feedback– By default the value is OFF. If the value is OFF it means that the survey is of type response. You can set it as Automatically when survey published or Manually.
- Feedback Customizations – you can set the feedback entity name, solution in which you want to add this entity, schema name of the entity.

On the same form, survey runtime controls include:
The invitations and actions section in the Survey Record form includes:


The Feedback surveys creates a new entity as specified in the Feedback Customizations. You need to specify the Solution name in which you want to add this newly created entity. The responses will be tracked in this newly generated entity and can be used for analysing purpose.
For every feedback survey, new entity will be generated. You need to specify the schema name of the entity.
Steps to design surveys in CRM
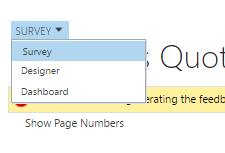
The process to define survey questions is not immediately obvious from the user interface but this can be found by toggling the designer form from the top of the survey record.
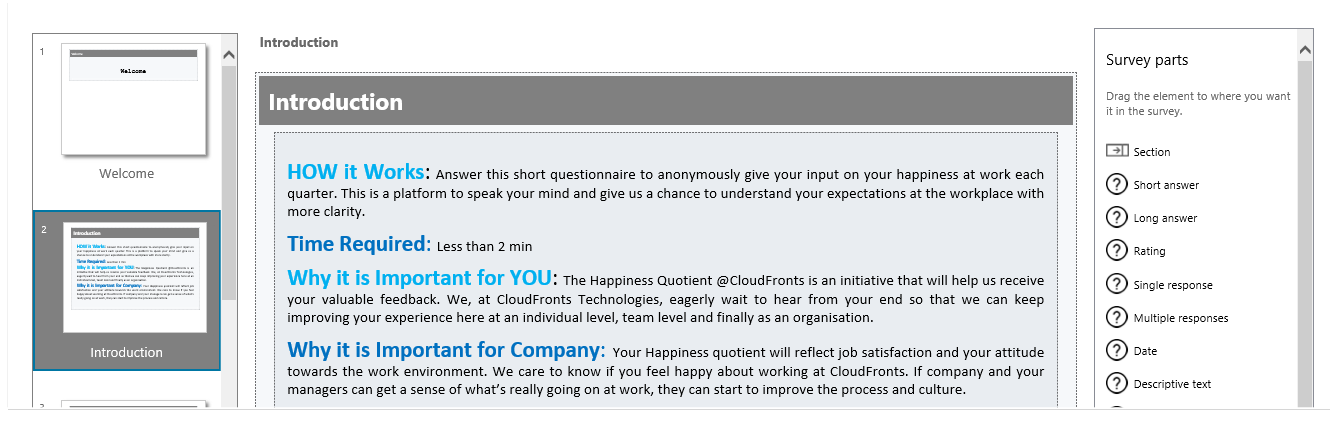
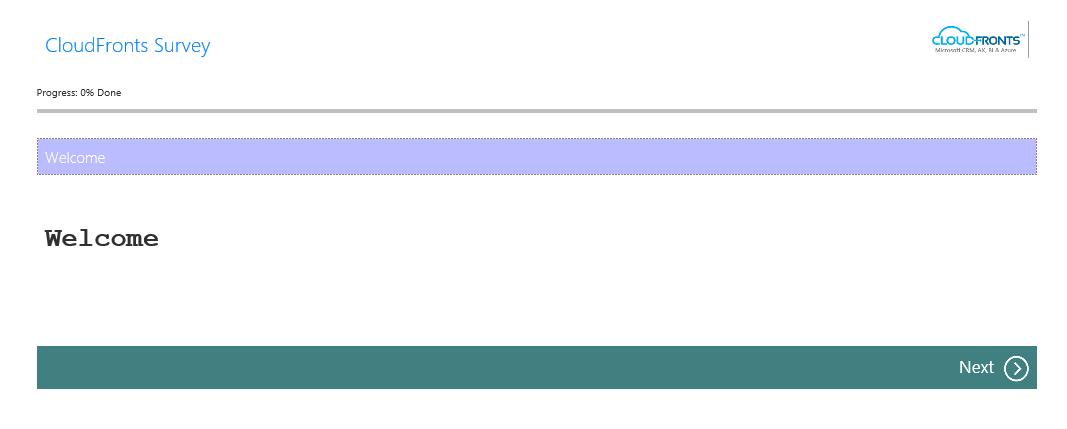
By default, three type of pages will be created.
- Welcome page
- Question page
- Complete page
You can add pages in between and define the page type. Each page has a section where we can define the category of content mentioned on the page.
Question page:
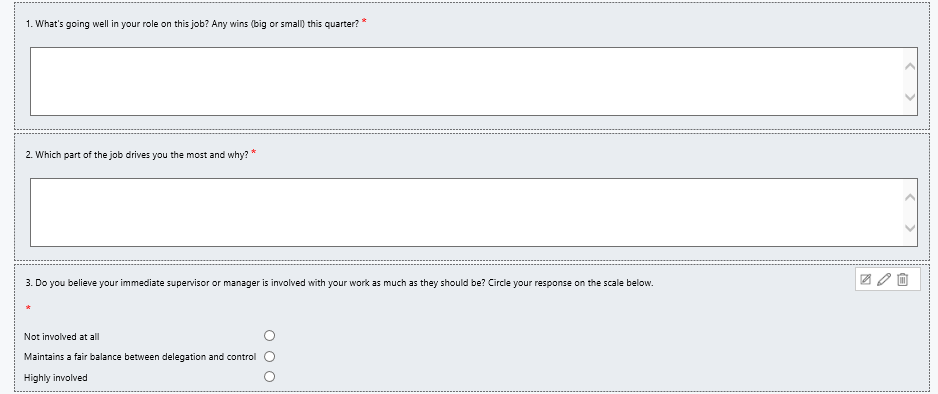
Individual question form records will be dragged into the section form from the right panel. In the below example, after the welcome page an introduction of the survey is mentioned. This will be mentioned as descriptive text box but this will still be defined as a Question.
The next page consists of questions for employees. Here is just a few type of questions that can be dragged in to a section from the panel on the right.
- Short or long answers– text boxes of varying sizes
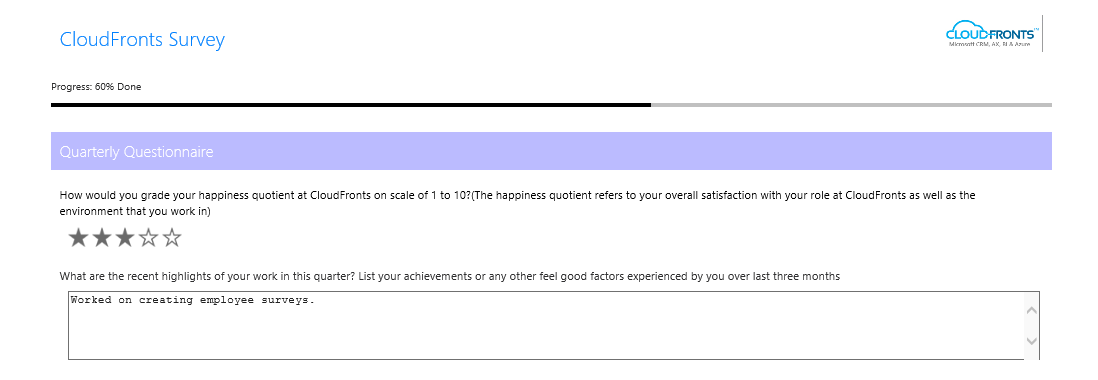
- Ratings– recipients give a star rating from 1 to 5 (or more) which can include half scores. Another option includes ratings by three colour coded flags
- Date fields – date type answer
- Ranking– we can ask the employee to rank the skills
- Net Promoter Score– a metric to define how likely an individual will recommend
- Customer effort Score– 5 point slider to rate how easy a client found it to deal with you
- A standard CSAT satisfaction metric– a standard customer satisfaction field.
- Smile’s rating– ask how respondents feel and capture their response in smiley that matches their mood. Publishers can choose from 9 different faces though in this release it doesn’t appear possible to upload a define new smiley icons beyond the default ones.
- Lists of Ratings– ask recipients to rate several items in one block. The example below has a list to ask what factors are important in choosing a new car
- Multiple ratings – similar to the above but using a grid of radio buttons to collect feedback per line
- Upload a file– enabling respondents to upload and share supporting files.
- Single response radio buttons– single response can be captured
- Multiple response tick boxes– multiple response can be captured
Simple text edits to questions can be made from the designer screen, otherwise click these items to open the question record to make the changes.
Rules can be set to make questions mandatory, or to show on-screen help in the event that clarification might be needed.
Survey publishers can also personalize survey forms by piping data in from CRM fields, for example a customer name, CRM user, product or location.
Now after adding questions you need to save and publish the survey so that you can use further.
- To save your work, click the Save button in the bottom right corner of the screen.
- When you’re done editing your survey, click Publish. After it’s published, you can do the following:
- To step through your survey, click Test.
- To preview your survey, click Preview.
- To create a copy of your survey, click Clone.
- To export translations, click Export translations. You can then access the resulting Translations.xml file from the Summary area of your survey.
- To copy snippets to use elsewhere in this survey or others, select the snippet (survey part or text) you want to copy, and then click Copy snippet.
- To stop this survey from running, click Stop
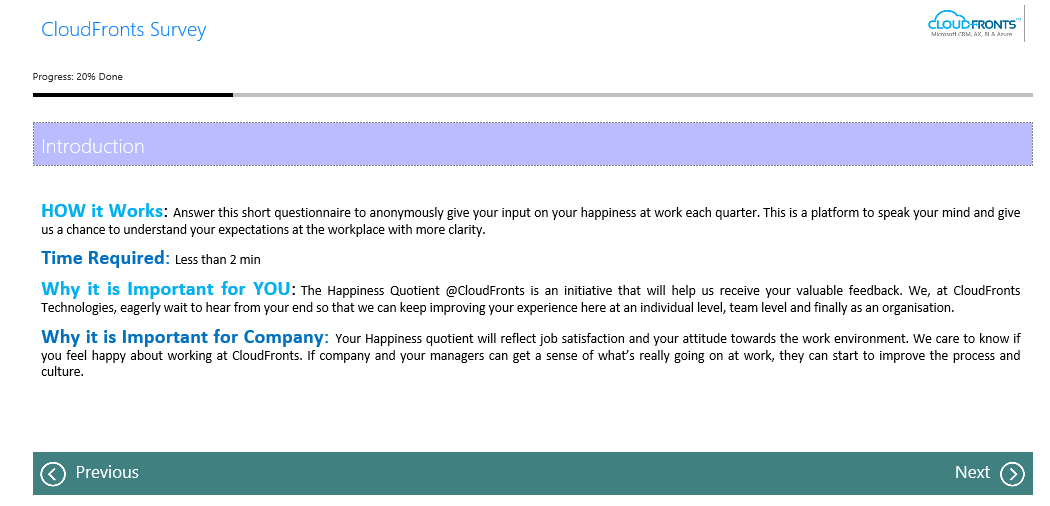
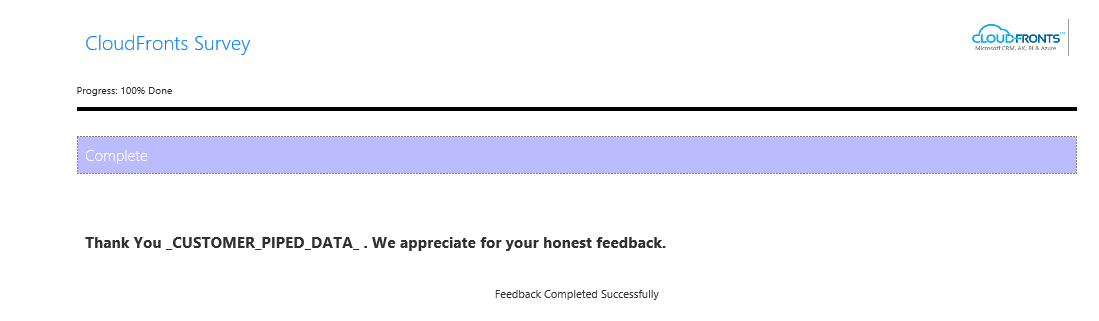
When you preview your survey you can see the actual view of the survey. This is how the survey will look.
- Welcome Page
- Introduction
- Questions page
- Complete page
So, this is how you can create surveys. To see how to create Response Routing Rules refer our blog article Response Routing Rules in Surveys.
