CRM App for Outlook Web App (OWA)
Dynamics CRM App for Outlook is a lightweight Office app that you can use together with Outlook 2013 or Outlook Web App (included with Office 365). You can use the app to track incoming email in Microsoft Dynamics CRM. When you track an email message, a copy of that message is stored as an email activity record in Microsoft Dynamics CRM. You or anyone with access to your CRM activities can then access that activity record in CRM, Dynamics CRM App for Outlook, Dynamics CRM for Outlook, or in the CRM mobile apps.
Microsoft Preview features:
- Are not supported by Microsoft Support.
- Are available on a “preview” basis so customers can get early access and provide feedback.
- May have limited or restricted functionality.
- Aren’t meant for production use.
- May be available only in selected geographic areas.
Prerequisites for installing and using CRM App for Outlook
Your CRM system administrator must deploy Dynamics CRM App for Outlook to your organization before you can access it. To deploy Dynamics CRM App for Outlook:
- Your organization must use CRM Online, and Dynamics CRM 2015 Update 1 must be installed.
- Your organization must use Exchange Online for email processing.
- Your organization must synchronize email through server-side synchronization.
- The system administrator must set up specific security roles.
- The system administrator must enable the Dynamics CRM App for Outlook Preview feature.
- The system administrator must add Dynamics CRM App for Outlook to your Exchange Online service.
Supported browsers
You can use Dynamics CRM App for Outlook with Outlook Web App on the following browsers:
- Internet Explorer 10 or Internet Explorer 11
- Google Chrome version 41 or later
With Dynamics CRM App for Outlook, you can:
- Tap the power of CRM while working in the familiar Outlook environment.
- Track incoming email wherever you are, as long as you have access to a browser.
- Track an incoming email message and (optionally) link it to an existing record in CRM. For example, you might want to link an email message to a specific account or opportunity. If a record doesn’t exist, you can create it right from within the app!
- Find out whether an email message is already tracked, and change the regarding record (the CRM record that the message is linked to).
- Create CRM contact or lead records for people on the From list that aren’t already included in the CRM database. You can also create new CRM records for any entity (record type), as long as the entity has been enabled for mobile and for multi-entity search.
- Preview information about contacts and leads stored in CRM. For example, you can find a number or company name for a contact or lead, or preview the last and next activities for a contact or lead.
- Open CRM records directly to find or enter more detailed information.
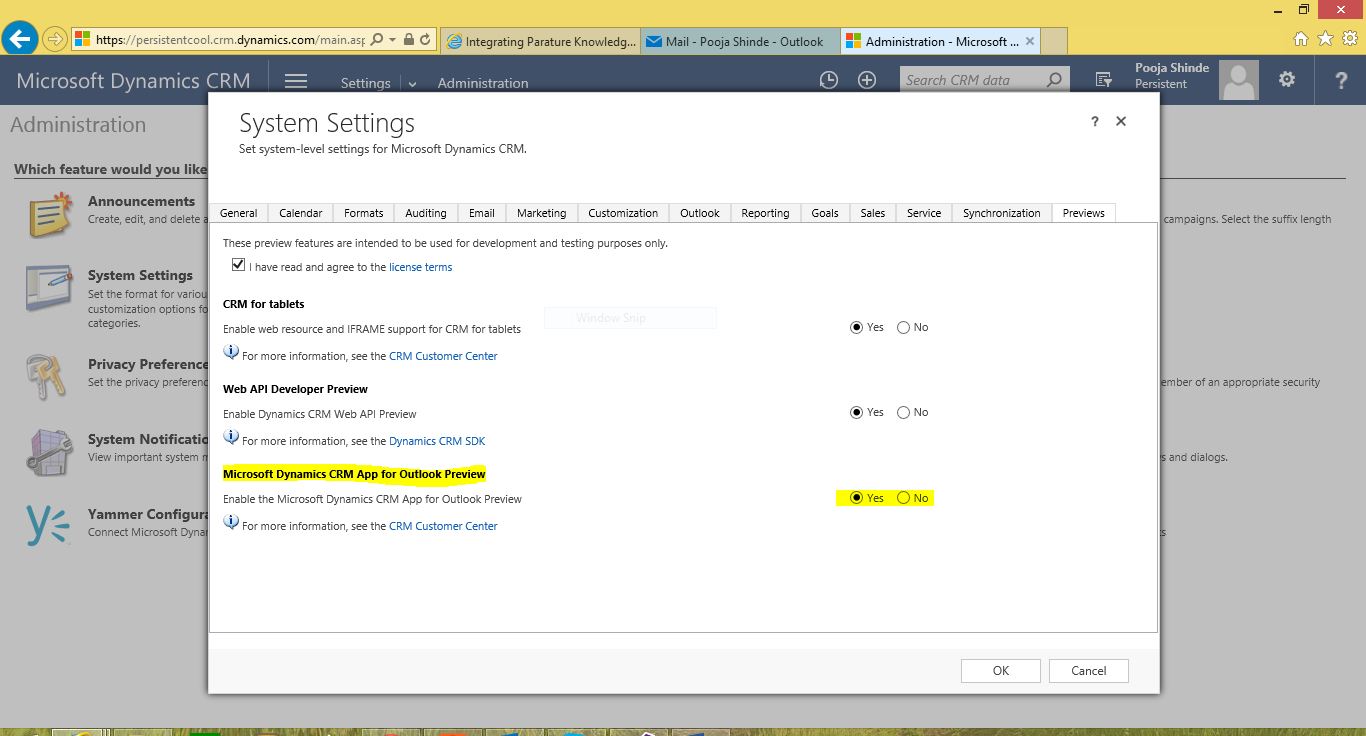
Enable the Dynamics CRM App for Outlook Preview feature
To enable the Dynamics CRM App for Outlook Preview feature:
- Go to Settings > Administration.
- Choose System Settings.
- Choose the Previews
- Select checkbox on the read and agree to license terms.
- Choose Yes to enable the Microsoft Dynamics CRM App for Outlook Preview.
- Click Ok.
Set the CRM App for Outlook privilege for a security role
- Go to Settings > Security. Choose Security Roles. Select the security role (for example, Salesperson), and then choose the Business Management
Verify that Use CRM for Office Apps is set to Organization. If not, choose Use CRM for Office Apps.
- Choose Save and Close to save the changes to the security role.
Deploy CRM App for Outlook
You can use the Exchange admin center to quickly and easily deploy Dynamics CRM App for Outlook to your users.
- Sign in to the Office 365 admin center.
- On the left-side menu, under Admin, choose Exchange.
- On the Exchange admin center page, under organization, choose apps.
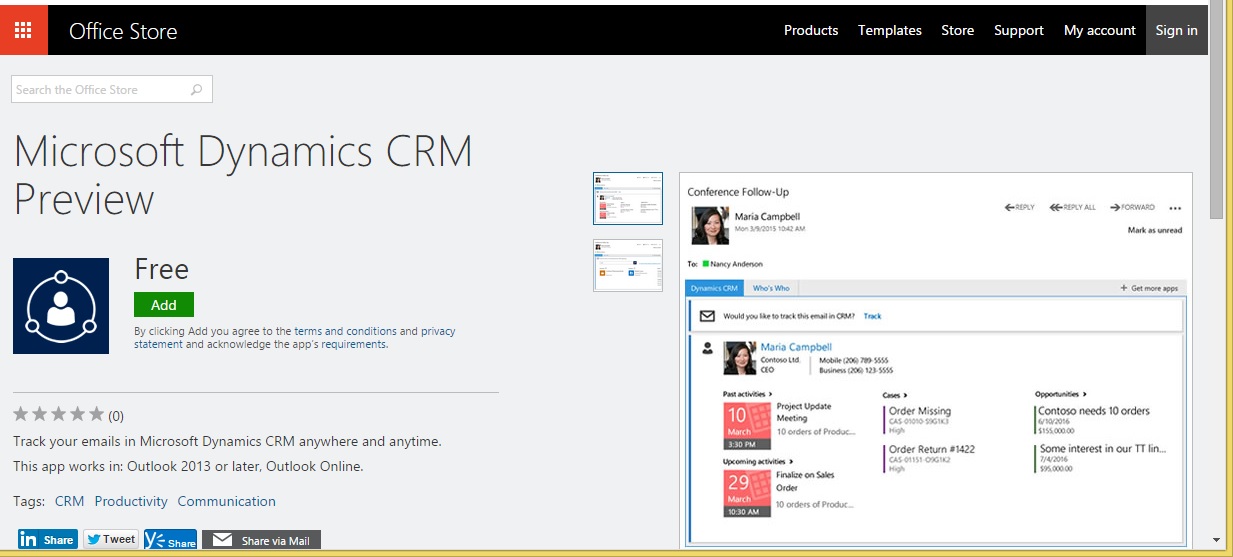
- Choose (+) > Add from the Office Store.
- Search for and add the Microsoft Dynamics CRM for Outlook app.
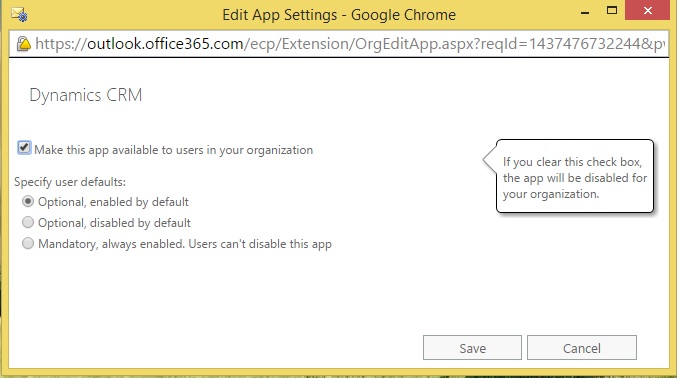
- Once the app is installed, refresh the list, select the app, and then choose Edit.
- Choose how you want to deploy Dynamics CRM App for Outlook to your users.
- Choose Save to enable the app for your organization.
Accessing Dynamics CRM App for Outlook after it’s been deployed
Once the system administrator installs and enables the Dynamics CRM App for Outlook, the app appears as a Dynamics CRM tab in the Outlook reading pane. Just choose the tab to access your CRM data.
Track an incoming email message from an unknown sender
- Select the email message in your Inbox, and then choose the Dynamics CRM
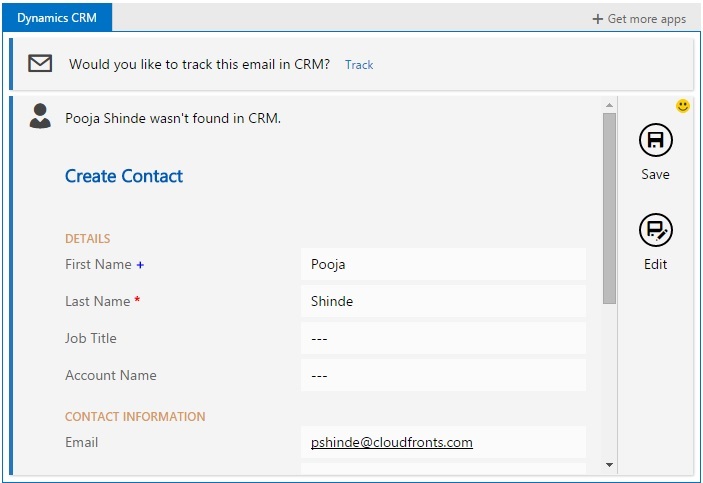
When an email message is from an unknown sender (the sender isn’t already a contact or lead in CRM), you’ll see the Create Contact form.
The First Name, Last Name, and Email fields are already filled in for you. The Phone Number field will be filled in if it’s available. - Click Save post filling the required info or choose Save and edit in CRM to open the contact form in crm. The sections Next Activity, Last Activity, Case Associated View and Opportunity Associated View are empty because the contact doesn’t have any related records in CRM yet.

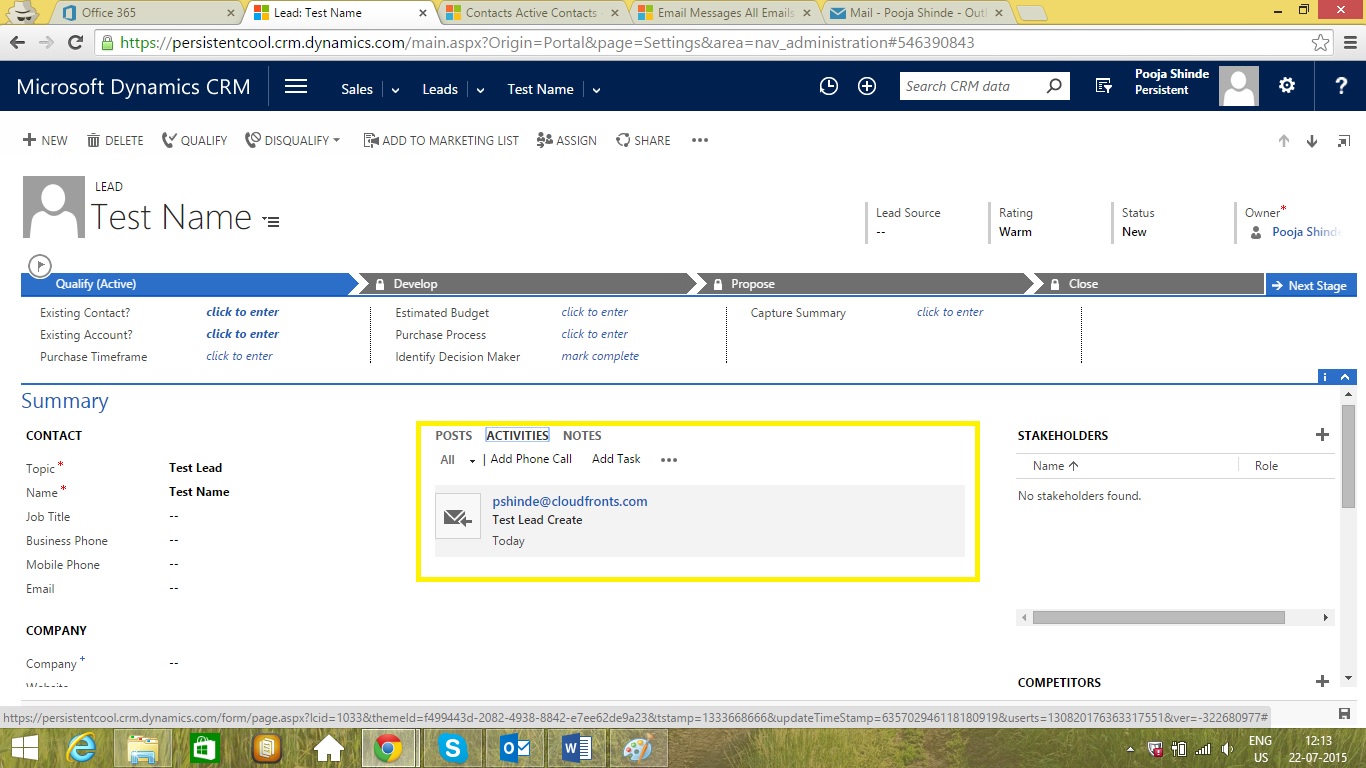
Email getting tracked in CRM for Microsoft Online Service Team contact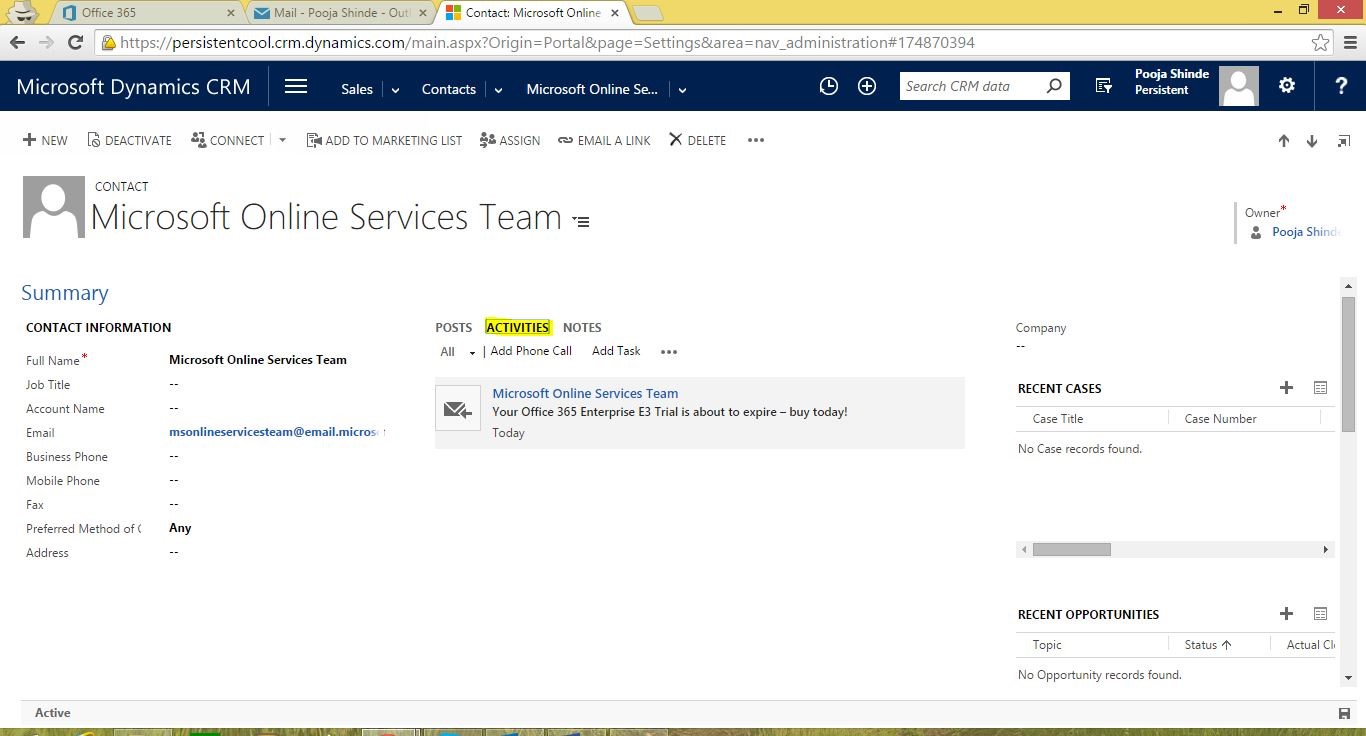
- Similarly one can also create for any entity (record type), as long as the entity has been enabled for mobile and for multi-entity search just like the contact/lead record using the Dynamics CRM tab and link the email message to that record.
To create a new record in CRM (for example, to create a lead record instead of a contact record) and link it to the email activity record: - Do not save the contact info
- Click on track.

- Choose New next to any enabled entity.
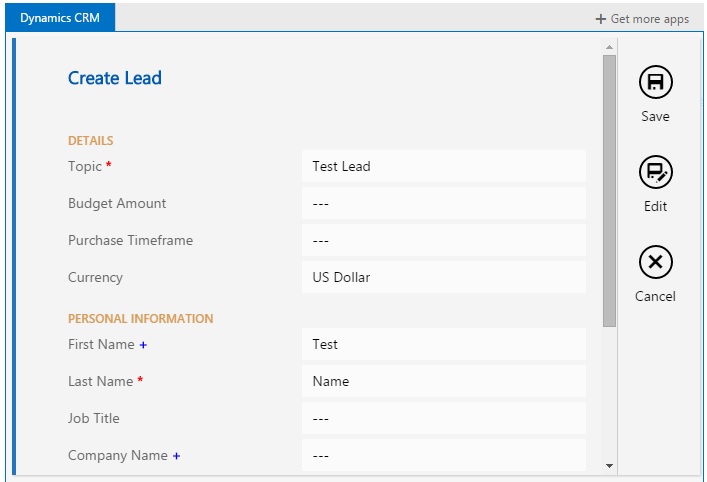
- In the quick create form, fill out the fields.
- Choose Save to save the record if you’re done adding information. To enter more detailed information, choose Edit to edit the record in CRM.
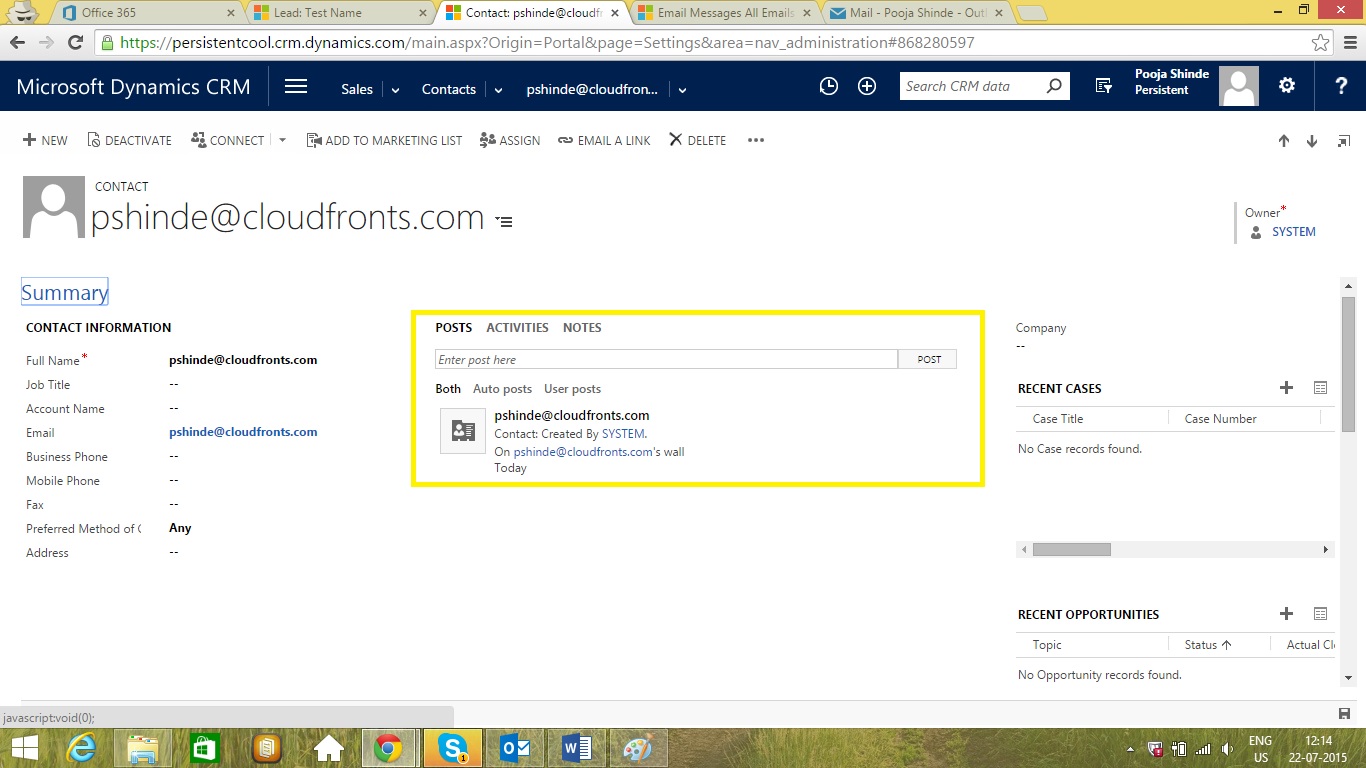
- A contact with the email id details is created in CRM by the system by default.
- There are 2 ways to track an incoming email in CRM using Dynamics CRM App.
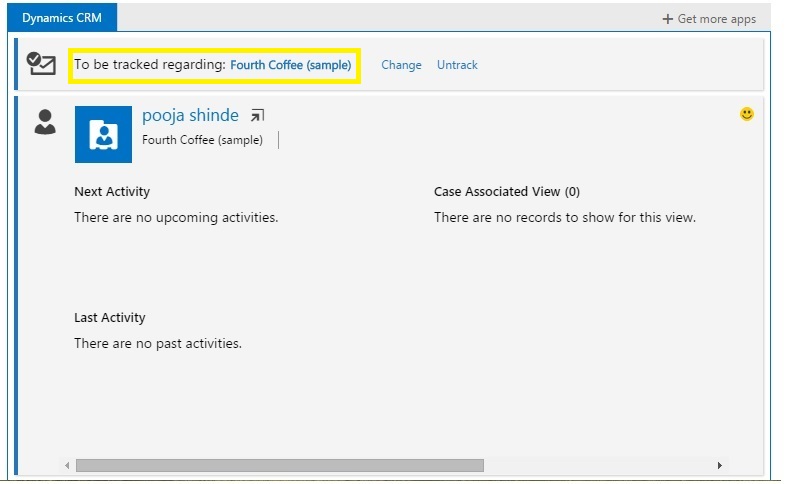
- If you don’t want to link the email message to an existing CRM record, choose “Or track without setting a regarding record”.
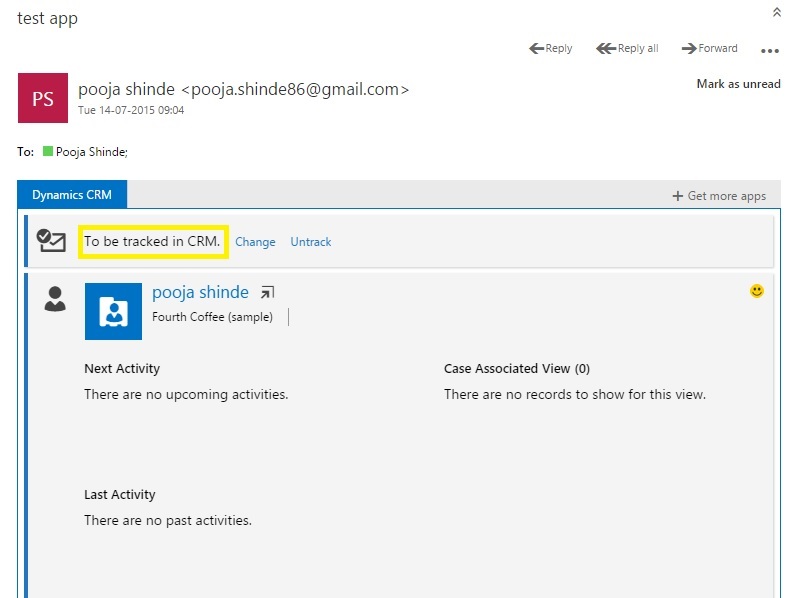
- To link the email message to an existing record in CRM, in the search box, enter a keyword (for example, a company name), choose Lookup, and then select one of the records in the resulting list.
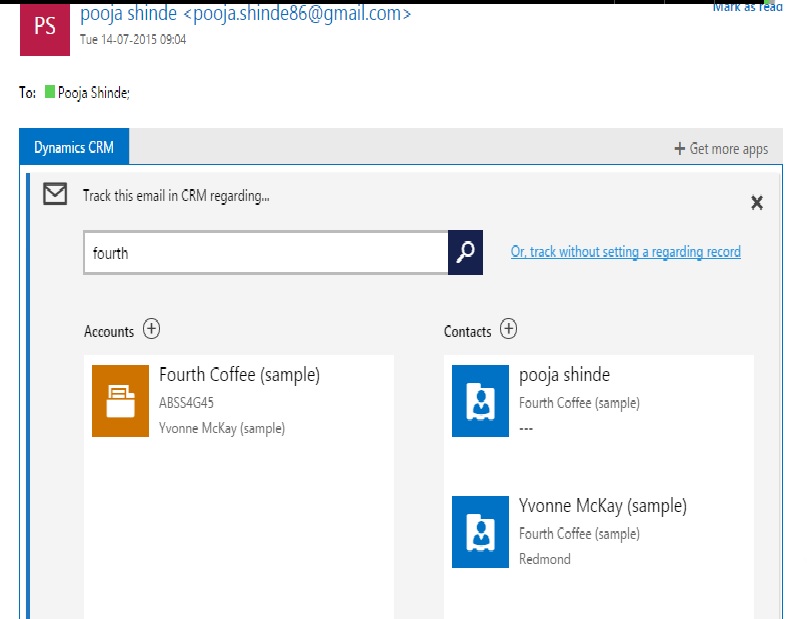
When you select a record, the record appears next to “To be tracked regarding”. To open the record in CRM, choose the link.

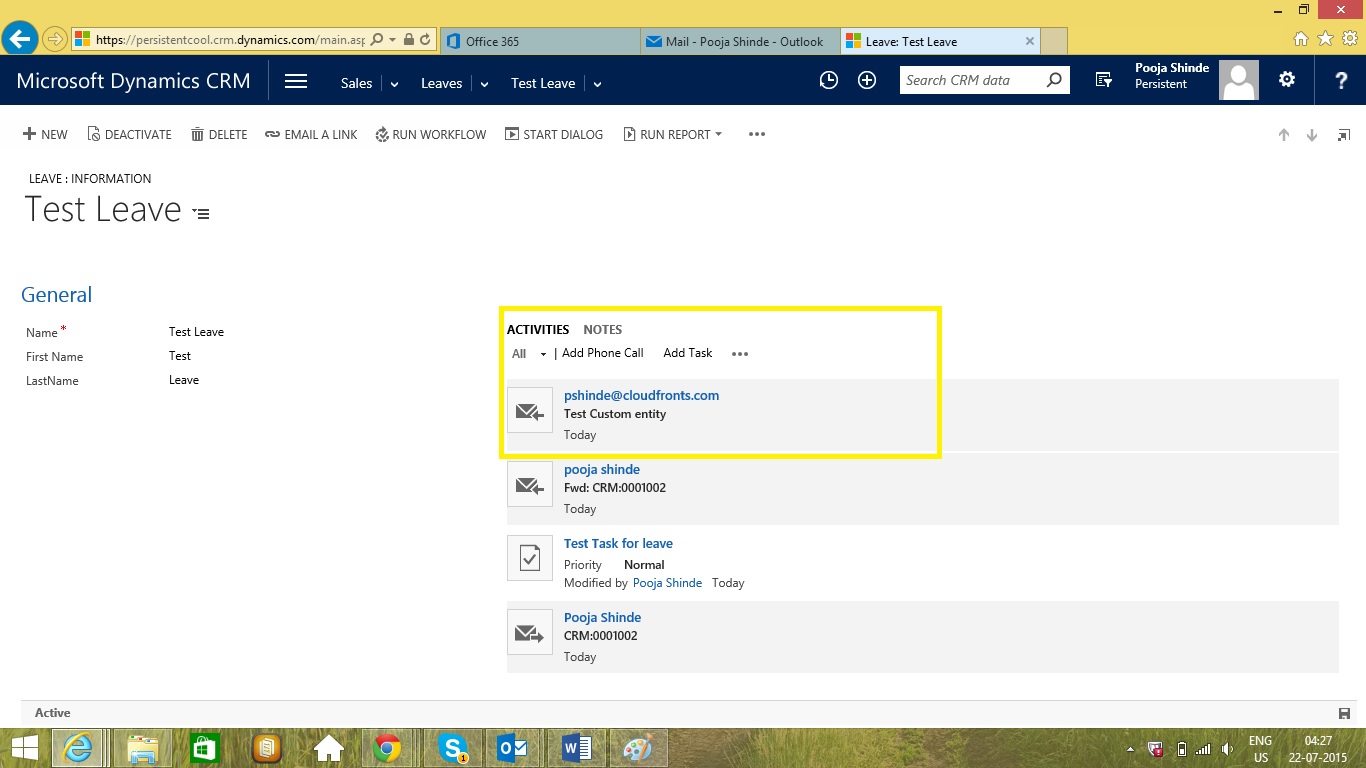
We have tested the feature for a custom entity. Please find the screenshots for the same.

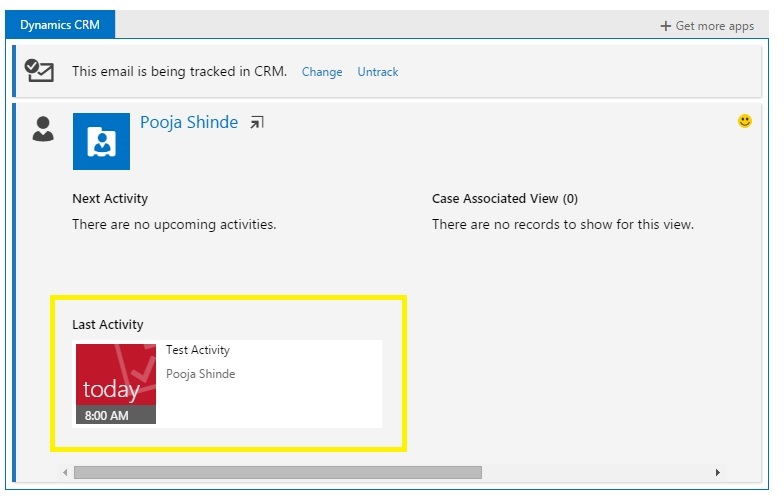
Preview information about a sender that’s already stored in CRM as a lead or contact
- Select the email message in your Inbox, and then choose the Dynamics CRM
- Contact information about the person (lead or contact) the email message is from
- Next and last activities
- Other related records, which include records from lists on the associated entity’s main form
- Open the email message, and then choose the Dynamics CRM
- Choose Change.
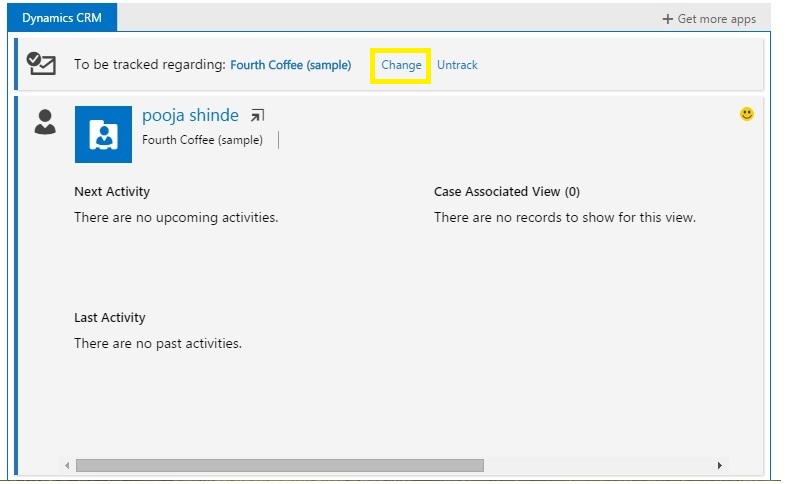
- Do one of the following:
- To select a different CRM record, enter a keyword (for example, a company name) in the search box, choose Lookup, and then select a record from the results list.
- To create a new record in CRM and link it to the email activity record:
- Choose New next to any enabled entity.
- In the quick create form, fill out the fields.
- Choose Save to save the record if you’re done adding information. To enter more detailed information, choose Save and edit in CRM.
- To untrack an incoming email using Dynamics CRM App, Click on untrack.

- After clicking Untrack you can see 2 options for Untracking:
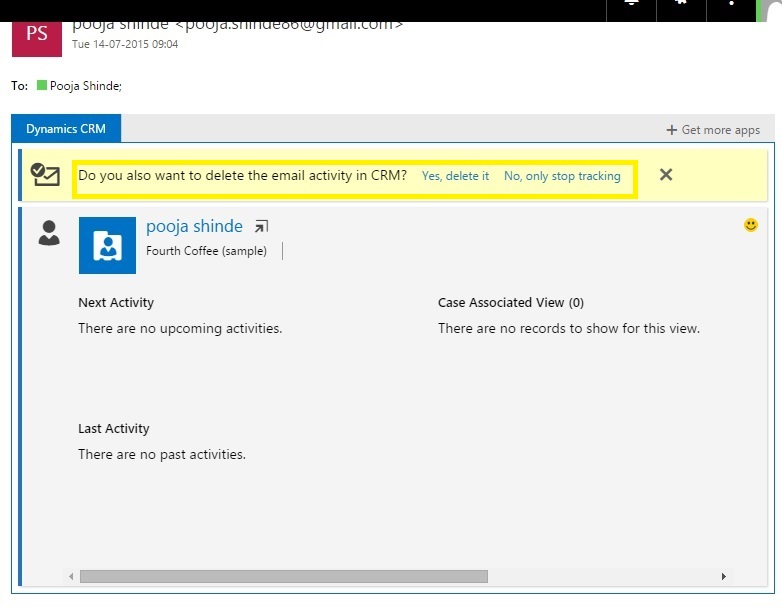
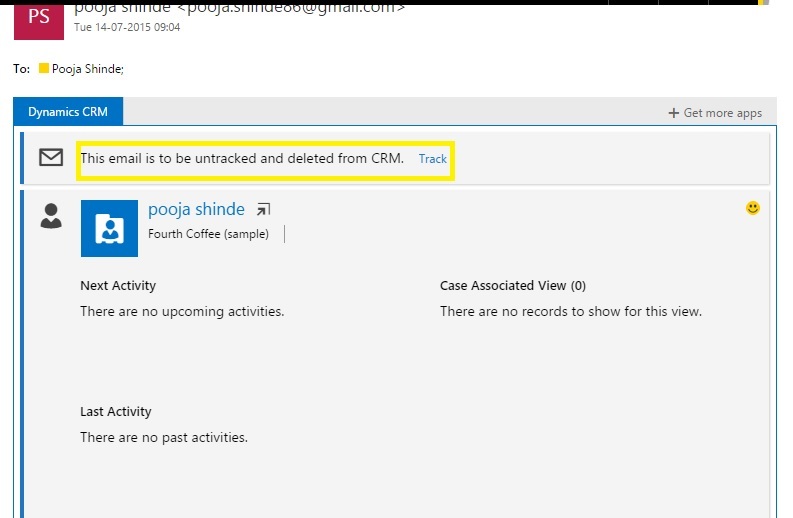
- Yes, delete it: Clicking this will untrack and delete the email from crm.
- Yes, delete it: Clicking this will untrack and delete the email from crm.
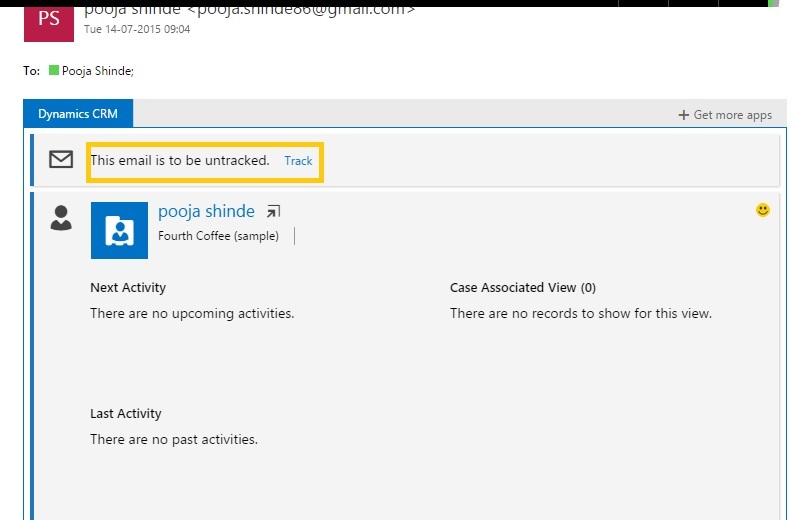
- No, only stop tracking: Click this untrack the email in crm.
- The name of the lead or contact
- The Pop Out button
- The name of the regarding record (once the email has been tracked)
- Any record or activity tile
The information you’ll see includes:
Change the regarding record for a tracked email message
To untrack an email message
Open a CRM record from CRM App for Outlook**
You can open CRM forms directly for contacts and other records. To open CRM records, choose any of the following links:
** Feature not available in IE 11.
