Setup social media for Microsoft Parature
Purpose of this blog is to setup social media (Facebook) for Microsoft Parature.
Prerequisite:
- Parature Enterprise license.
- Facebook Page on which Parature Support has to be setup.
Purpose of the setup:
Setting up Social media for Parature will help clients raise tickets from the social media platforms. Tickets can directly be created from social media platforms like Facebook, Twitter, YouTube, Instagram, LinkedIn.
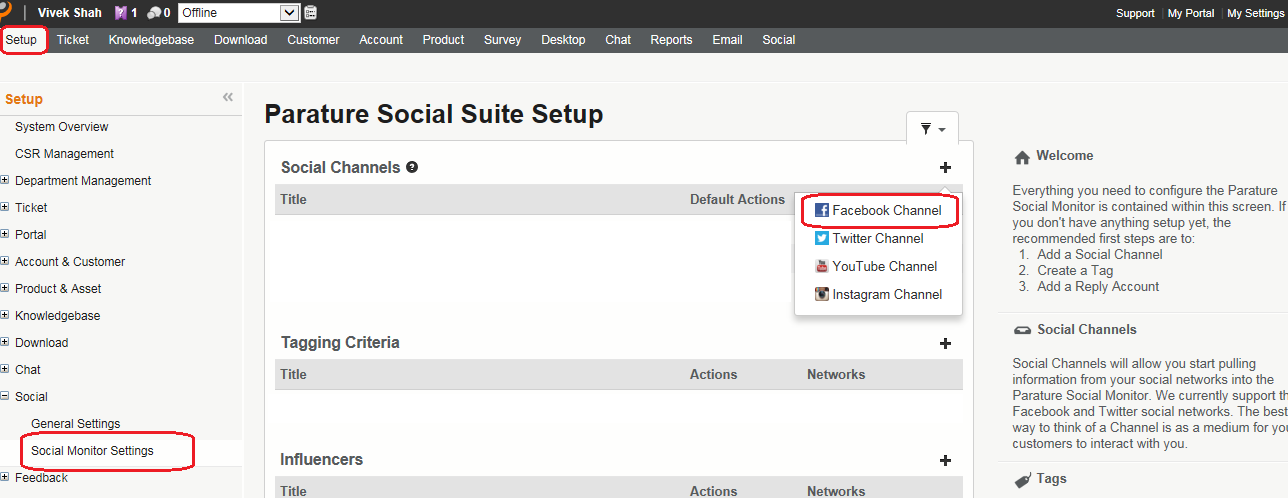
Steps to setup social media (Facebook) for Parature:
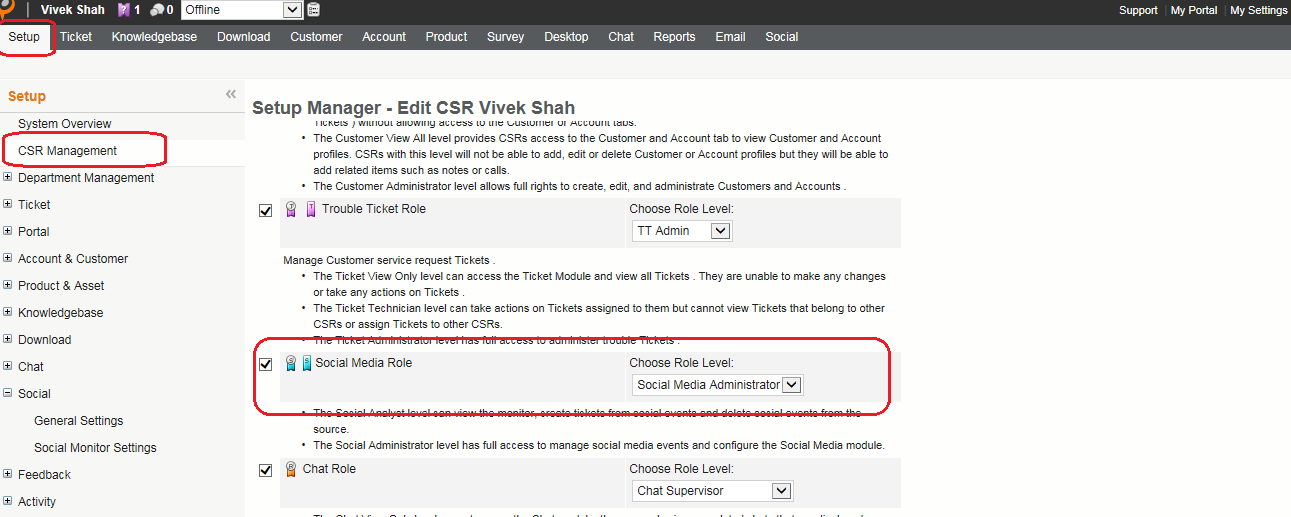
- To begin with setup, first ensure social media role for the user is ON. We can set social media role for the user by going to Setup -> CSR Management -> Social Media Role.
Set the role level to Social Media Administrator. - Next is setup of Social Channel.
To setup Facebook channel:
- Go to Setup -> Social -> Social Monitor Settings
In Social Channels section, click “+” symbol, and click Facebook Channel. - It will take you to Facebook’s login page. Insert the Facebook credentials and log-in.
- On successful login, a pop-up will come to select the Facebook page on which the Parature Support has to be enabled.
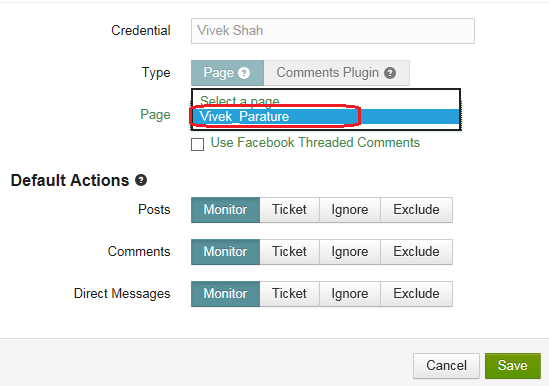
Select the Facebook page on which you want to enable the Parature Support.
Set All Default Actions to “Monitor”. - Add “Tags”, “Influencers” and “Reply As Accounts” as needed.
“Tags” allow you to have glimpse of what’s happening on your social channels.
“Reply As Accounts” allow the customer service representative to create tickets from customer posts and also reply them via same social media site. In this way unnecessary rerouting through multiple channels can be avoided. - Enable the Social media:
- Select the newly created social channel, select Action and click Enable.
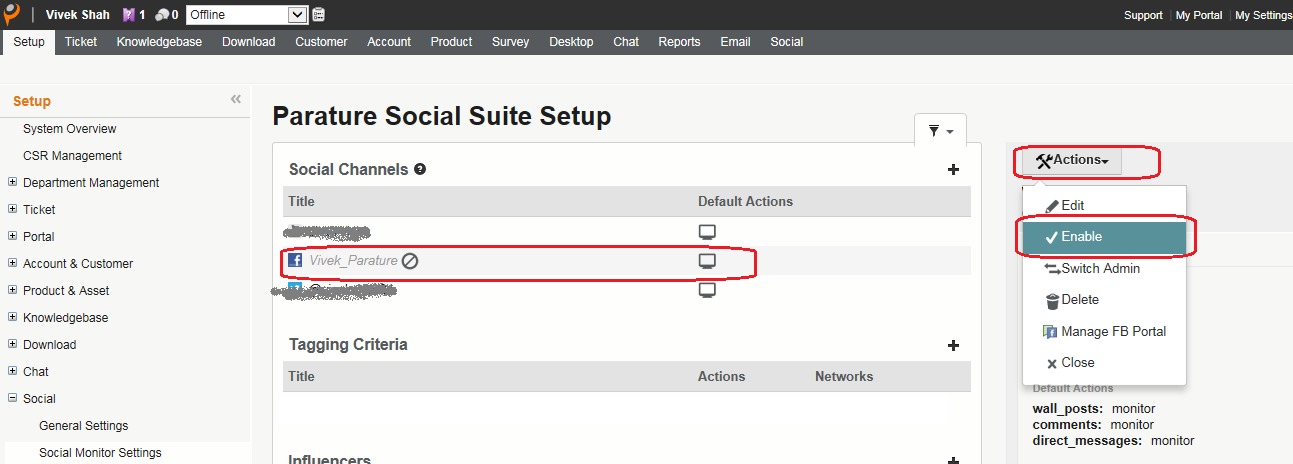
- To ensure your Facebook page is enabled, Select the Social channel, click on Actions – > Enable FB Portal.
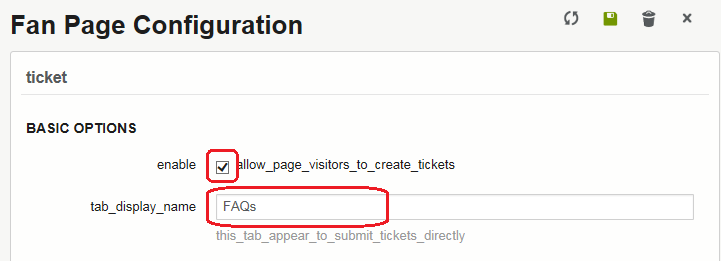
From here we can set access to knowledgebase for the customer, Allow the customer to raise tickets and also chat with the service representative. - To allow customer to raise ticket from the social media:
- Under Basic Options, select Enable.
- Enter Tab Display Name.
- Make sure Summary and Details field under Primary Fields section is selected to “Summary”.
- Using Custom fields, you can further modify Customer Social media experience.
- Miscellaneous options allow you to select how tickets are to be handled.
- Enabling Knowledge Base for the portal:
Knowledge Base allows customer to searching content on their own if they don’t want to submit a ticket.
To Enable the Knowledge Base: - Under Knowledge Base section, select Enable.
- Enter Tab Display Name for the Knowledge Base.
- Enter the number of recently modified articles and number of most popular articles you which to show on the Facebook page.
