Retention Tags and Policies in Exchange Online
Introduction:
Messaging records management (MRM) helps organizations to manage email lifecycle and reduce legal risks associated with e-mail and other communications.
MRM in exchange online is accomplished by using retention tags and policies.
Retention Tags:

Retention tags are used to apply retention settings to folders and individual items such as e-mail messages and voice mail. This specify how long a message remains in a mailbox and the action to be taken when the message reaches the specified retention age. When a message reaches its retention age, it’s moved to the user’s In-Place Archive or deleted.
Types of Retention tags:
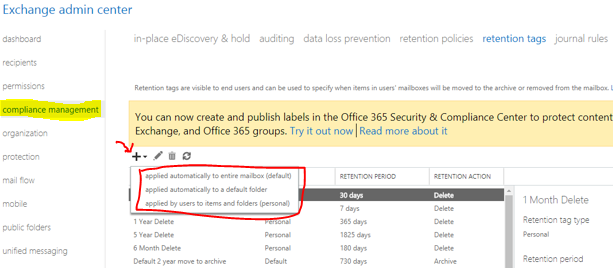
Retention tags are classified into the following three types based on who can apply them and where in a mailbox they can be applied.
- Default policy tags – Applied automatically to entire mailbox.
- Retention policy tag – Applies automatically to a default folder.
- Personal tag – Manually to items and folders. Personal tags are available to Outlook web app users as a part of their retention policy.
Creating retention tags:
- In EAC, go to Compliance center > Retention tags, and then click +.
- Retention tags are classified into three types, select one of the option.
- The New retention tag page title and options will vary depending on the type of tag you selected.
- Enter a name for tag, chose retention actions and period, click Save.
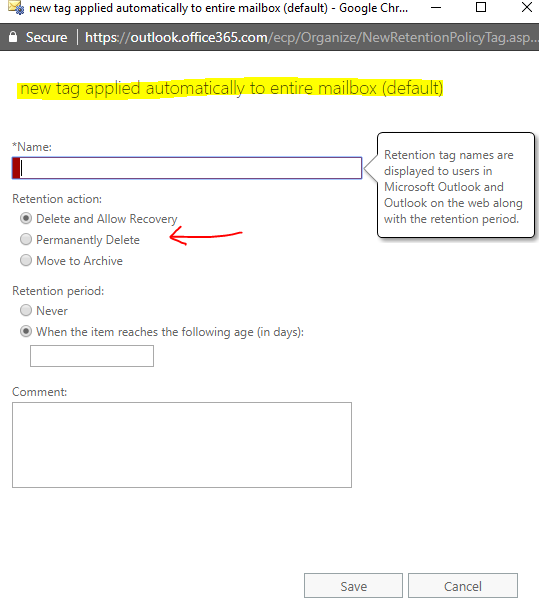
Retention Actions:
- Delete and allow recovery – Allow the user to recover deleted items until the deleted items retention period for the mailbox has not reached.
- Move to archive – Move the message to user’s archive folder, this is applicable only for tags that are automatically applied to the entire mailbox (default) and applied by users to items & folders (Personal).
- Permanently delete – Purges the item from the mailbox database.
Retention Policies:
To apply one or more retention tags to a mailbox, you must add them to a retention policy and then apply the policy to mailboxes. A mailbox can’t have more than one retention policy. Retention tags can be linked to or unlinked from a retention policy at any time, and the changes automatically take effect for all mailboxes that have the policy applied.
Creating a Retention Policy:
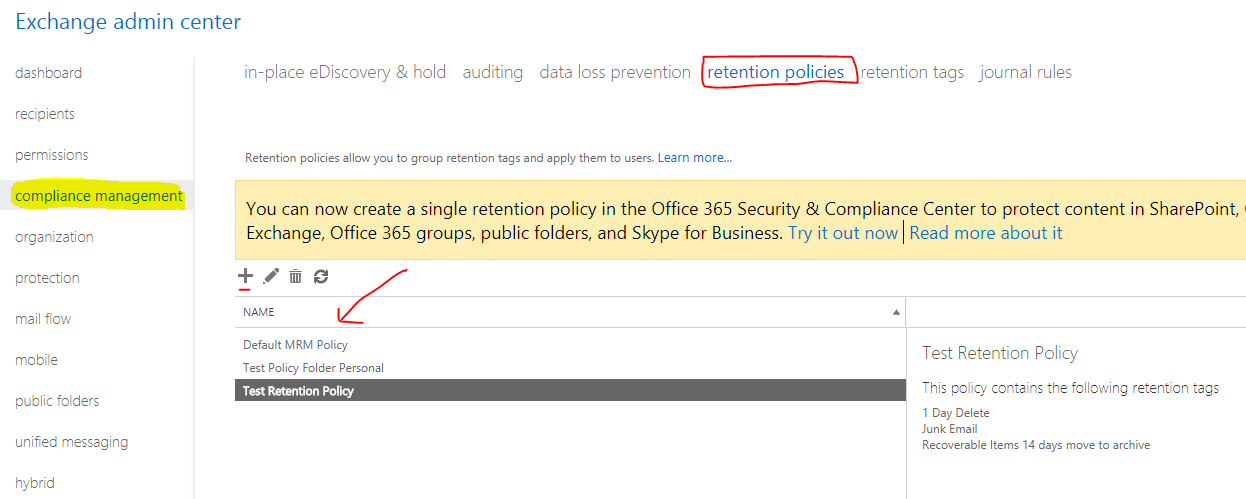
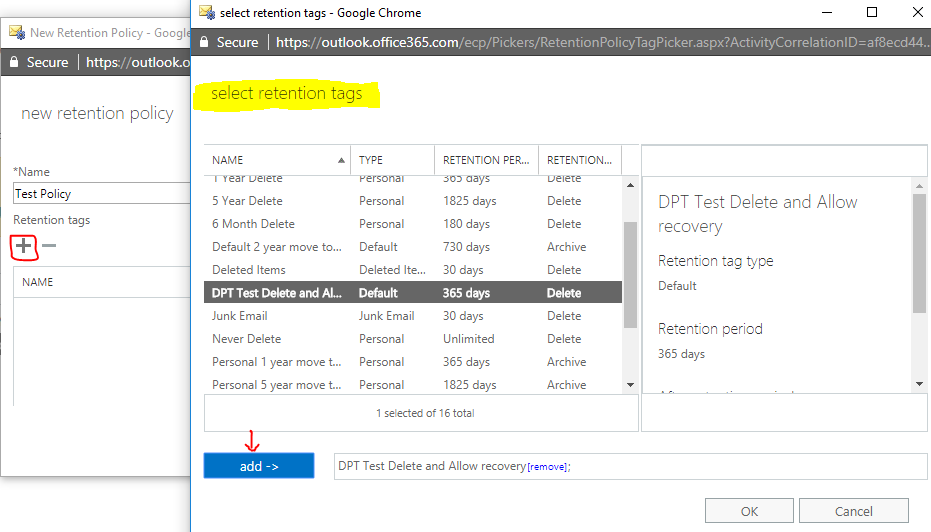
- In EAC, go to Compliance center > Retention policies, and then click +.
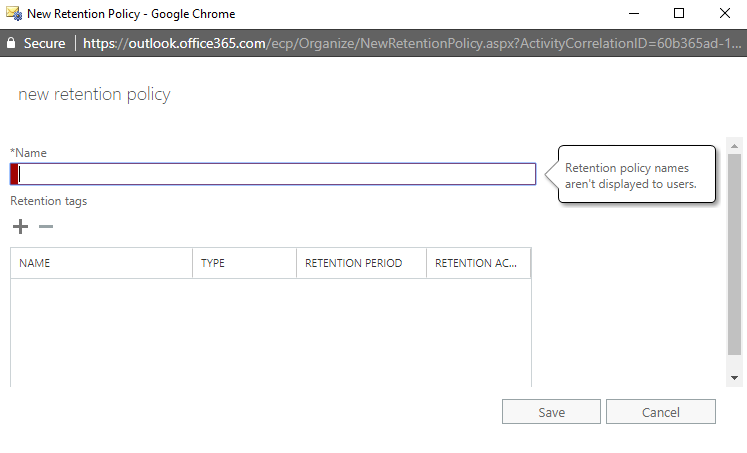
- In New Retention Policy, provide a name for the policy and click + to add retention tags. After click +, list of all the retention tags will shown and you can select from that.
- After linking retention tags to policy, click Save.
A retention policy can contain the following tags:
- One DPT with the Move to Archive action
- One DPT with the Delete and Allow Recovery or Permanently Delete actions
- One DPT for voice mail messages with the Delete and Allow Recovery or Permanently Delete actions
- One RPT per default folder such as Inbox to delete items
- Any number of personal tags
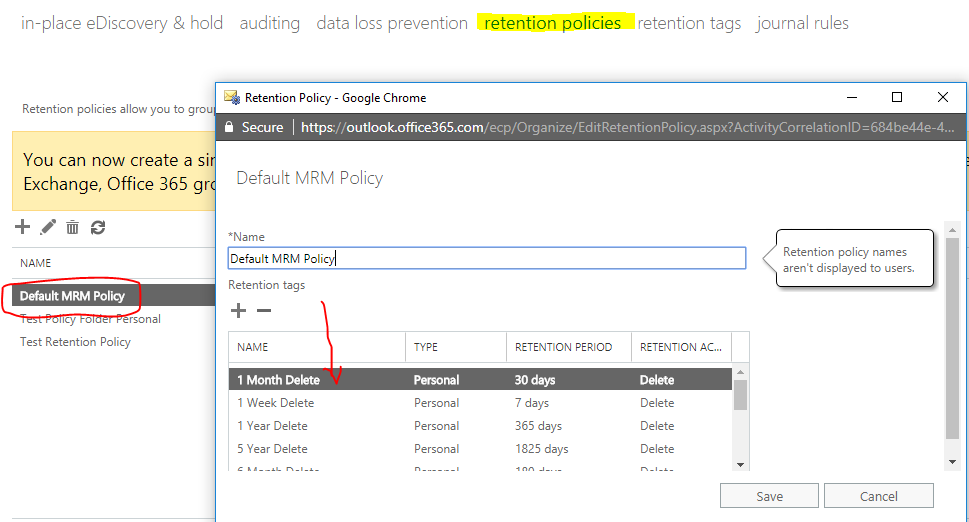
Default Retention Policy:
Exchange Setup creates the retention policy Default MRM Policy. The Default MRM Policy is applied automatically to new mailboxes in Exchange Online. You can modify tags included in the Default MRM Policy.
Place a mailbox on Retention Hold:
Placing a mailbox on retention hold suspends the processing of a retention policy. Retention hold is designed for situations such as a user being on vacation or away temporarily.
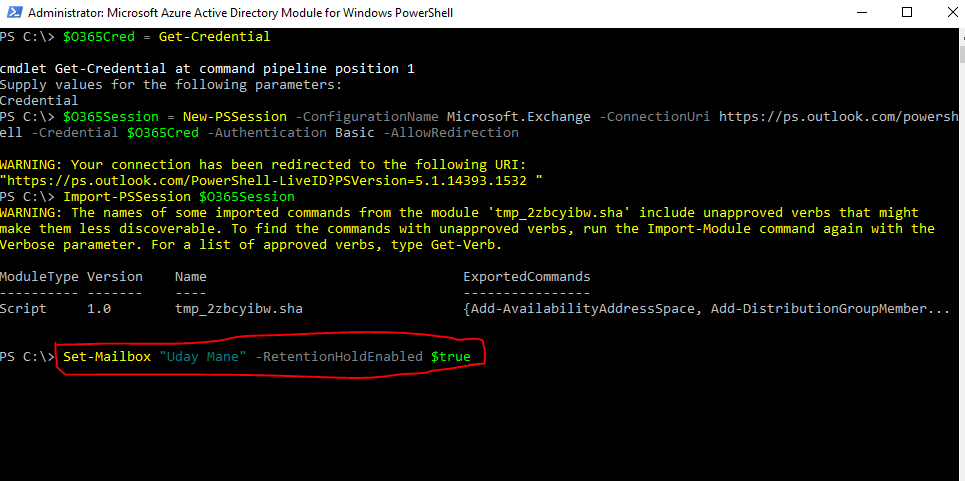
To set a mailbox on Retention Hold, you need to use Powershell.
For placing a mailbox on Retention Hold:
Command – Set-Mailbox “Uday Mane” -RetentionHoldEnabled $true
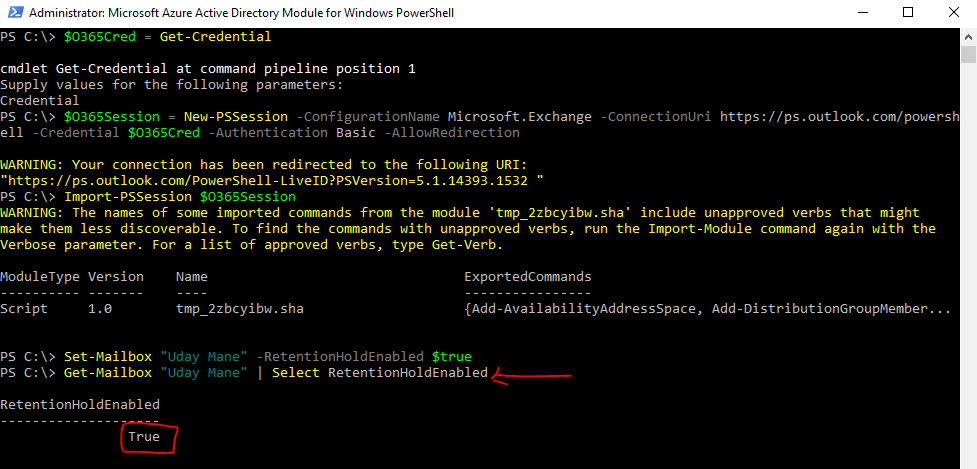
To check whether the Retention Hold in enabled on a Mailbox:
Command – Get-Mailbox “Uday Mane” | Select RetentionHoldEnabled
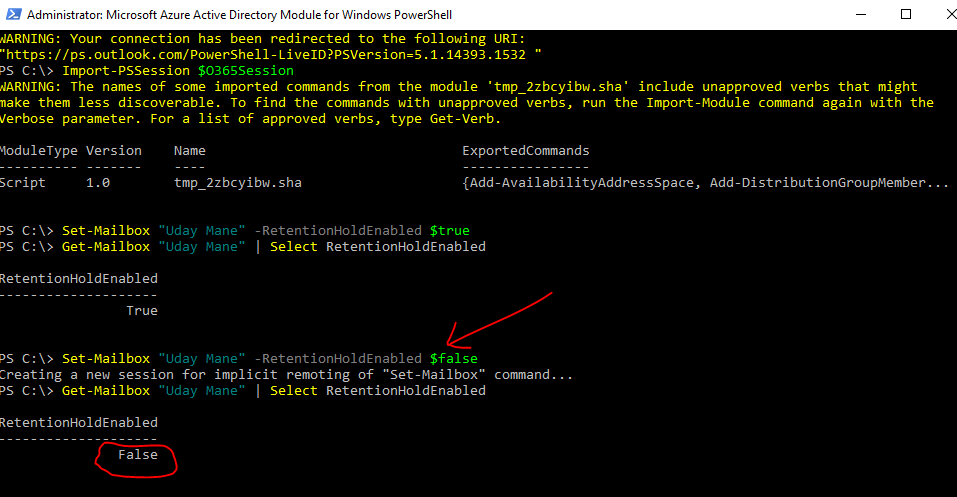
To remove retention, hold from a mailbox:
Command – Set-Mailbox “Uday Mane” -RetentionHoldEnabled $false
Conclusion:
So, this is how we can use MRM to manage email lifecycle and reduce legal risks associated with email and other communications.
