Configuring Barcodes on POS Receipts
Introduction:
Refunding a transaction is an everyday occurrence in Retail. LS Central provides us with the functionality to initiate the refund of a transaction by simply scanning one barcode!
In this blog, we will be looking at how to configure this feature.
References:
Pre-requisites:
- Microsoft Dynamics 365 Business Central
- LS Central
Configuration:
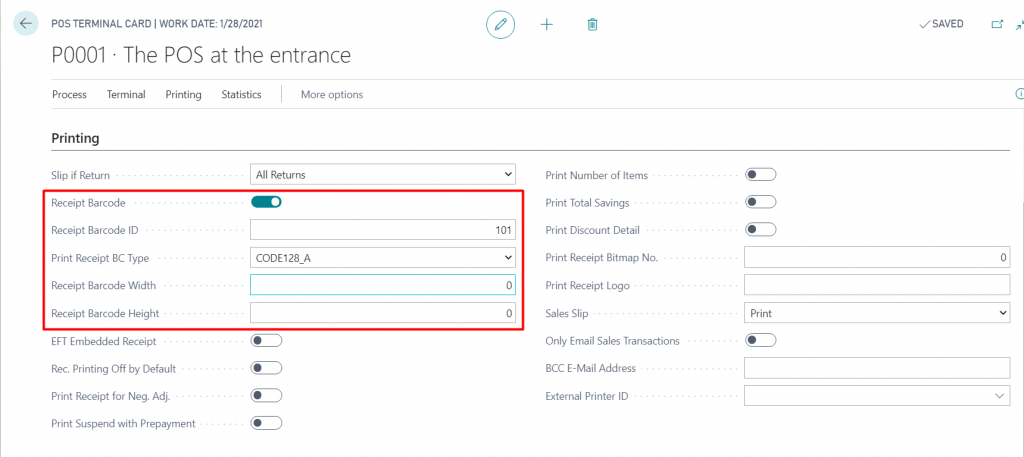
- From Business Central, open the POS Terminal for the current Store.

- In the “Printing” tab,
- Set the “Receipt Barcode” ID to 101.
- Set the “Print Receipt BC Type” to “CODE39” or “CODE128_A”.
- You can optionally adjust the Barcode Height and Width but depending upon the POS Printer it may or may not be scannable as the resolution of the barcode suffers. The default parameters which are applied if you leave the fields to 0 are width – 8 and height 40.
- Set the “Receipt Barcode” to true.
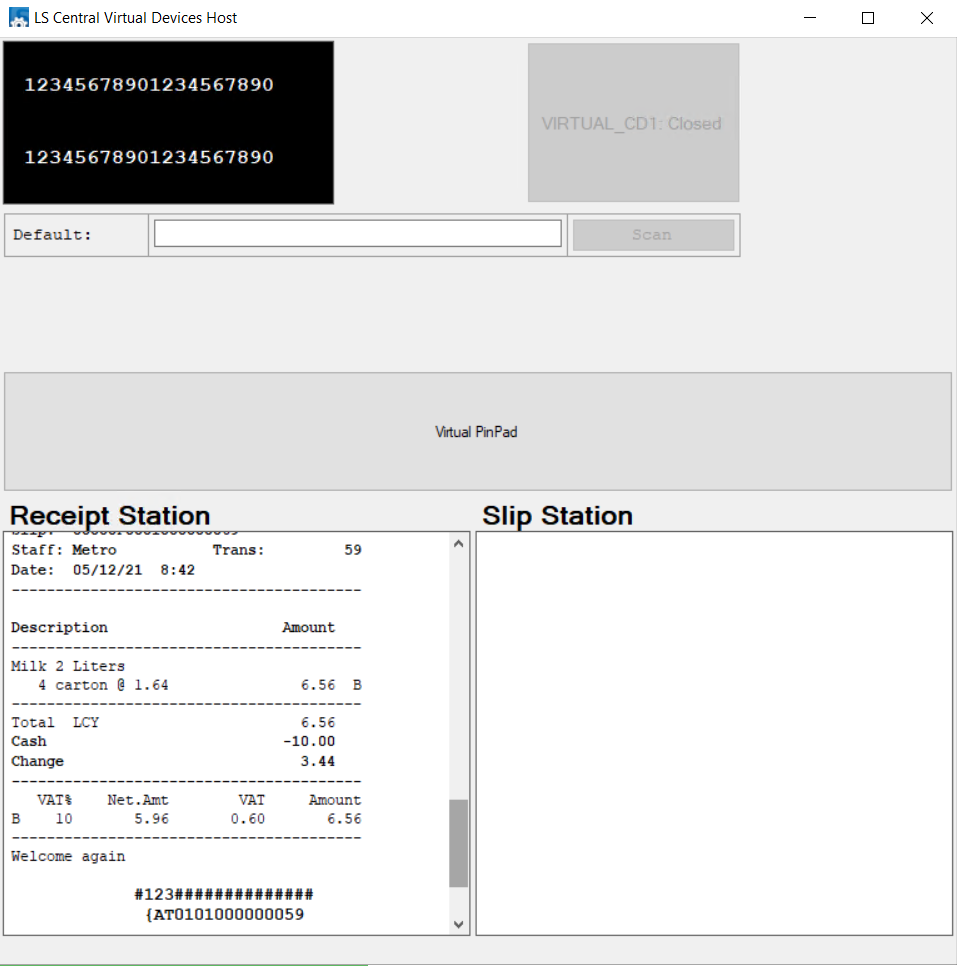
- Once this is done, simply run the POS and generate a Receipt.
When the Barcode at the bottom of the Receipt is scanned it should directly take the User to the refund screen of the POS. For instance, this is how it looks on the Virtual Printer:
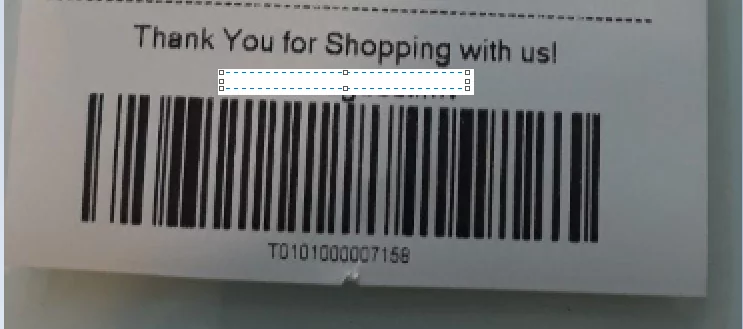
While, this is how it looks when using a real printer.
Conclusion:
Thus, in this blog we saw how to configure Barcodes on POS Receipt.
Thanks for reading!
