Vendor Electronic Payment in Navision 2017
Introduction:
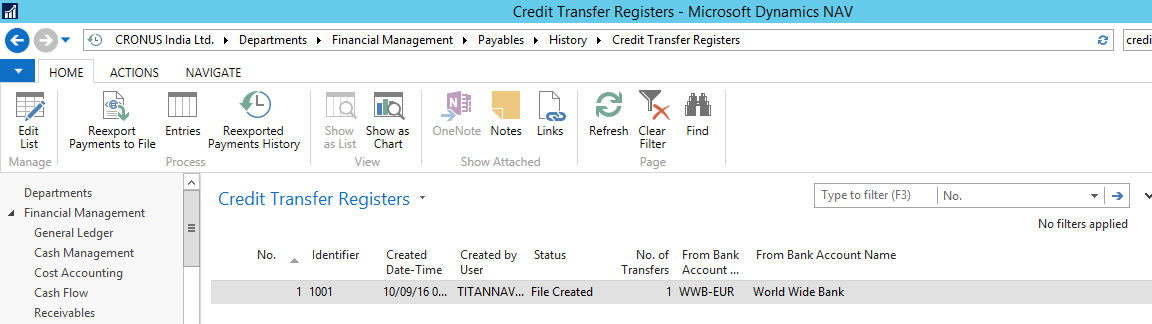
Electronic payment to vendors can be done using Navision 2017. This reduces manual work and also errors that can be caused during payment. After specifying the payment details in the payment journal, the file can be exported. This file then has to be transmitted and uploaded to the bank to process the payment. Once it is confirmed that the payment is received and processed by the bank, it has to be posted. The details of the exported file are visible in Credit transfer registers. This helps to find what has been exported and by whom.
In this article, we will be demonstrating steps required for doing Electronic Payment to vendors.
Prerequisite:
Microsoft Dynamics Navision 2017
Purpose of the setup:
Our goal is to do Electronic payment to Vendors for their unpaid Invoices in Navision.
Steps:
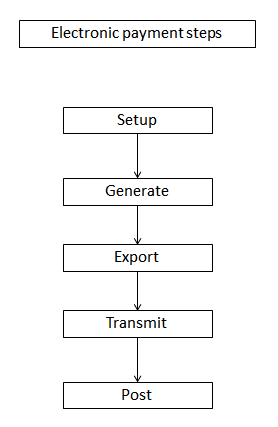
Electronic Payment to Vendors basically consists of the following steps:
- Setup
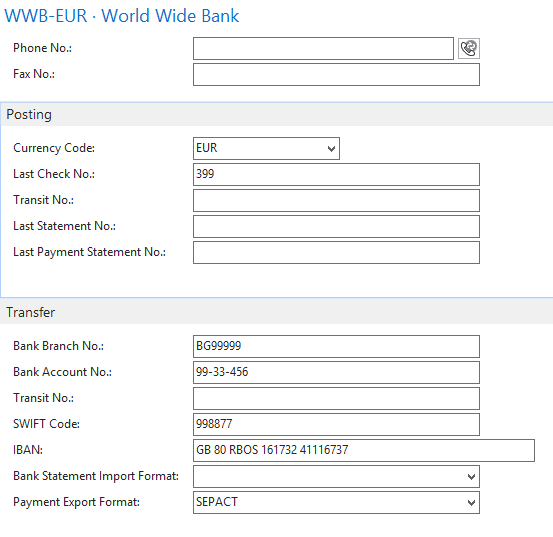
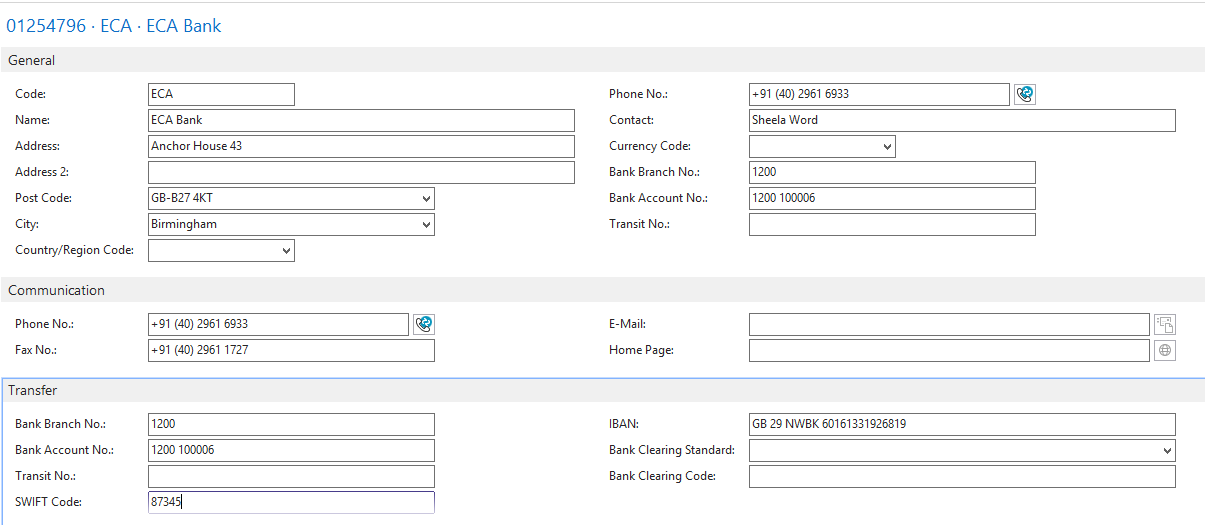
- Setup the bank account
Bank account needs to be setup to do payments. In order to be able to use credit transfers with this bank account, SWIFT code and IBAN should be valid. Payment export format should be SEPACT.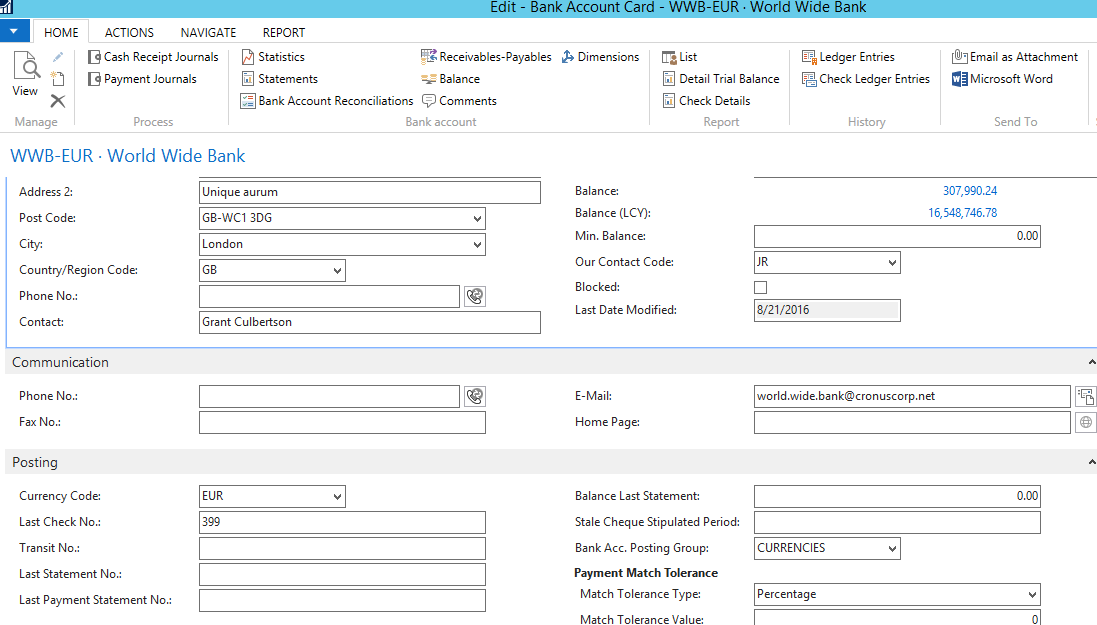
- Setup the vendor along with appropriate bank account details
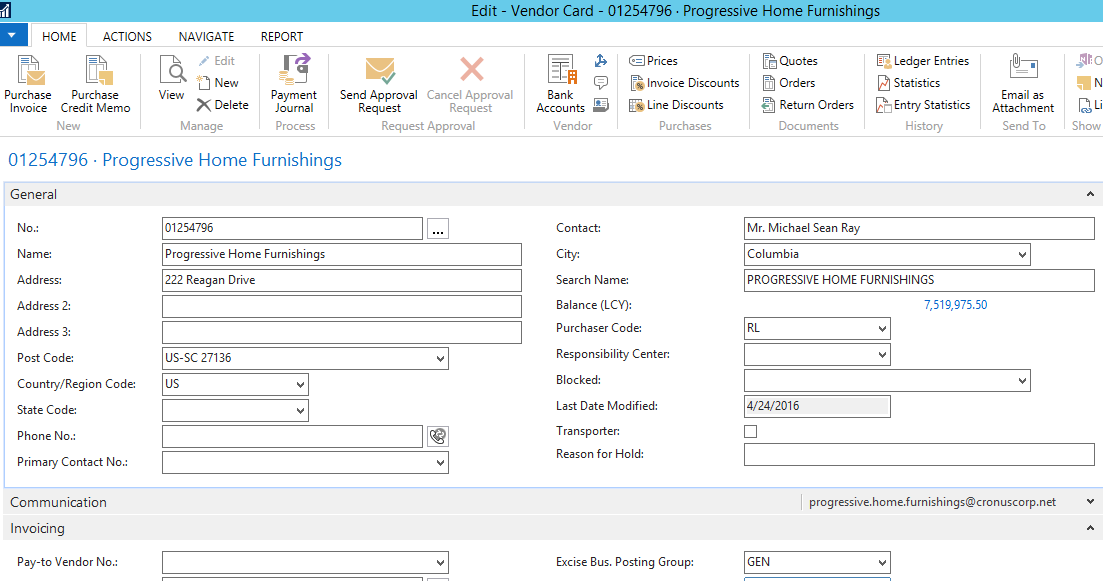
Go to bank accounts of the vendor.
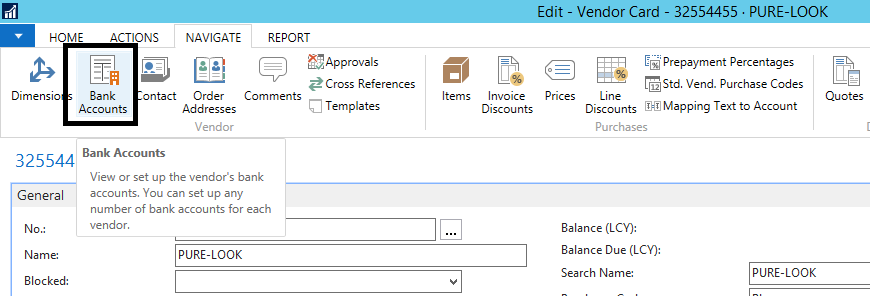
Make sure valid Swift code and IBAN is assigned.
Choose preferred bank account for this vendor.

- Setup the bank account
- Generate Electronic payment
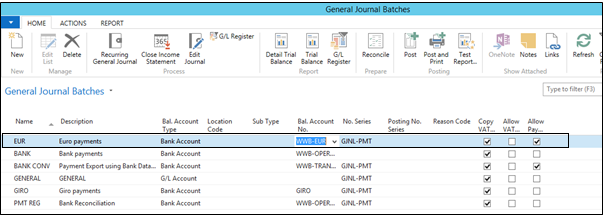
We will be creating a new General Journal Batch. Bal. account type should be ‘Bank Account’. Bal. Account no. is the Account from which payment will be done to the vendor.Allow Payment export should be selected.
Select the newly created batch as the ‘Batch Name’. ‘Applies to Doc. Type’ should be selected as ‘Invoice’.
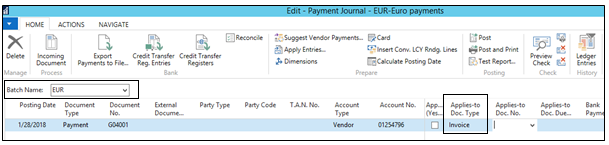
When ‘Applies to Doc. No.’ is clicked, a list of all the unpaid invoices for this vendor will be displayed.
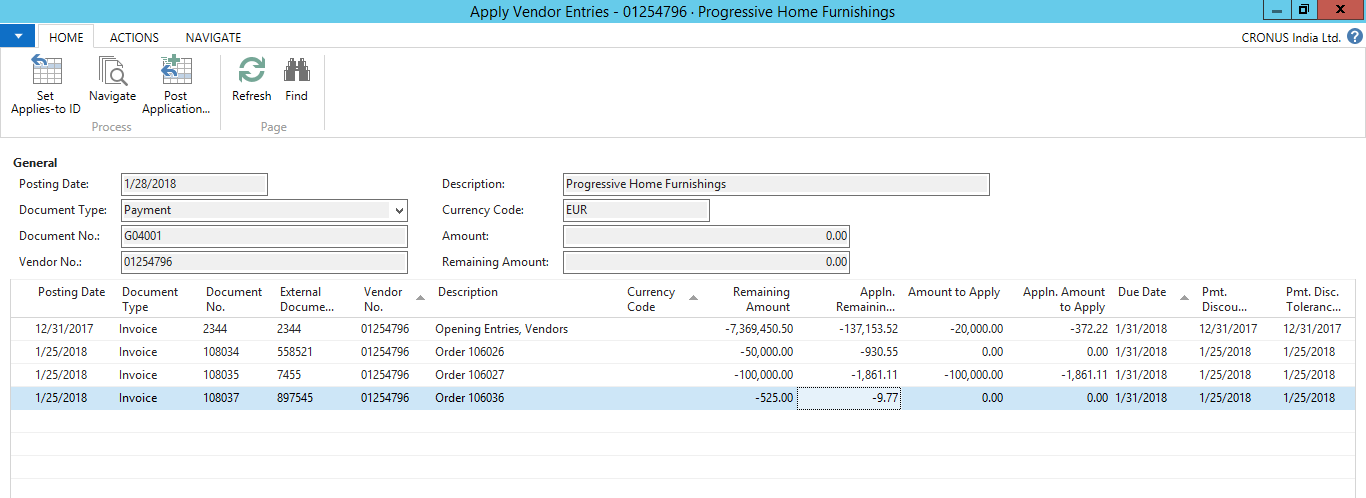
The invoice for which Electronic payment has to be done is selected.
- Export Electronic payment
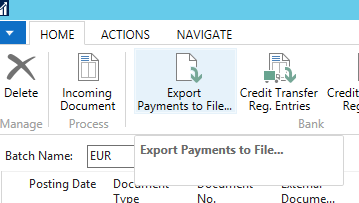
When you are ready to post payments to your vendors using the payment journal, you can export a file with the payment information on the journal lines. - Transmit Electronic payment
The bank payment file is exported to the location that you specify, and you can proceed to upload it to your electronic bank account and make the actual payments.When you receive confirmation that the payments are successfully processed in the bank, you can post the exported payment journal lines.
- Post Electronic payment
Payments should not be posted until it is confirmed from the bank that the payment is received.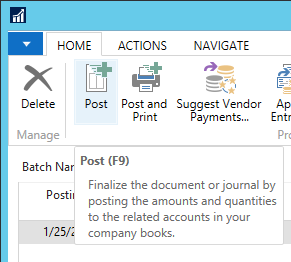
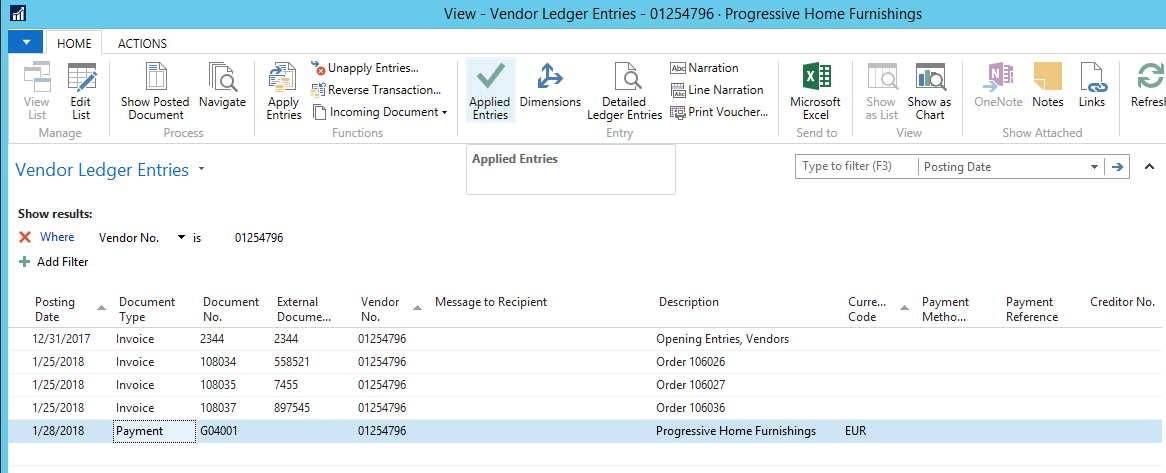
Once it is posted, check the vendor ledger entries of the vendor for which the payment is made. Select the payment which is made and click on applied Entries. The vendor invoice for which this particular Electronic payment is done will be displayed and vice versa is applicable.
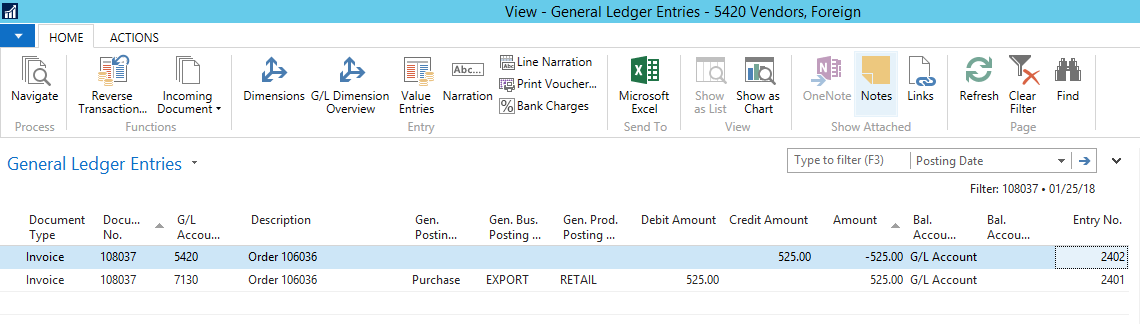
The GL Entries for this particular vendor will be visible by selecting the Payment and then clicking on ‘Navigate’ in the ribbon.
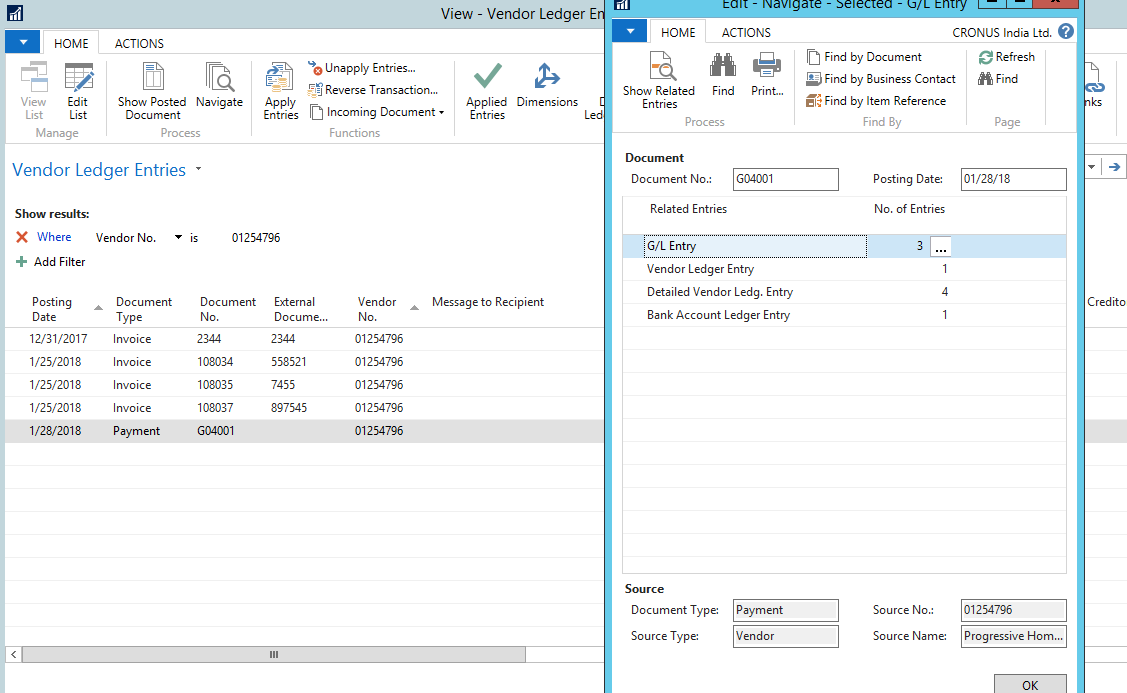
The amount has been deducted from our bank account and added to the vendor bank account.
In the credit transfer register, the details of the exported file will be visible.
Conclusion:
Thus, Electronic payment is a very beneficial way of doing payments to vendors since it makes the entire process of doing payment easier and faster. Also, all the exported files history can be viewed anytime as it gets saved in the Credit transfer registers.
