Create Record in CRM using PowerApps with Microsoft flow
A fiber optic link service organization utilizes the application to react to blackouts by dispatching specialists to issue zones. An in-home medical care specialist organization utilizes the application to timetable and dispatch medical services laborers to direct medication and other considerations to various patients.
A facility manager uses the Dynamics 365 Field Service management software to deliver maintenance and repair services for heating and cooling equipment. A medical device manufacturer sells machines to hospitals and clinics and uses the application to manage maintenance services over the lifetime of the machinery.
Customer Service will typically use the desktop application to prioritize different requests so that work orders and on-site visits can be created from cases.
Service Managers will use the software to oversee service delivery and track performance metrics over time.
Introduction:
This blog explains how to create Record in CRM using PowerApps with Microsoft flow.
Steps to be followed:
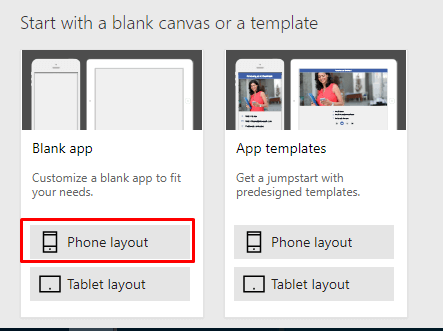
- Create Blank App.
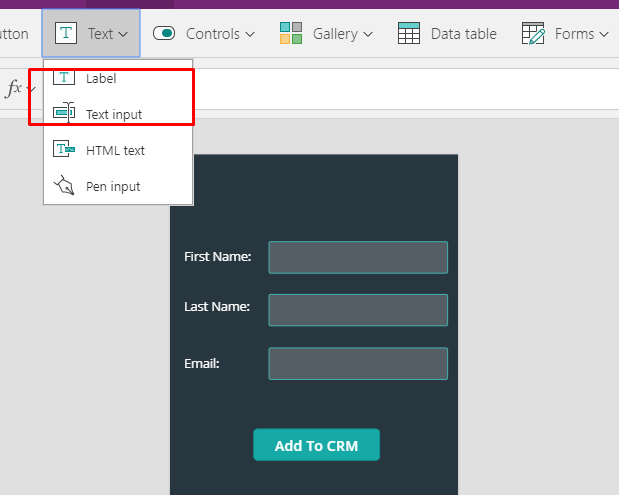
- Insert Label, Text Input and Button controls.(Fields which you want to create in CRM.)
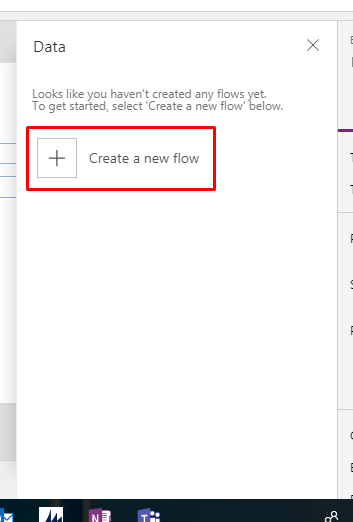
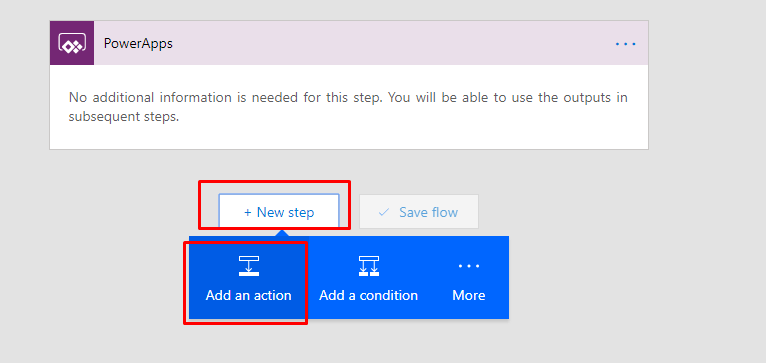
- Select the Button (Add To CRM) and go to Action –> Flows.

- Click on Create a New Flow.
- Click on New step –> Add an Action.
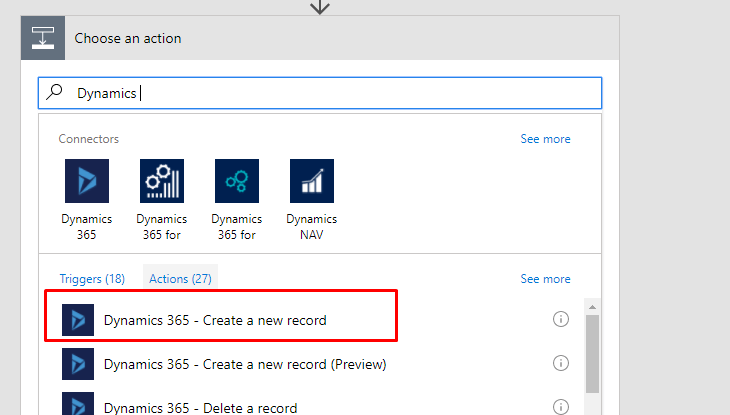
- Select Dynamics 365 –> Create a new record.
- Enter the Organization Name and Select the Entity for which you want to create record in CRM.
- For Last Name, click on “Ask in PowerApps”.
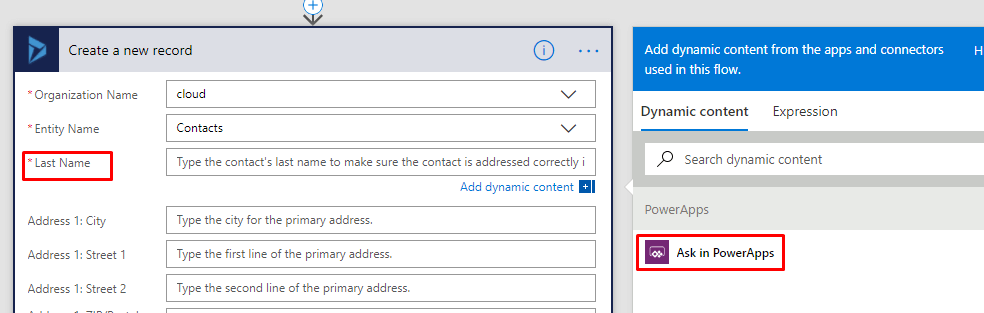
- Repeat for Email and First Name.


- For Description we will add text.

- For Last Name, click on “Ask in PowerApps”.
- Give Name to the flow and Create Flow.

- Now change the OnSelect Property of button.(here lastname, firstname and email are the name of text input control)

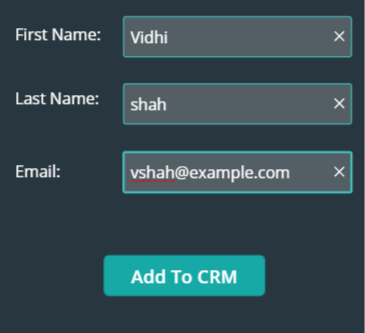
- Enter Details and Click on Button.
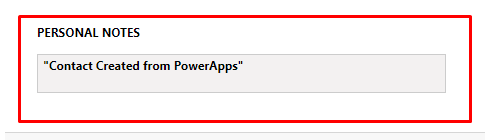
- Record will get created in CRM.
 Description: