Row Level Security using Power BI
Prerequisite:
Power BI Desktop Tool, Power BI Online Service
Purpose of the setup:
Purpose of this blog is to demonstrate Row Level Security (RLS) using Power BI
Procedure:
To demonstrate this, we have created a Power BI Desktop file and published it to Power BI Online account.
Before starting, let us assume a scenario where there is a Sales Organization.
A Sales organization uses CRM data. They need to provide Sales data by Role to different person as per their job profile or control. CEO of a Sales organization can view data for all the opportunities. Sales Manager can view only his related sales data i.e. opportunities created by the Sales Person under his team. Sales Person can view only his sales opportunities.

Fig 1: Scenario
This can be achieved using RLS in Power BI.
Steps
Here we have created a Dashboard with sample data for a Sales Organization that deals with Opportunity data from CRM.
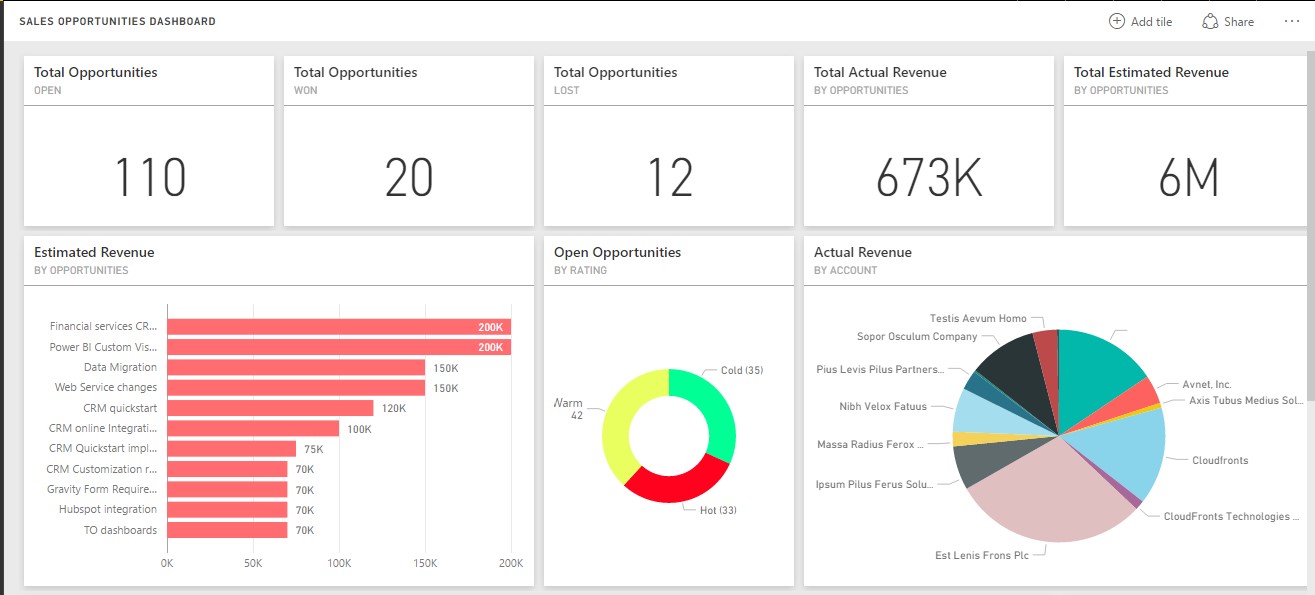
Fig 2: CEO Dashboard
This is the Opportunity dashboard that shows the complete CRM Opportunity data of the organization.
Now if the CEO wants to restrict the Sales Manager and Sales Person to view only at their level i.e. the Sales Manager can view data under his team and a Sales Person can view only his data as an owner.
For achieving this the CEO can share the dashboard to the person and then can assign the role.
Step 1:
Select the dataset from which the row level security has to be applied.
There is a new option called SECURITY, which we find once we click on the ellipses (…) next to the dataset.
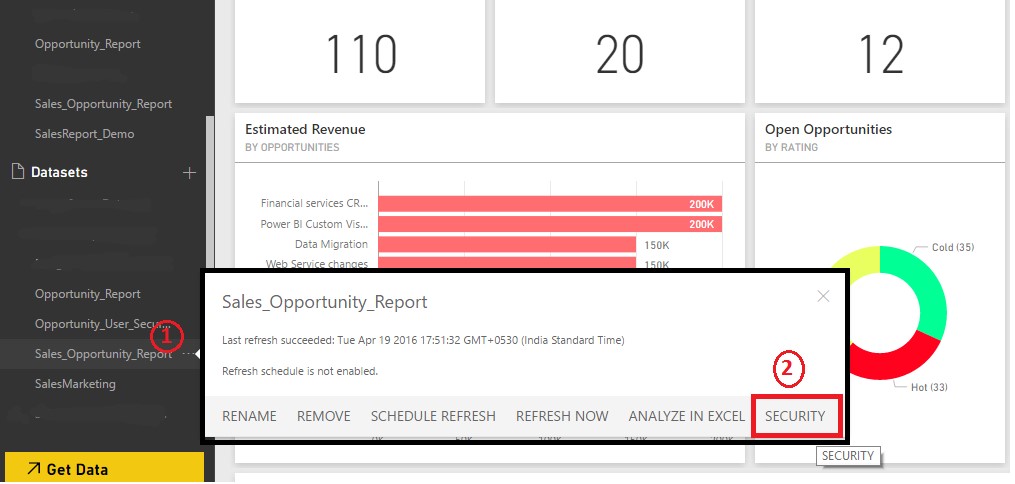
Fig 2: Security Option
Step 2:
Now click on Create New Role then add the email address of the person (which he uses as login id for his Power BI account) and then click on Add.
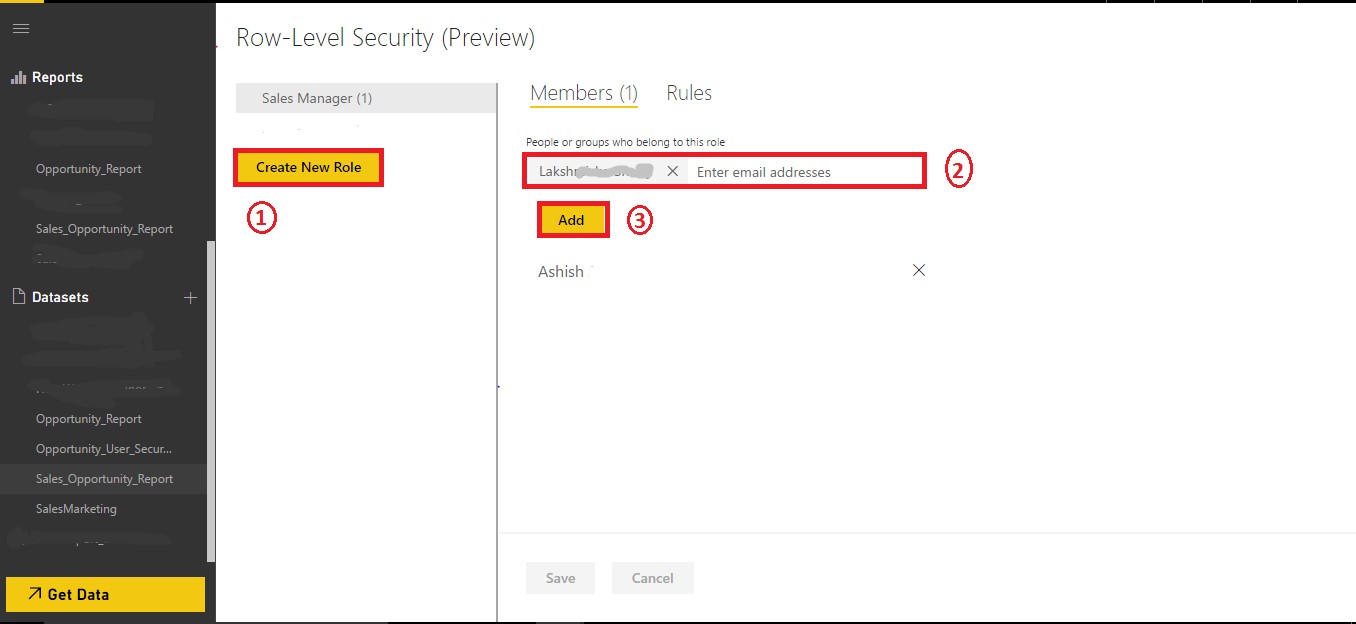
Fig 3: Adding Members to RLS
Step 3:
After adding the members click on Rules to provide the filtering of data based on DAX filters.
In Rules we have to select the table(s) on which we have to apply filter and then write the DAX Function in the DAX Input box.
Finally click on SAVE.
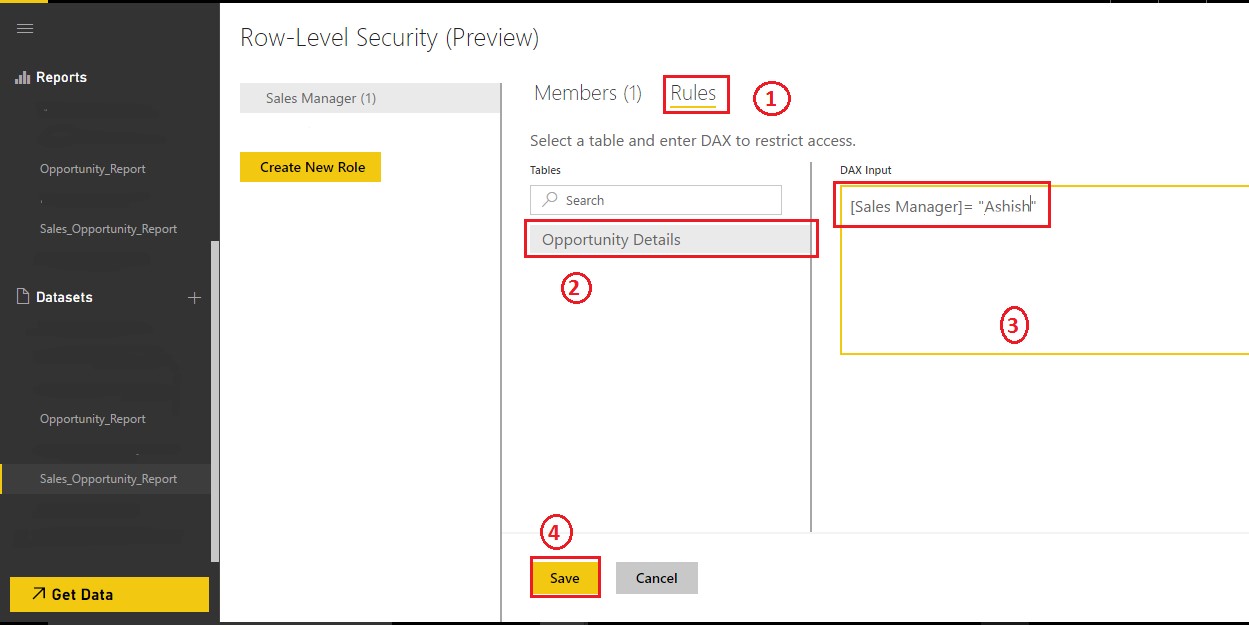
Fig 4: Rules Option
Step 4:
Now we are done with RLS in Power BI, to view the result we can go to the person’s Power BI account and find the result.
Note: It may happen that the result is not visible immediately. So for that we can refresh the Power BI dashboard once.
In this case the dashboard has been already shared with the Sales Manager who according to the scenario is the Sales person in our case.
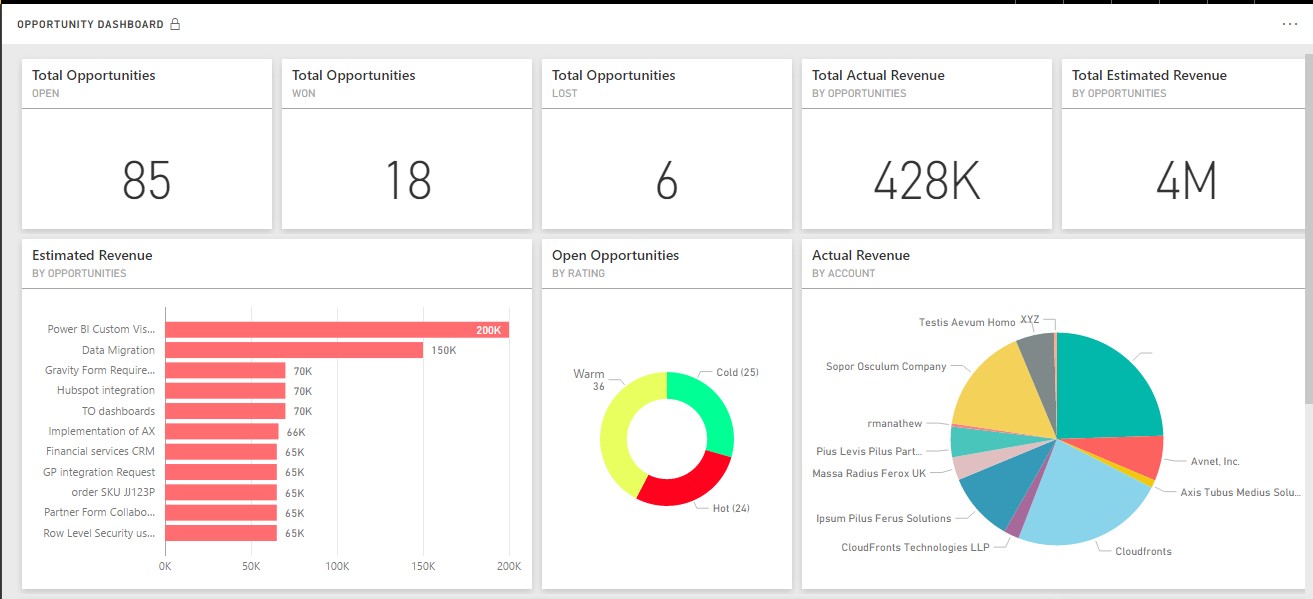
Fig 5: Sales Manager Level Dashboard
Similarly, CEO can apply RLS for a sales person to restrict to his data on dashboard.
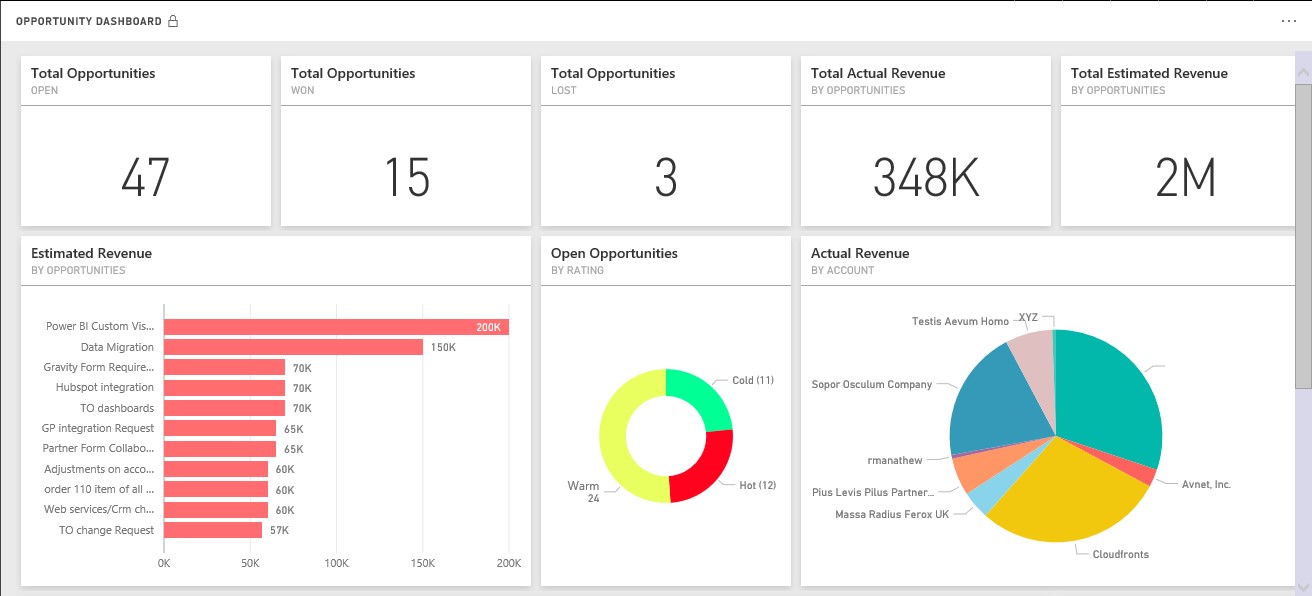
Fig 6: Sales Person Level Dashboard
This is how RLS is achieved using Power BI. Since, this is in Preview there are few limitations too.
Limitation:
- You can define RLS only on the datasets created using Power BI Desktop client
- If you make a change to your PBIX file, and republish to the service, you will need to re-create RLS
- Defining RLS in a group workspace is not supported
- You cannot add security groups or distribution lists to the member list
- Q&A and Cortana is not supported with RLS
