How to insert a Checkbox in SSRS Reports in Microsoft Dynamics 365 Business Central
Introduction:
In this blog, I will depict how a checkbox can be inserted in an SSRS report.
Pre-Requisites:
1. Microsoft Dynamics 365 Business Central
2. SSRS Reports
Steps:
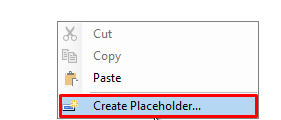
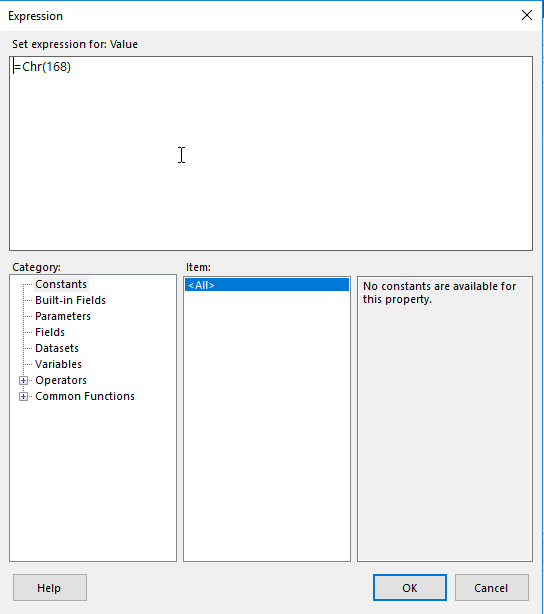
1. Create a placeholder in the Table and insert the character mentioned below.
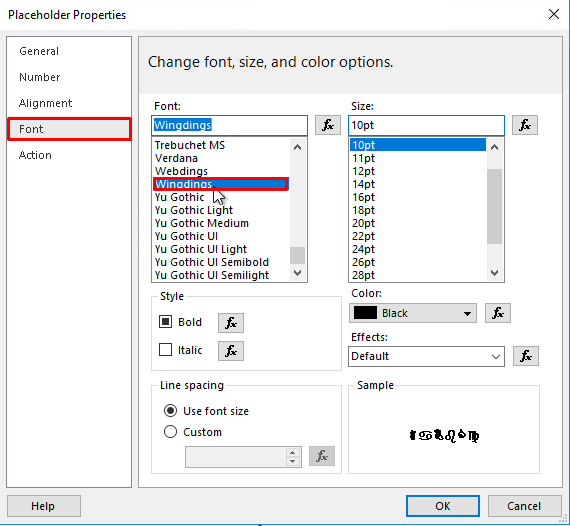
2. Now select the Font as Wingdings. The following set of symbols can be seen on the Report Layout.
![]()
3. When the report is run from the Business Central the checkbox can be seen.
![]()
Conclusion:
Thus, by using the following technique checkboxes can be generated in the SSRS report.
