Microsoft Social Engagement
CloudFronts recently implemented and went live with Microsoft Social Engagement to analyze the reviews of their services using twitter handler @cloudfronts and #askCloudFrontsPM and use it to track Leads in Dynamics 365.
So, Microsoft Social Engagement helps to analyze people’s views about the company, product and services on Social Network like Facebook, Twitter and Instagram. It collects the information from Social Media and helps examine the positive, negative or neutral sentiments of the posts.
There are three main key aspects of Social Engagement:
- Listen Everywhere: The information from where you hear it, what is it about, how people feel about the business i.e. your products and services.
- Analyze the Language/ Location/ Sentiments: The language in which the post is made or the location from where the post is done and Influence of products in Market is it Good or Bad?
- Drive Engagement: To Capture Feedbacks, Provide Service based on the Cases or Create a Lead.
Let’s see an example how Microsoft Social Engagement is used to drive information out from Twitter Profile for certain keywords like in our case say #askCloudFrontsPM that is posted by people anywhere around the world and based on the posts a lead is created in Dynamics365.
Note: So being a Global Admin, I have configured the settings in Microsoft Social Engagement.
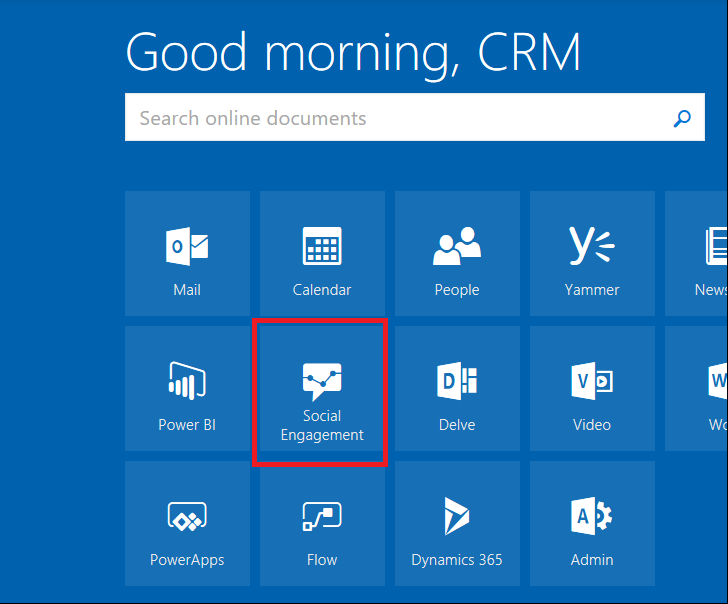
Microsoft Social Engagement can be accessed from https://portal.office.com
Overview on Navigation Areas

Search Setup:
This application area is where the Manager defines the search topics for the posts.
Analytics:
This area is where the Manager or Analyst can see their data in Visual Metrics i.e. with various factors like Sentiments, Phrases, Location, Source and Language they can also filter out relevant data as per their business needs.
Social Center:
This is a Subset of Analytics. Here the user can see posts from last 14 days. Streams capture the posts that are more relevant and can be configured using the filters.
Activity Maps:
Activity Maps are real time visualization of post with Location. This Map shows the area that where in the world the topics are discussed.
Message Center:
Message Center is used to manage alerts based on the trends or posts and get notified by email to specified recipients.
Settings:
This area is where the Admin can configure Social Profiles, Dynamics 365 Connection, Automation Rules and additional settings.
Setup
Below are the steps which needs to be configured to get the desired results.
Configuration:

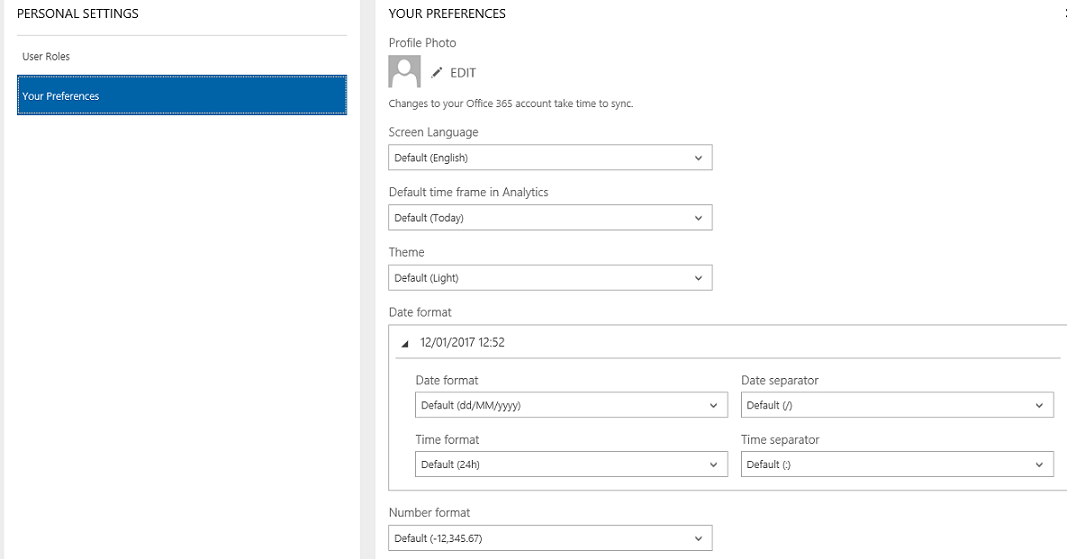
a. Personal Settings
Here Admin can set the default setting of Language, default filter for Analytics, Theme, Date Format and Number Format.
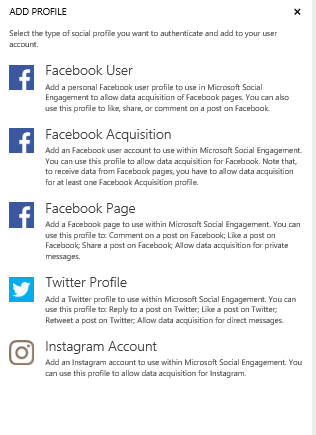
b. Social Profiles
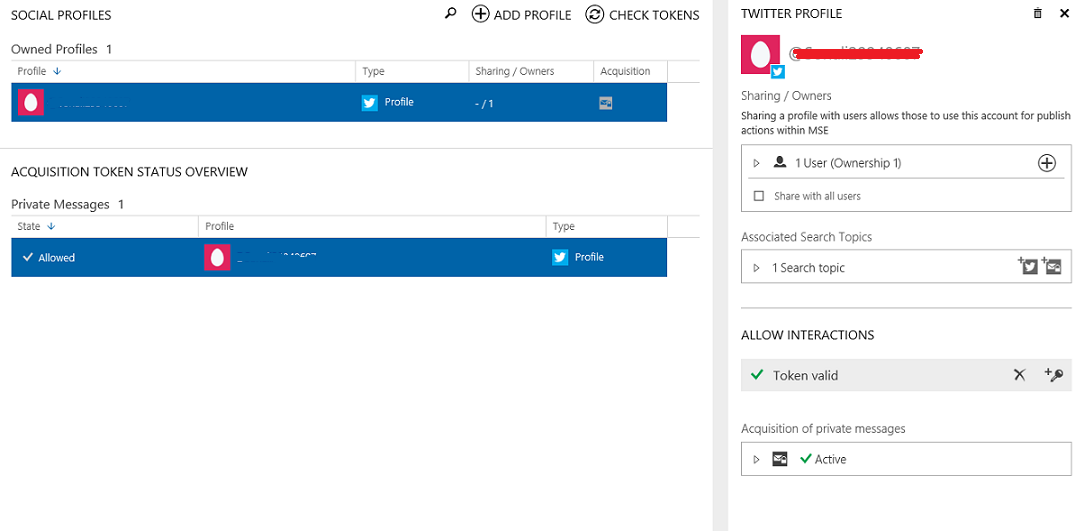
Three type of Social Profiles can be created i.e. Facebook, Instagram and Twitter. So once the admin creates the Social Profile, the profile needs to be authenticated with username and password. Here in this case I have configured a Twitter Profile.
This Profile has two key main sections:
User (Ownership):
This is where the Admin can decide about the ownership of Profile and can also add users in that profile who can access and share that Social Profile.
Search Topics:
This is the area where the Admin can decide on the Search Topic Keywords and can assign a Search Topic in a particular Channel to this specific Social Profile.
c. Default/ Global Settings
As the name suggests, this setting applies to the entire organization i.e. to setup Default Preferences.
Different Parameters are configured like Default Screen Language, Time Frame, Date Time Format, Number Format, Search Topics, Location Groups and Additional Settings.
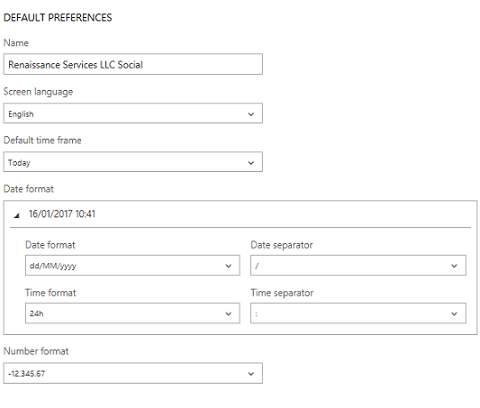
Default Preference:
This section will cover the Solution Name, Screen Language, Date Format and Number Format.
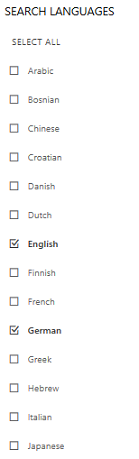
Search Language:
Here the Admin can manage the languages that should be enabled for Search Setup.
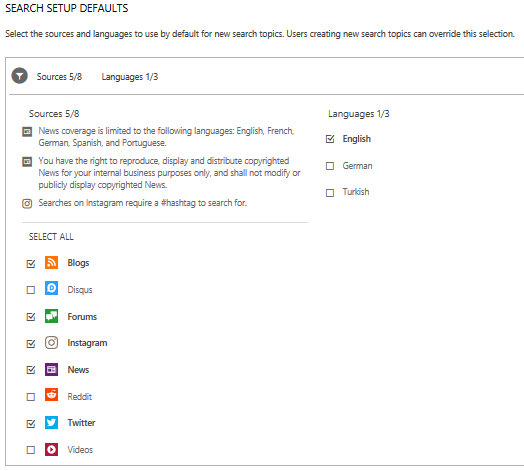
Search Setup Defaults:
This Section defines the area about where the search should work and in which Language that is Search can happen from Blogs, News, Instagram, Twitter, Facebook, Forums etc. for English Language.
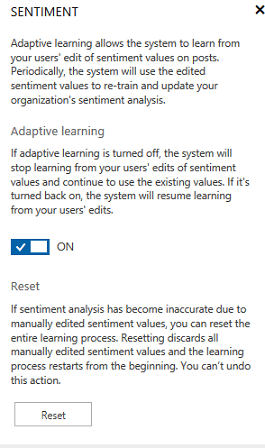
Sentiments:
This is Adaptive Learning i.e. it allows the system to learn the sentiments from the user’s posts. People using MSE can also change the sentiment value of the posts and can help the system train well.
So this section allows the Admin to enable and reset these settings.
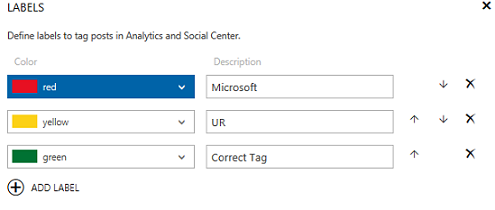
Labels:
User can define certain labels to categorize the posts in the Analytics and Social Center.
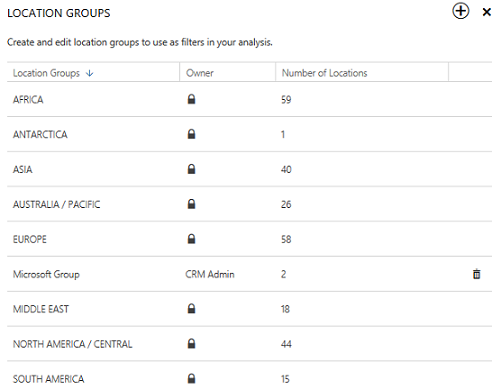
Location Groups:
Location Groups can be used as filters in Analytics. In this section the user can add the Location Groups and can add the Number of Locations based on their Preferences.
User Management:
This is only visible to Admins. Here the user can be assigned roles and permissions for Microsoft Social Engagement.
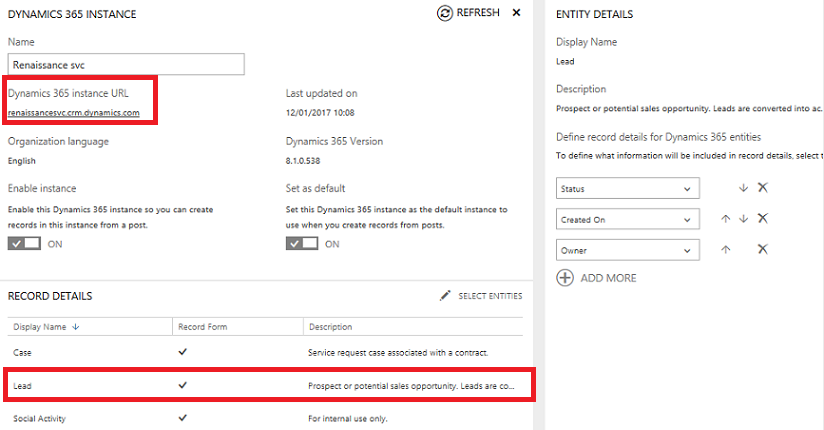
Dynamics 365 Connection:
This section is to establish the connection between the Microsoft Social Engagement and Dynamics 365 (in this case) and will create a Lead Record in Dynamics 365.
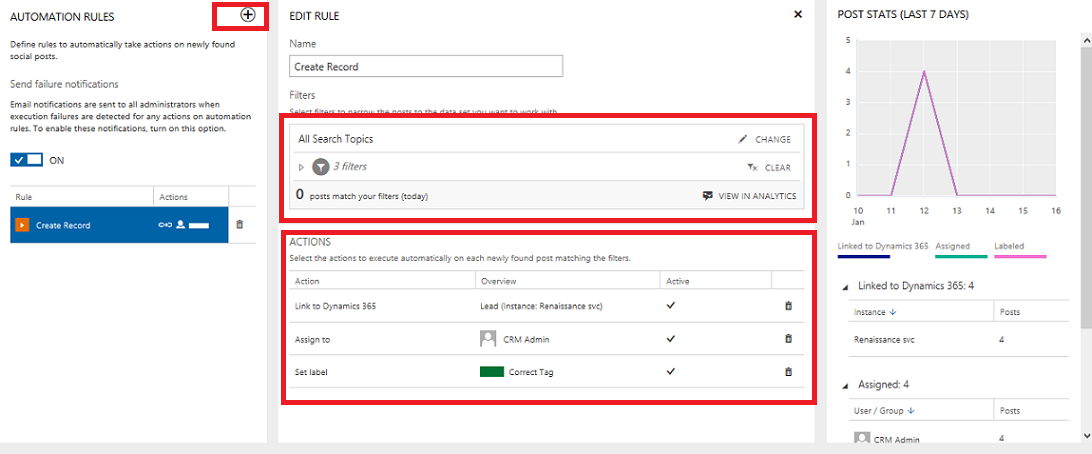
Automation Rules:
Automation Rules can be defined to filter down the posts and then automatically create new cases, leads or events or assign it to user or set a label. Only Manager or System Admin can manage Automation Rules.
Admin can create new automation rules, provide filters and based on those filter conditions, the admin can decide to perform actions of linking the post in Dynamics 365 or assigning the post to some user or to set the label of the post.
The graph on the extreme right shows the analysis of the posts that fall in that particular filter criteria specified earlier.
Search Setup
Search Setup is required to make sure that the Analyst is capturing the right conversations of Customers from Social Media. Analyst can also fine tune the searches and drill down the data based on their Business Requirements.
While defining the Social Profile in Settings, the search topic needs to be configured and should be applied to that particular Social Profile.
One Option is to create the Search Topic while configuring the Social Profile and Second Option is from the Navigation Area.
Note: At least on Active Search is required to acquire the social data. Also it takes some time to fetch in the data in the Analytics.
Create Category:
Analyst or Admin can create a category to define the search results. They have no impact on the posts, it just helps to organize posts.
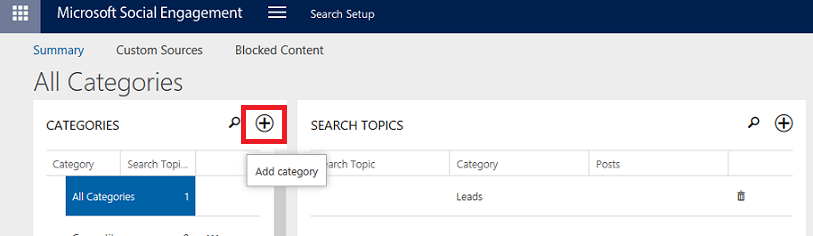
Create Search Topic:
Create a Search Topic and assign the search to a particular user and add Rules.
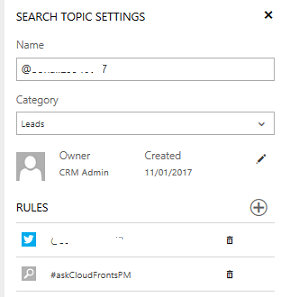
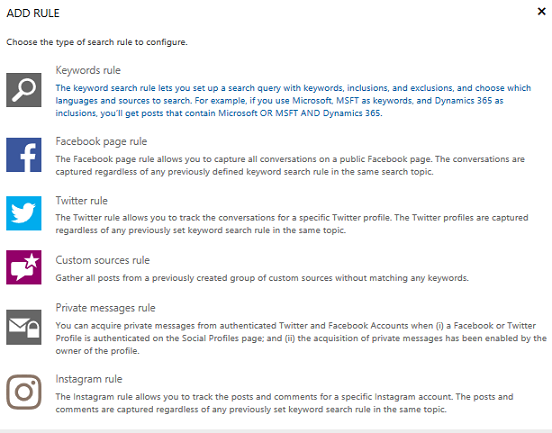
Create and Add Rules to Search Topic:
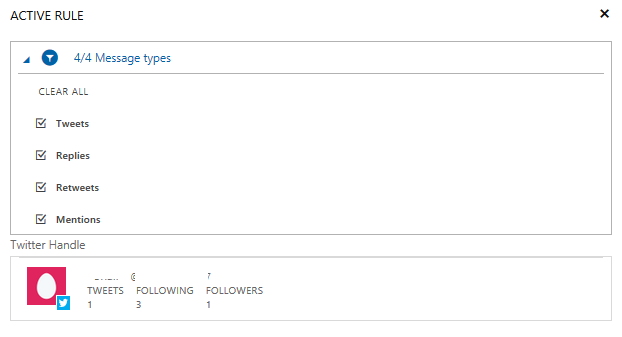
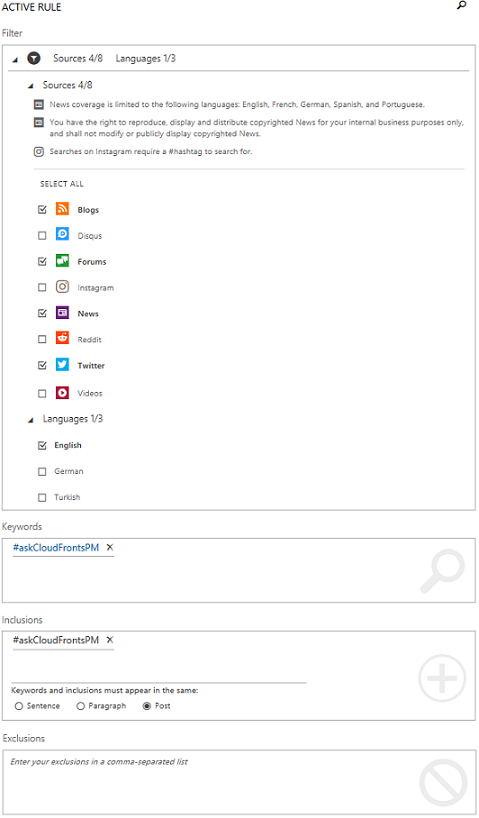
Create a search topic to capture Mentions, Tweets, Retweets or Replies from Twitter Account or add Facebook, Twitter, Instagram or Keyword Rules. In our case we have made the Twitter Rule and Keyword Rule to filter out the Twitter Tweets, Posts and Messages.
Here the Admin has configured the keyword “#askCloudFrontsPM” and based on this keyword the posts will be filtered and will be assigned to CRM Admin.
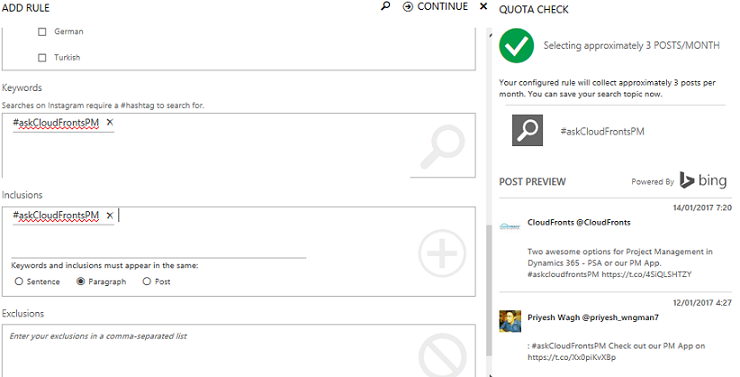
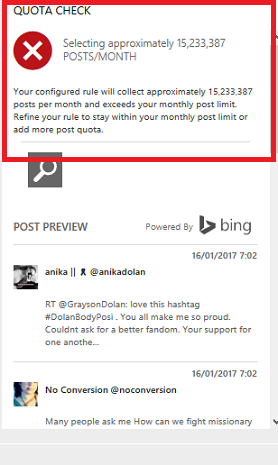
Validate the Search Topic:
Once the Rule is added, then the next step is to validate the rule. So when we add a rule, a Quota Check is done, which will show whether the keywords used as proper or not.
Below screenshot shows how the Quota Check is done.
Analytics:
After configuring the rules, now Analysts can analyze Social Data using Widgets i.e. with the help of Visual Metrics we can identify Customer views.
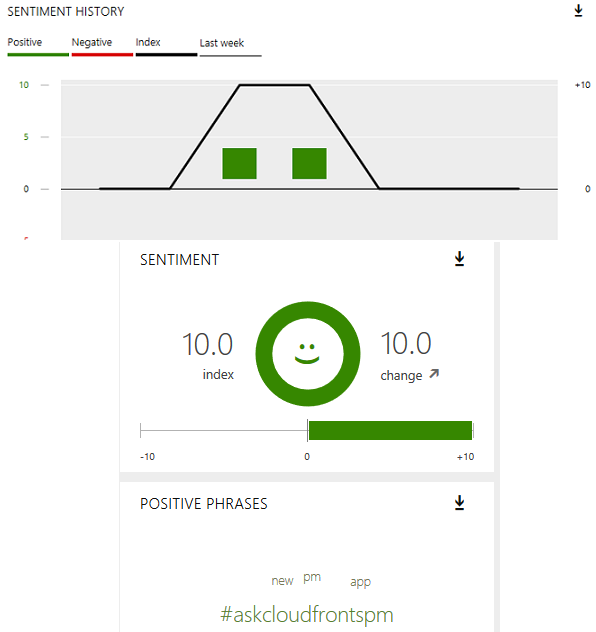
Analytics Widgets can help in gaining the insights from Public Conversations. It can filter and display the Top Phrases and Languages that are used in the Posts.
Widgets also helps to analyze the Sentiments of the posts i.e. whether the posts on Social Media are negative, positive or neutral.
They can also be used to check the location and location groups from where the posts are coming and the volume of posts they are bringing in from those particular Location Groups.
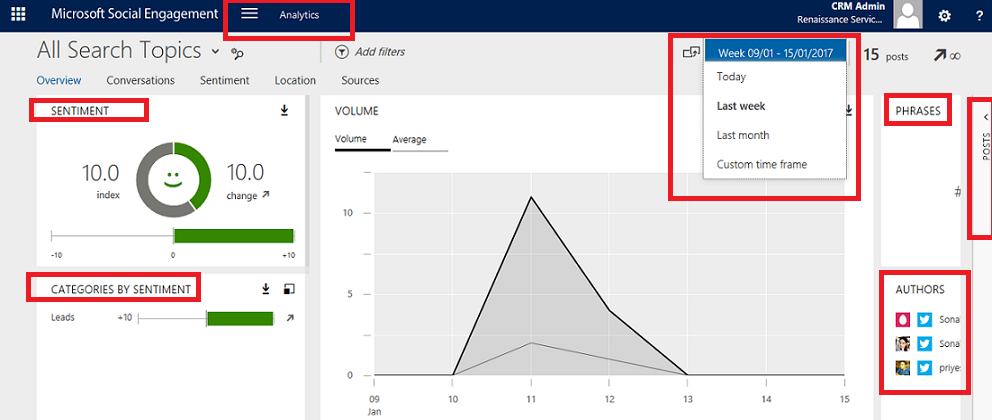
The highlighted area defines the Sentiments, Time Frame, Phrases, Authors and Posts. These key areas are further drilled down. Like as shown below the Overall Analytics can be drilled down in Sentiments like Positive, Negative and Positive Phrases.
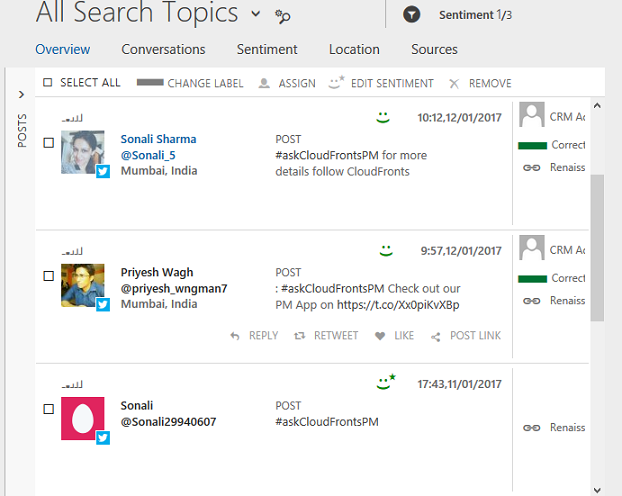
In the Extreme Right Side, the post window can be used to show the posts based on filters specified in the Search Setup and the specified Time Frame.
Engagement:
Now with the Posts from Social Media, the Admin can now decide whether the data is relevant or not and if Relevant it can be used where in Dynamics 365 i.e. to Create Records or to Assign that created Record.
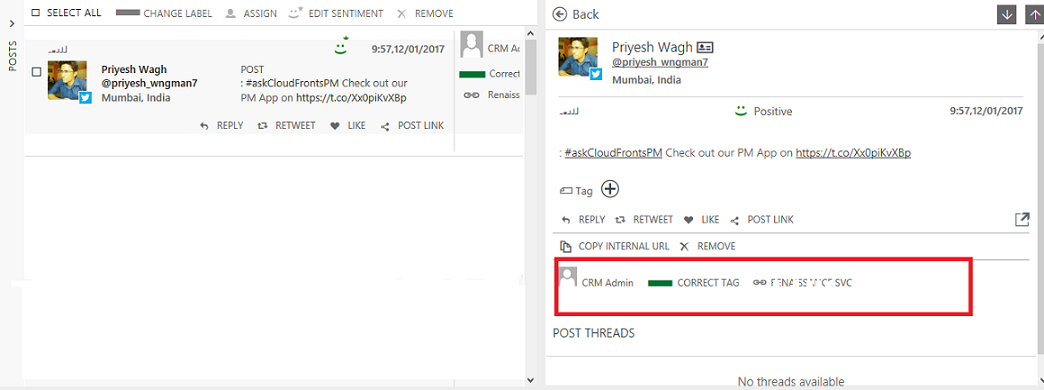
Here in this case we have already created an Automation Rule in Global Settings based on the search filter and based on that a Lead Record should be created in Dynamics 365.
We can Reply, Retweet, Like, Post the Link and can also manually link the Post to Dynamics 365.
With these posts we can train the system for Adaptive Learning whether the post is with Positive, Negative or Neutral Semantics.
Conclusion
Thus with the help of Microsoft Social Engagement, Organizations can track and work on the Social Media Posts and help them enhance the Business Capabilities in Business Casual Way.
