Calendar sharing in Exchange Online
Introduction:
Sharing policies enable users to share calendar information with different types of external users. Sharing polices are assigned to mailboxes and allow users to share their free/busy information with recipients in external Office 365 organizations.
Creating a sharing policy in Exchange Online.
Allow users to share calendar information and contacts with external organizations.
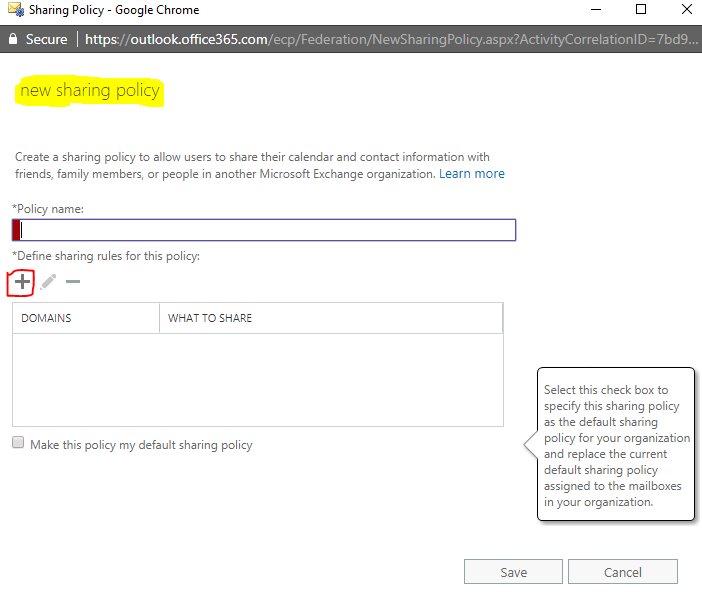
- Navigate to EAC Organization > Sharing.
- Under Individual Sharing, click+.
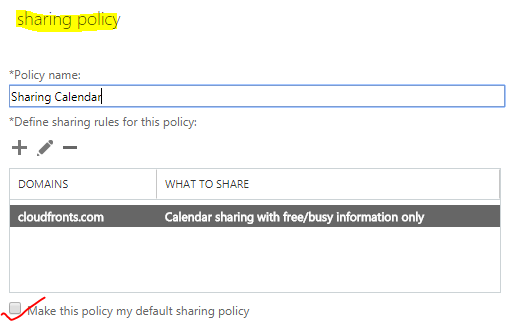
- In new sharing policy, type a name for the sharing policy in the Policy name.
- Click + to define the sharing rules for the policy.
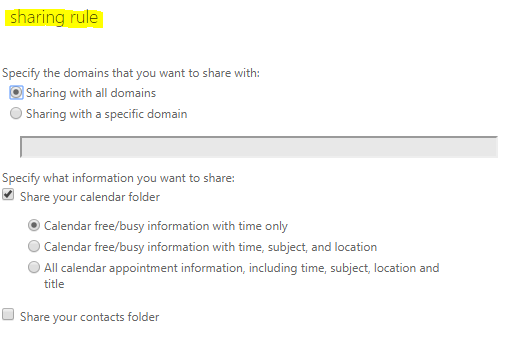
- In sharing rule, select one of the following options to specify the domains you want to share with (as shown below):
- Sharing with all domains
- Sharing with a specific domain
- If you select Sharing with a specific domain, type the name of the domain.
- To specify the information which can be shared, select Share your calendar folder check box, and then select one of the following:
- Calendar free/busy information with time only
- Calendar free/busy information with time, subject, and location
- All calendar appointment information, including time, subject, location and title
- Click save to set the rules.
- If you want to set this sharing policy as the default sharing policy in your organization, select the Make this policy my default sharing policy check box.
- Click save to create the sharing policy.
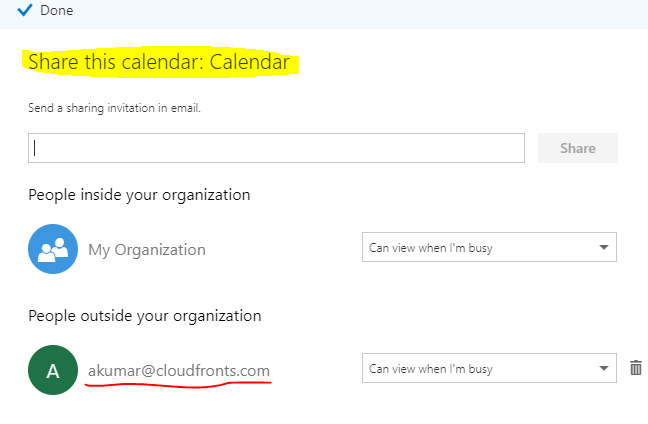
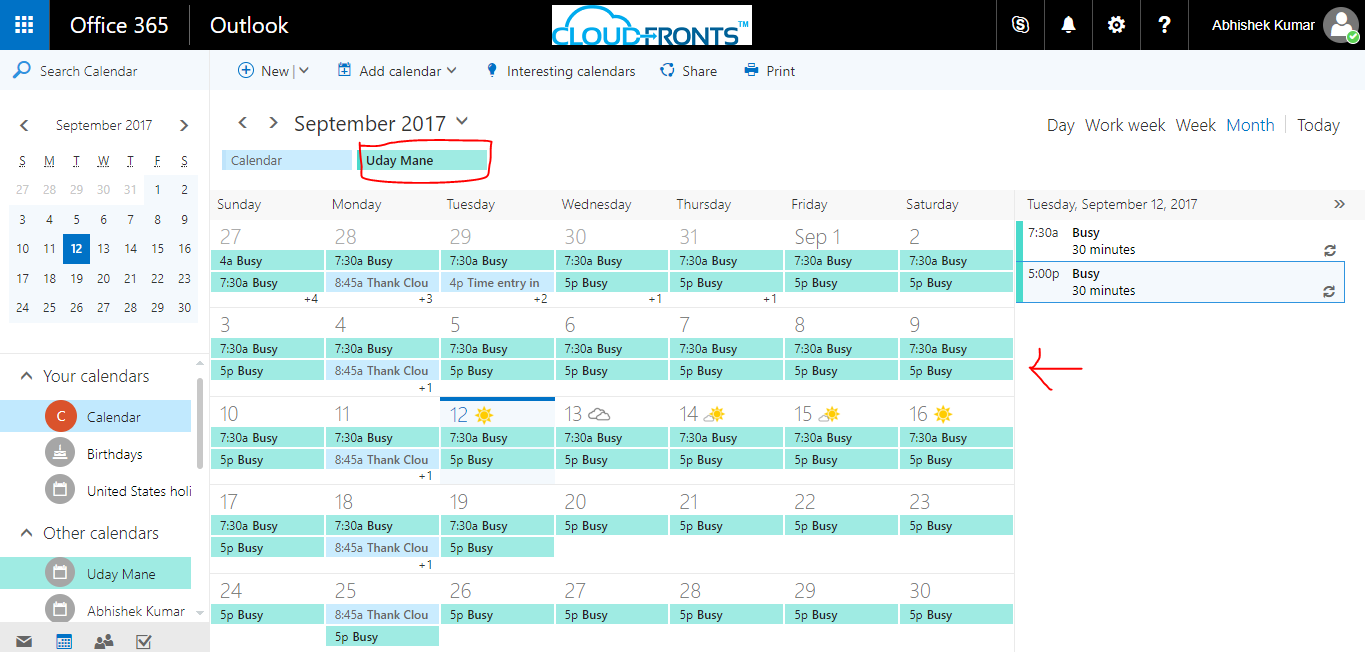
After creating the policy, User can share their calendar from Outlook.
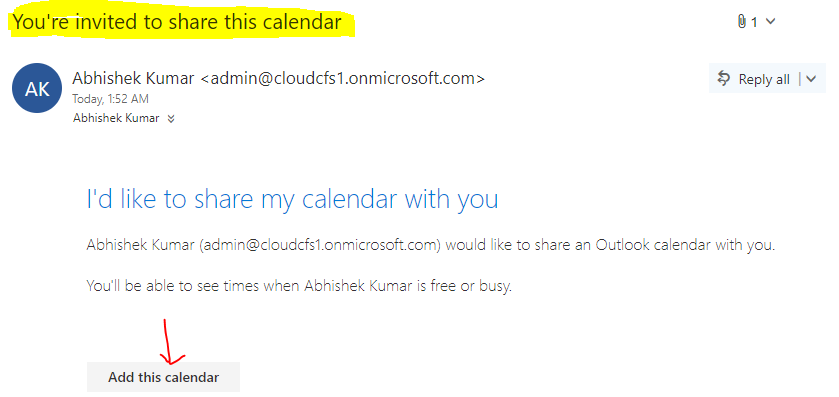
- The person to whom you have allowed to share calendar will receive an email (as shown below).
- By clicking on Add this calendar, the calendar of yours will be shared with that person.


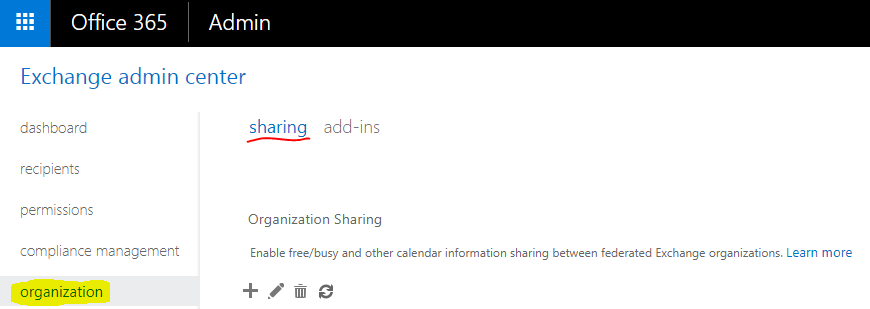
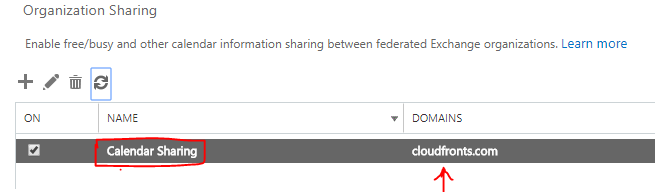
Create an organizational relationship.
Set up an organization relationship to share calendar information with an external business partner
- Navigate to Organization > Sharing in Exchange Admin Center.
- Under Organization sharing, click +.
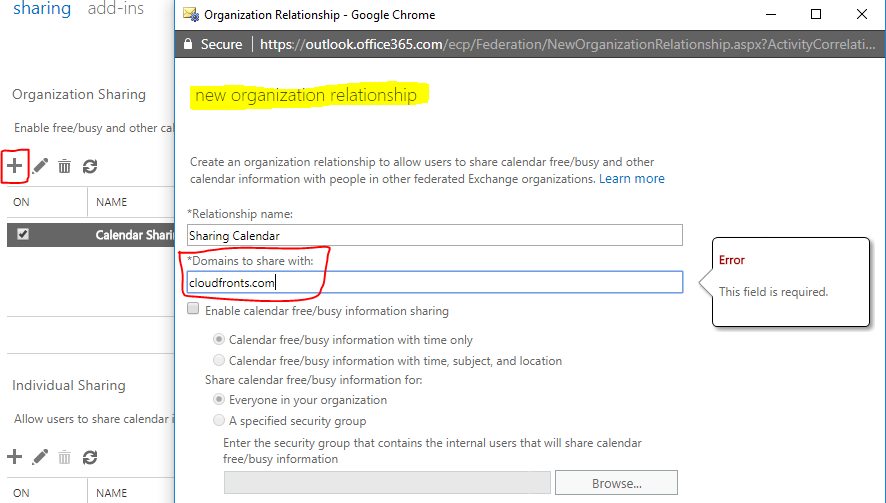
- In new organization relationship, in the Relationship name box, type a name for the organization relationship.
- In the Domains to share withbox, type the domain for the external Office 365 organization.
- In Enable calendar free/busy information sharingcheck box to turn on calendar sharing with the domains you listed.
To set the free/busy access level, select one of the following:- Calendar free/busy information with time only.
- Calendar free/busy with time, subject, and location.
To set which users will share calendar free/busy information, select one of the following:
- Everyone in your organization.
- A specified security group – You can browse and select the group for whom you want to enable the sharing.
- Click save to create the organization relationship.
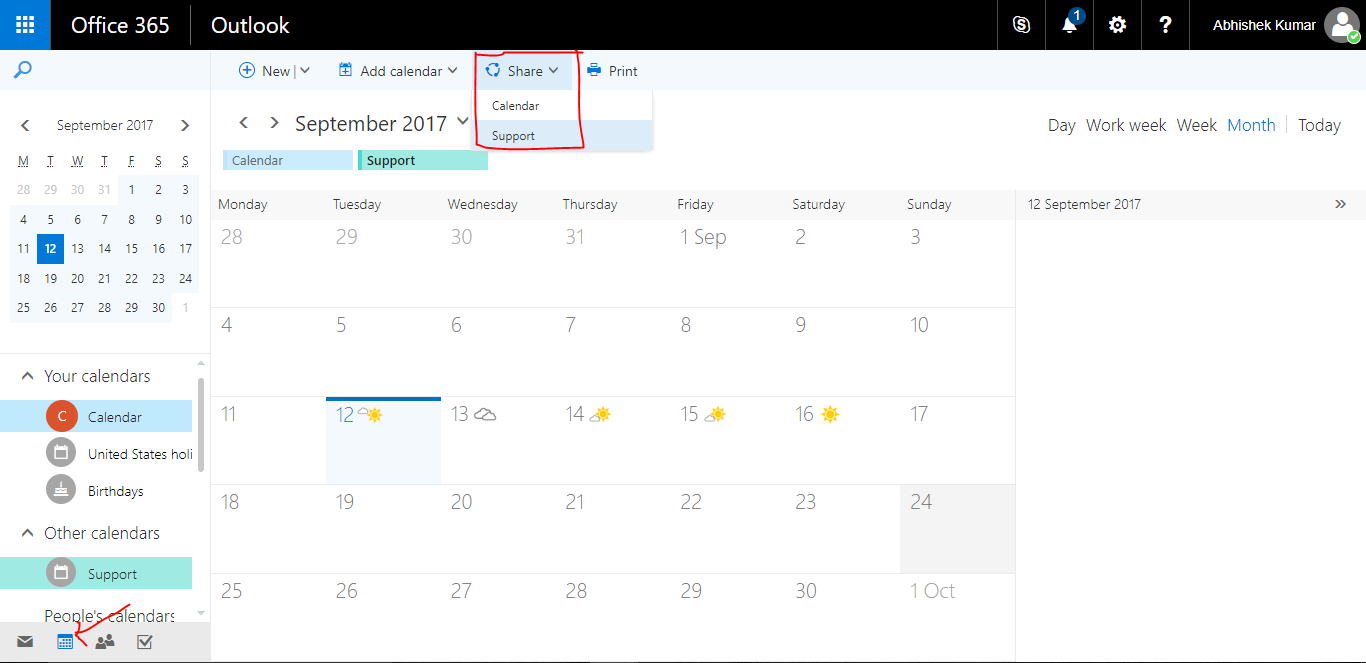
For users to share calendar:
- Go to Outlook > Calendar.
- Click Share.
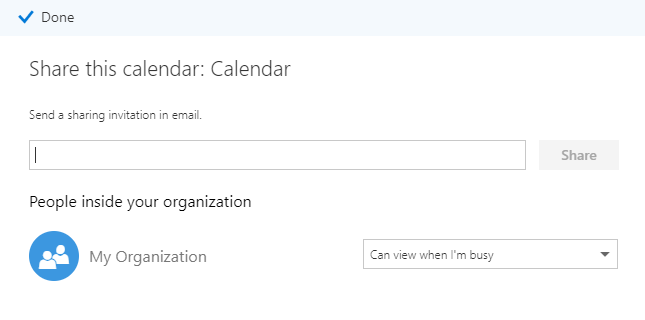
- Send a sharing invitation in email.
Conclusion:
So, in this way we can share the calendars between organizations and external users.
