CRM Portal and SharePoint Integration
Pre-requisites:
- CRM 2016 online Portal
- SharePoint Online
- CRM Online 2016 [With System Administrator or System Customizer role]
In this blog, we will demonstrate how to user SharePoint Document Library for Document Management Using CRM 2016 Online Portal, where you can upload the document directly to SharePoint.
Steps for CRM Portal Share Point Integration
Step 1: Enable the document management on the entity. You can refer to “Enable SharePoint Integration and OneDrive for Business in CRM”.
Step 2: Open an Entity Web form where you want to display SharePoint document library on the portal.
- Click on the Insert-tab,
- click on Sub-Grid.
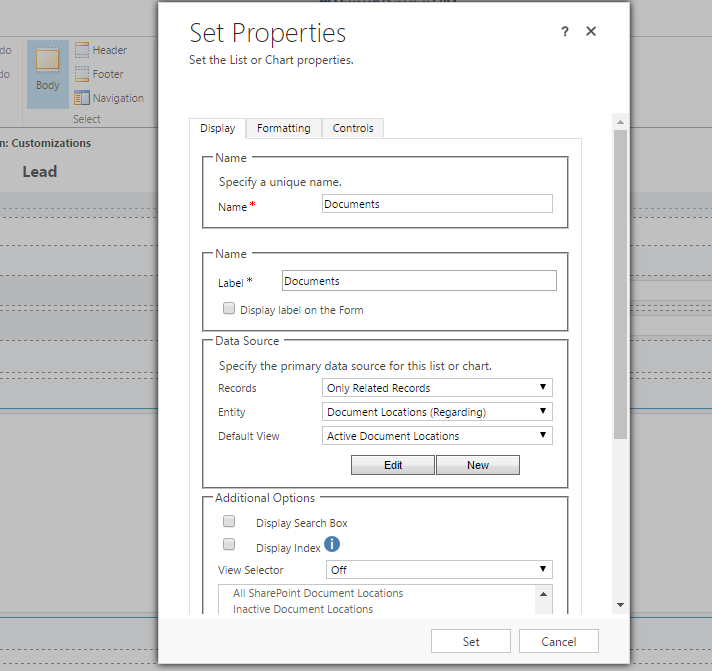
- specify a name to sub-grid.
- In “Data Source” section select “Only related Records” from Records dropdown.
- Select “Document Location (Regarding)” in Entity dropdown.
- Select “Active Document Location” from Default View section [shown in Below Image].
- Click on Set.
- Click on save then publish the customization.
Step 3: Create Entity form.
Once the entity web form is published, you need to assign a proper Entity Permission so that SharePoint document library will render properly in CRM portal.
In CRM, navigate to Portal -> Entity Forms and click on New to add new Entity Form to CRM Portal.
Specify the name of your new entity form, Select the entity where you want to have the document management feature in portal. Then select the Entity web form where we have added document sub grid. If you want to just render only a tab on the portal, then select the name of an tab.
if you want to create new record then select the mode as “Insert” but if you set mode to insert then you will not able to see Document Grid.
If you want to edit it then you can set mode to “Edit”. When mode is set to edit then Record Source Type is mandatory to select. You can select Query string from drop down and in related query string parameter select “ID” as shown below.
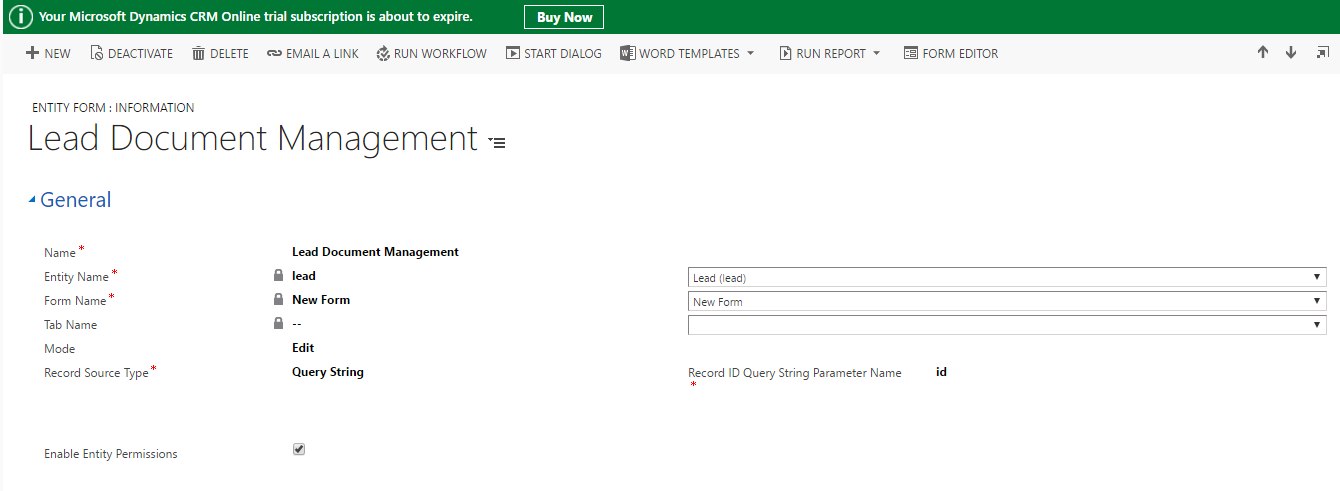
If you want portal user to just view the document, then you can set the Mode to “Read Only”.
Make sure you have checked Enable Entity permission.
Save this record.
Step 4: Entity permission
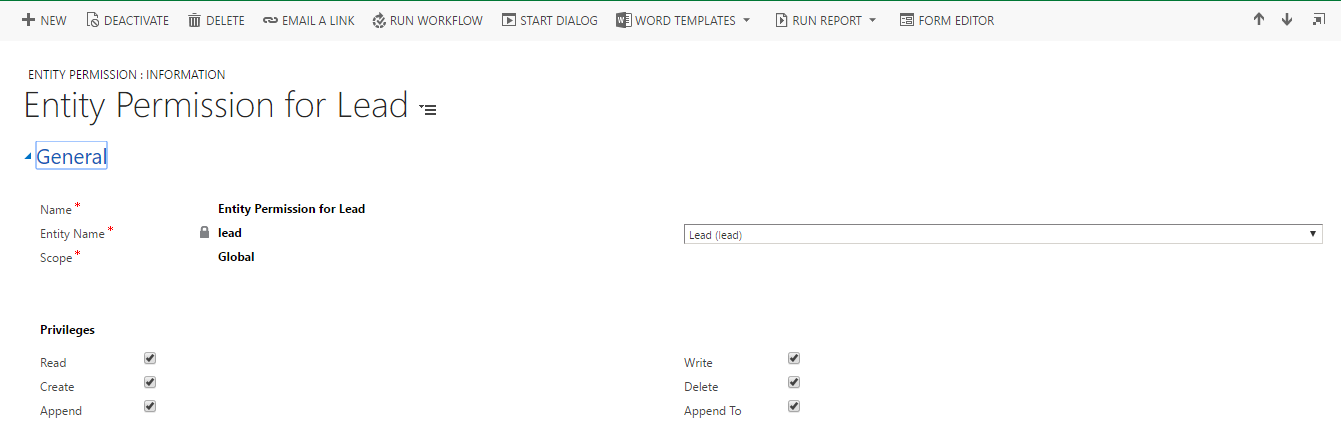
Navigate to portal -> Entity Permission.
Click on new to add new Entity Permission to enable SharePoint document library in the portal. Create an Entity Permission record specifying the Document Location entity with Parent scope. Select the Regarding relationship for the Parent Scope Relationship and point the Parent Entity Permission lookup to the previous entity permission record. Give the privileges as per the requirement.
Step 5: Create Entity List.
- In CRM, navigate to Portals>Entity Lists and Create a new record
- Name the record
- From the Entity Name dropdown choose Entity, where we want to enable SharePoint document management
- Enable Entity Permissions
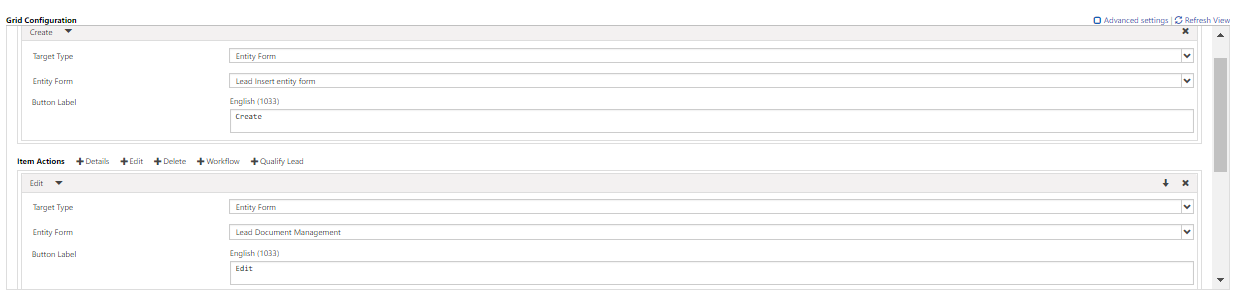
- Scroll to the bottom of the Entity List and add an Edit Action to the Grid Configuration pane as shown below.
- Leave the Target Type as Entity Form and choose Lead – Edit from the Entity Form dropdown (Which is created in earlier steps)
Save the records.
Step 6: Now, login to CRM Portal with admin credential. Add new child page by selecting the Entity List which we have created earlier step. Leave web Form and Entity form as blank. And select page templet as per your site configuration.
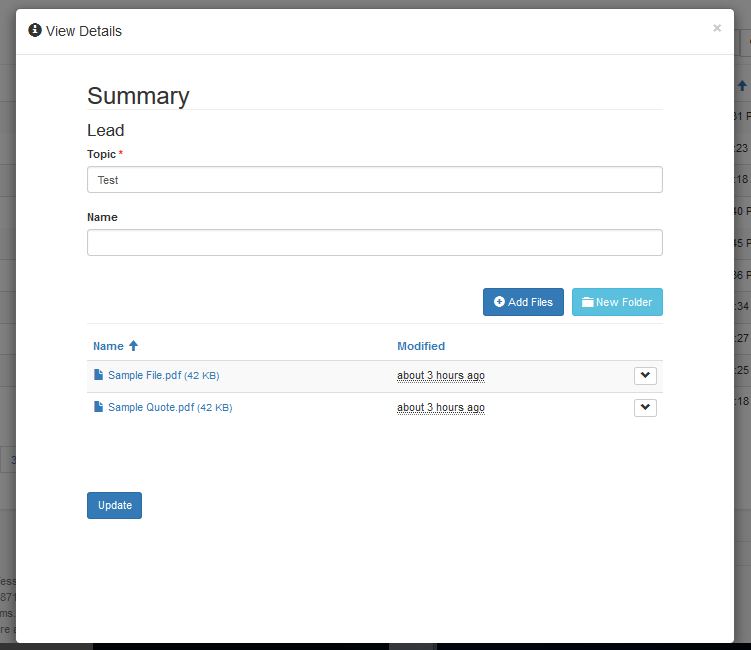
Step 7: once you add the entity List to your page you will be able to see the Grid view. click on View details on the record, it will pop up the Entity form which we have created, where you can see the option to upload the file. We can also see the grid containing documents which are uploaded earlier for that record.