Purchasing a Power BI Premium Node and assigning it to a Workspace
Introduction:
In this blog we will discuss the different Power BI Premium Capacity nodes available and the steps to purchase these. We will also discuss how to assign a premium node to a workspace in Power BI.
Power BI Capacity Based SKUs:
There are 3 categories of SKUs that can be purchased which gives us a number of ways to embed our content using any of the capacities depending on our requirement. Following are the 3 different series provided by Microsoft.
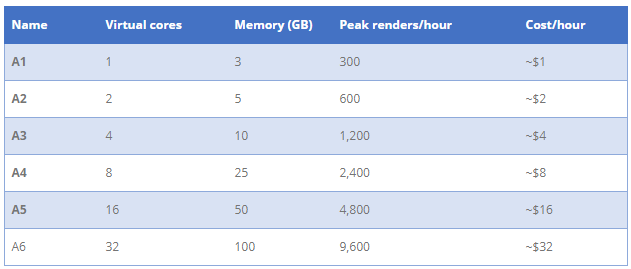
- Power BI Embedded A SKUs
This capacity is generally used by small ISVs for embedding own solutions. Unlike the other two series this series is charged on an hourly basis. It can be paused and started whenever needed and also it has additional scalability.
- Power BI Premium EM SKUs
This capacity is also generally used by ISVs for 3rd party embedding in a custom application or in SaaS applications like Sharepoint or Teams. It offers everything provided by A SKUs and also offers the ability to share Power BI reports. EM SKUs unlike A SKUs cannot be paused and require a monthly or annual commitment.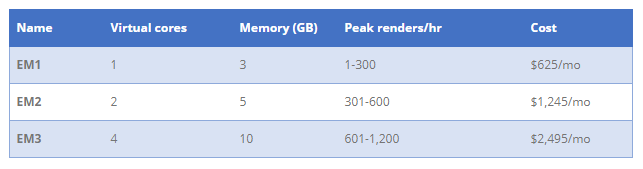
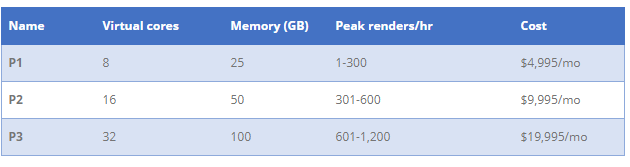
- Power BI Premium P SKUs
For this capacity, the hosting organization does not generally have any requirement for custom software development. It has all the features of E SKUs and also additional Power BI services like App sharing, Ad hoc dashboard sharing.etc. They allow the users to use Power BI’s browser based experience and are more dependent on the UI provided by Power BI.
Purchasing the nodes:
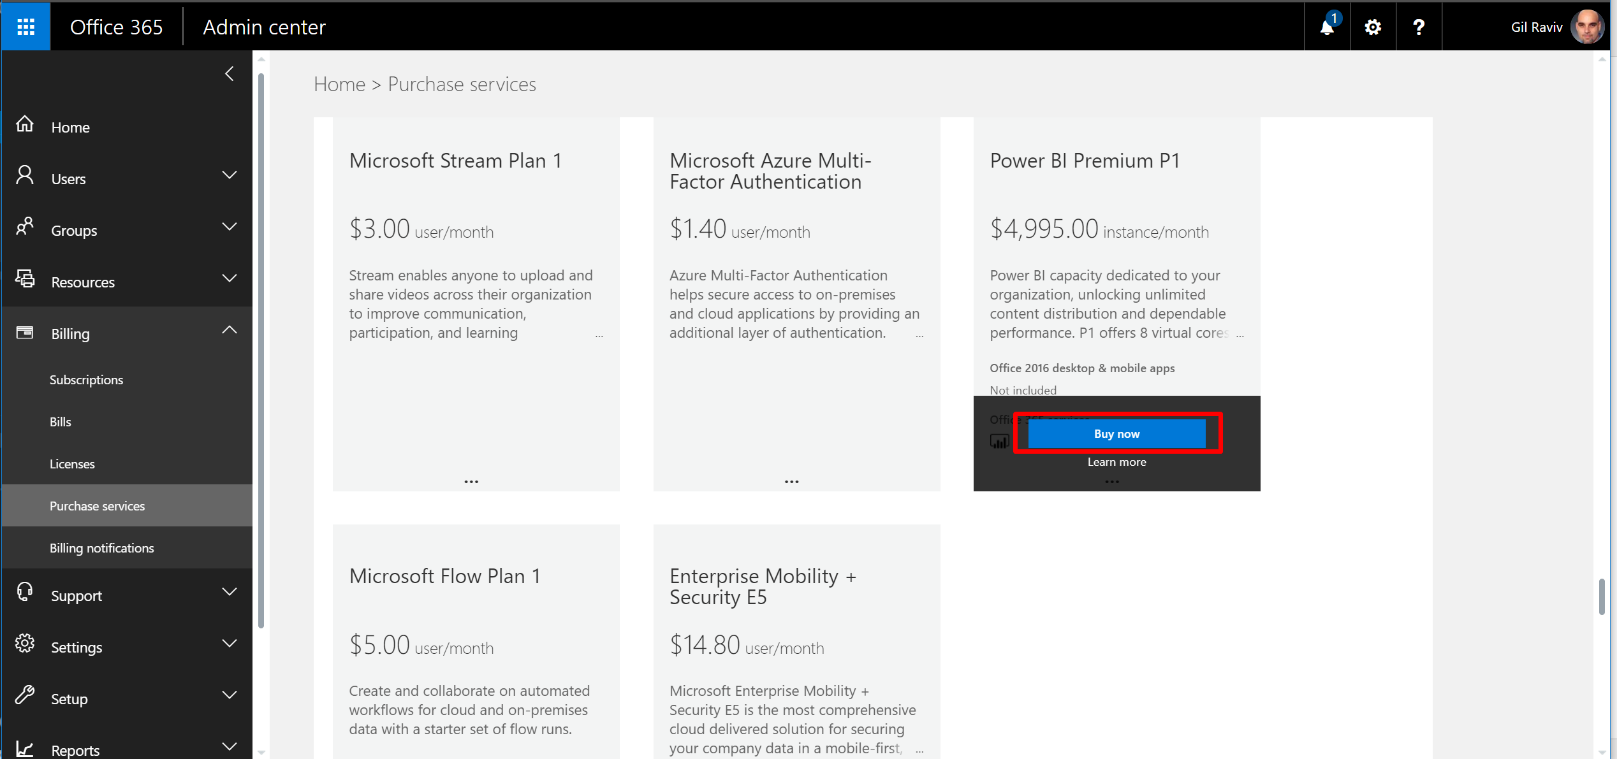
- If you are a Billing Admin in your O365 tenant then you can purchase the capacity nodes under Purchase service in Billing. Currently the EM3, P1, P2 and P3 capacities can be purchased from the Office portal.
- The A series can be purchased from the Microsoft Azure Portal.
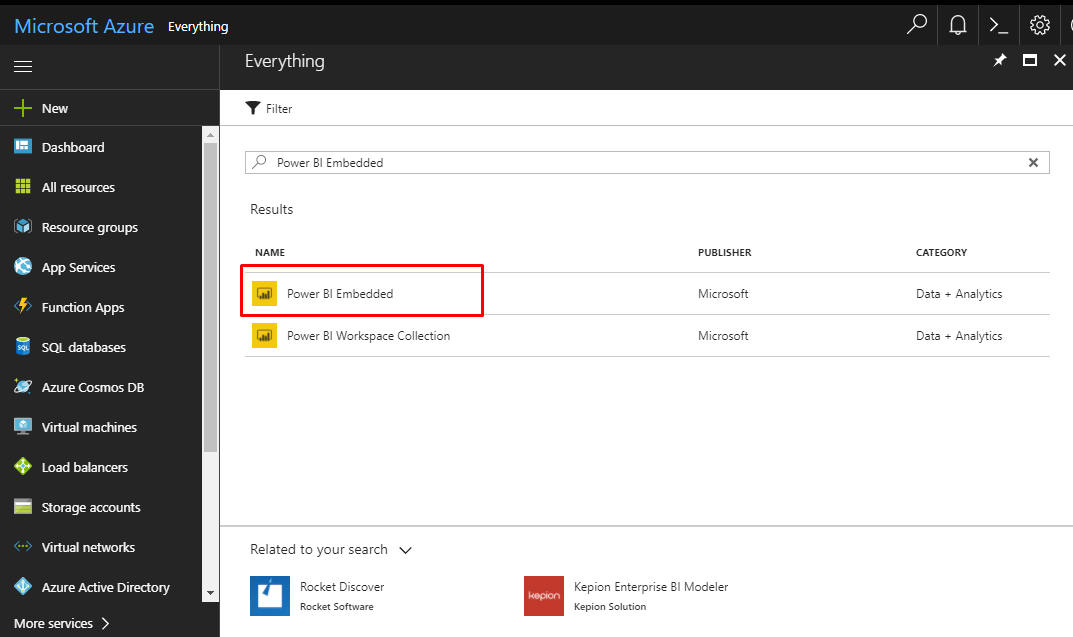
- Click on New and search for Power BI Embedded.
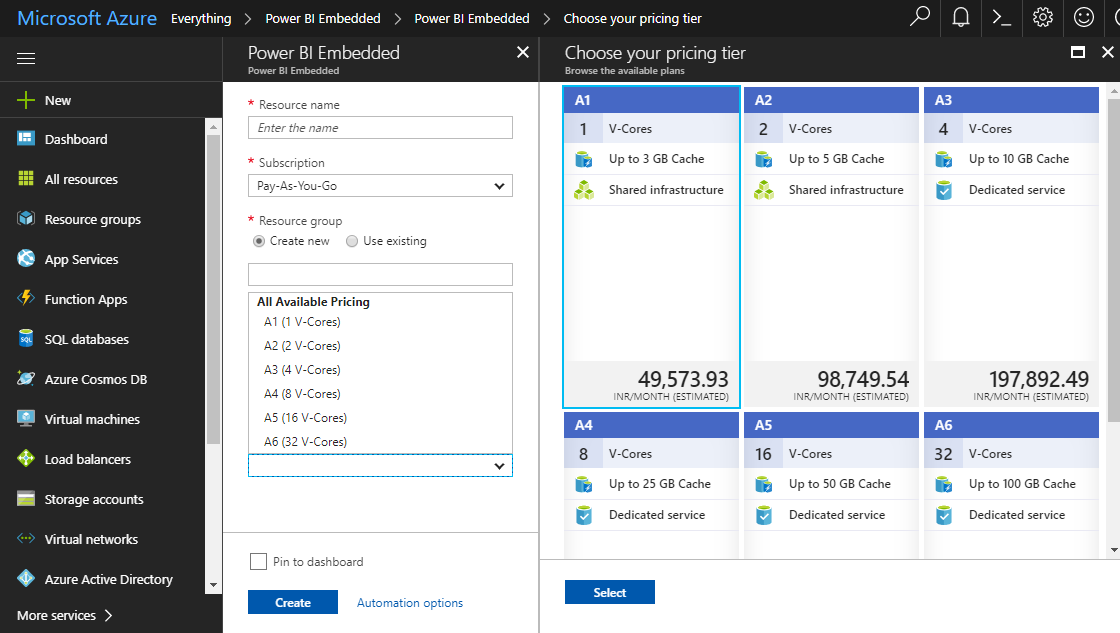
- Fill in the necessary details. A capacity administrator needs to be assigned, who will be responsible for creating the capacities and assigning it to the workspaces.
- Click on New and search for Power BI Embedded.
Note: I still haven’t figured out where to find the EM1 and EM2 nodes but I’m presuming that they haven’t been released yet.
Assigning a Capacity to a workspace:
I am using the A1 node for this example.
We can see that the Pause feature is available in this node.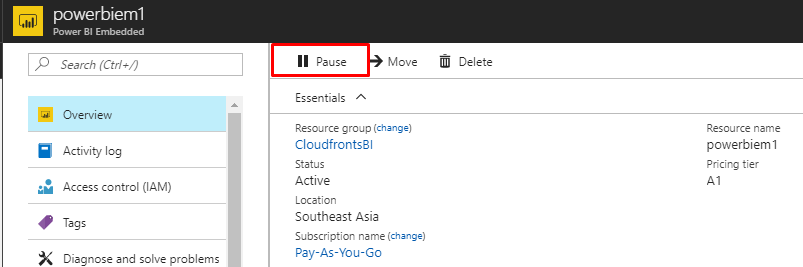
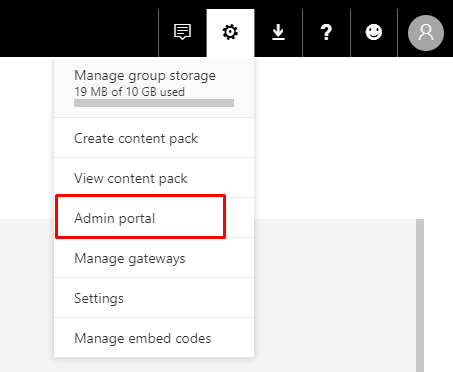
- The first step is that the capacity admin logs into their Power BI account. It is important to note that the capacity admin should have a Pro License. Click on Settings and go to the Admin Portal.
- Next Select your capacity. Here we can manage capacity size, assign user permissions. etc.
- If you are opening the portal for the first time then there will be an Assign Workspace option available. Under User Permissions select Entire organization (Assign capacity to entire organization) or Specific users (Assign capacity to specific Users)
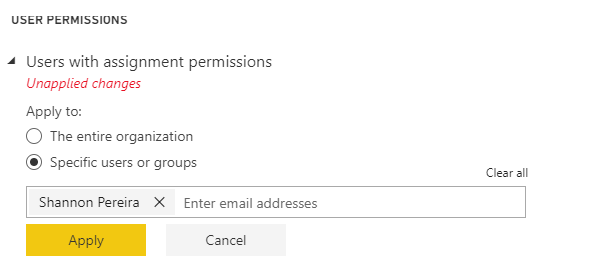
- Depending on the option selected above either the workspaces of the entire organization or the workspaces of the selected users will be loaded below
- If you are opening the portal for the first time then there will be an Assign Workspace option available. Under User Permissions select Entire organization (Assign capacity to entire organization) or Specific users (Assign capacity to specific Users)
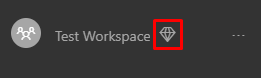
- Now we create a sample App workspace named ‘Test Workspace’ to which we will assign our capacity node. You can also use an existing workspace instead.
- Click on Workspaces and select Create app workspace
- Name your workspace and enter all the workspace members.
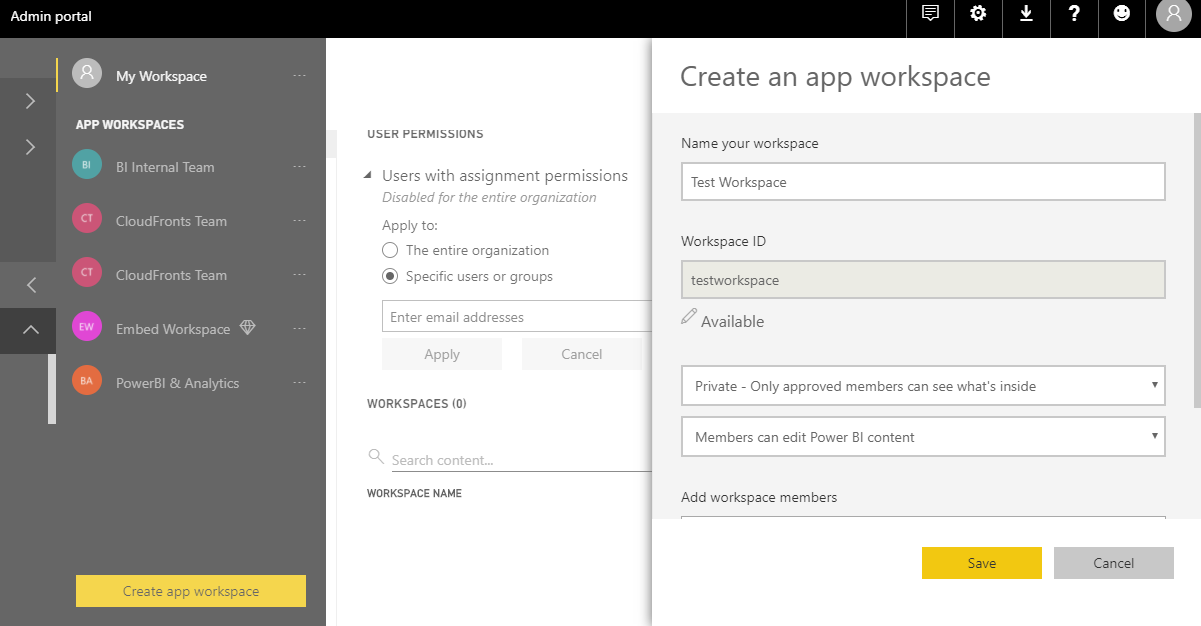
- Under the Advanced option there should be a Premium toggle button available(This option will only be available if the user is a Capacity Admin, Power BI Admin or a Global Admin and also the User permission mentioned above needs to be given). Turn the Premium option On.
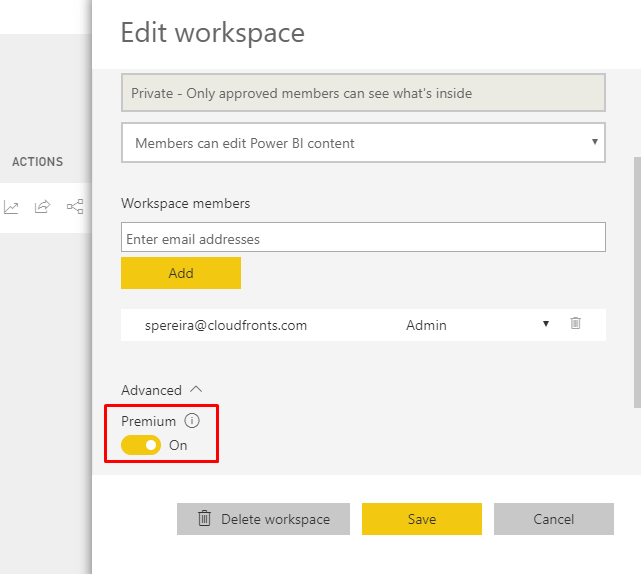
- Click on Save.
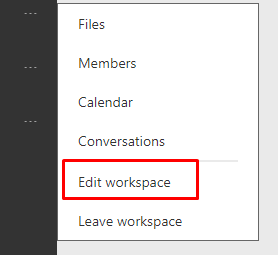
- If you are using an existing workspace then go to workspace and click on the ellipses(…) beside the workspace and select the Edit Workspace option and enable the Premium option.
- To be sure that we have successfully backed our workspace with a capacity node, we can confirm by looking at the diamond icon beside our workspace name.
Conclusion:
We have successfully learnt how to purchase a Power BI capacity node and assign it to a workspace which will enjoy all the benefits provided by Power BI Premium and also give us Embedding Services with it.
