Create Fruit Detection App inside Power Platform — PowerApps and AI Build
Before you begin with this Blog, please read my previous blog which was on How to Create Object Detection Model inside the Power Platform — PowerApps | AI Builder.
In a previous blog, we have created the Object Detection Model that we are going to use in this blog.
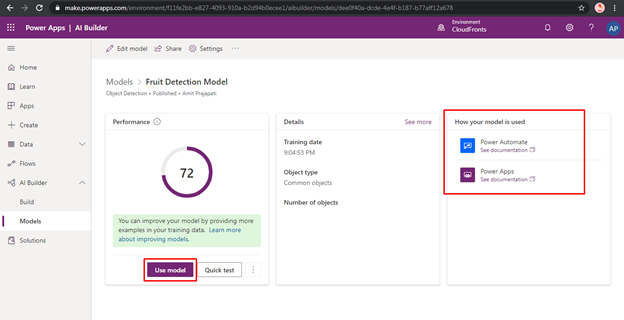
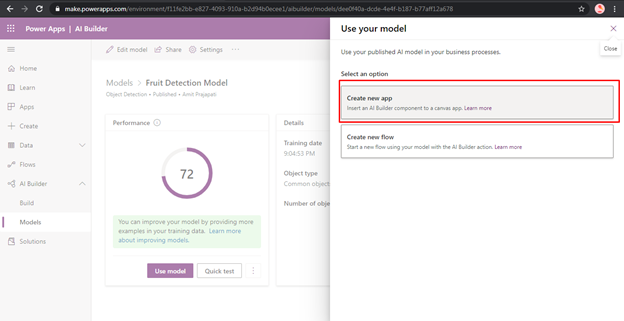
Step 1: Expand the AI Builder section in Power App and click on the Models. Open Fruit Detection Model that we have created in the Previous blog series. Click on the Use model and select the Create new App. It will redirect to the Power App Builder Studio.
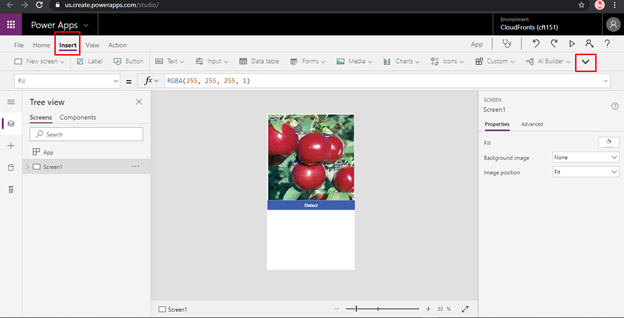
Step 2: You will see the Object Detector Control will automatically on the screen. Your application is ready you can run the detect the objects.

Step 3: Now, we will insert the Gallery Control so that we can see the count of each object present in the images. Click on Insert and Select on the Add gallery.
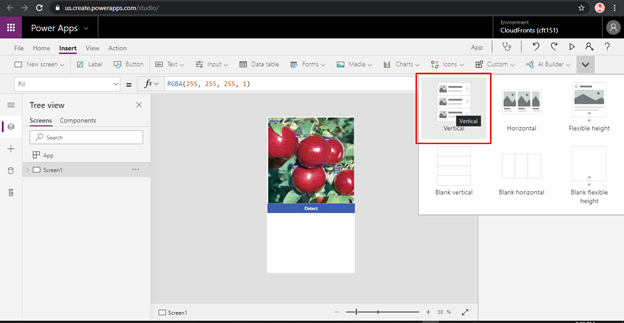
If you are not able to see the Option Expand the ribbon from Top right Side. Select Vertical and choose Title and Subtitle.
Step 4: Click on the Gallery Control and set the property to ObjectDetector1.VisionObjects

Click on the Title and set the property to ThisItem.displayName
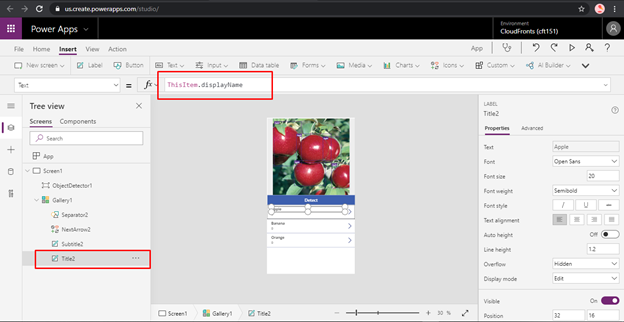
Click on the SubTitle and set the property to ThisItem.count

We will do some changes in the font and alignment of the control so that the application should look simple, readable & accessible.
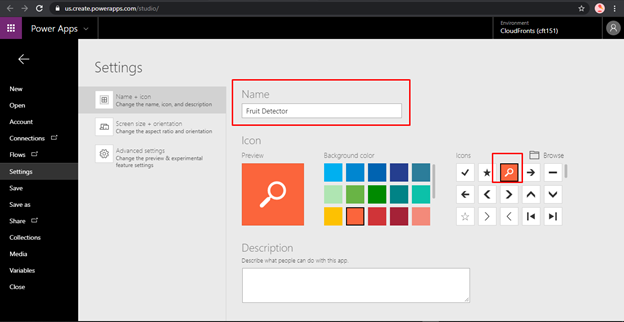
Step 5: Click on File and Save the PowerApp. You can give the name and icon to your PowerApp.

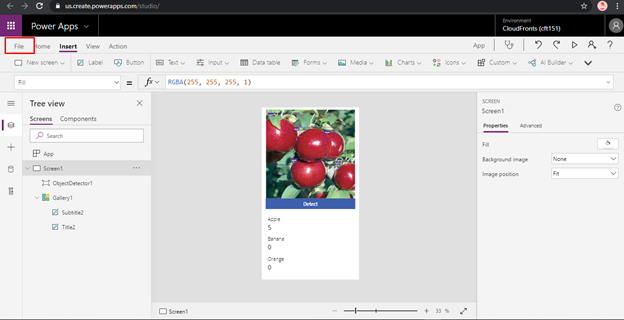
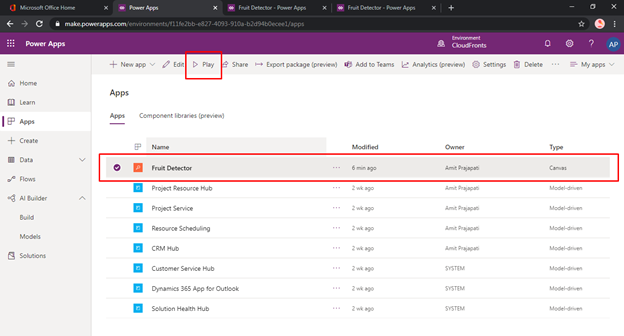
Your App is ready you can select your app and click on the Play. And Click Detect it will open your file explorer to select the images. If you are using this application on the mobile your camera will be open.

Following is a screenshot of Application with detected Object Inside it.

I hope this helps you to understand how to create an Object Detection models and use that Model in Power Apps.
