How to integrate entities from one CRM system to another using Tibco cloud integration
Sometimes we may feel the need to copy our data from one Microsoft Dynamics 365 CRM environment into another for scenarios such as moving data from UAT environment to production, copying data from Parent organization to Child, etc. This can be easily achieved by leveraging Tibco Cloud Integration’s simple and no code approach. Following is the method in which we can integrate our data
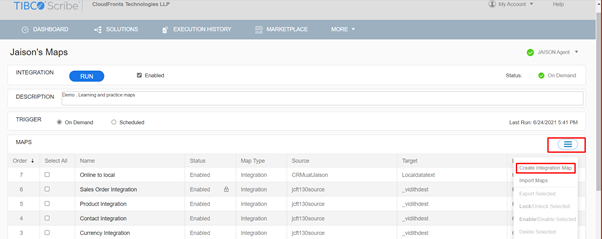
- Go to app.scribesoft.com and from the dashboard create a new integration app.

- Inside the app dashboard click on the Hamburger style button and then click on Create integration Map option
- In the page that opens up we can name our map as desired. Since I am going to integrate account entity in this tutorial I have named it as account integration.
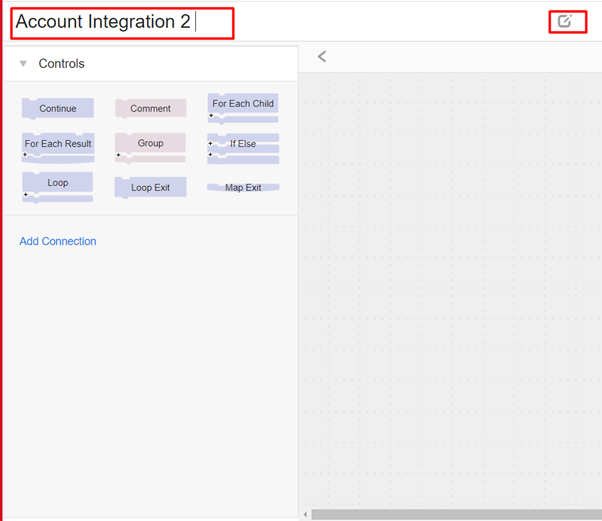
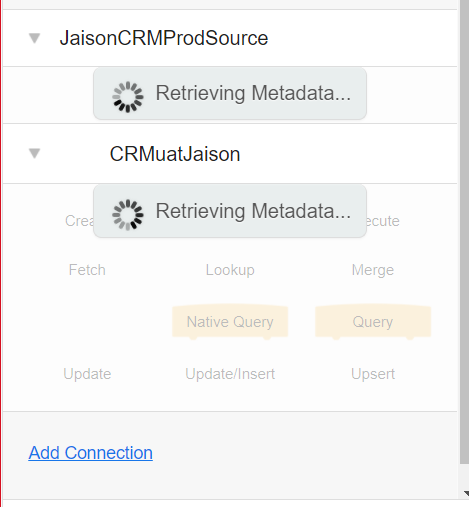
- Now we have to add a source connection from which data will be extracted, here we can use existing connectors or create a new connector.
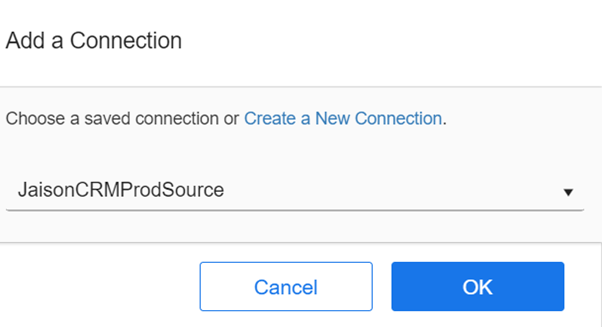
- After clicking the Ok button the metadata for source connector will load, in the meanwhile we can add Destination connector as well.
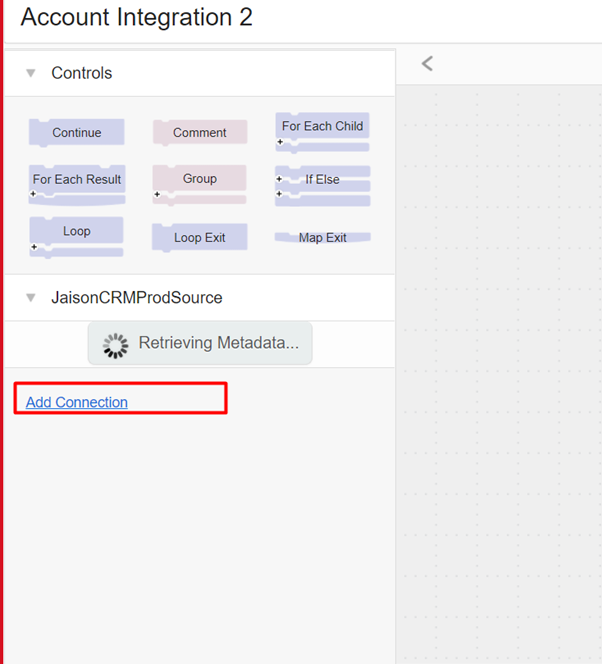
- We have to wait a while until the metadata of both source as well as destination gets loaded.
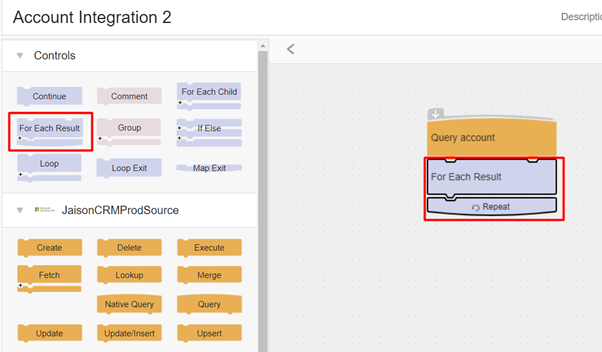
- After the connectors get loaded we have to drag the Query block from the source connector to the map designer as we want to Query and get the required entities first.
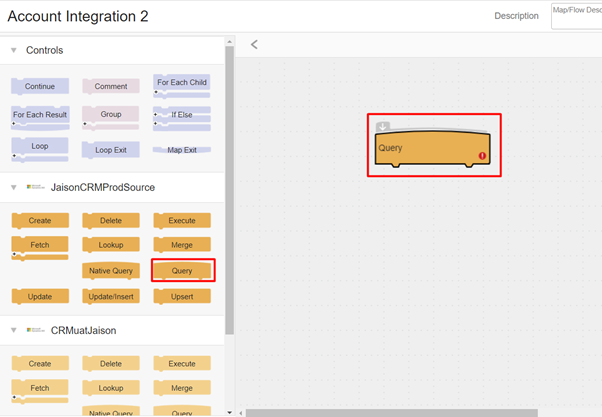
- Double click on the Query block and from the entity drop down you can select any entity you want to copy from source to destination, for this tutorial I am selecting Account entity.

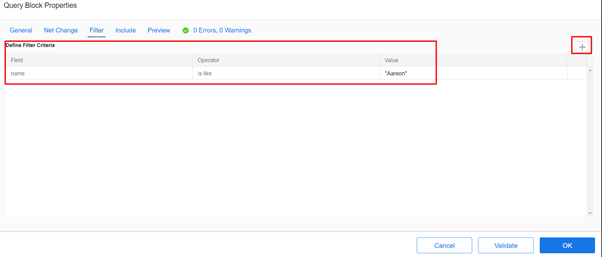
- From the filter tab you can choose to filter records from the entity based on the fields.
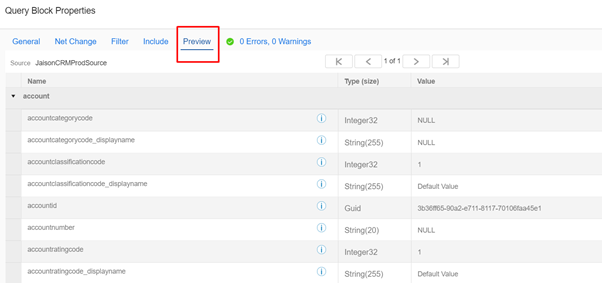
- After adding filters, in order to check if correct data is being pulled from source along with the filters applied click on the Preview Tab and verify the values of the fields of the entity.
- Validate and click on Ok button. Now since there may be multiple records, for each record in source we have to create a record in the destination for doing this we use For Each loop from the Controls section.
- Since for each record we found in source we have to create a record in destination we will insert the Create block from destination connector in between the For loop.
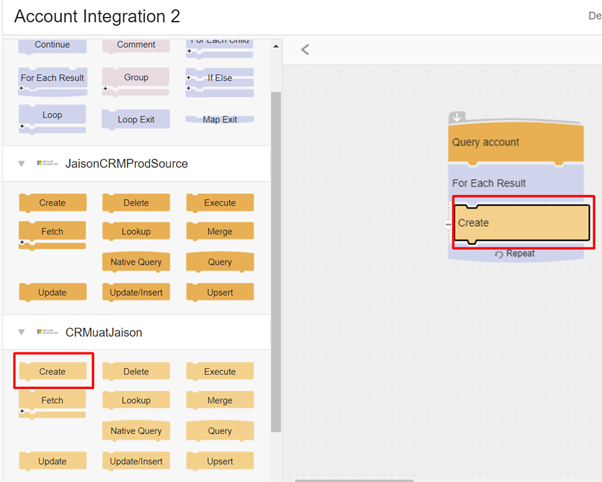
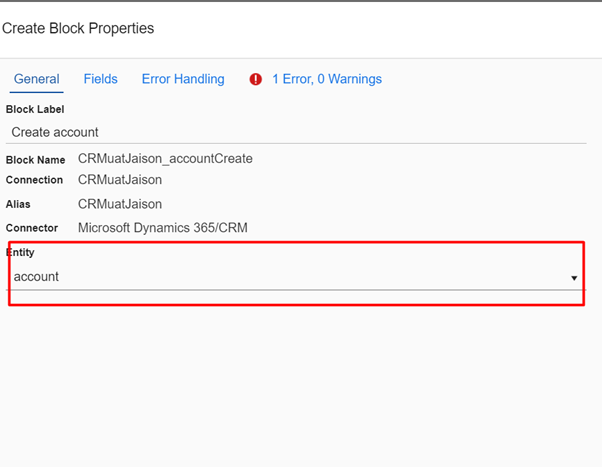
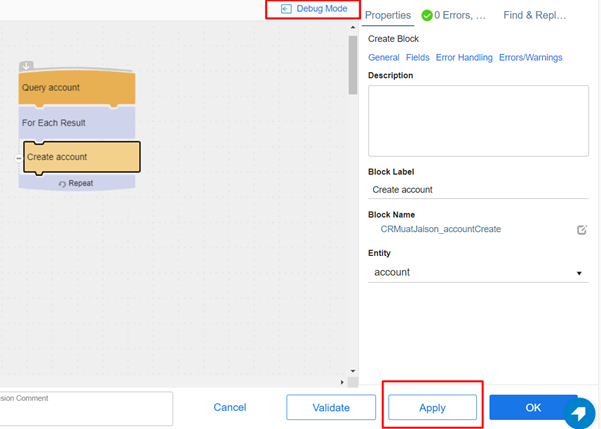
- Now we will double click and open the Create block and select Account in the Destination Connector’s Entity.
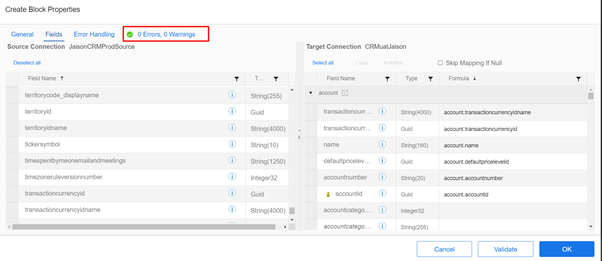
- In the fields tab we will map all the necessary fields required to create an Account in CRM and then click on the OK button. If some important field isn’t mapped correctly it will throw an error during validation.
- Our map is now ready without any errors we will click on the Apply button and save the map and proceed for debugging.
- Debugging is important as it helps us to understand the flow of Data and if in case of any errors they can be tracked easily, In the Debug mode click on Start.
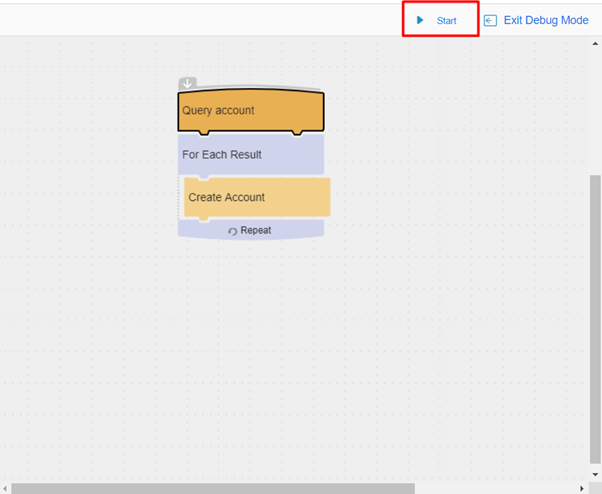
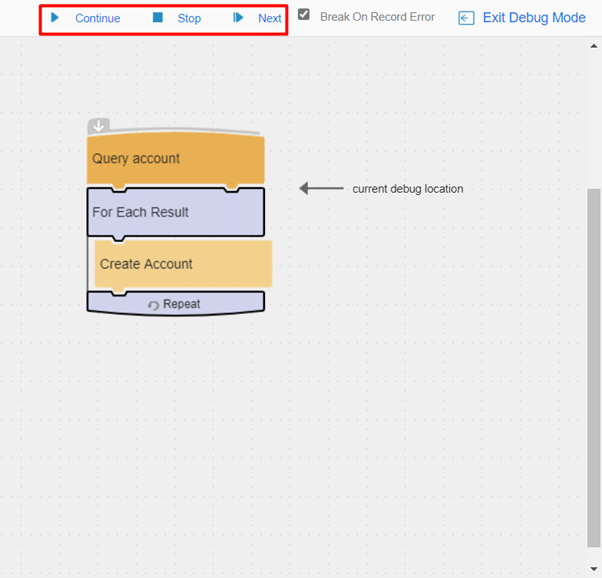
- Click on Next to see step by step execution of the map, and continue to finish running the map.
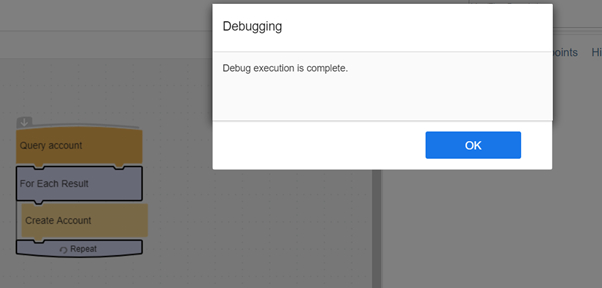
- After execution is complete the following window will be shown
- If you check the destination CRM now you will find the new record has been reflected from source.
This was it, in few steps we copied Data from one CRM system to another. Thank you for reading my blog, hope it helped !!
