Creating Azure blob container
Azure blob container is a service for storing large amount of unstructured object data, text files or binary. We can publicly expose or can use blob storage privately.
Below are the steps to create Azure blob container:
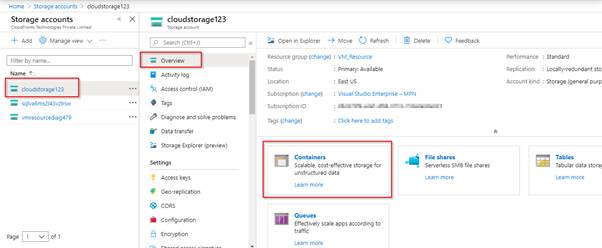
- Go to Storage account, select storage account (In this case cloudstorage123) > overview and click on containers.
- When we go inside of container, click on ‘+ container’ to create new container, then it will prompt to enter the container name and public access level.
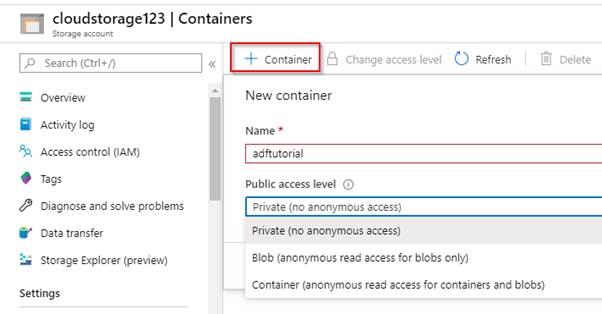
Below are public access levels,
- Private: By Default, it is private, and it is accessible to account owner.
- Blob: Allows public read access to blob.
- Container: Allows public read and list access to entire container.
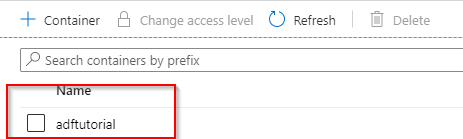
after entering above details container gets created,
- Now we will create blob storage, to do we have to click on upload
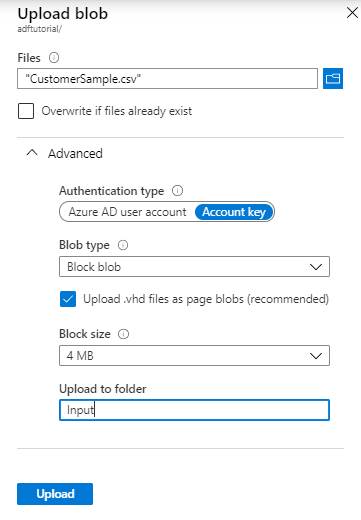
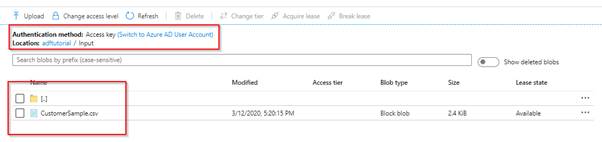
- Now we can see that Csv file uploaded and under the Input folder.
- Each step description,
- Select file from local system.
- In advanced section,
- Select Authentication type either using account key or Azure AD user account.
- Select the blob type: It can be Block blob, page blob and append blob.
- Block blob: It stored text and binary data, up to 4.7 TB Block blobs are made up of blocks of data and managed individually.
- Appends blob: This blob is like Block lob and it is optimized to appends operations. e.g. it can be used for logging
- Page blob: It stored random access file up to 8 TB in size, page blobs stores virtual hard drive and serve as disks for VM.
- Block size: select as per requirement, it can be 64KB,128KB,256KB,512KB,2MB,4MB,100MB
- Enter the folder name in which we wanted to upload blob, if we enter the folder name which does not exists it will create new folder.
Hope above helps!
