Using Automated Testing in POSTMAN for Business Central Web Services
Introduction:
While using Business Central Web Services or APIs, we often use POSTMAN for testing the request and the responses.
Today we’ll see how we can automate this testing to a certain extent using the inbuilt features of POSTMAN.
We can have testing logic that runs before every request, after every request or logic that tests on particular request.
In the below demonstration, we’ll write automated test to check for GET, PUT, POST and DELETE operations for a single record on a custom API. Postman itself provides a bunch of standard procedures or boiler plate code which we can modify as per our requirements. As this uses Javascript we can also use additional JS features here.
Pre-requisites:
- Postman
- Business Central OnCloud or OnPremise
References:
- Writing tests | Postman Learning Center
- Announcing Postman for the Web, Now in Open Beta | Postman Blog
Configuration:
- Post Request –
- So first we are going to be creating a record in the Customer Table with the following fields.
- One of the common things to be testing with Custom APIs is to verify whether the request is being created successfully (1) and what we are sending and what is being stored in the record are the same(2). As we are using Javascript, the response is stored in the jsonData variable and we can access any of the fields of the response as a property on the jsonData variable.
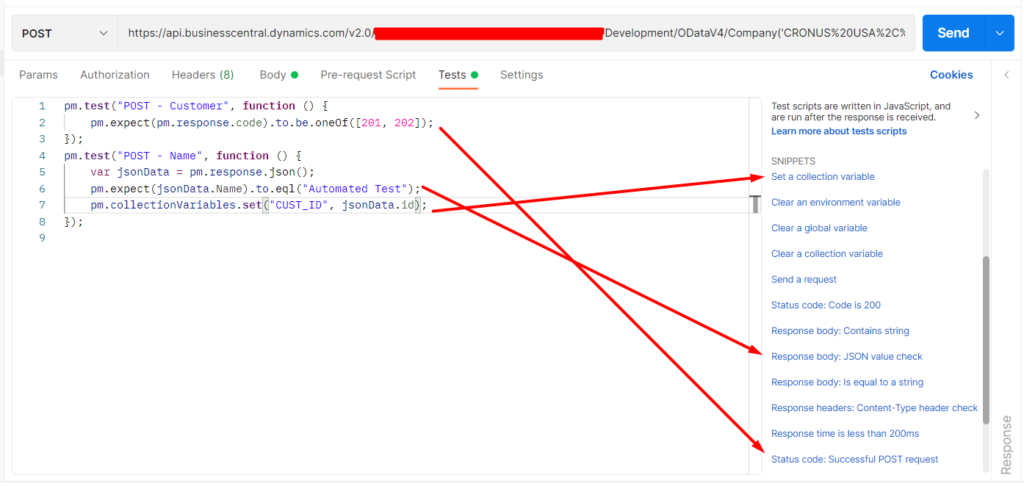
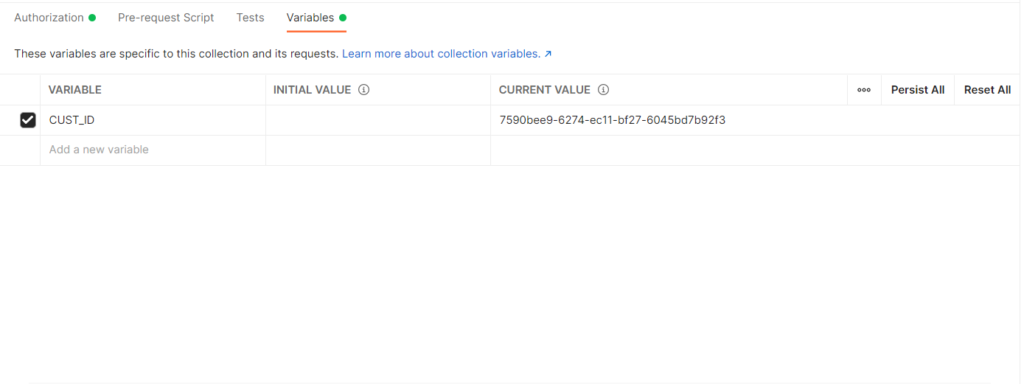
- As the rest of our automated tests are doing to be performed on this same record, we need to store the Identifier for this record inside some variable which exists outside the scope of this request, here we are using a variable with the Collection scope. If you want to use the same variable outside of this collection, you can also define Global variables.
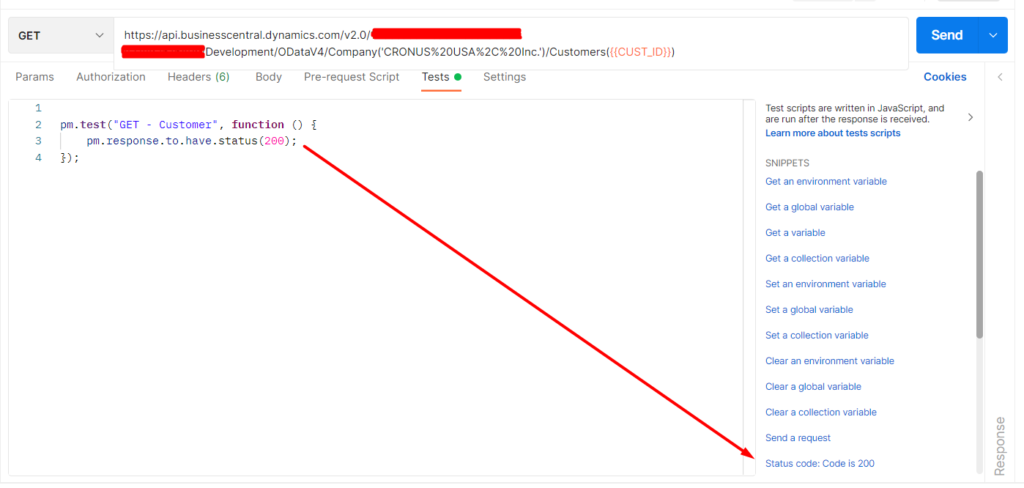
- GET Request –
- In a simple GET request, the only thing we are concerned with here, is whether the request is executed successfully or not. For this we are simply going to be checking the Status Code.
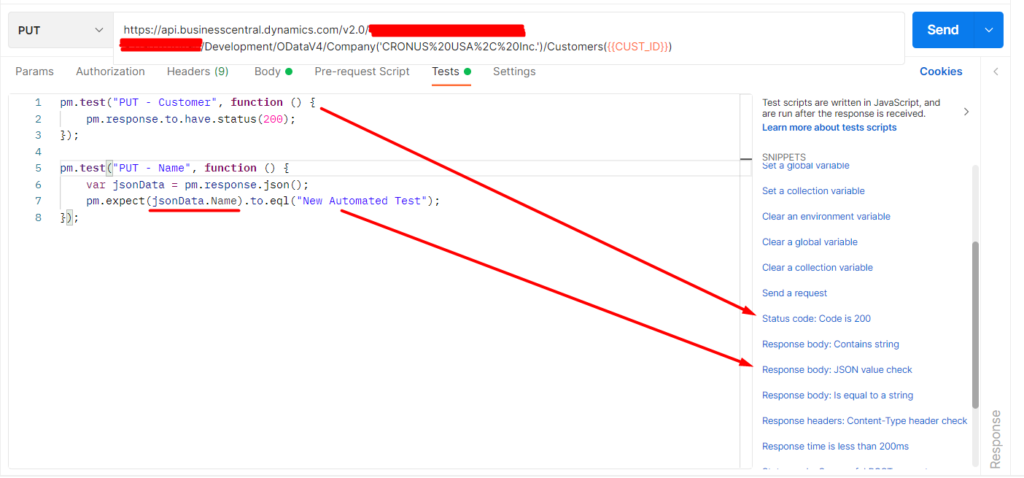
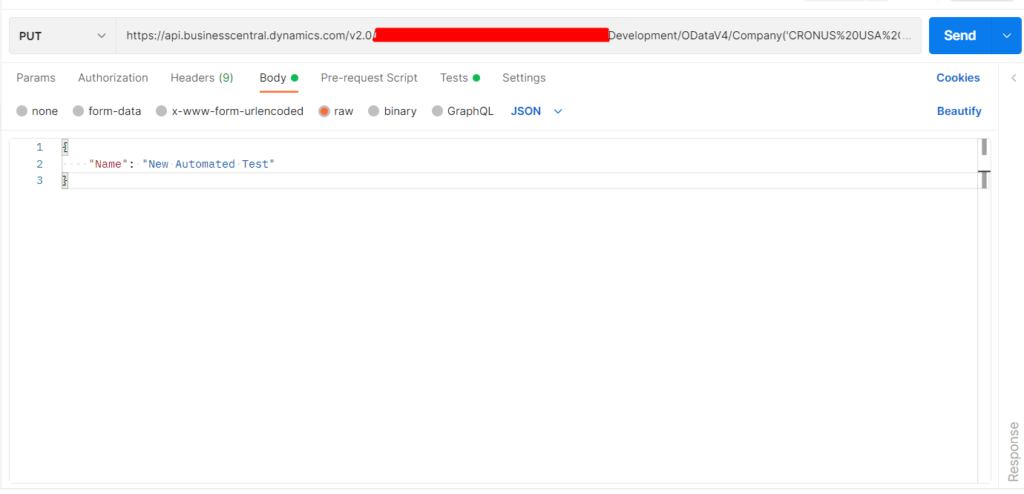
- PUT Request –
- In a PUT request, we are going to be modifying the record that we previously created, here I’m going to update the name of the record.
- A common test-case for PUT requests would be to ensure that (a) the request is completed successfully and (b) what is being sent in the request is what is updated on the record and is available in the response.
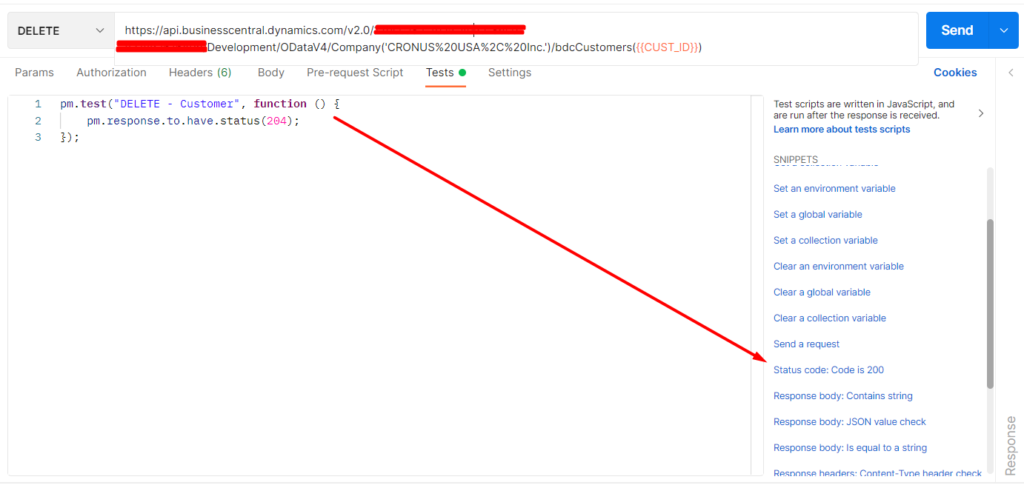
- DELETE Request –
- In a simple DELETE request, the only thing we are concerned with is whether the requested is executed successfully and here we will be simply checking the Status Code returned.
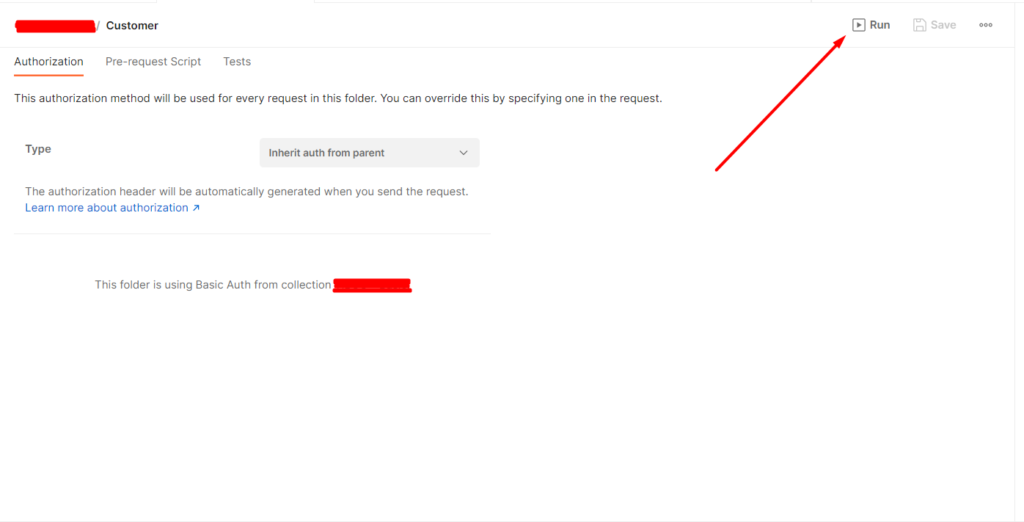
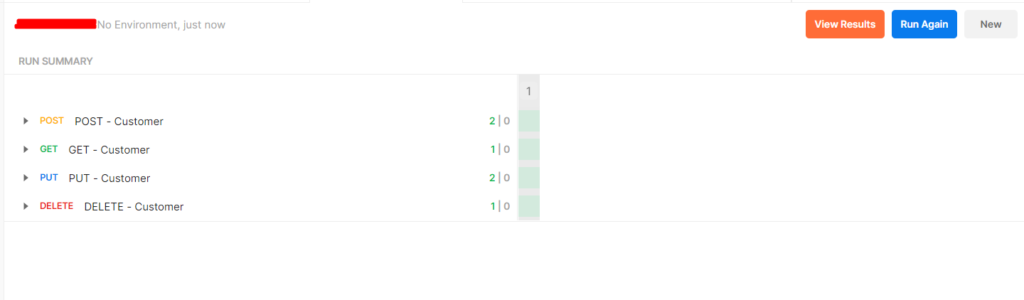
- Once all the Automated Tests are written, you can either execute them from the Collection Level or from a folder level. Here we will be executing our tests from the folder level.
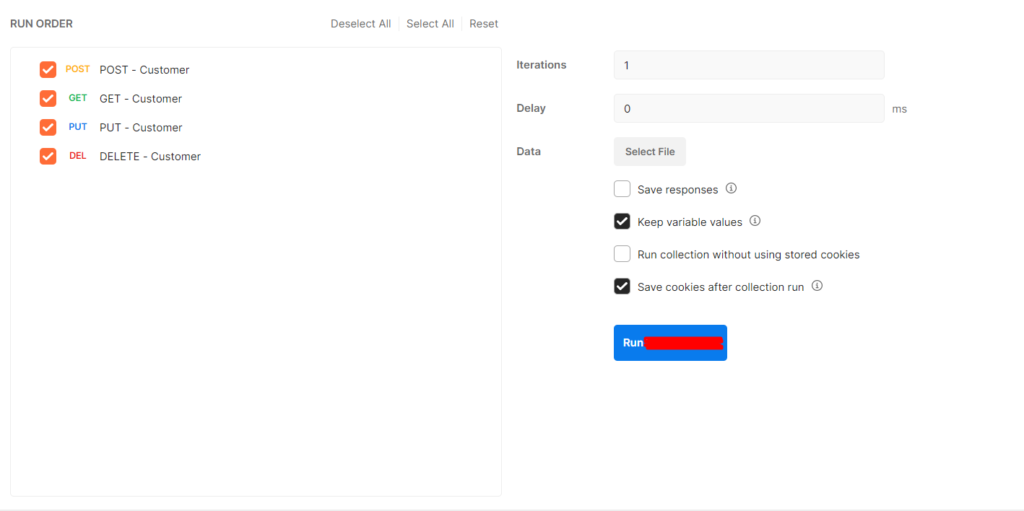
- We can also define the Run Order for the requests.
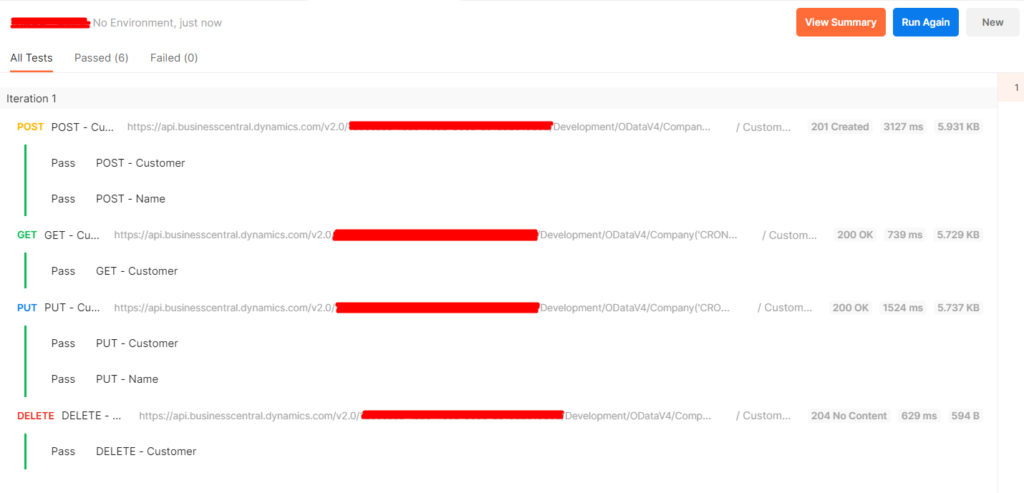
- Once the Tests have run, we can get a summary of the results as well as detailed version of the results.
Conclusion:
Thus we saw how to use Automated Testing in POSTMAN to reduce re-work and increase efficiency while testing.
A bonus tip – you can now use POSTMAN Web Version to create requests instead of download the POSTMAN app and the entire blog above was written using the Web App of POSTMAN. Do note that not everything that can be done on the Windows App can be done on the Web App.
Happy Coding!
