Salesforce → CRM real-time Integration
Introduction
This article is 2nd part of the blog published earlier on CRM and Salesforce integration. In earlier blog, we have seen how we can do real-time integration from Dynamics CRM to Salesforce. In this blog we will see how to do real-time integration from Salesforce to Dynamics CRM.
Requirements
Let’s assume a real world example. Contoso company tracks their Accounts and Contact details in Salesforce and customer care in Dynamics CRM. So they want allow creation of Accounts and Contacts in Salesforce and those should get created in Dynamics CRM in real-time. Also, they want to handle any Account/Contact update to be reflected in Dynamics CRM.
Implementation Approach
Below are the steps we will follow to do this integration for an Account entity.
- To trigger integration from Salesforce, we will implement a workflow rule in Salesforce on an Account object. We will configure this workflow to get triggered on Account creation or update.
- Add an Outbound Message as an action in above workflow rule to pass the data to integration service which will actually do the integration. The integration service will be hosted on either azure environment or externally accessible web server (e.g. IIS).
- Once we configure outbound message, we will use the WSDL generated by outbound message and create a web service which will perform below operations:
- Consume the outbound message
- Connect to Dynamics CRM
- Create/update record in Dynamics CRM as per outbound message.
- Log integration details.
In this way, we can achieve real-time integration from Salesforce to CRM without modifying any Salesforce object or without having need to understand Salesforce query language.
Implementation Steps
- Login to Salesforce environment.
- Create Workflow Rule as per below screenshot (More about workflow rules).

- Name: Give any rule name which is easy to understand purpose of the workflow rule.
- Object: Select Account object as we are doing integration for Account create/update.
- Select Evaluation Criteria as ‘Evaluate the rule when a record is created, and every time it’s edited.
- In Rule Criteria section,
- Select Run this rule if the following as ‘formula evaluates to true’.
- In formula, put 1 = 1 and click on Save. We are putting this condition to allow all records and not filter any.
- Add an outbound message as an action as per below screenshot in the workflow rule.
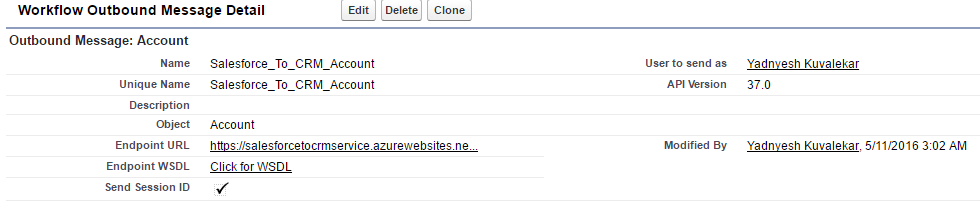
- Name: Give any name which is easy to understand purpose of the message.
- Object: Select Account.
- Endpoint URL: <hosted web service URL with asmx extension at the end>
- Select Send Session ID checkbox.
- Select All Columns.
- Once created, you need to create a web service project. Use below link to do the same.
https://developer.salesforce.com/page/Creating_an_Outbound_Messaging_Notification_Service_with_CSharp_and_.Net_Framework_2.0 - Once you are ready with above ASMX web service, write C# code to connect to CRM and consume the Outbound message as shown in above blog.
Functional Flow chart

