Enable SharePoint Integration and OneDrive for Business in CRM
The blog article tells user how to integrate SharePoint and OneDrive for Business CRM to store the CRM related documents.
Let’s see the steps to enable SharePoint and OneDrive for Business.
Pre–requisites
- User needs to be Office 365 Global Administration to enable Server Based SharePoint.
- User needs to have Microsoft Office 365 Plan E3.
Steps to Enable SharePoint Integration
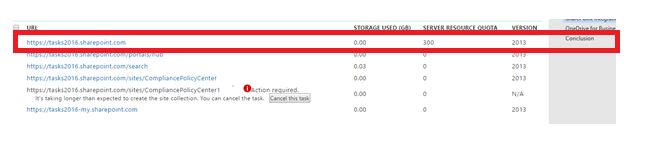
Step 1: Under Default Admin Page, Select SharePoint.

Under SharePoint, note down the Public Website URL.
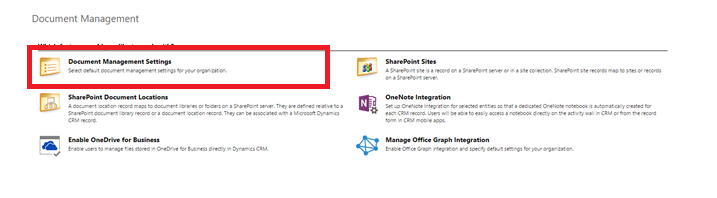
Step 2: Under Settings, select Document Management Option.

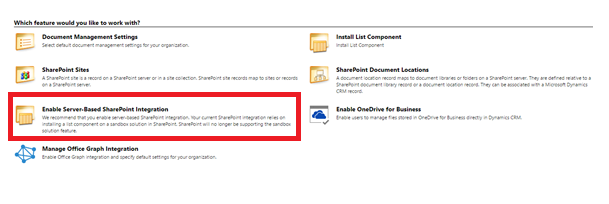
Step 3: Select Enable Server Based SharePoint Integration
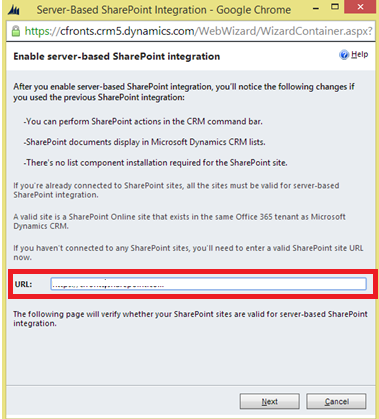
Once step 3 is done, user needs to provide the URL that was noted in Step 1. Enter the URL and select OK.
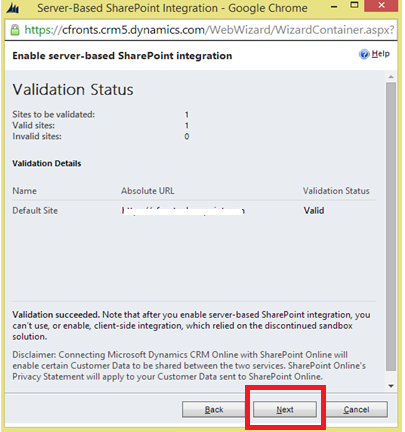
System will validate the URL provided in previous step and once the status is Valid, click Next.
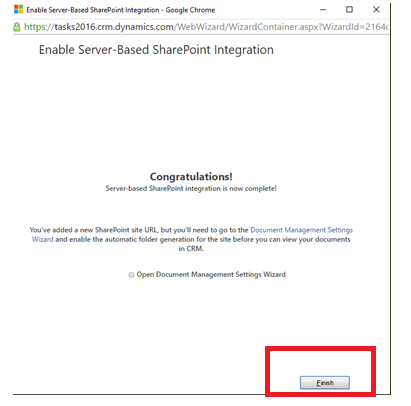
Below Message will be displayed saying that Server Based SharePoint Integration is completed and under Document Management Settings, setup the folders for respective entities.
Step 4: Now Under Document Management Settings, select the list of entities for which document management should be enabled.
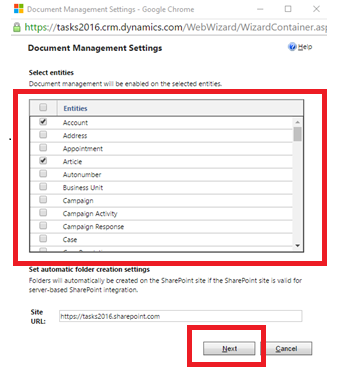
Step 5: Click Next
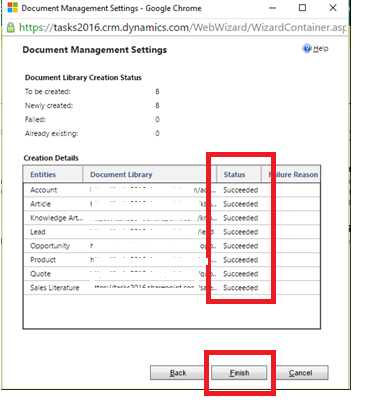
Now the user can see the status of all entities enabled for document management.
Steps to Enable OneDrive for Business
Note: Without Enabling Server Based- SharePoint Integration, OneDrive for Business cannot be enabled.
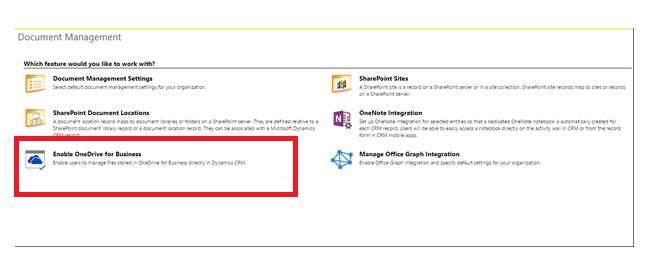
Step 1: Under Settings, select Document Management Option.

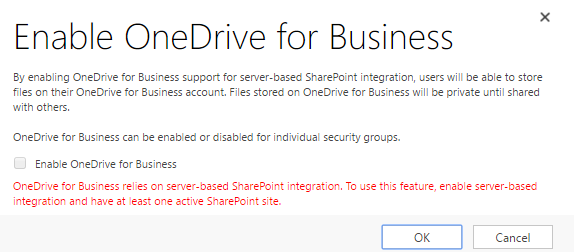
Step 2: Under Document Management, select Enable OneDrive for Business Option.
Step 3: Click on Enable OneDrive for Business Option.
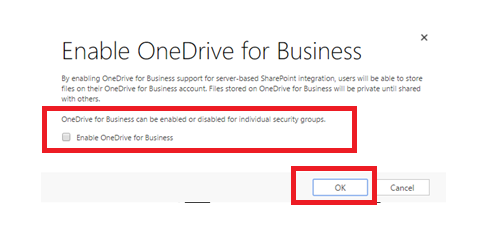
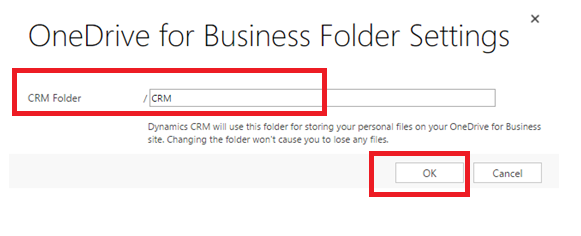
Once OneDrive for Business is enabled, user needs to configure folder settings. i.e. user will have to setup where personal documents can be stored.
Step 4: So under OneDrive for Business Folder settings, select the folder and click OK.

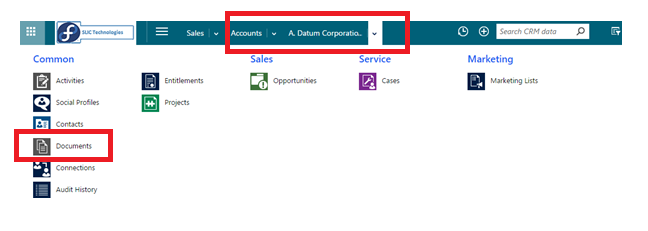
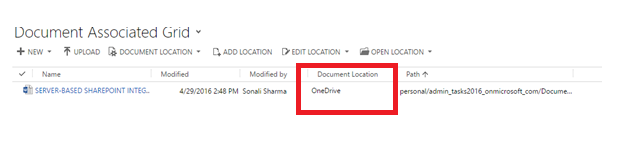
Now say if a user wants to add documents to Account Record. User will open that account record, and then select Documents.
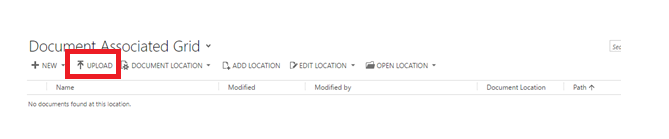
Step 5: Under Documents Associated Grid, Upload Document.
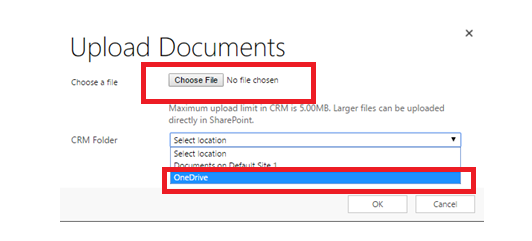
Step 6: Choose the file to Upload and in CRM folder, select OneDrive.
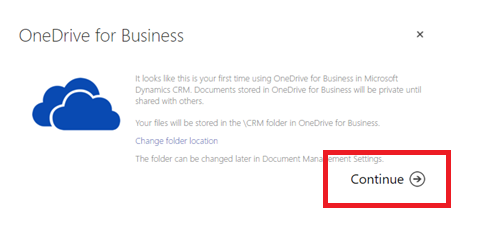
Since the user is uploading files for the first time, he will get a confirmation box where he can change the folder location or continue using the same location as provided under Step 4.
Conclusion
Thus by using above simple steps, SharePoint of Integration and OneDrive for Business can be enabled in CRM to store all the CRM related Documents.
