Login Based Security in Power BI
Prerequisite:
Power BI Desktop Tool, Power BI Online Service
Purpose of the setup:
Purpose of this blog is to demonstrate USERNAME () function with Row Level Security (RLS) using Power BI to get the dynamic security when users login.
Procedure:
To demonstrate this, we have created a Power BI Desktop file and published it to Power BI Online service account.
Now the basic steps for creating role based security is explained in our previous blog on RLS in Power BI. You can refer the steps in the link given below:
https://www.cloudfronts.com/row-level-security-using-power-bi/
In the above mentioned link we used DAX function as [Sales Manager] = “Ashish” i.e. we have hard coded the DAX Function to filter data only for specific records. The drawback is that we need to hard code for every user in the organization no matter how many users are present.
So, now we can make use of USERNAME() function which will automatically filter the data depending on the username used to login to Power BI service account. You can read more about this update in the Power BI blog given in the link below.
https://powerbi.microsoft.com/en-us/blog/using-username-in-dax-with-row-level-security/
Here, USERNAME() is used to get the current logged in user and filter the data accordingly so as to enable him to view his own data. Below is the screenshot of dataset used.
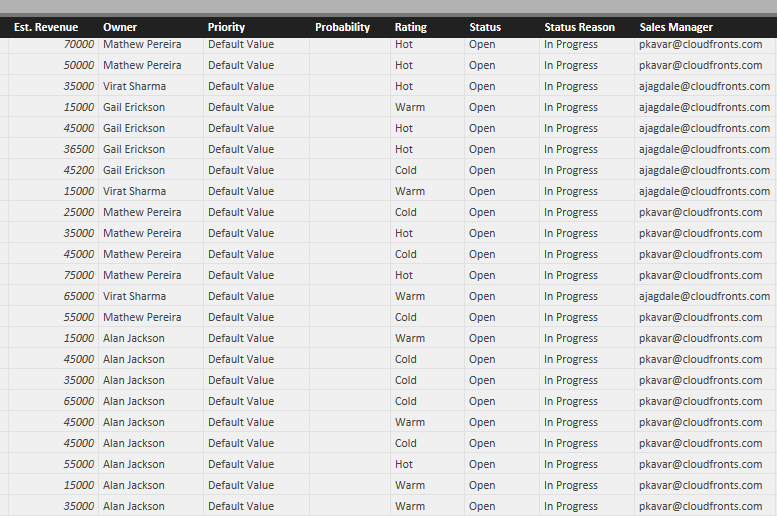
Fig 1: Dataset used for Performing RLS
In the Example, Ankita is the CEO (i.e. the one who has Admin rights) so she can see all the data in the dashboard.
Whereas Ashish and Prakash are the two Sales Manager who when logs in can view only their data i.e. data for them and the Sales Person in their team.
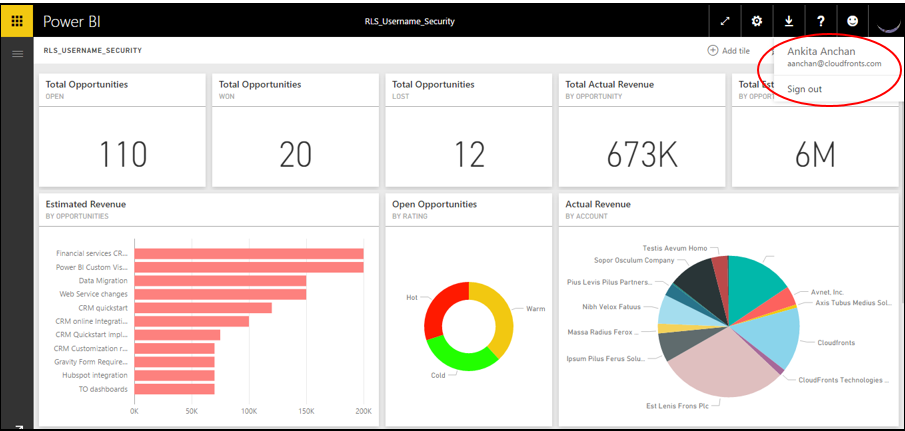
Fig 2: CEO/Admin Dashboard
Now if the CEO wants to restrict the Sales Manager and Sales Person to view only at their level i.e. the Sales Manager can view data under his team and a Sales Person can view only his data as an owner.
For achieving this the CEO can share the dashboard to the person and then can assign the role.
The steps are similar to the steps demonstrated in the previous Blog the only thing to change is the DAX function. The DAX function used is [Sales Manager] =USERNAME ()
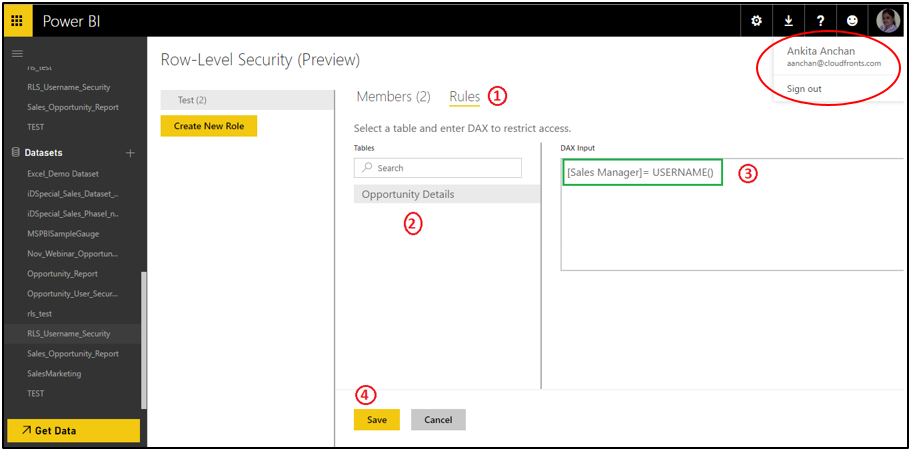
Fig 3: Creating Role
Now we are done with RLS in Power BI with USERNAME () function.
So when person named Ashish logs in with his Power BI account with username as ajagdale@cloudfronts.com, he will only be able to view his own data.
Here, data in same RLS_USERNAME_SECURITY dashboard shared with Ashish displays only data for ajagdale@cloudfronts.com as the Sales Manager.
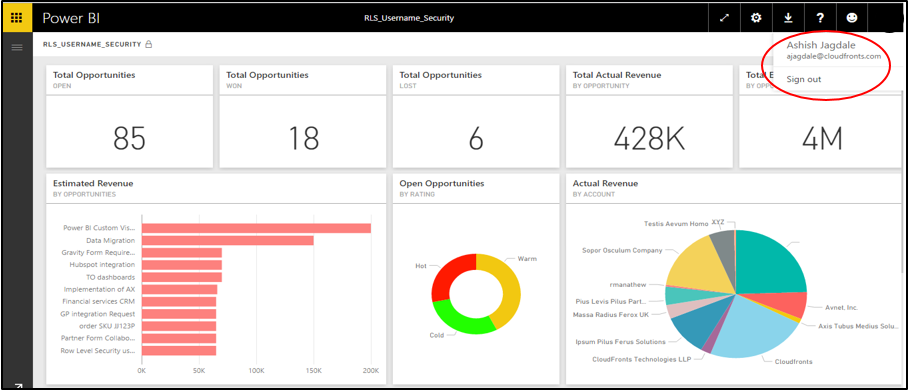
Fig 4: Sales Manager (Ashish’s) Dashboard
Note: The column on which we are applying the USERNAME () function has to be the Login id (or username) which is used to log in to Power BI account so that the function can filter depending on username.
It may happen that the result is not visible immediately. So for that we can refresh the Power BI dashboard once.
Similarly, we can add another person to the same role created and he will also be able to view his own data.
For example, another Sales Manager named (say) Prakash logs in to Power BI with his email as pkavar@cloudfronts.com then he will also be able to view pkavar@cloudfronts.com as Sales Manager.

Fig 5: Sales Manager (Prakash’s) Dashboard
In this way as many users we will add in the role we can create Row level security for them.
