Developing Integration Solutions using Microsoft Azure BizTalk Services
Part 2 – Integrating Microsoft Dynamics CRM Online to Microsoft Azure Service Bus Queue.
You can check part 1 here.
Scope:
To demonstrate the integration through Message-flow from Microsoft Dynamics CRM Online and Azure Service Bus Queue.
Pre-requisite:
- Source: Microsoft Dynamics CRM Online
- Target: Microsoft Azure Service Bus Queue
- SDK for Dynamics CRM Online (plugin Registration Tool)
- Service Bus Explorer to view the message contents received from CRM in Azure SB Queue.
- Visual Studio to create Custom WCF Service to push the messages from CRM to SB Queue (alternate method)
Background:
In earlier Blog we had seen steps to Create Microsoft Azure BizTalk Services as well as Developing and Deploying BizTalk bridges on Azure. In this Blog we will see the steps to create Service End Point (Azure Aware Plugin) that will push messages in JSON (default) format whenever a new Account Name is created in CRM to Azure Service Bus. We can View the contents of this message in Azure SB Queue, using Service Bus Explorer Tool (URL for the tool https://code.msdn.microsoft.com/windowsazure/service-bus-explorer-f2abca5a).
Alternately we can also create a custom WCF Web Service that will push the messages whenever a new record is created CRM (Entity- Accounts)
STEP 01: Creating Azure Aware Plugin in CRM
- Download the Microsoft Dynamics CRM Software Development Kit (SDK) for CRM Online and on-premises CRM 2015 from URL http://www.microsoft.com/en-us/download/details.aspx?id=44567
- After Download, Extract the same and go to Path \MicrosoftDynamicsCRM2015SDK\SDK\Tools\PluginRegistration, and launch the PluginRegistration.exe
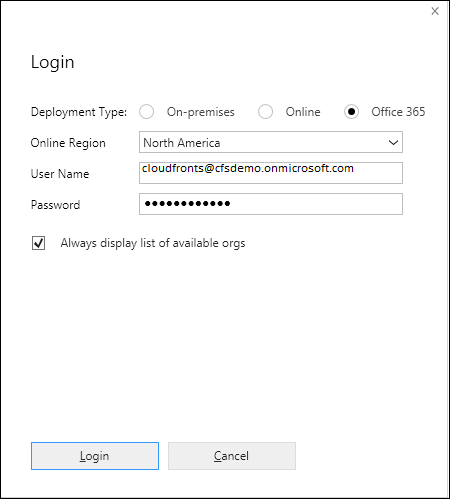
- Select Create New Connection and enter the details for your CRM like Deployment Type as per your CRM, Online Region, User Name and Password and click on Login. You can create CRM Trail account if needed.
- In the Next Window of Service End Point Registration, provide details for the endpoint
![]()
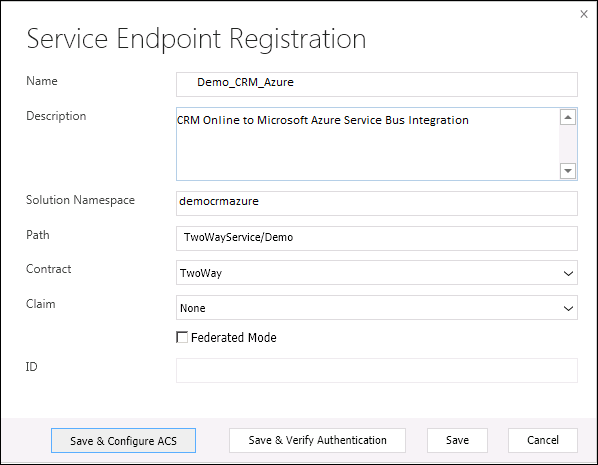
Please note in above screen the path is taken from Service Endpoint URL in Azure.
For example URL is
Then my path is TwoWayService/Demo.
The Contract can be selected from dropdown Oneway, TwoWay, Queue, REST, TOPIC and PersistentQueue.
After entering the details you need to click on Save & Configure ACS (Access Control Service)
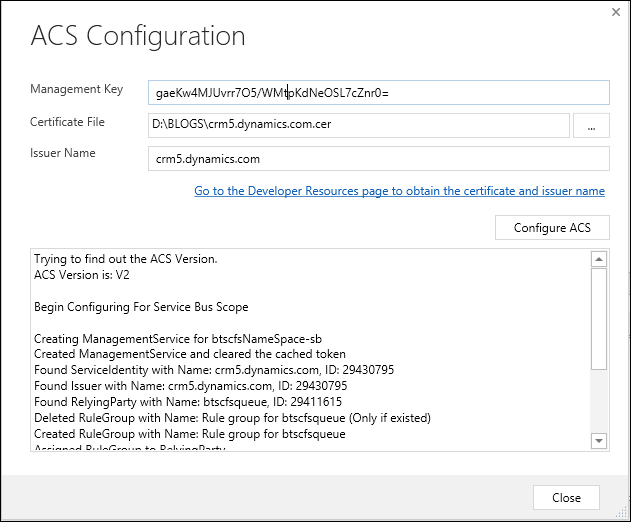
We will need below Information in this screen.
- Management Key
- Certificate File
- Issuer Name
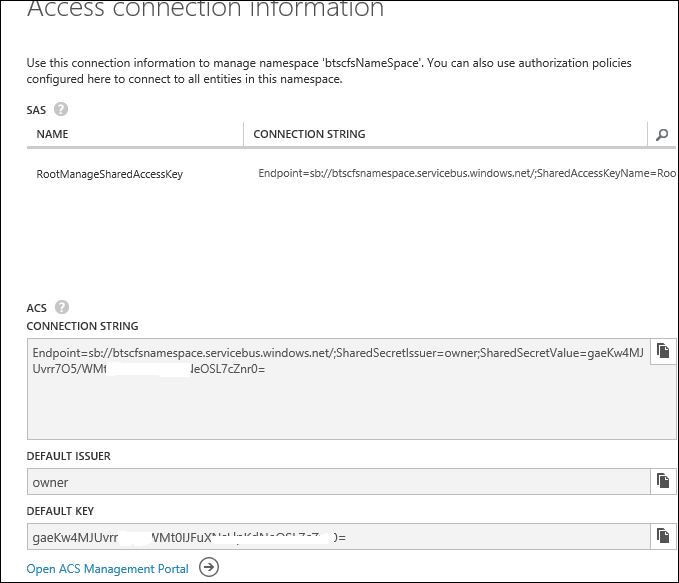
- Management Key: This key is obtained from Azure Portal.
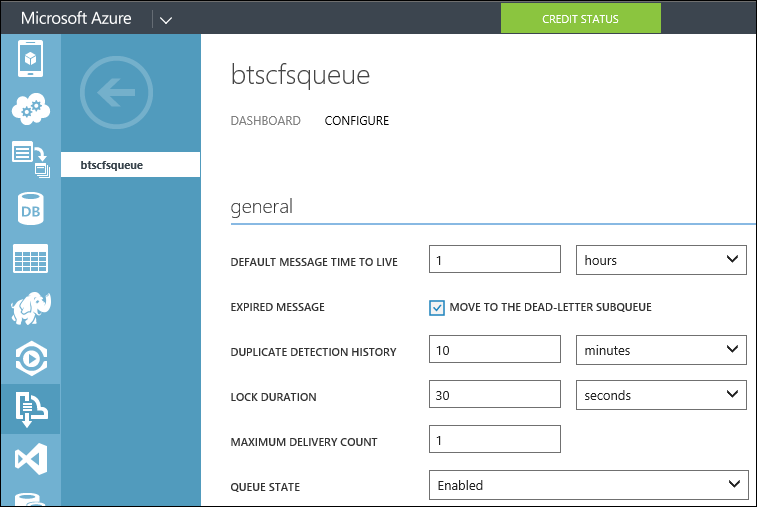
Login to Azure Portal and Create a ServiceBus and a Queue. Here the Service Bus is btscfsnamespace and btscfsqueue is a Queue in it.
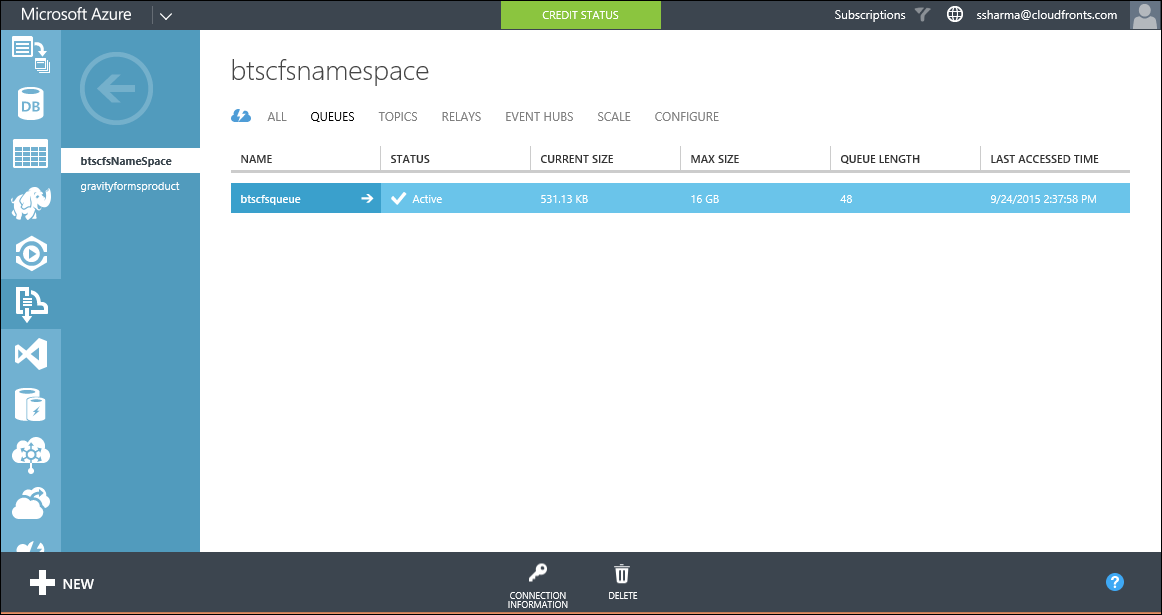
The Management Key is the Default Key found in the Connection Information for the Service Bus in the Azure Portal.
After this you need to Register the Steps in Plugin Registration tool for the Service End point you recently created.
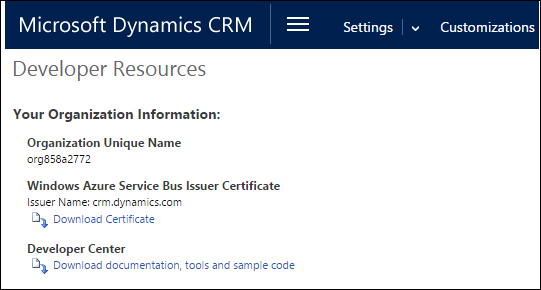
- Certificate File: This certificate file is obtained from CRM under Customizations, under Developer Resources.
- Issuer Name : This is found as in above screen in CRM under Windows Azure Service Bus Issuer Certificate (crm.dynamics.com)
Select Save & Verify Authentication in the Service Endpoint Registration window and close the window after verification test is completed successfully.
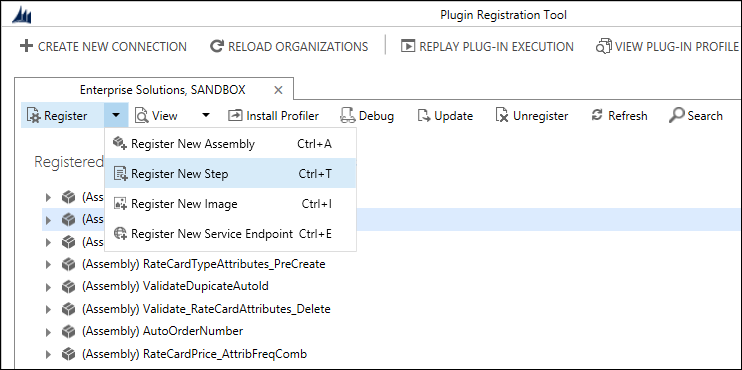
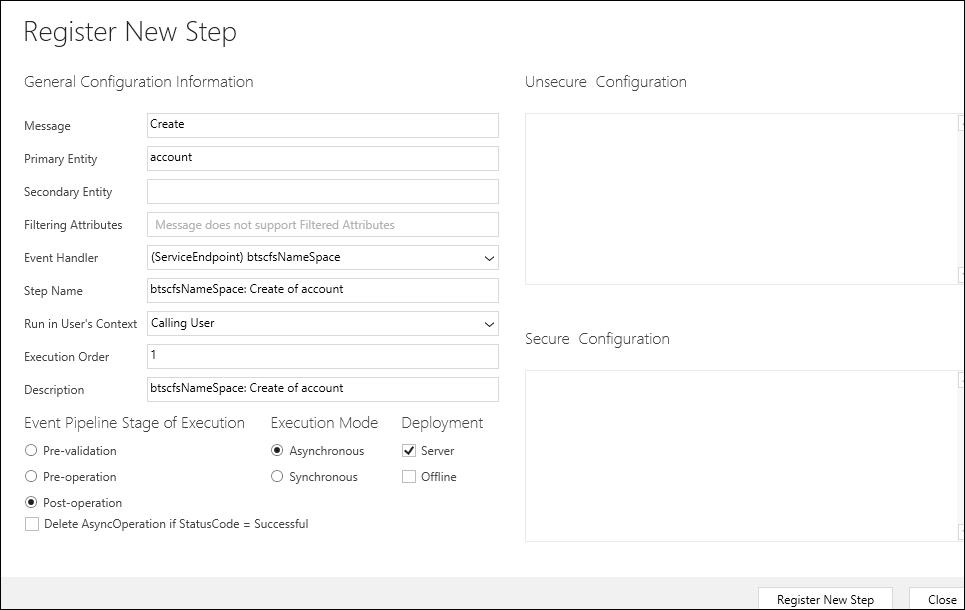
Step 02: Registering the Step in Plugin Registration Tool

In the Message, mention the type of action like Create or Update or Delete etc. Then specify the Entity in CRM. In this case Entity is Account. Execution Mode will be Asynchronous.
Now that the Plugin registration and Step registration is completed. We can login to CRM and create new Account Name in account entity.
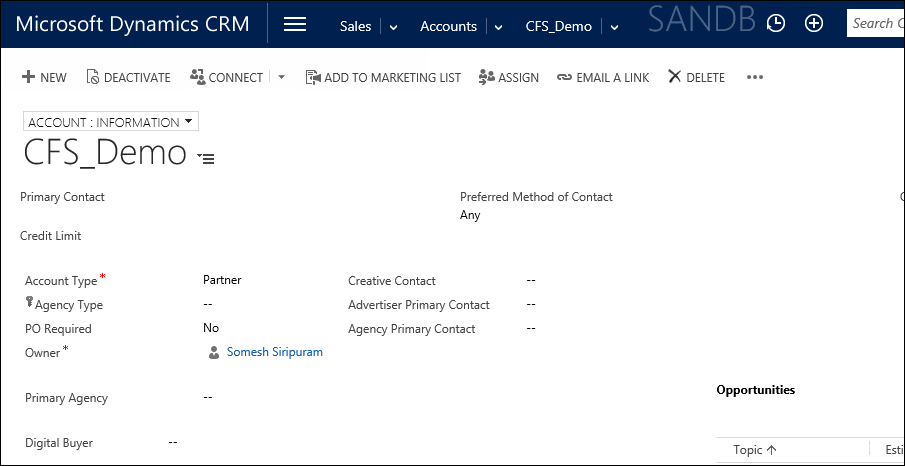
When a new Account Name is created, the Message is pushed by the plugin that we created earlier to Azure Service Bus Queue.
You can view the Message using the service bus explorer tool.
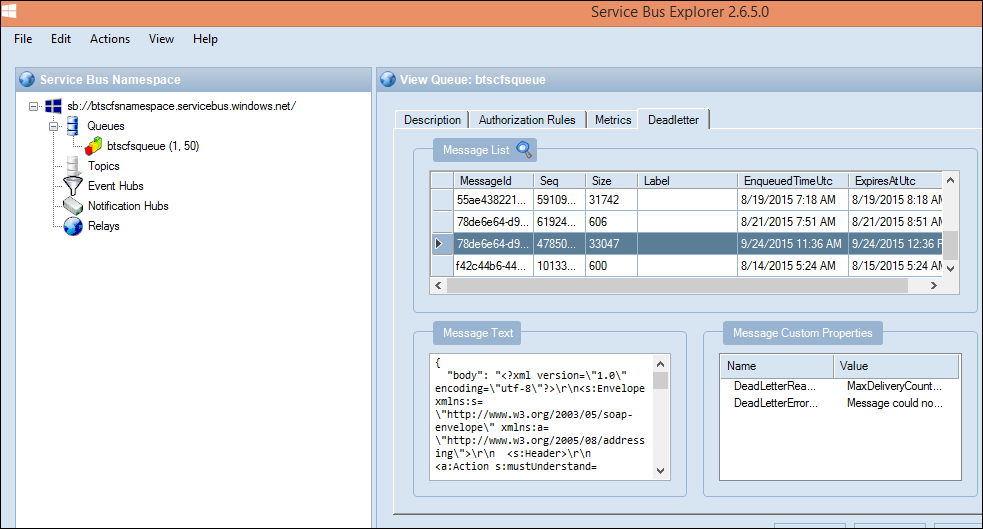
The message remains in the Queue as per the Time-To-Live settings in the Azure portal. After that if there is no further processing, the message gets moved to dead-letter queue.
So we have pushed the messages from Account entity in CRM to Azure Service Bus Queue.
Azure Service Bus Queue has many features as below
- FIFO Ordering guaranteed
- Transaction Support
- Automatic Dead Lettering
- Increasing Queue TTL (Max Unlimited)
- Poison Message Support
- Message Auto Forwarding
- WCF Integration Support
- Message Sessions supported
- Duplicate Detection functionality.
- Maximum Queue Size 1 GB to 80 GB
- Maximum Message Size 256 KB
- Maximum message by default is TTL 7 days
- Maximum No of Queues 10,000 (per service namespace, can be increased)
- Unlimited number of concurrent clients for REST based
- Maximum throughput upto 2000 Messages/seconds
- Average Latency 20-25 ms.
Azure Service Bus Architecture combined with BizTalk Bridge solution deployed in Azure can provide integration solutions with scalable and monitoring capabilities at affordable cost.
In the above steps, there was not coding involved due to SDK plugin registration tool.
We can write the custom WCF service that will push the messages from CRM whenever a new Account is created, to Azure Service Bus Queue and then from there these messages can be picked up by BizTalk Service Bridge that listens for the incoming messages in the Queue and then process these messages to external end point or web service that can write the same in to other application or another CRM. We can track the status of these message processing in BizTalk service Tracking option.
Creating the WCF service to Push the messages from CRM to Azure Service Bus Queue.
Alternately we can write a custom code that will integrate the pre-defined entities and fields from CRM to other applications. Here we need Schema from Source and Target. To achieve this we need to host the WCF code and register the Assembly using the same plugin registration we used earlier.
Describing the code for the same is beyond the scope of this blog.
Please note the messages that we send to SB Queue through WCF service are by default in XML UTF -8 encoding, and this aspects needs to be handled while creating the processing steps in the Solutions that listens to this messages.
In the next article we will have more insight in to the Messages flow in the Queues and the Processing inside the Azure BizTalk Bridges.
