Setup Chat for Parature
Purpose of this blog is to set up Chat Channel for Microsoft Parature.
Prerequisite:
- Parature Enterprise license.
Purpose of the set up:
Setting up Chat channel for Microsoft Parature will help clients have direct live interaction with Customer Service Representatives (CSR’s) addressing their issues.
Steps to set up Chat channel for Parature:
- Ensure Chat Supervisor Role is being assigned to the CSR. If not assigned, enable the Chat Role and assign Role level as ‘Chat Supervisor’.
Go to Setup -> CSR Management -> (CSR) -> Chat Role: Assign the Role and click Save.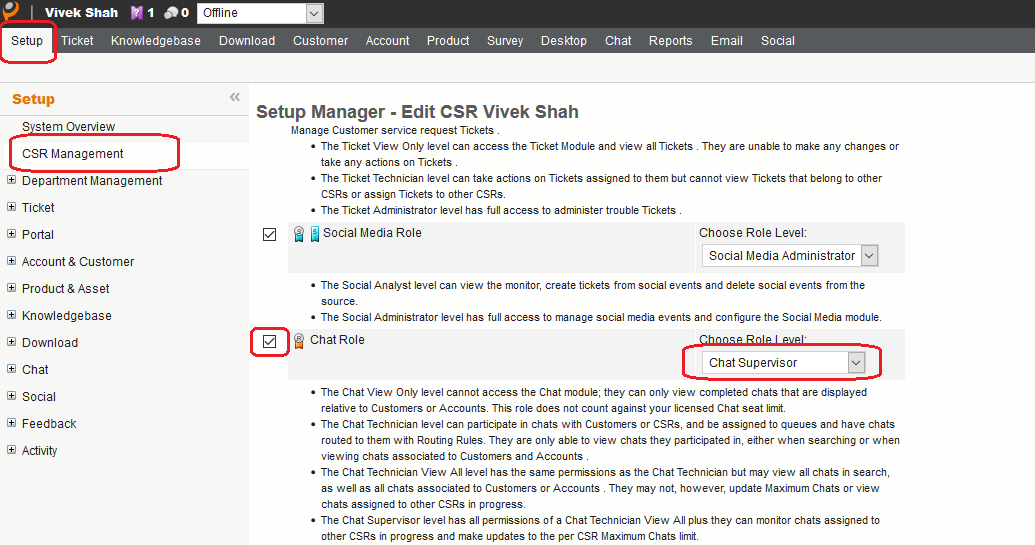
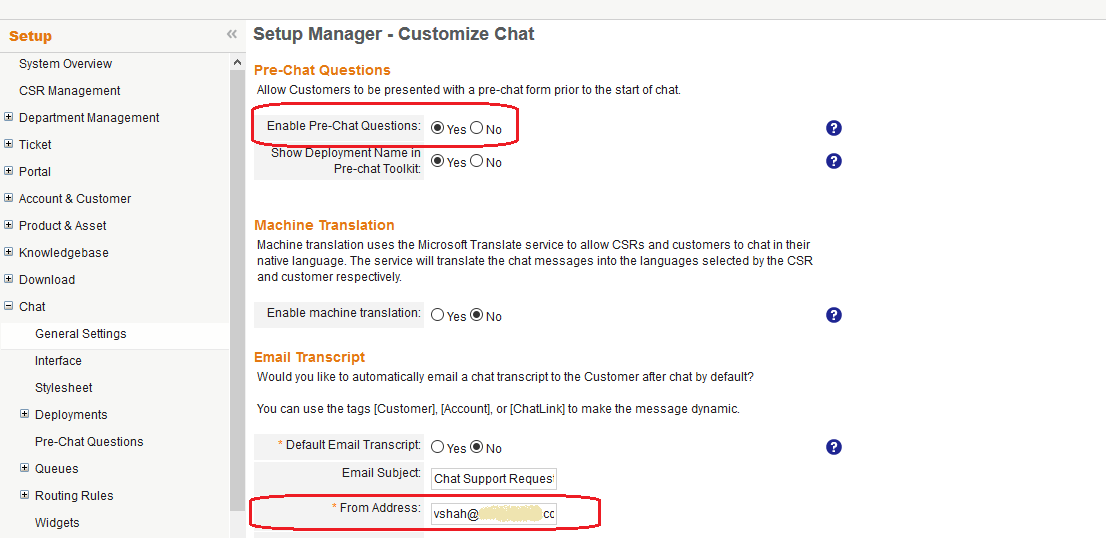
- Enable Pre-Chat questions:
- Go to Setup -> Chat. Click on Edit.
- Under Pre-Chat Questions section, enable the Pre-Chat Questions.
- Under Email Transcript section, enter the ‘From Address’.
- Click on Update.
- Create Pre-Chat Questions:
- Got to Setup -> Chat -> Pre-Chat Questions.
- Click ‘New Field’.
- Enter ‘Field Name’ and ‘Field Type’.
Field Types available are:
- Checkbox field.
- Multiple Check Box field.
- Dropdown field.
- Multiple dropdown field.
- Radio Field.
- TextArea field.
- Text field.
- Email field.
- US Phone Field.
- URL field.
- US Date field.
- Integer field.
- International Phone field.
- See the below figure for reference:
Suppose we want to get Additional Note from the end user before the chat begins, we will use text field for getting the note from the user:
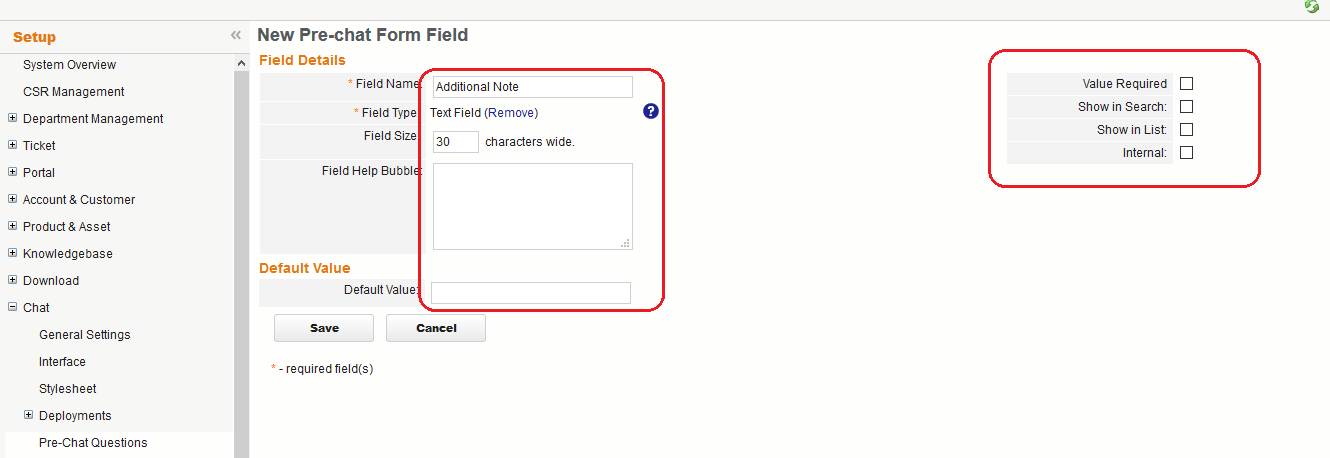
As you can see in the above image, after selecting the Field Type as Text Field, we get to select the Field Size. Also additionally we can select whether the field should be Required, Shown in Search, Shown in List and Internal by choosing options available on the right side.
- Click Save.
- Set up Post Chat Survey:
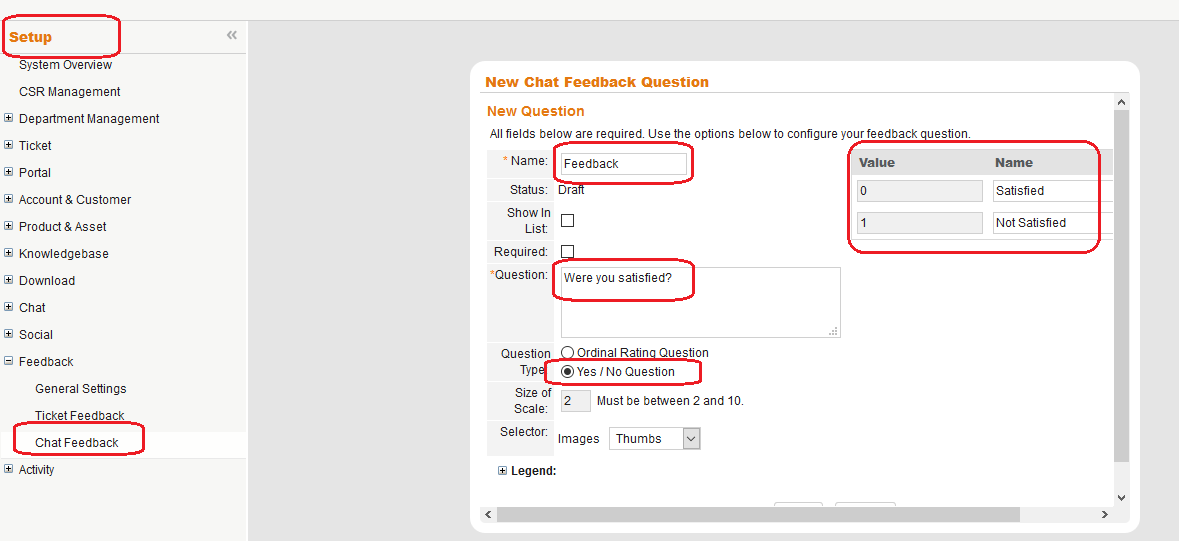
- Go to Setup -> Feedback -> Chat Feedback.
- Enable the feedback.
- Click on Create new Question.
- Enter details as shown in below figure:
- Click Save.
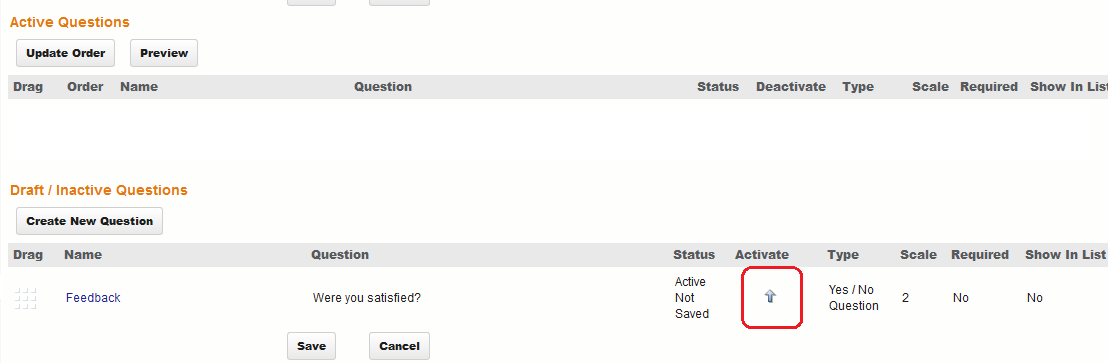
- By Default the Feedback question will be in Draft state. In order to Activate it, click on activate button as shown in below figure:
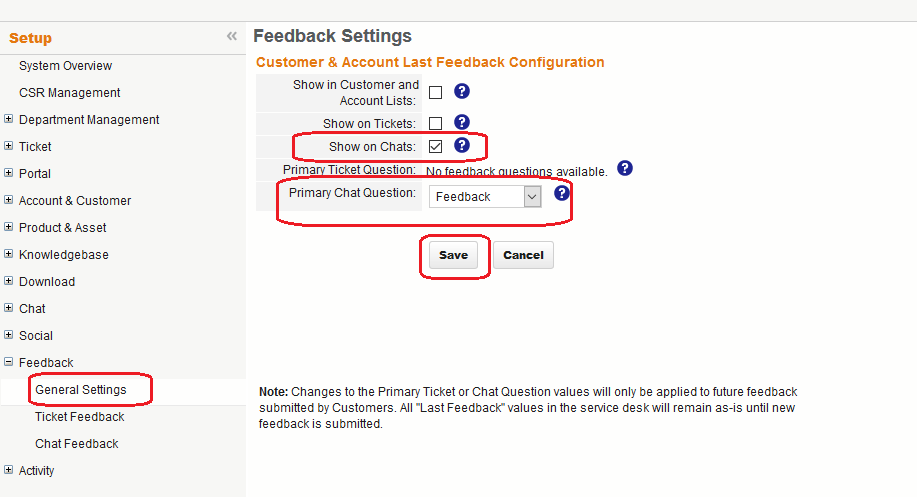
- Go to Setup -> Feedback -> General Settings.
- Select ‘Show on Chats’.
- Select your question as Primary Chat Question.
- Click on Save.
- Setup Routing Rules for Chat:
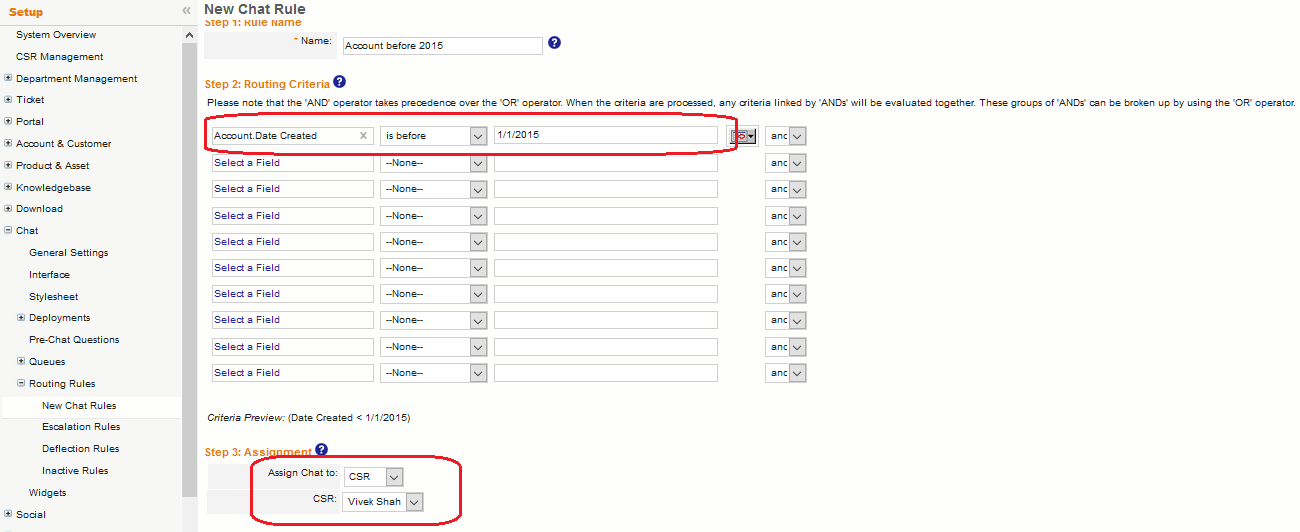
- Go to Setup -> Chat -> Routing Rules -> New Chat Rules
- Click on ‘New Rule’.
- Setup your Routing Criteria.
For example, we want to setup routing rule based on Account creation date i.e. If Account was created before 1st Jan 2015, Assign it to CSR named ‘Vivek Shah’, we can do it using Routing Rules as below: - Click Save.
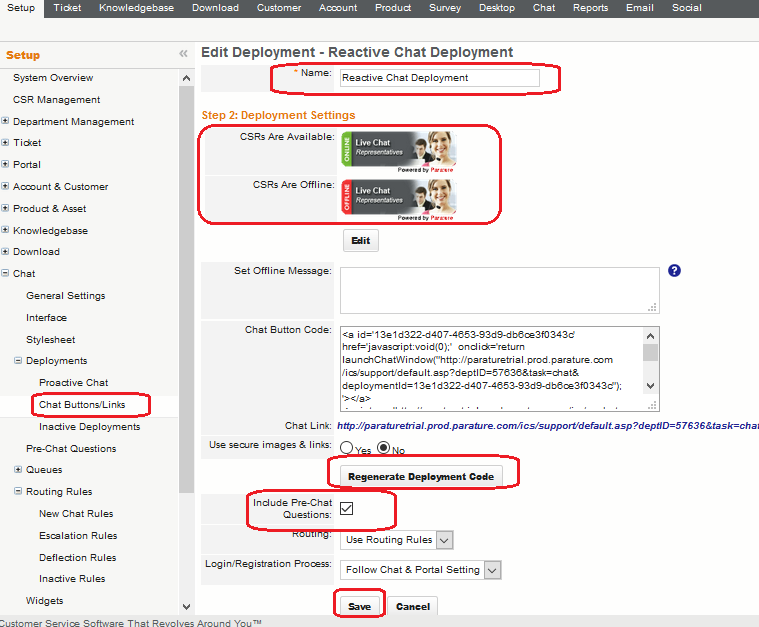
- Go to Setup -> Chat -> Deployments.
- For Reactive Chat deployment settings, click on ‘Chat Buttons/Links’. For Proactive Chat deployment settings, click on ‘Proactive Chat’.
To setup Reactive Chat deployment Click on ‘Chat Buttons/Links’.
- Enter Deployment name.
- Select Deployment setting image by clicking in Edit button under ‘Deployment Settings’. Click on ‘Save Images’.
- Click on ‘Generate Deployment Code’.
- Check ‘Include Pre-Chat Questions’.
- Click on Save.
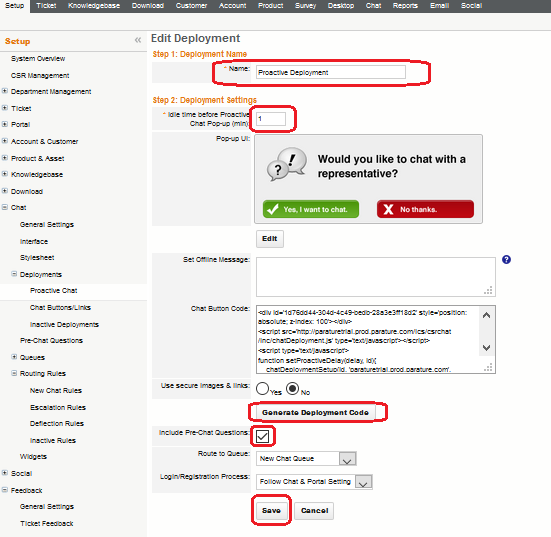
To setup Proactive Chat deployment click on ‘Proactive Chat’:
- Enter name for deployment.
- Setup Idle time before Proactive Chat Pop-up to 1 minute.
- Click ‘Generate Deployment Code’.
- Check ‘Include Pre-Chat Questions’.
- Click on Save.