How to create and manage Public Folders
Public Folders in Office 365 are designed for shared access and provide an effective way to collaborate in your Organization. It can be accessed by multiple users depending upon the permission given from the Exchange Admin Center.
Public Folder is available on Outlook on the web, Outlook 2007 or later and on Outlook for Mac.
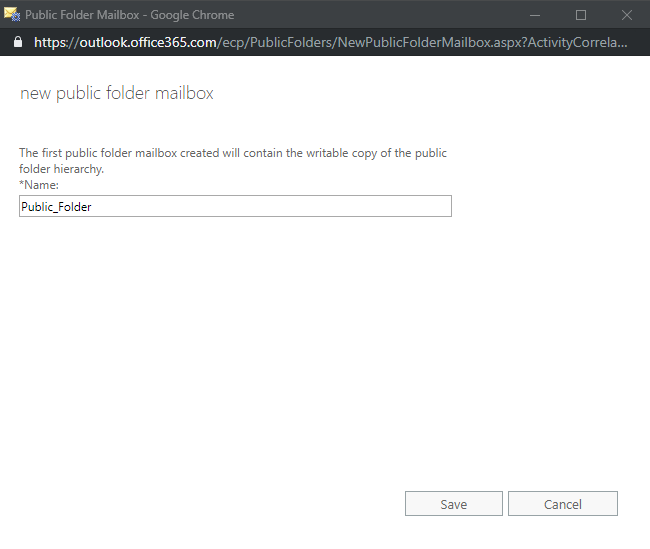
Note: Before creating a Public Folder from Exchange, you first need to create a public folder mailbox. Public folder mailboxes contain the hierarchy of information and content for public folders.
Create a Public Folder Mailbox:
- From Exchange Admin Center, go to Public folders > Public folder mailboxes > Click Add (+).
- Creating a Public Folder mailbox through PowerShell.
- Connect to Exchange Online through PowerShell.
- Enter the command “New-Mailbox -PublicFolder -Name <Name>”, provide the name of the public folder mailbox in place of
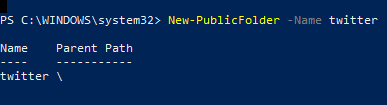
- As I had already created Public_Folder as a public folder mailbox, if I try to create a new one from the PowerShell, it will be a secondary hierarchy public folder mailbox. Below I had created a new one with the name of “twitter”.


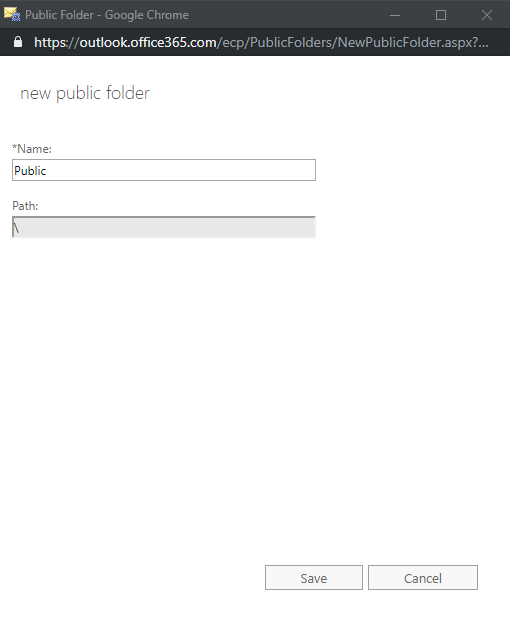
Creating a Public Folder:
- Creating a Public Folder through EAC.
- Go to Public folders > Public folders (on the right-hand side)
- Click Add (+) and give a name to the Public folder.
- Creating a Public folder through PowerShell.
- Connect to Exchange Online through PowerShell.
- Enter command “New-PublicFolder -Name twitter”, these commands create a public folder on the parent path.

Mail-Enable Public Folder:
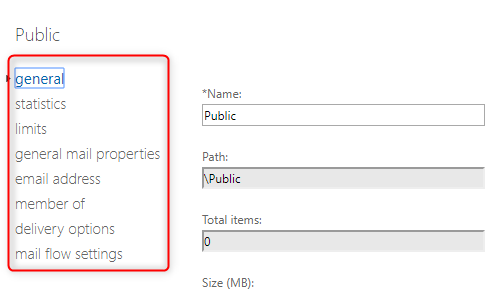
Once you have created a public folder, you can mail-enabled it which will allow users to post to the public folder by sending an email message. When the public folder is mail-enabled additional settings to become available. For example – Mail delivery options, mail delegation, etc.
- Using EAC to the mail-enable public folder.
- Navigate to Public Folder > Public Folders.
- Select the Public folder for which you want to mail-enable.
- In the details pane, Mail settings, click Enable.
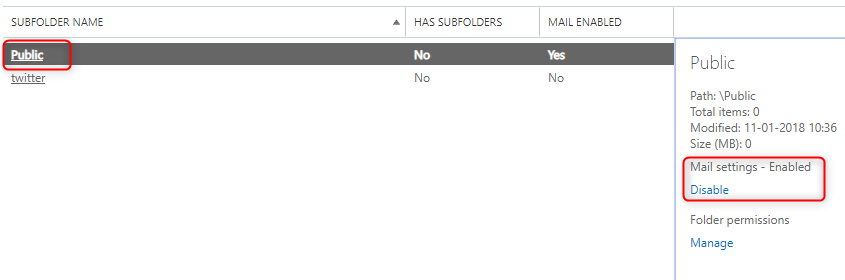
- To check other additional settings, select the public folder and click Edit.
- Mail-Enable Public Folder through PowerShell.
- Connect to Exchange Online through PowerShell.
- Enter command “Enable-MailPublicFolder -Identity \twitter”

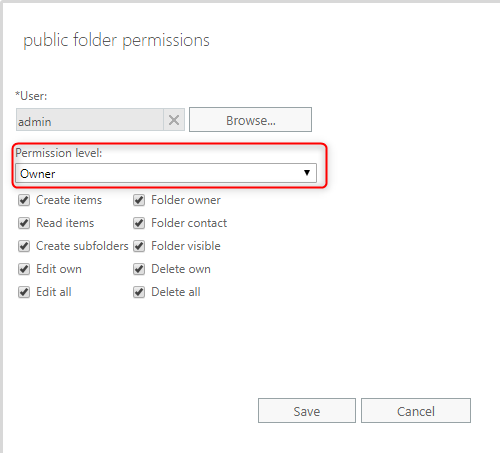
Public Folder Permissions:
You can add or remove users who can access the public folder and you can also edit the permission level.
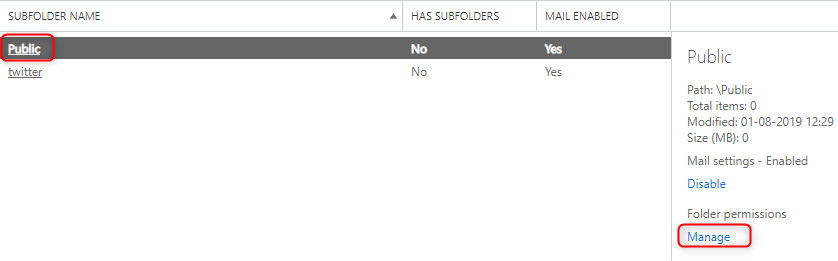
- Go to EAC > Public Folders > Public Folders.
- Select the public folder for which you want to provide access to a user and edit the permission level.
- In the details pane, go to Folder Permissions > Manage.
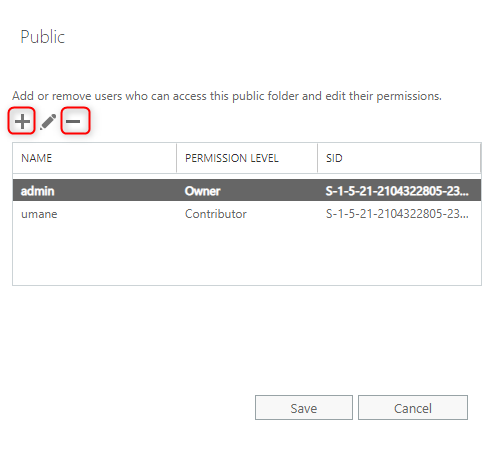
- For editing the permissions level, click on the user added and then click edit.