Adding Microsoft Dynamics NAV Connection in TIBCO Cloud Integration
Introduction:
Establishing a connection is an important step before developing a solution for Integration. While integrating with Microsoft Dynamics NAV as a source/destination a Connection is needed which can be established as follows.
Step 1:
Click on “More” tab and choose Connections.

Step 2:
Click on “Addition” Symbol to add a Connection.

Step 3:
Install On-Prem Agent on Nav server. Refer to the link below.
Step 4:
Add the details as follows.
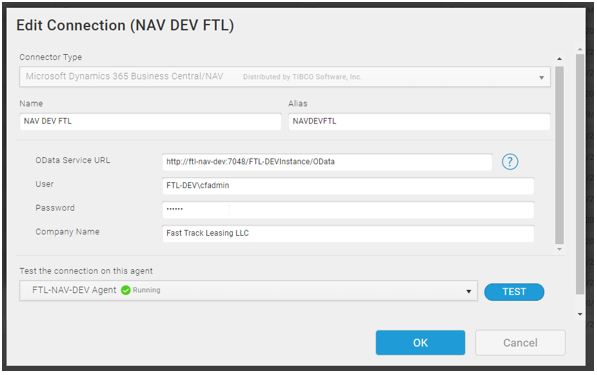
Connector Type: Microsoft Dynamics 365 Business Central/NAV.
Name: Give a name for your connection.
OData Service URL:
Get the required Odata URL from NAV.
Note: The URL should end with “Odata” at end. No additional forward slash must be added at the end of the URL which might result in errors.
http://ftl-nav-dev:7048/FTL-DEVInstance/OData
User: Find it after the date as follows.
Password: Password for NAV
Company Name: Find it before the date as follows.
Agent: Select the On-Prem Agent which you had installed.

