Advanced & Auto Bank Reconciliation in Dynamics 365 Finance
Introduction
In any accounting software, it is always important to keep track of all real-time bank transactions and record them in the ERP. Since bank transactions are booked manually in the ERP, it is necessary to ensure that the bank statements and ERP records are matched on any given date. This is where bank reconciliation comes into play.
Bank Reconciliation
Bank reconciliation is an activity done by any finance user for the purpose of reconciling book transactions w.r.t bank statements and ensuring that both are as closely matched as possible.
D365 Finance offers two ways of performing bank reconciliations.
One is by entering the bank statement amount manually and reconciling the ERP statements for each record against the amount. The other is by importing the bank statement into the system and letting the system match the records of the statement against the ERP based on a certain criteria. The blog is made with the assumption that the reader is already aware of the manual bank reconciliation process in D365 Finance.
The second method is undoubtedly easier, flexible, and time-saving for any user.
While there are several widely used bank statement format types which can be processed in D365 Finance like MT490, CAMT.054, BAI2 and others, this blog post will be focused on the MT490 format only.
Moreover, D365 Finance also enables the user to reconcile not only payments/receipts, but also transactions from the bank’s side, like bank charges, interest fees or reversals and post those entries into the ledger automatically. There is also a flexibility to create a set of rules that can allow for minor amount/date variations of the system w.r.t the bank statement.
Steps to perform the bank reconciliation in an automated manner
Setup
We have to enable the system to accept bank statements in MT940 statement first.
In order to do that, navigate to, Organization Administration > Workspaces > Electronic Reporting
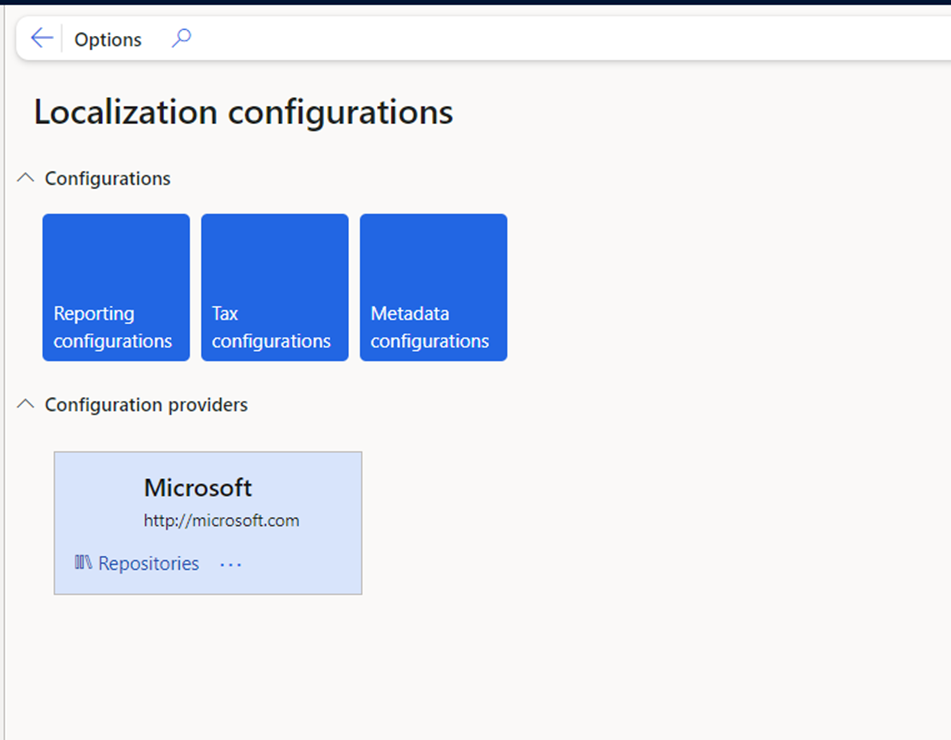
Click on Repositories.
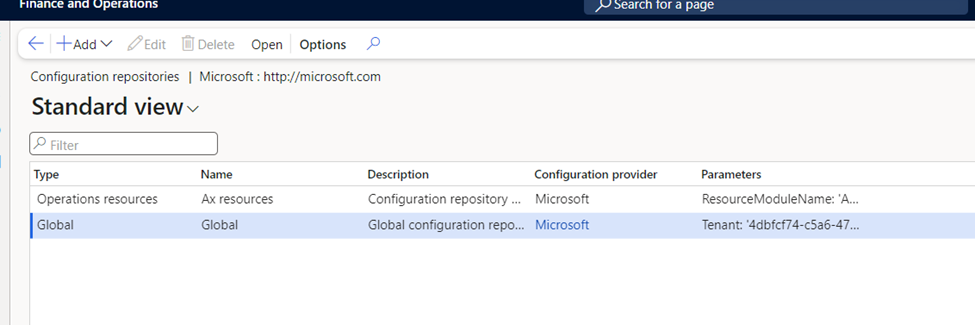
Select Global and click Open on top.
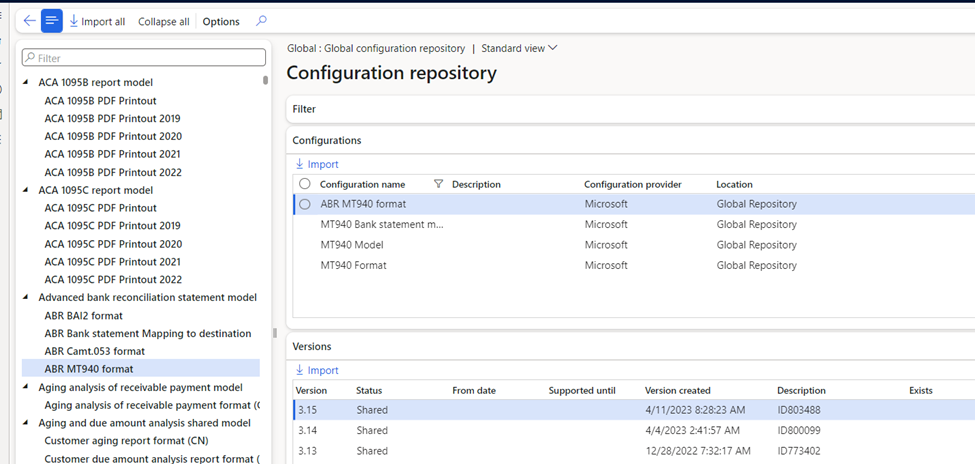
Filter the Configuration name by searching for ‘MT940’. The above list of formats will be displayed.
Select them all and click on Import. The system will import the bank formats in D365 Finance.
Next, we have to map the format in a setup.
Go to Cash & Bank Management > Advanced Bank Reconciliation Setup > Bank Statement Format
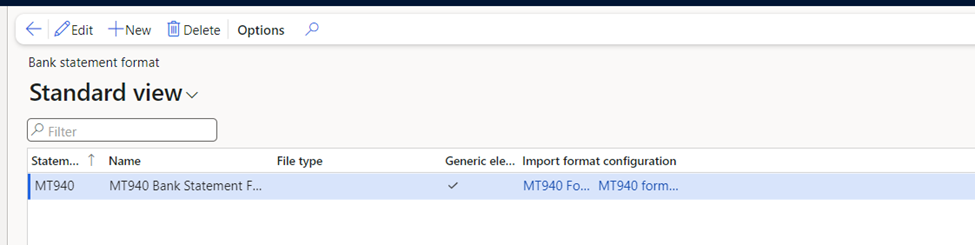
Create a new record and specify the Statement Code, Name and map the Import format which was imported in the previous step.
Now this is done, the only part left is to configure the Bank master to enable advanced bank reconciliations for any transactions.
Open the Bank Account Master.

Turn on ‘Advanced Bank Reconciliation’ and select MT940 in the field Statement format.
Once this is done, we are ready to use Advanced Bank Reconciliation.
Working
To start with advanced reconciliation, we will take a scenario of a bank where the following transactions have occurred:
- Bank opening balance
- Payment made to vendor
- Payment received from customer
The above 3 transactions are created in the system and will be reconciled with the use of a bank statement.
The bank statement will be a notepad file that will be imported in the system. While the bank statement is always provided by the bank, it is important to know the bank statement format so we can setup and test any scenario with dummy records.
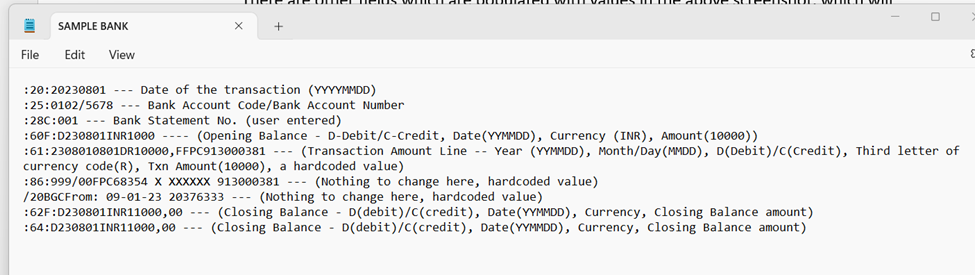
The above screenshot specifies the structure in which the bank statement is accepted by the system. We will be using this format to import bank records and reconcile them with the system records.
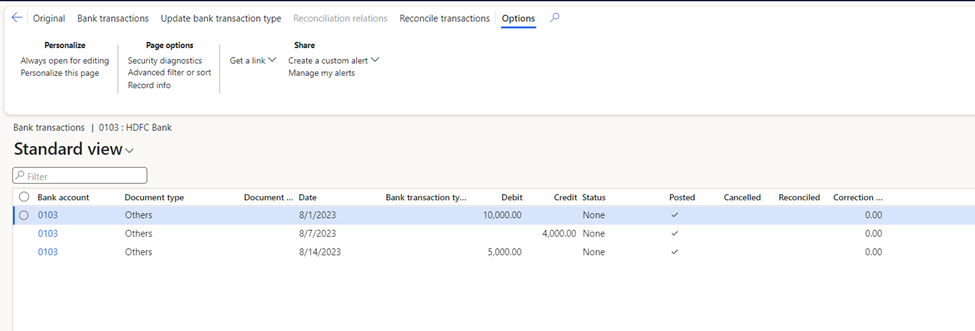
From the above image, 3 types of bank transactions have been made in the system with the respective amounts and dates.
Now the bank statement file for the above transactions is as follows:
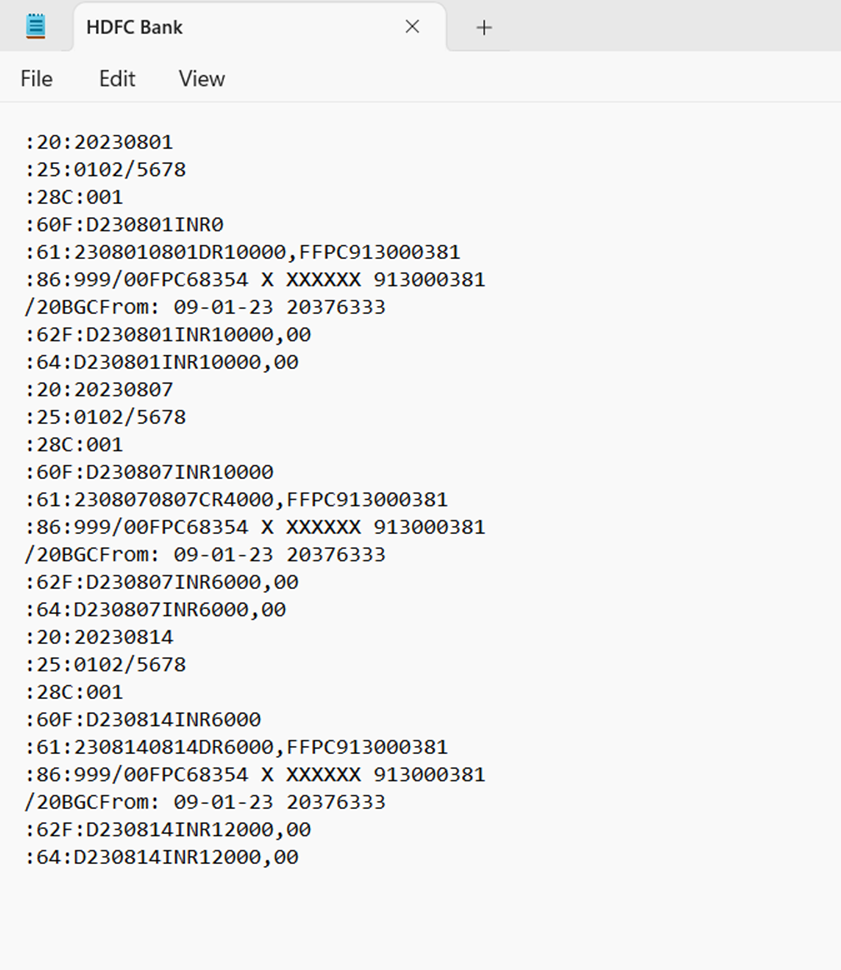
As you may observe, all three transactions are recorded one below the other, and the opening and closing figures are manually entered here. In real-time scenarios, this is provided by the bank and the user does not open or make any changes to the file.
In order to import the file, go to Bank Account > Bank Statements > Import Statement
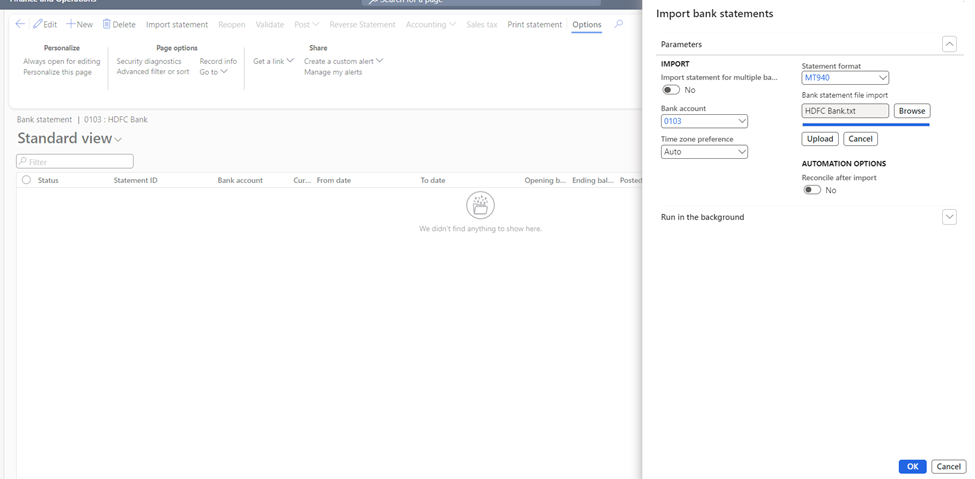
In the parameters, select the bank account, browse the text file from your PC and click on upload, then click on OK.
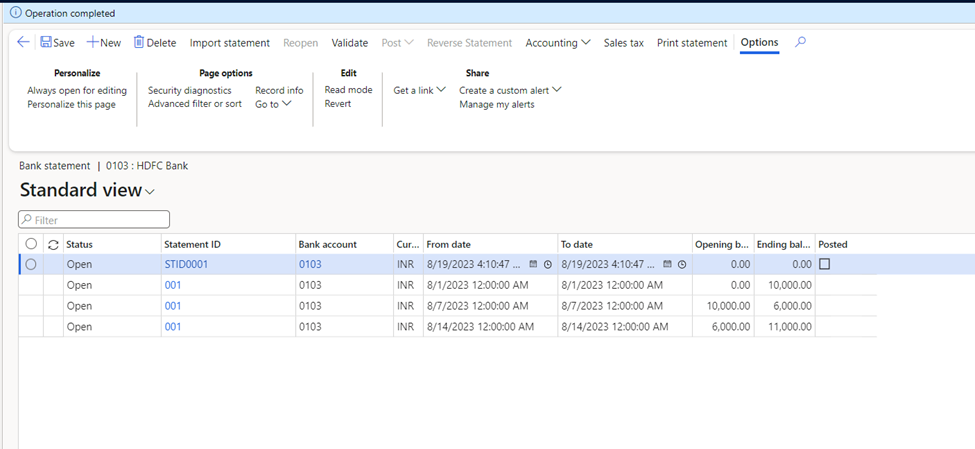
The bank statement is imported with the above transactions.
Select the transactions and click on Validate on top.
Now we proceed with the reconciliation.
Go back and click on Bank Reconciliation in the Bank Account screen.
Create a new reconciliation. Then click on Worksheet at the top.
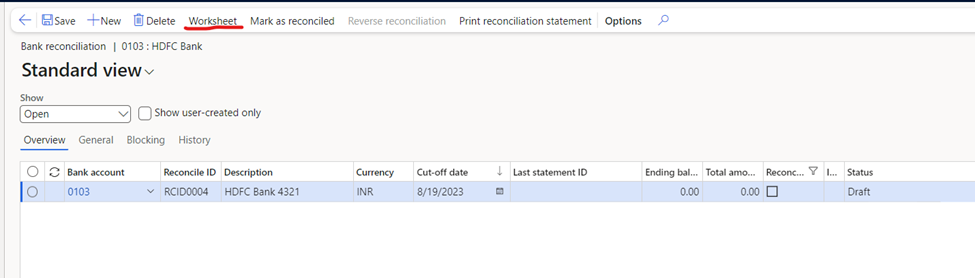
The reconciliation screen is opened.
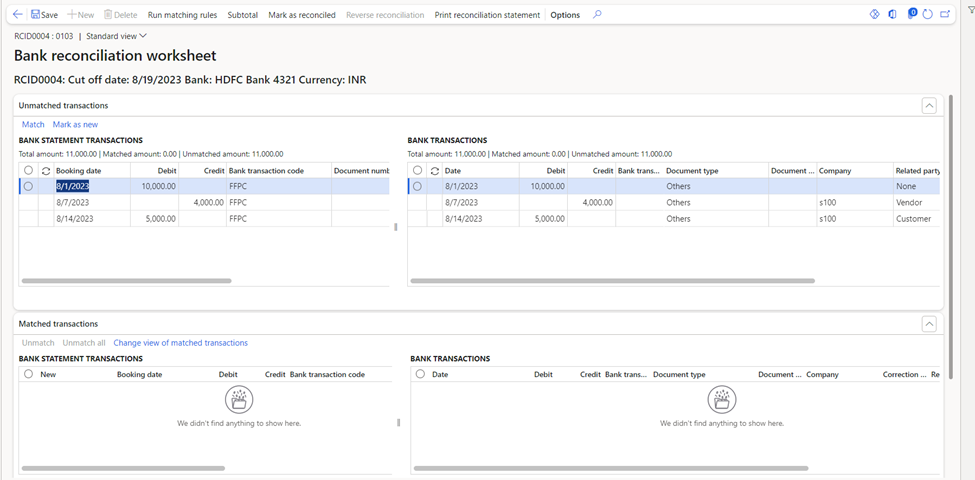
Here, the user is presented with the option to manually match any record to reconcile or let the system match the records based on a certain matching rule.
While any variation of rules can be defined, the most commonly used rules are:
- Date variations: where the dates of bank statements and system transactions vary by a certain number of days.
- Amount variations: where the bank statement amount and the system transaction amount can vary due to reasons like rounding off.
- Bank charges/interest fees/reversals: Where the bank deducts a certain amount based on charges or interests, or if the bank erroneously records a transaction and reverses it on its own end.
Based on the above, we will define a matching rule based on date and amount difference and re-import the statement.
To define a matching rule, navigate to Cash & Bank Management > Advanced Bank Reconciliation Setup > Reconciliation Matching Rules
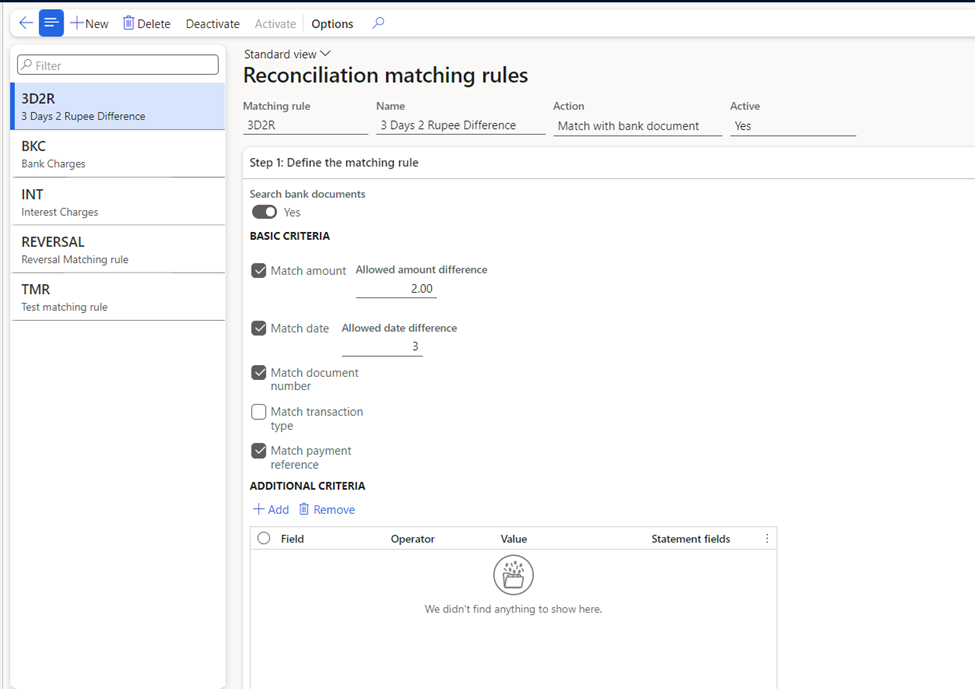
Based on the above image, the criteria for the match amount and match date is defined where a variation of 2 INR and 3 days will be allowed in reconciliation.
Once it is saved, click on Activate.
Next, navigate to Cash & Bank Management > Advanced Bank Reconciliation Setup > Reconciliation Matching Rule Sets
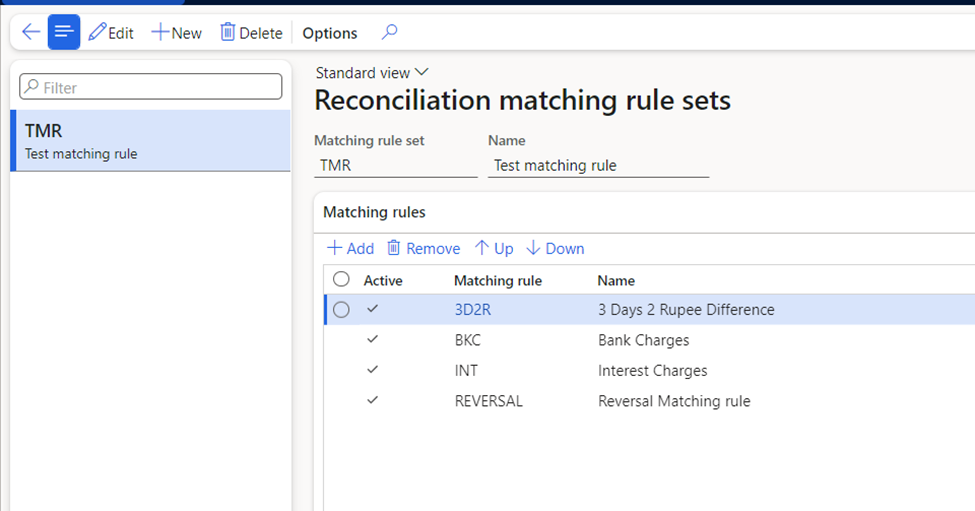
Create a new rule set and link the matching rule that was created earlier. As you may observe, we can link multiple rules here. This is useful when it is necessary to reconcile statements with a variety of rules instead of a single rule.
Next, go to Bank Account > Scroll down to Reconcilation section and link the matching rule set in the Default Matching Rule Set

Now we are ready to run the reconciliation once more with some variations of amounts and days in the bank statement.
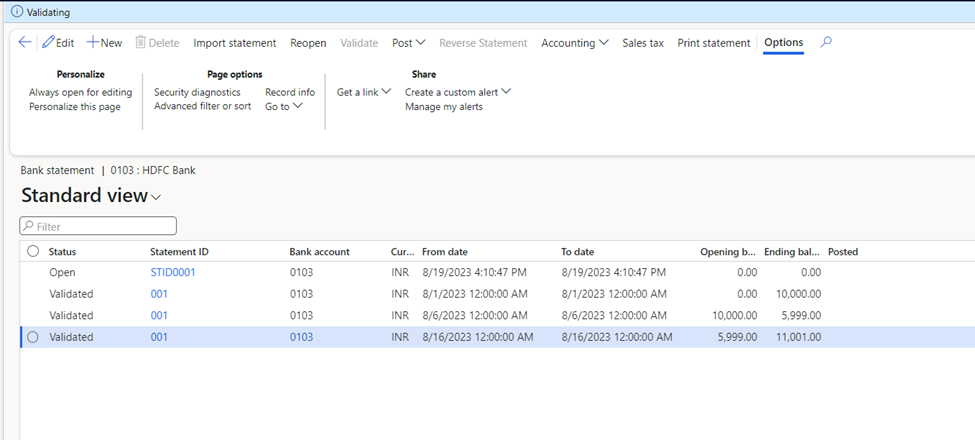
Import the statement once more and validate it.
The bank statement is imported as follows:
Now create a reconciliation worksheet.
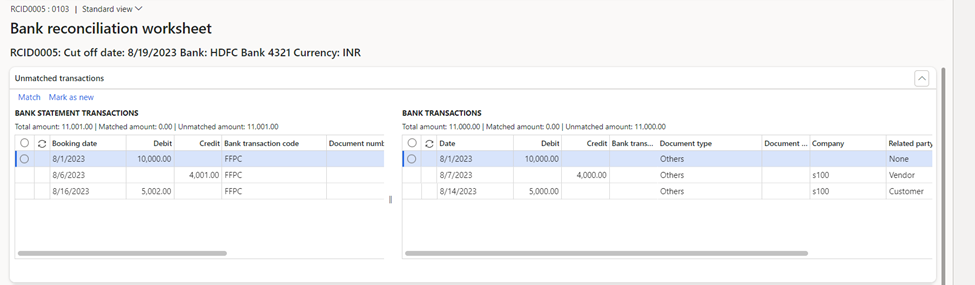
On the top, select the option ‘Run Matching Rules’.
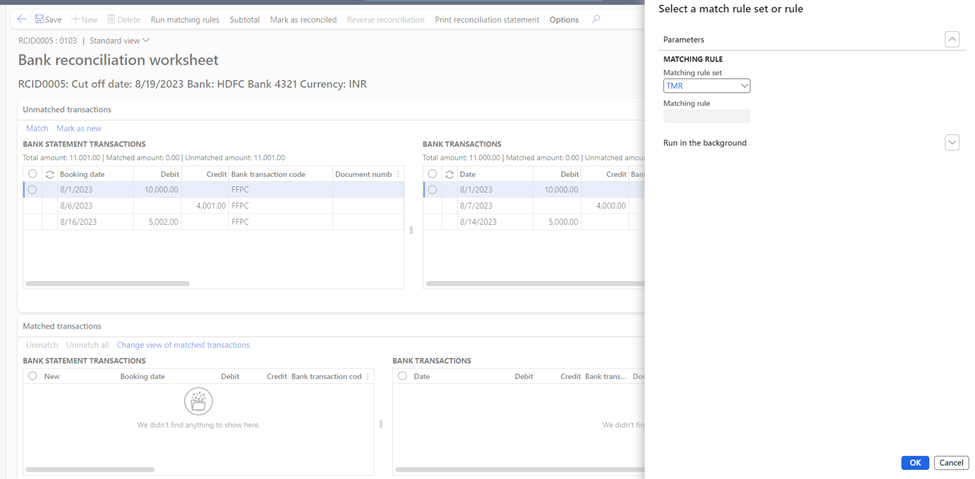
Once the matching rules run, the system will automatically match the transactions.
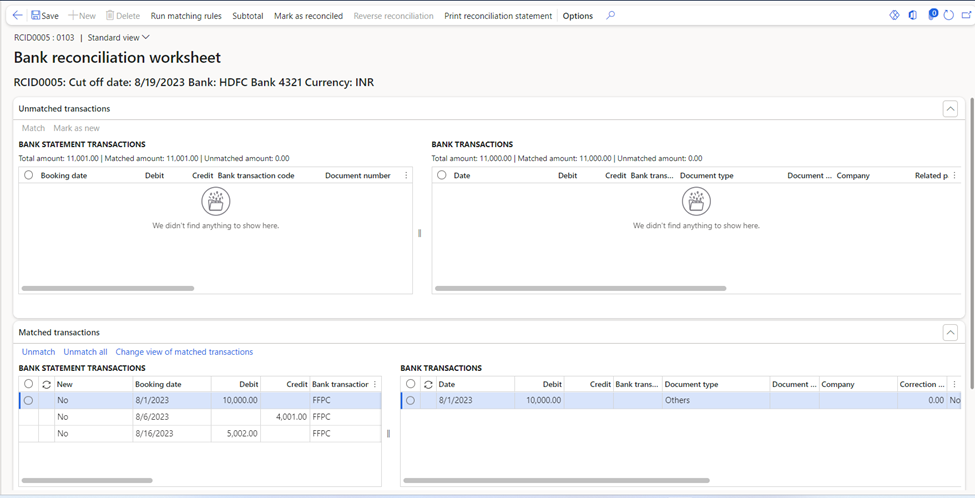
The user can now click on ‘Mark as Reconciled’ to finish the reconciliation.
While this method undoubtedly is easier to process, it can be made even simpler by letting the system create a worksheet and match all records based on the matching rules right upon the statement import itself. To do this, open the Bank Account, scroll down to the Reconciliation section, and turn on the parameter ‘Reconcile after import’.
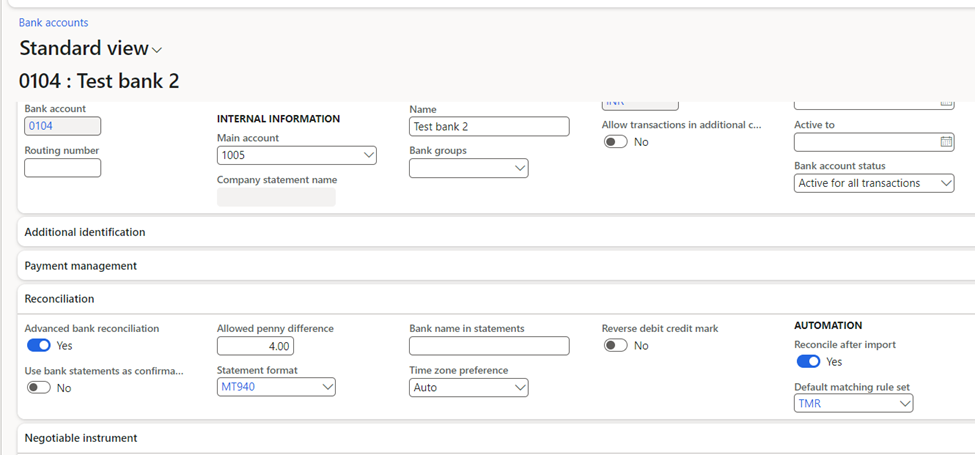
Enabling this parameter will ensure that the system will automatically reconcile any and all bank statements imported for this bank based on the matching rule defined for it.
If the user does not wish to enable this for every statement import but only on a need basis for a select few imports, then this parameter should be turned off. This parameter can be activated in the bank statement import screen:
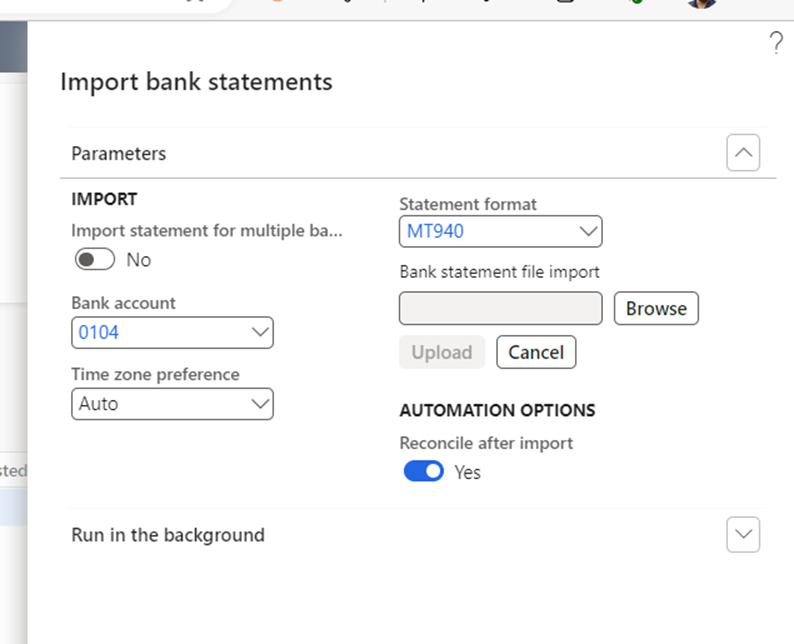
This will ensure that the system will only auto-reconcile for that particular bank statement.
This concludes the topic for Advanced Bank Reconciliation in Dynamics 365 Finance.
