Distributing GL amounts between financial dimensions and using advanced rules to link a dimension to only one particular account
In every organization, all kinds of expenses and revenues are tracked under dimensions like cost centers, departments, employees, etc. It is often a business requirement to split expenses or incomes in fixed proportions between two or more dimensions for accurate reporting. On the other hand, it may be required to assign a dimension only on one GL account, restricting it from others. D365 Finance offers a smooth, flexible and a very easy process to fulfill both kinds of requirements to achieve accurate reporting of the organization’s P&L from a dimension standpoint.
The blog assumes the reader is already aware about setting up financial dimensions and using them for regular transactions so the point of focus will be on the advanced features only.
The procedures for both requirements are as follows: –
- Splitting GL amount in fixed proportions between 2 or more dimensions: –
Let’s assume that an organization tracks all kinds of office expenses in two dimensions – department and cost center. The organization wants to split the cost in a 70:30 proportion between both. In order to do that, we will use Ledger Allocation Journals.
Path – General Ledger -> Allocations -> Ledger Allocation Rules
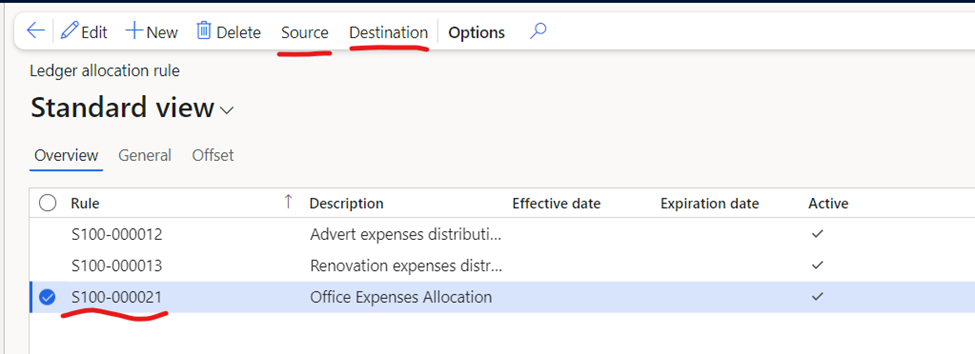
The source defines the main account that will be used to split the amount. The Destination defines the dimensions and the proportion in which the amount will be split between them.
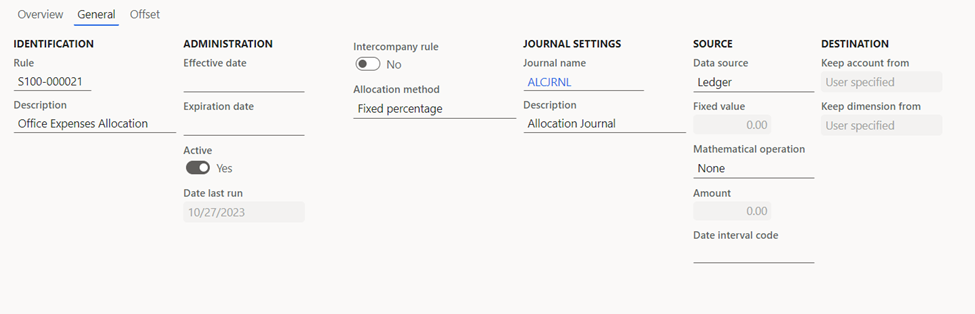
In the General tab, we define the validity date for which the rule will be active.
The allocation method defines the various methods in which the GL amount can be distributed. Most often, the splitting is in fixed percentages.
Turn the Active checkbox to activate the rule.

In the source, define the main account.
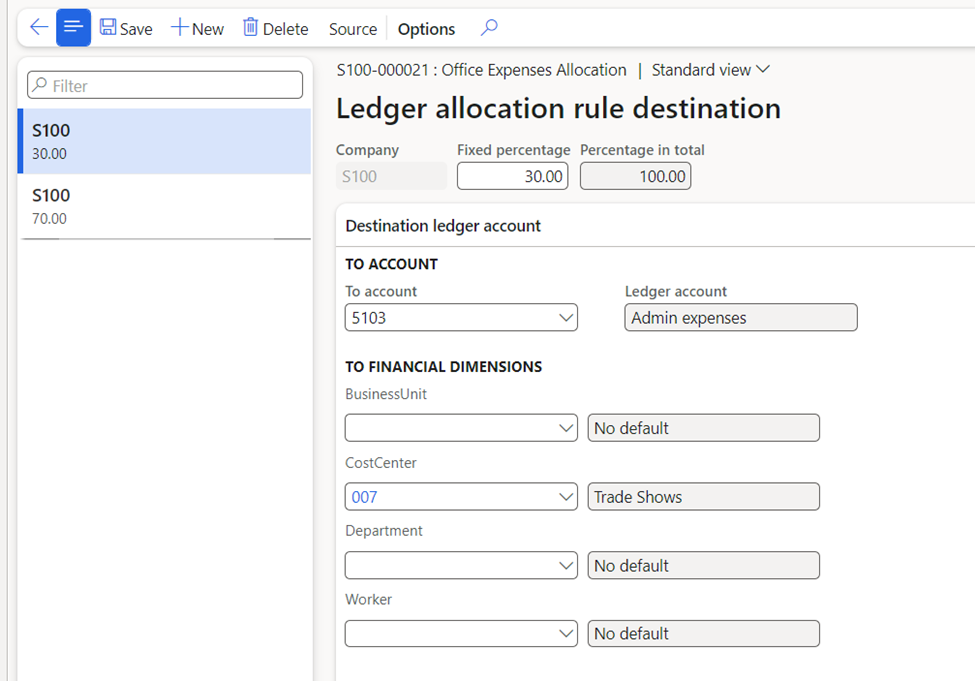
In Destination, define the percentages of distribution.
From the above image, we are using a 70:30 distribution ratio between Cost Center and Department. Here, we have defined a default dimension so that the system will know how to distribute the amount between the cost center and the department only. It will ignore any other dimension. If the default field is left blank, then the user will have to manually select the dimensions at the time of the transaction.
In the first distribution, a fixed percentage of 30% is applied to the Cost Center.
Create a new distribution again and allocate the remaining 70% to a department dimension.
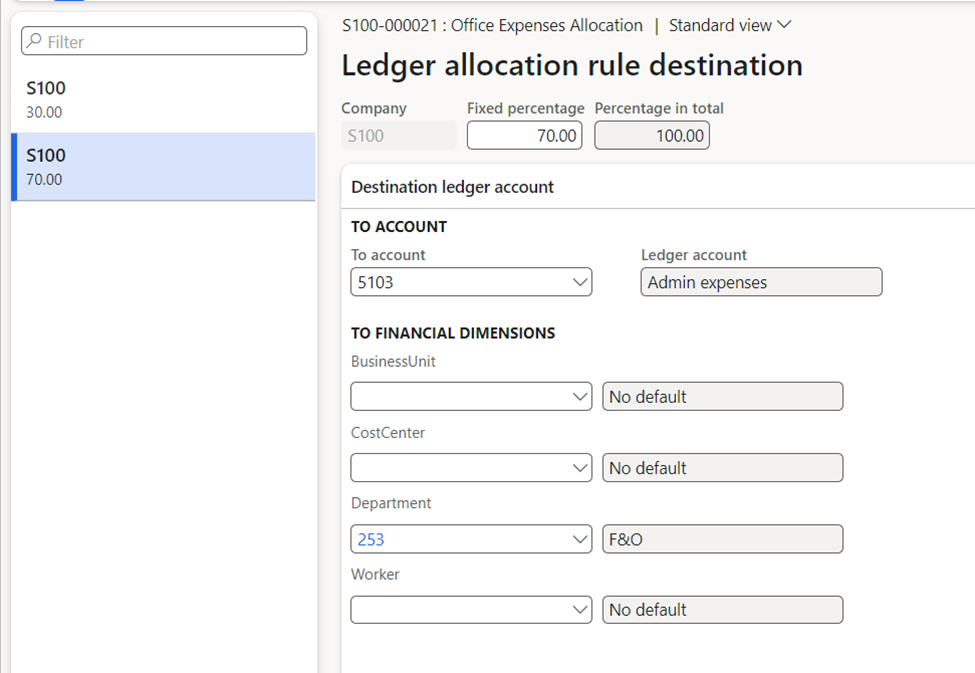
In this example, we are using only 2 dimensions, but the user may define as many distributions between multiple dimensions as required as long as the percentages add up to 100%.
Save the rule and close it.
Now, create any regular transaction with the GL account, like a general journal.
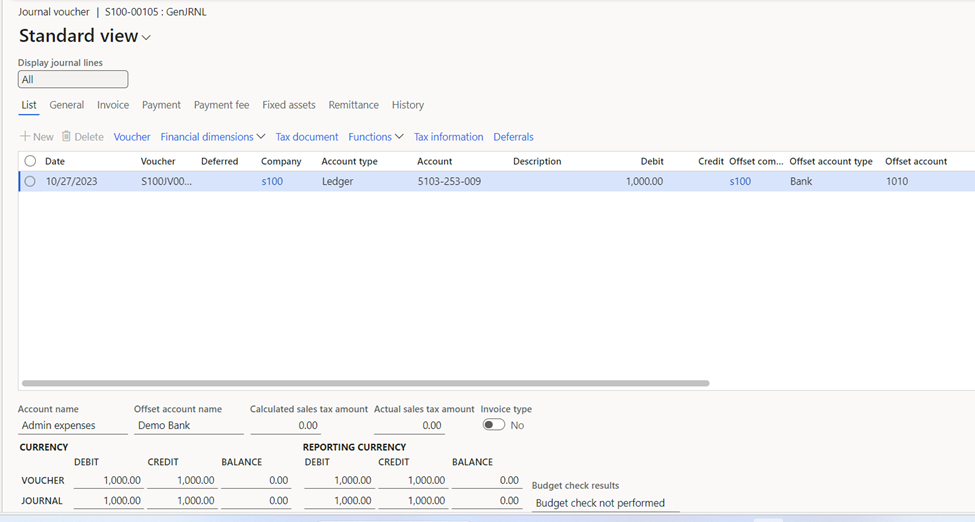
Select the dimensions for the cost center and the department as shown above and post the document.
Once posted, go to General ledger -> Ledger Allocations -> Process Allocation Request.
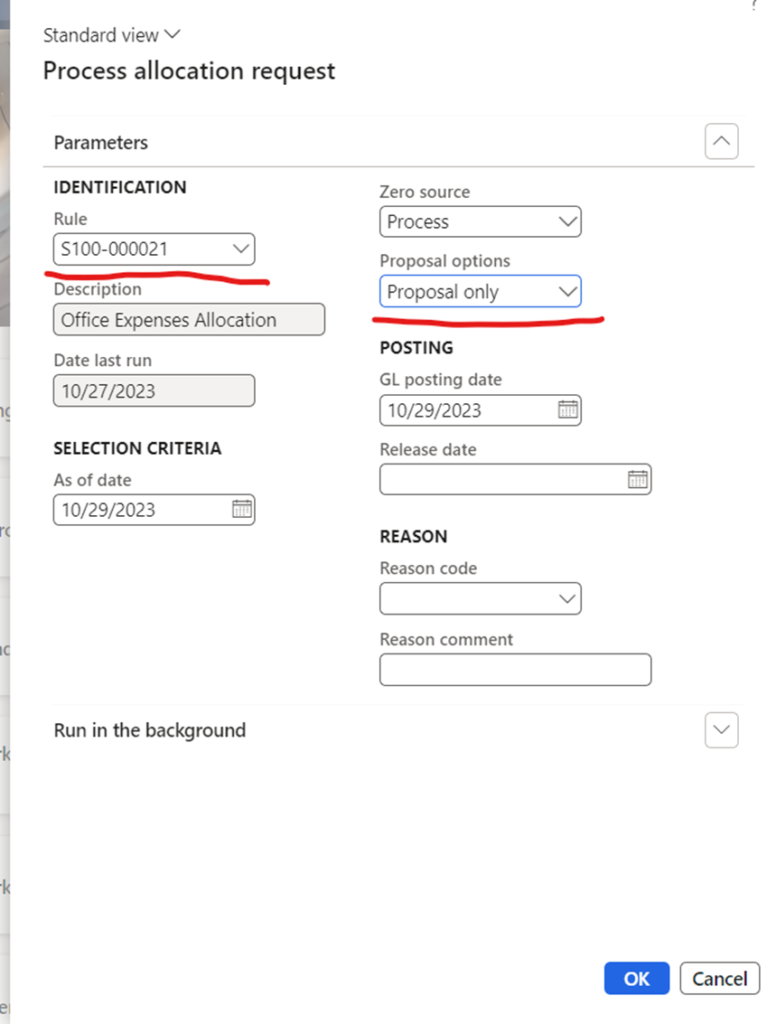
Select the allocation rule.
In the field Proposal Options, there are two options: –
- Post only
- Proposal only
The first option will directly post the entry and allocate it to the dimensions.
The second option will keep the entry unposted so that the user may verify the dimensions or make changes to them manually if required.
It is always preferable to select the second option. Upon clicking Okay, the system will create an allocation journal as shown below: –
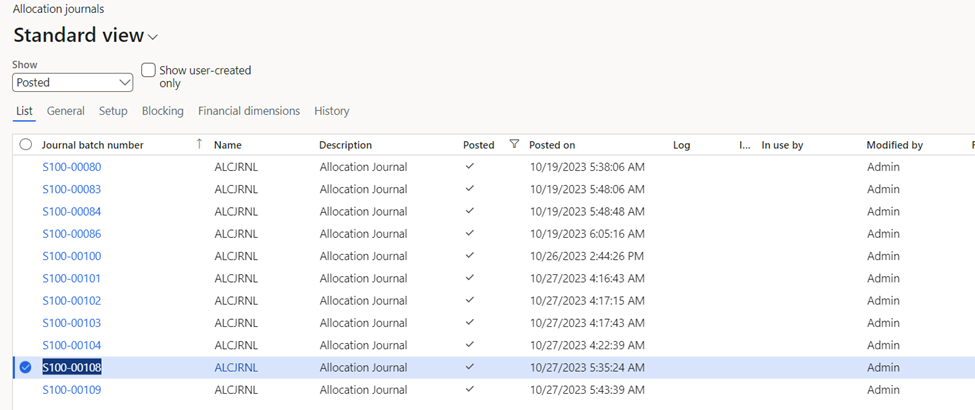
Upon clicking open the allocation journal, the accounting impact is shown as below: –
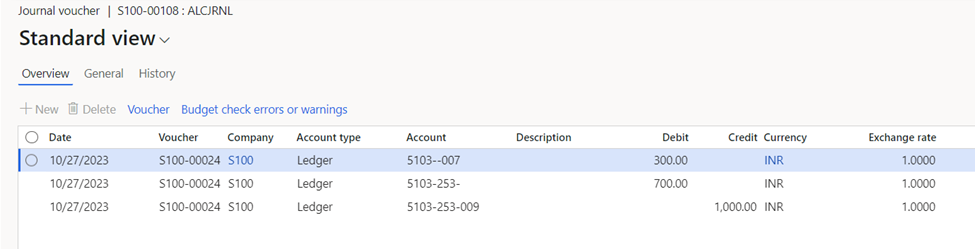
The accounting impact can be summarized below as follows: –
| GL Account/Dimension | Description | Dr | Cr |
| 5103-007 | Office Expense – Cost Center | 700 | |
| 5103-257 | Office Expense – Department | 300 | |
| 5103 | Office Expenses | 1000 |
From the above ledger impact, the GL balance stays the same, but the amount gets distributed between the 2 dimensions in the exact proportion.
II. Using advanced rules to assign an additional dimension to a particular GL account only.
To understand this requirement, let’s take the example of an organization that has a mandatory Department dimension assigned on all expense accounts. But there may be an exceptional case where one expense GL account requires one more dimension apart from Department. In this case, if we add a dimension in the account structure, then that dimension will be needlessly assigned to all GL accounts. We must ensure that it should be applicable to the one account only. For this, we use the concept of Advanced Rules.
With the help of Advanced Rules, we can configure the Account Structures to accommodate any additional dimension for one particular GL account only.
The steps to configure it are as follows: –
Go to: General ledger -> Chart of Accounts -> Structures -> Advanced Rule Structures
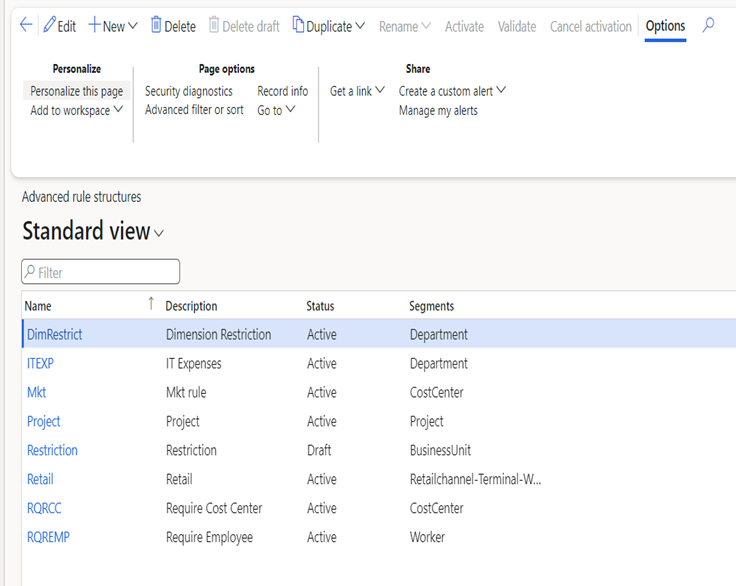
The screen displays all the Advanced Rule Structures present. Create a new one.
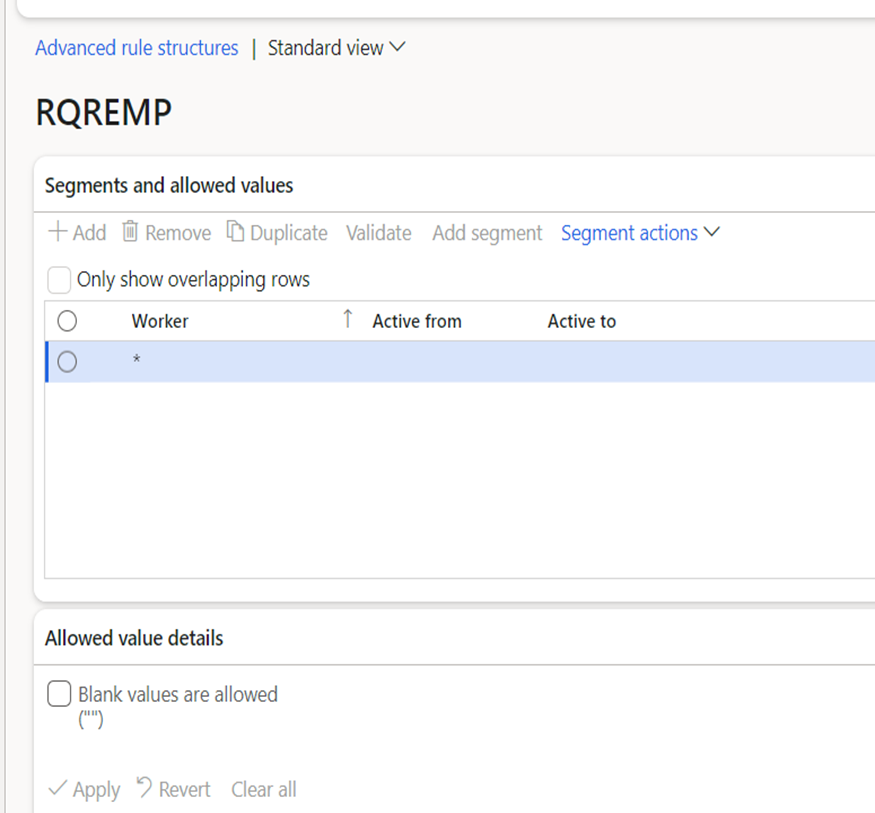
Select the dimension that is required. In this example, we have selected the dimension of ‘Worker’ and kept it as mandatory.
Activate the Advanced Rule Structure and close it.
Open Account Structures.
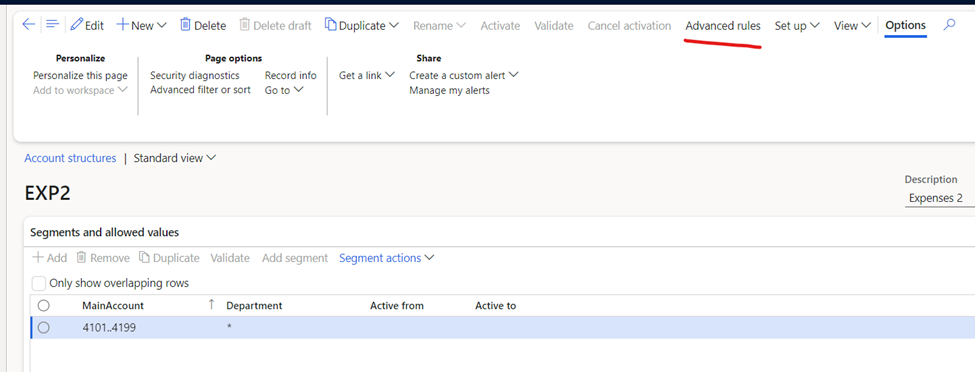
From the above image, all the GL accounts here will have a mandatory Department dimension. But let’s assume that one GL account – 4101 will require the dimension for Worker along with Department. For that, open Advanced Rules on top.
Create a new rule.
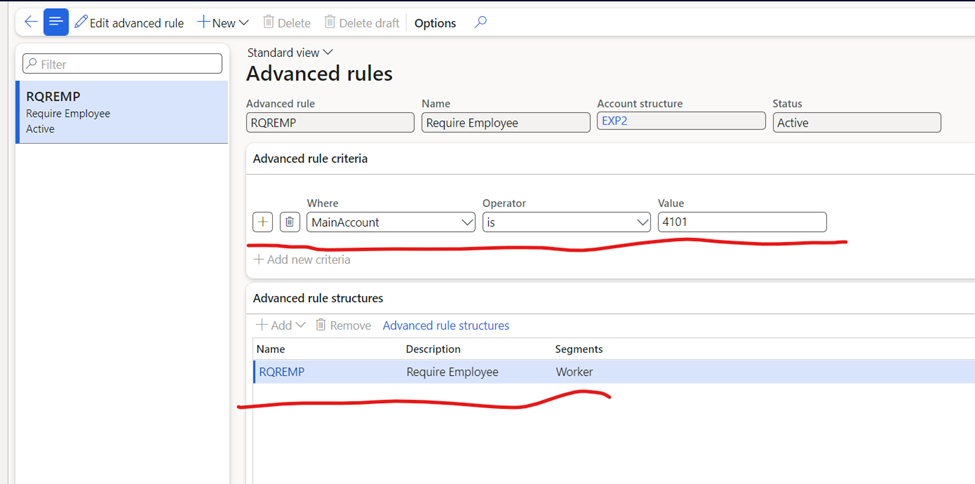
Select the Main Account where you want to apply the dimension as shown above.
Then in the below section, add the Advanced Rule Structure that was created earlier.
The rule works like this: – If Main Account = 4101, then apply Advanced Rule Structure where dimension = Employee.
Therefore, in any transaction with the account 4101, it will assign the Worker dimension on it. Let’s take an example where a GL account other than 4101 is used here.
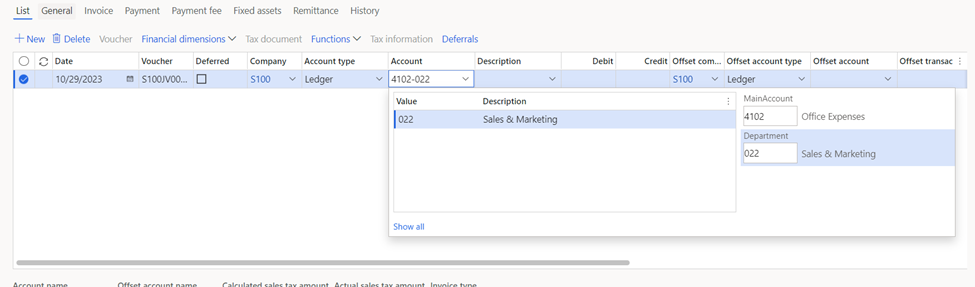
In this transaction, for the account 4102, the system is prompting us to select the Department dimension only, as required.
Now let’s select the account 4101.
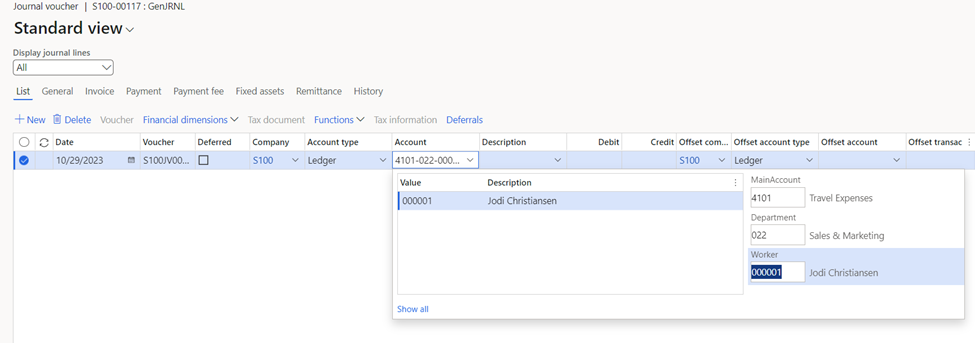
As observed from the above image, the system is now prompting us to select the Worker dimension also.
Thus, this ensures that only some GL accounts may be configured to enter an additional dimension.
We can also configure the rules such that there are combinations of Main Accounts and Dimensions to add any additional dimension. For example, if the user selects a combination of Main Account and a Dimension, then the system can prompt the user to fill in another dimension as well.
