How to set up POS Hybrid App on Android
Microsoft Dynamics 365 for finance and operations is an ERP solution that Microsoft has created. It is useful for both medium and large enterprises that want to excel and grow. ERP is an acronym for Enterprise Resource Planning. It is true that there are so many ERP solutions in the market. But, Microsoft Dynamics is one of the best ERP solutions that you can find in the market.
The unique features that they offer through this solution or software are numerous. By using this particular software you will make your staff become a lot more effective and efficient. Learning this software is not a difficult task. There are so many resources available online that you can check if you want to excel in it or if you have any doubts.
In this blog, we’ll see how to set up the Hybrid App on Android using Xamarin.
Hybrid App is the app that combines the elements of both native and web apps. The native app builds for a specific platform. Web applications are generalized for multiple platforms and not installed locally but made available over the Internet through a browser.
Xamarin is a cross-platform implementation of the Common Language Infrastructure (CLI) and Common Language Specifications
-
- The element that used to develop an application for android
- C# language
- Mono .NET Framework
- Compiler
Following are the steps to follow in order to configure set up the POS Hybrid App
- Install Xamarin
Xamarin provides a common development experience for creating cross-platform mobile applications. Xamarin facilitates the development of Android and iOS applications by providing the Xamarin.iOS and Mono. Android libraries. These libraries are built on top of the Mono .NET framework and bridge the gap between the application and the platform-specific APIs. Open the visual studio installer you will see the below screen.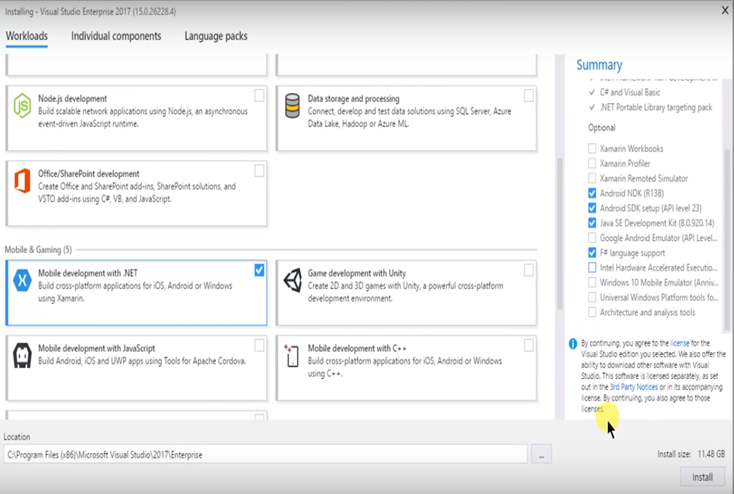 Make sure the below component are selected
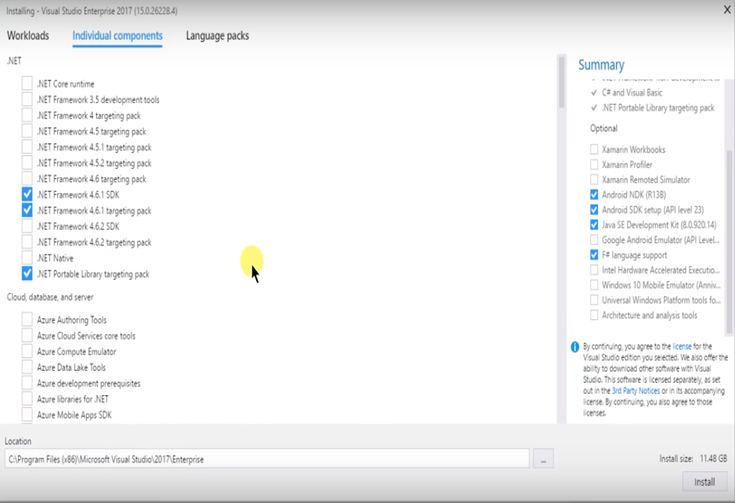
2. Xamarin Configuration
Xamarin.Android uses the Java Development Kit (JDK) and the Android SDK to build apps. During installation, the Visual Studio installer places these tools in their default locations and configures the development environment with the appropriate path configuration. You can view and change these locations by clicking Tools > Options > Xamarin > Android Settings.
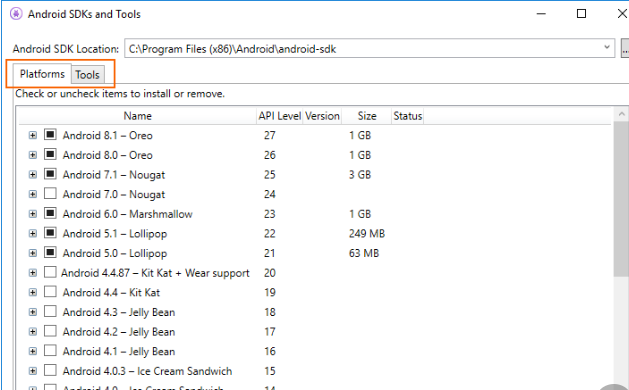
3. Android SDK Manager
Visual studio include SDK manager that lets you download android SDK
Uncheck everything. Then check only the following:
Android SDK Tools
Android SDK Platform-tools
Android SDK Build-tools (I don’t think this is necessary)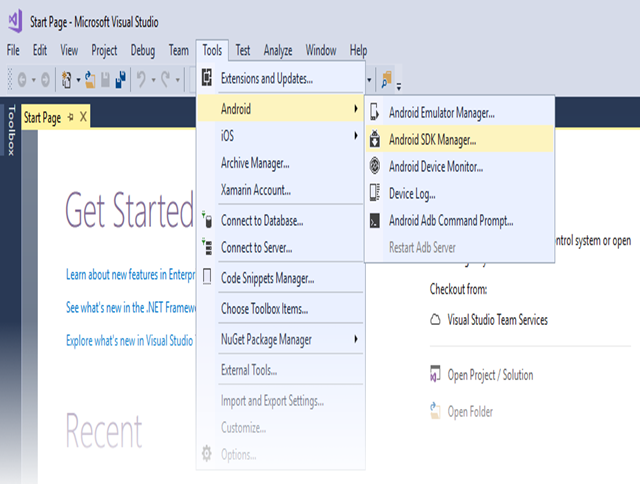
4. Select the Android SDK Manager
5. You can always debug using actual Android device instead of using Emulator for debugging.
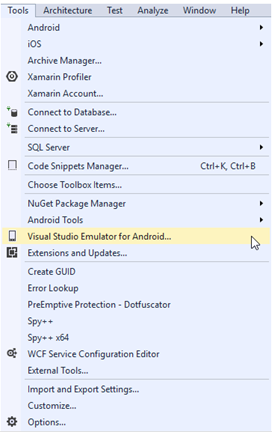
If you need to turn ON Hyper-V in your machine, you will need to go with Visual Studio Android Emulator. To open/configure Visual Studio Android Emulator, go to Tools>Visual Studio Emulator for Android
You will be able to launch or configure the emulator in the new dialog popup.
To make Android SDK Emulator run without lagging, we will need to install Intel HAXM. However, Intel HAXM cannot work together with Hyper-V. So, we need to turn OFF Hyper-V in the machine
Go to control panel turn windows feature on and off and uncheck hyper v
Make sure Virtualization Technology settings are Enable in BIOS settings.
Once we install HAXM we can proceed to an android emulator which will open the Android virtual device manager dialog box.
The Android Emulator can be run in a variety of configurations to simulate different devices. Each configuration is called a virtual device. When you deploy and test your app on the emulator, you select a pre-configured or custom virtual device that simulates a physical Android device.
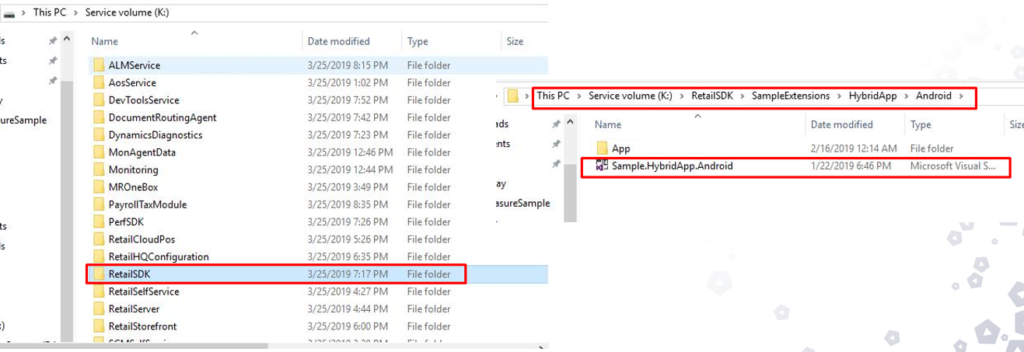
 6. SDK Configuration Setup
In the Retail SDK folder, open SampleExtensions\HybridApp\Android\solution. Build and deploy using the emulator and verify that everything appears as it should.
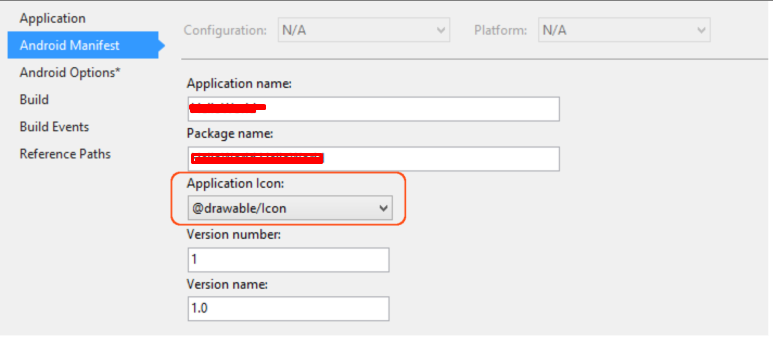
 7. Export the android app
- Specify the Application Icon
- Version the Application – An integer value (used internally by Android and the application) that represents the version of the application. Most applications start out with this value set to 1, and then it is incremented with each build.
- Version Name – A string that is used only for communicating information to the user about the version of the application these values can be set in the Android Manifest section of project Properties, as shown in the following screenshot
 8. Shrink the APK
Xamarin.Android APKs can be made smaller through a combination of the Xamarin. Android linker, which removes unnecessary managed code, and the ProGuard tool from the Android SDK, which removes unused Java bytecode.
 9. Archive for Publishing
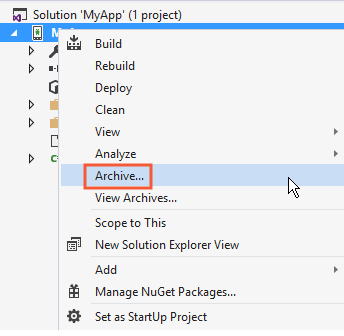
To begin the publishing process, right-click the project in Solution Explorer and select the Archive.
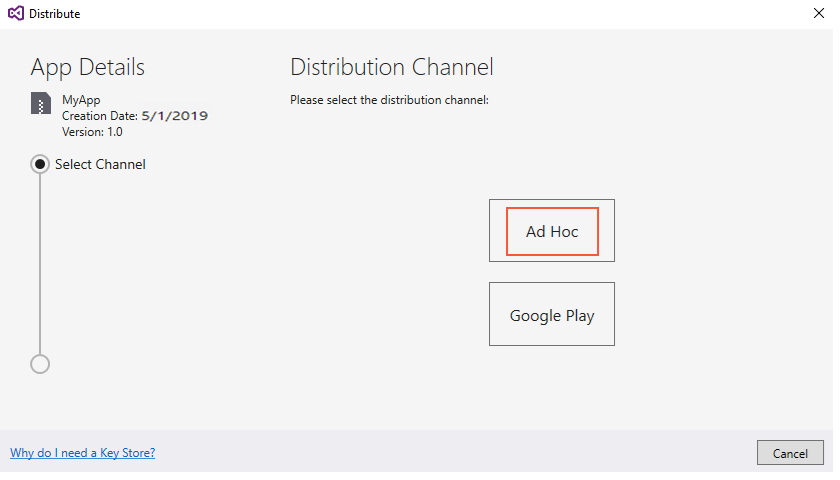
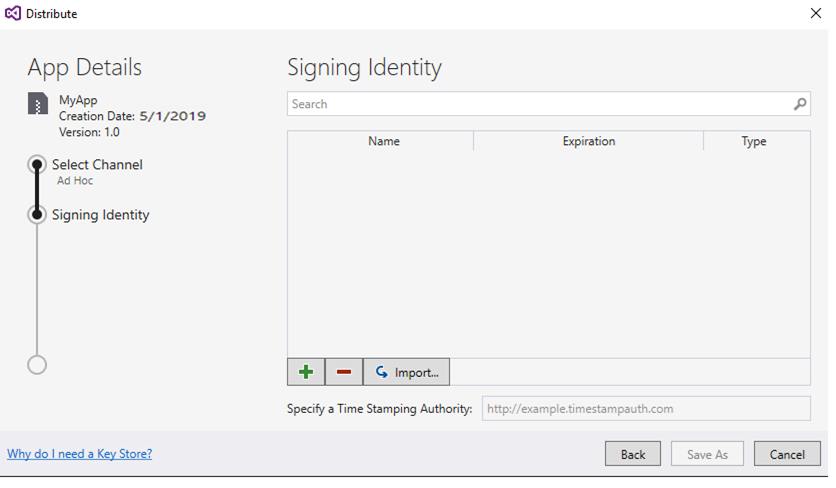
When we select Ad hoc visual studio will open the signing dialog box app required to sign with a signing key or if we have already signed we can use import key option. After clicking on the new sign in create key store dialog box shown we can fill the required information it will create a key store and will be shown undersigning section as we are creating ad hoc publish we click on save it will create achieve file, and it will ask for password if not set earlier.
10. The final step is to distribute the app.
There are different way to publish the app google pay, web or independent
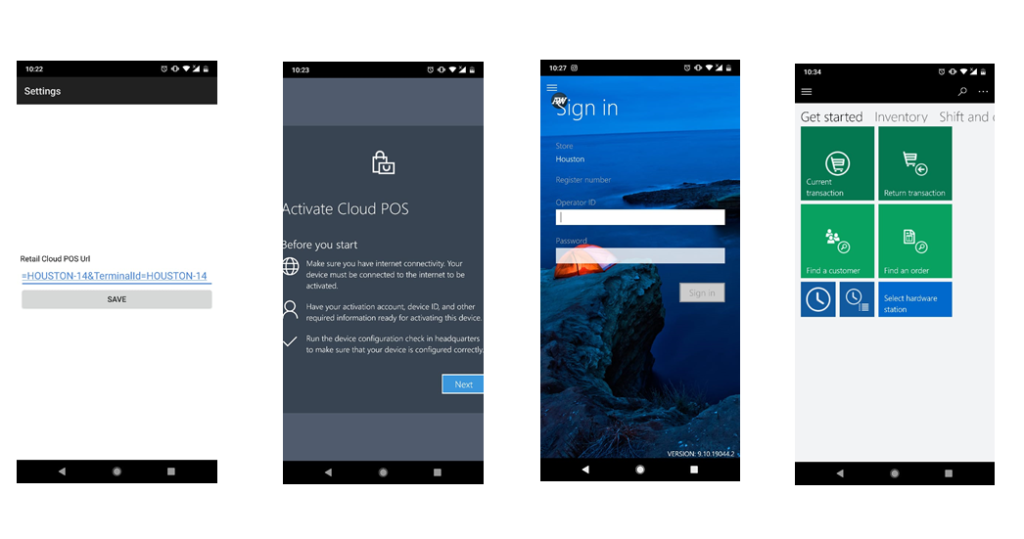
11. Sign In with the credential device will get register and we can see the POS Retail UI