SSO configuration for CRM Portal
Prerequisite
- Internet facing Domain controller (if it’s an On-Prem DC)
- Setup the ADFS Role in our Domain Controller [Which will act as a IdP]
- Dynamic CRM online 2016 and CRM Portal
Setting Up ADFS
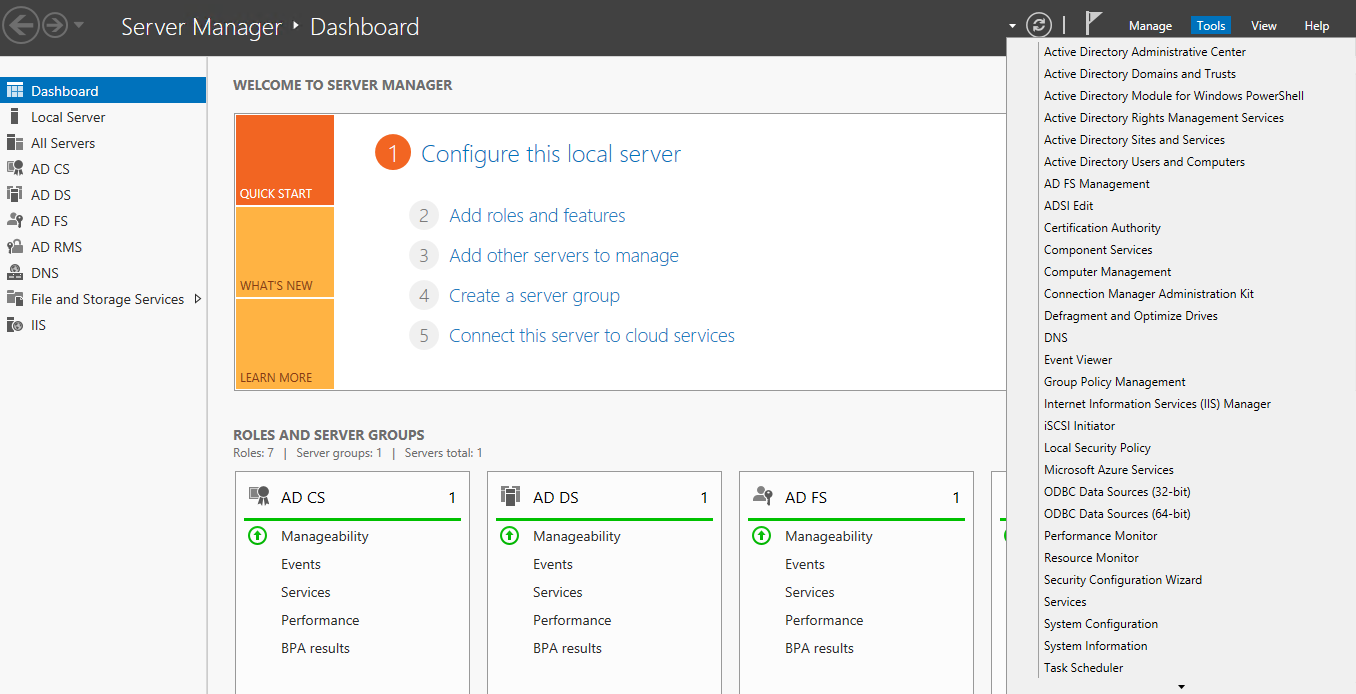
Open the ADFS Management in the server manager [Tool > AD FS Management]
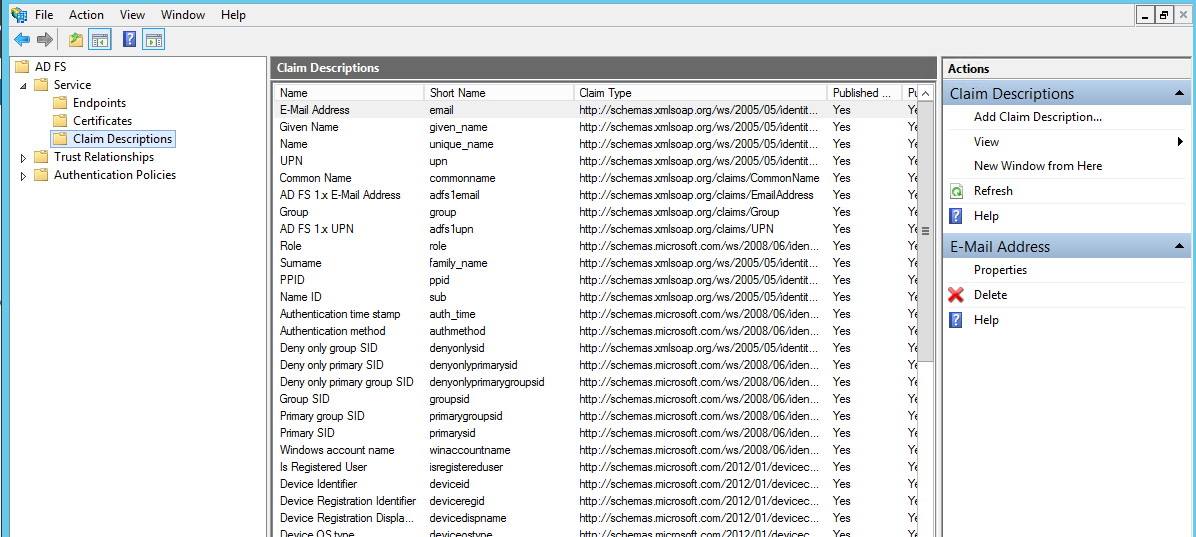
In AD FS Management tool, select Service > Claim Descriptions.
SSO configuration for CRM Portal
Step 1: Add Claim Description
Click on Add Claim Description
-
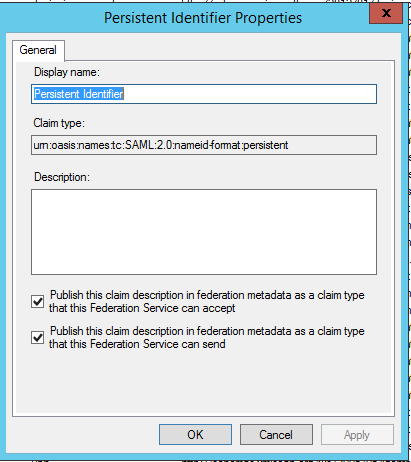
- Add Display name as “Persistent Identifier”
- Add Claim Identifier as “urn:oasis:names:tc:SAML:2.0:nameid-format:persistent”
- Check the “Publish this claim description in federation metadata as a claim type that this Federation Service can accept”
- Check then “Publish this claim description in federation metadata as a claim type that this Federation Service can send”
- Click on Save.
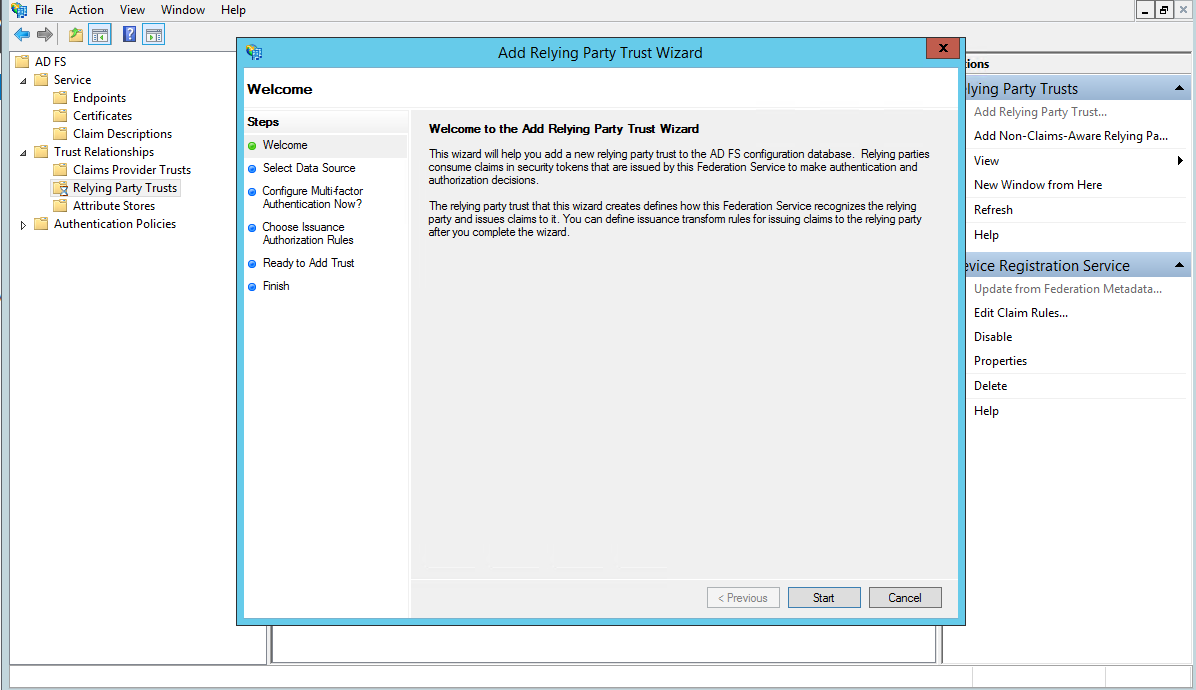
Step 2: Add Relying Party trust
Go to Trust Relationships >Relying Party Trust
-
- Click on Add Relying Party Trust
-
- Click on Start
-
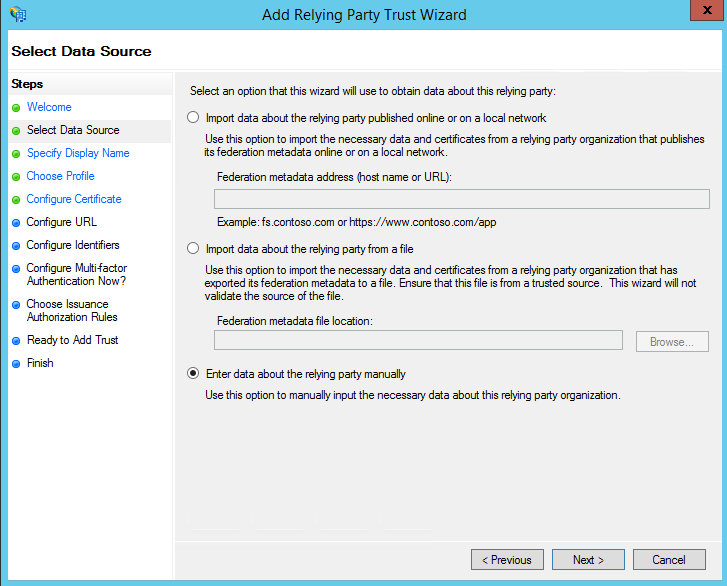
- Select “Enter data about the relying party manually” and then Click Next
- Enter “Display Name” then Click Next
- Select “AD FS Profile” then Click Next
- In configure Setup Leave the setting as it is and just click Next.
- In Configure URL Select “Enable support for the SAML 2.0 WebSSO protocol” and add URL https://YourPrortalURL/Signin-saml2 [Append the “Signin-saml2” to your portal URL it’s an CRM portal internal URL which will internally manage the SAML Authorization].
- In Configure Multifactor Authentication Just click Next as here we are not focused on multifactor authentication.
- In Choose Issuance Authorization Rules, select “Permit all users to access this relying party”, click Next
- In Ready to Add Trust, Click Next.
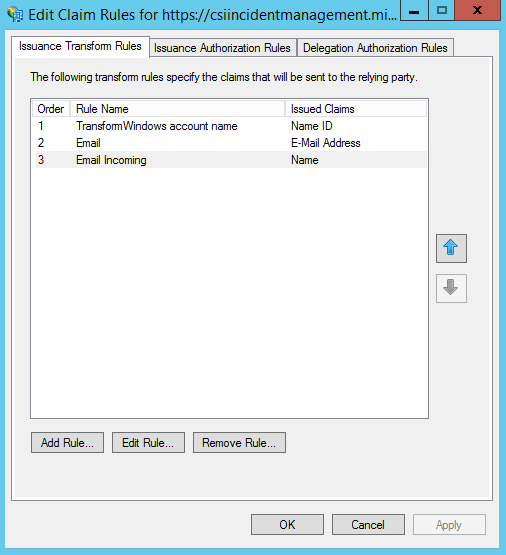
- Finally Click Close. When we close it open another dialog for setup the claim rule.
- Click On “Add Rule”
-
- In claim rule template select “Transform an incoming Claim”
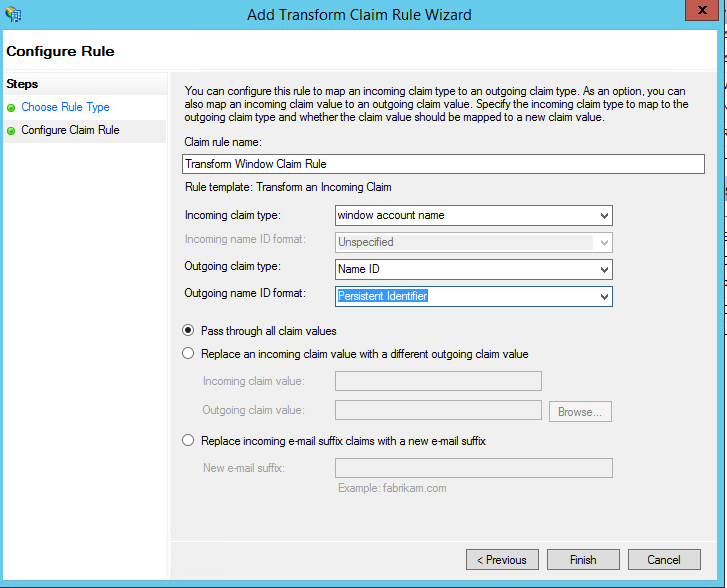
- Select Incoming Claim Type as “Window Account Name”
- Select Outgoing Claim Type as “Name ID”
- Select Outgoing Name ID format “Persistent Identifier” [ created in 1st step]
- Select “Pass through all Claim Values”
- Then click on Finish.
Setting in CRM Portal (Site Setting)
Login to CRM Using admin OR Customizer role, then go to Portal Site setting as Shown below,

In site setting add below 4 records to enable SSO using AD FS, before that make sure Authentication/Registration/ExternalLoginEnabled is set to “True”.
- Add New Site setting as “Authentication/SAML2/ADFS/MetadataAddress” where value of this setting will be https://adfs_domain/FederationMetadata/2007-06/FederationMetadata.xml Just append the “FederationMetadata/2007-06/FederationMetadata.xml” to your AD FS domain name also make sure your AD FS has “Https”
- “Authentication/SAML2/ADFS/AuthenticationType” where value of this setting will be https://adfs_domain/adfs/services/trust Just append the “adfs/services/trust” to your AD FS domain name
- “Authentication/SAML2/ADFS/ServiceProviderRealm” where the value will be your portal URL.
- “Authentication/SAML2/ADFS/AssertionConsumerServiceUrl” where value will be “https://portalURL/signin-saml2”
After this setting just restart you CRM Portal, then you can use SSO in Your Portal.
