Configuring Azure AD B2C: Sign up and sign in for consumers in your applications on Azure
Azure Active Directory B2C is a cloud identity management solution for your consumer-facing web and mobile applications. It is a highly available global service that scales to hundreds of millions of consumer’s identities. Built on an enterprise-grade secure platform, Azure Active Directory B2C keeps your applications, your business, and your consumers protected.
Azure Active Directory B2C offers developers a better way to integrate consumer identity management into their applications with the help of a secure, standards-based platform and a rich set of extensible policies. When you use Azure Active Directory B2C, your consumers can sign up for your applications by using their existing social accounts (Facebook, Google, Amazon, LinkedIn) or by creating new credentials with username and password and called as “local accounts.”
Get started
To build an application that accepts consumer sign up and sign in, you’ll first need to register the application with an Azure Active Directory B2C tenant.
Step 1:
Sign into Azure subscription and get access to Azure AD B2C.
Step 2:
Create an Azure AD B2C tenant
Use the following steps to create a new Azure AD B2C tenant. Currently B2C features can’t be turned on in your existing tenants.
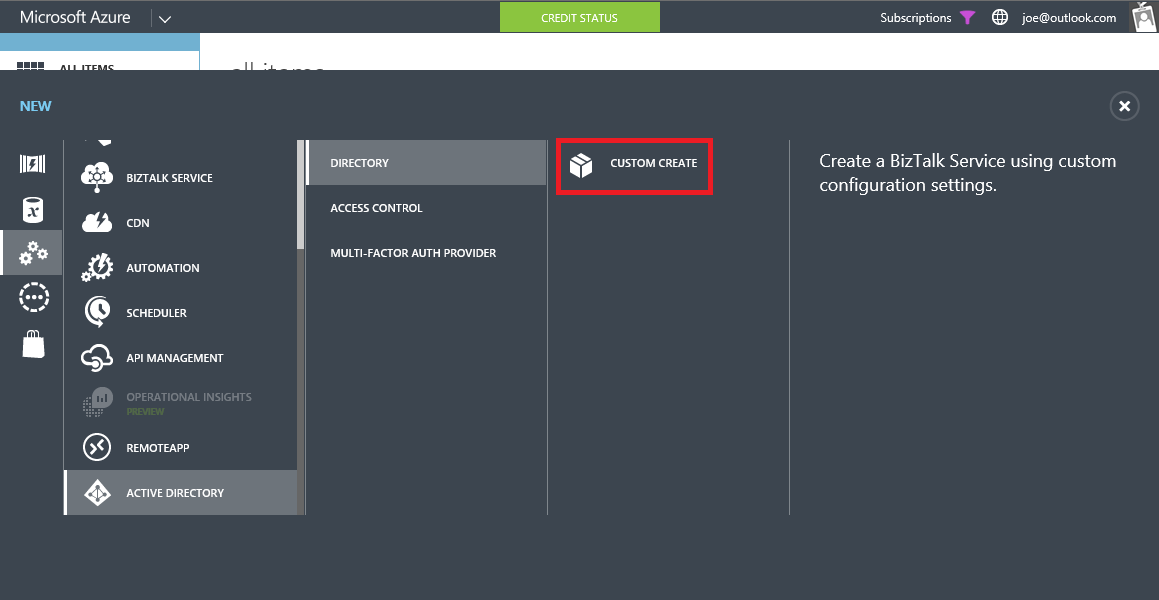
- Sign in to theAzure portal as the Administrator.
- Click New > App Services > Active Directory > Directory > Custom Create.
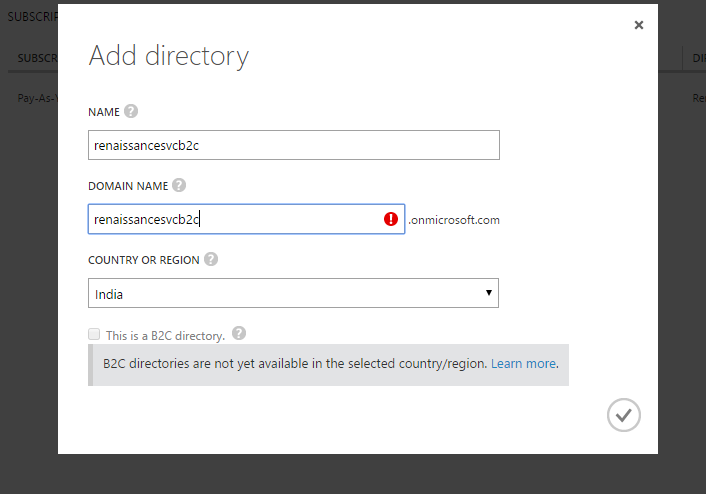
- Choose the Name, Domain Name and Country or Region for your tenant.
- B2C directories are not yet available in the selected country/region so select region or country B2C is available.
- Check the option that says This is a B2C directory.
- Complete.
- Your tenant is now created and will appear in the Active Directory extension. You are also made a Global Administrator of the tenant. You can add other Global Administrators as required.
Step 3:
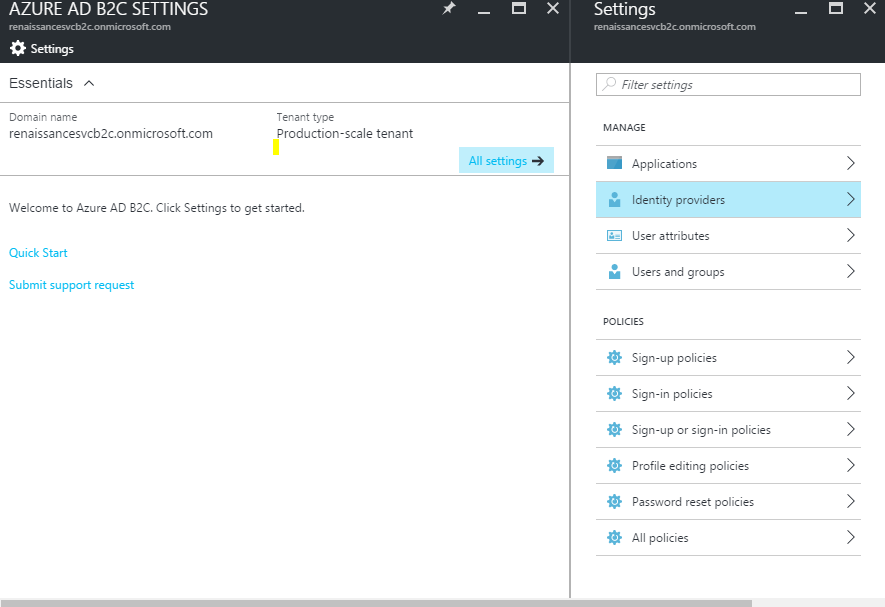
Navigate to the B2C features blade on the Azure portal
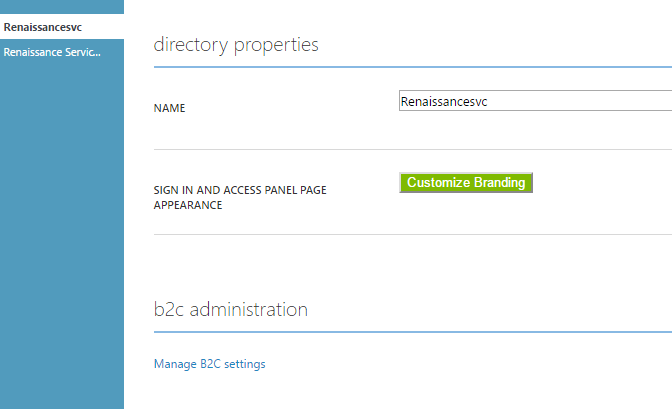
- Navigate to the Active Directory extension on the navigation bar on the left side.
- Find your tenant under theDirectory tab and click it.
- Click theConfigure tab.
- Click theManage B2C settings link in the B2C administration section.
- The Azure portal with the B2C features blade showing will open in a new browser tab or window.
Note: It can take up to 2-3 minutes for your tenant to be accessible on the Azure portal. Retrying these steps after some time will fix this.
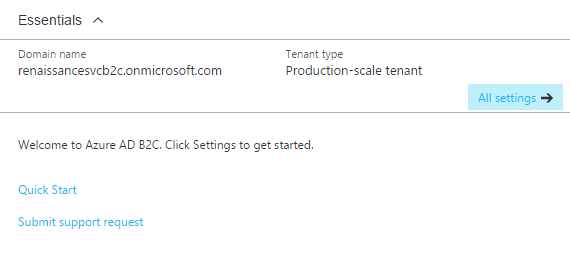
Easy access to the B2C features blade on the Azure portal
Pin this blade to your Starboard for easy access.
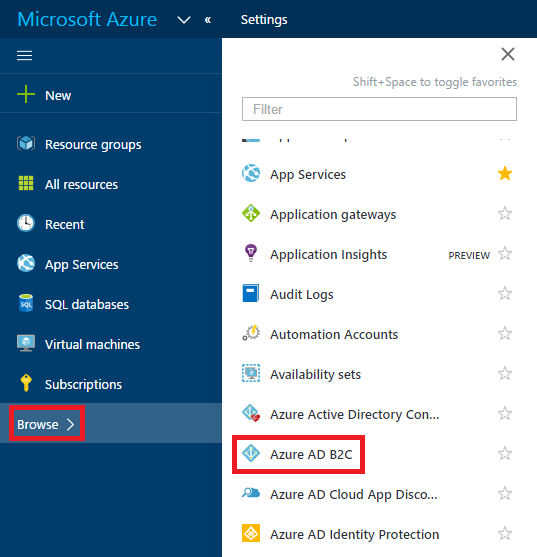
- Sign into the Azure portal as the Global Administrator of your B2C tenant. If you are already signed into a different tenant, switch tenants (on the top-right corner).
- Click Browse on the left-hand navigation.
- Click Azure AD B2C to access the B2C features blade.
Azure AD B2C to access the B2C features blade –
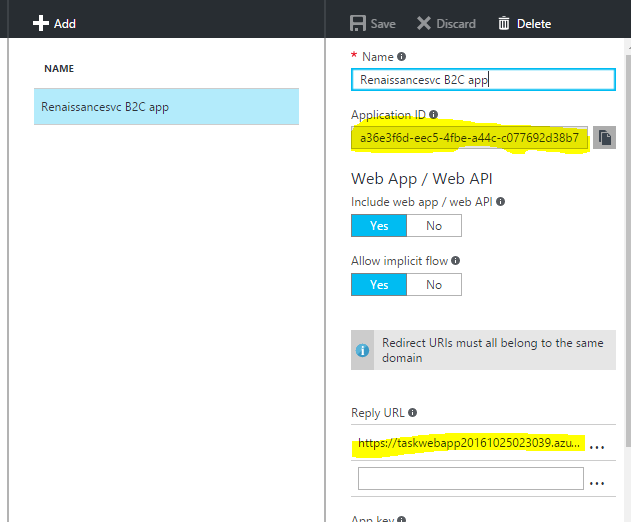
How to add application in Azure AD B2C
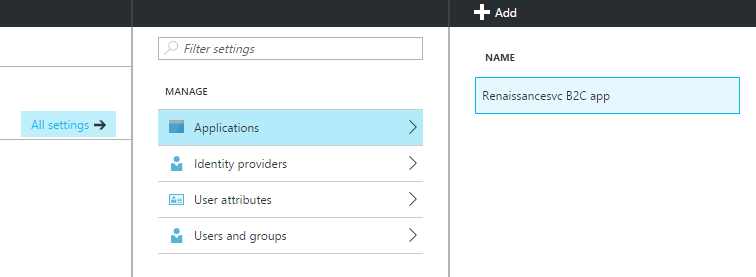
After adding application, you need to share application ID with developing team for further coding to redirect to sign up and sign in page.
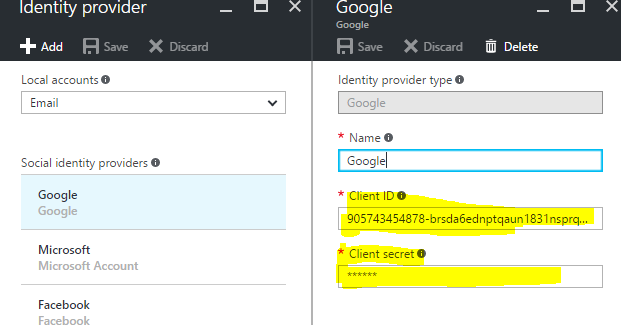
This is ‘renaissancesvcb2c.onmicrosoft.com’ your tenant ID and ‘https://www.contoso.com’URL will be required for configuring with Identity providers to sign up and sign in.

After configuring your tenant ID and URL with Identity providers it will provide Client and secret ID.
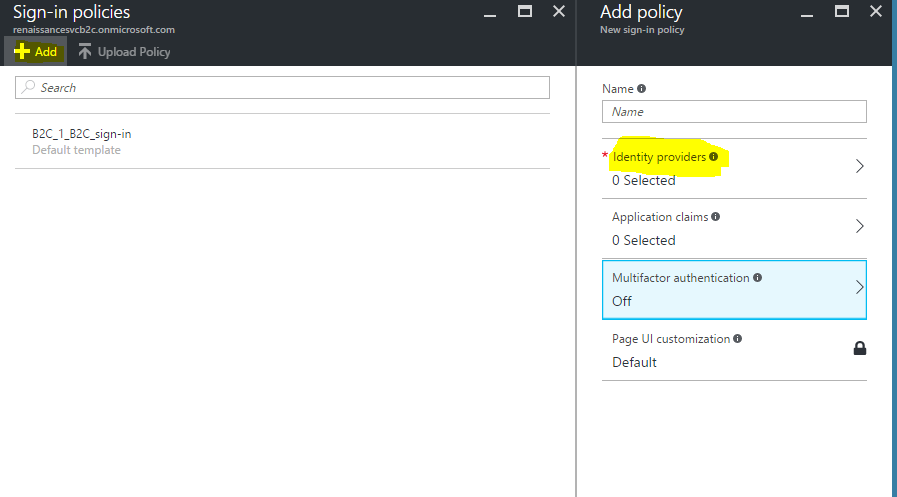
Add Identity Provider Use that ID and Key in Azure AD and try to Sign up and Sign in.
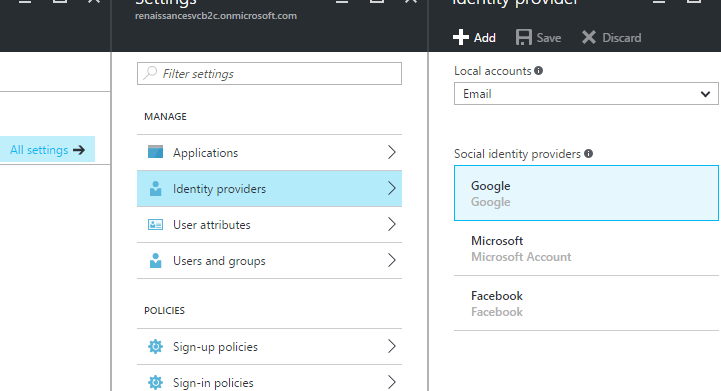
After Adding Identity providers.
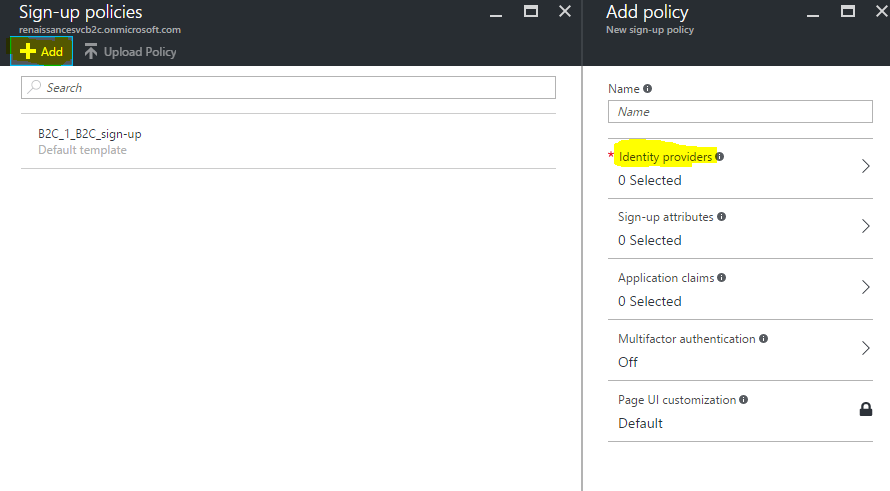
Next step –
Add sign up polices as per your requirement.
Adding sign in policies is easier then sign up policies.