How to create a SharePoint site and enable Server-Based SharePoint Integration for Document Management System in D365 CRM
What is a SharePoint site?
Sharepoint site is an application which is provided by Microsoft which can be used to store information and content. This may include documents, images videos, tasks, and so many things.
For more details please follow the link
Steps to create a site and integrate your SharePoint with D365 CRM
Step 1: Log in to Office 365 login and open SharePoint.
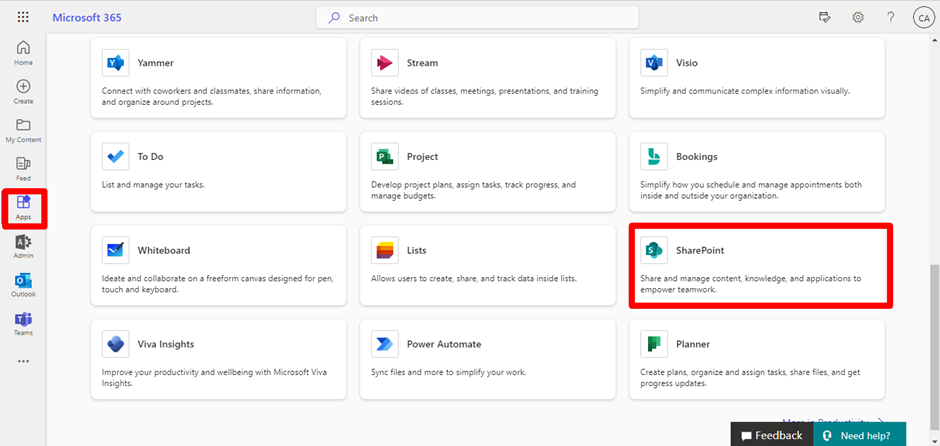
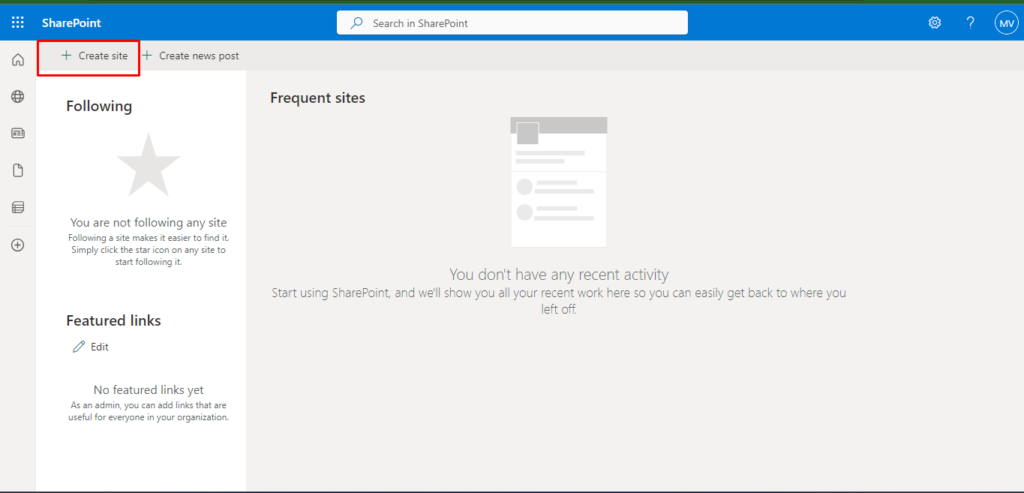
Step 2: Once you click on Sharepoint, go onto the Home icon and click on +Create site.
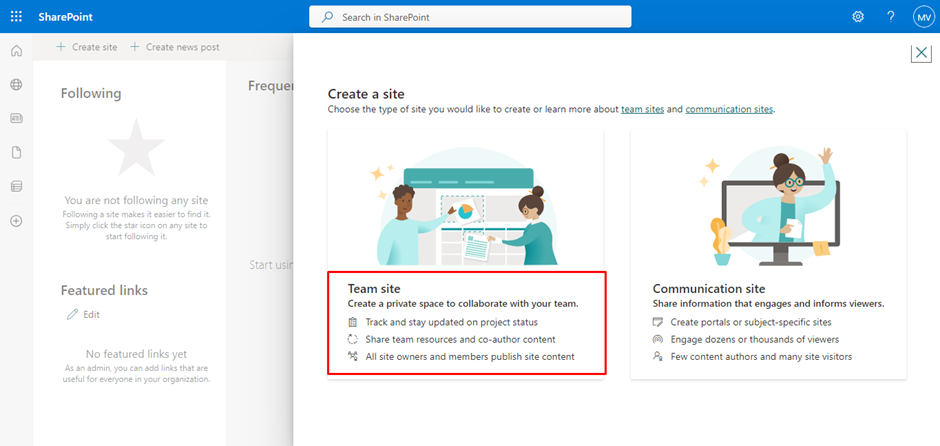
Step 3: Click on Team site. My requirement is to track my project status and to share team resources and co-author content. So that’s why I select the Team site.
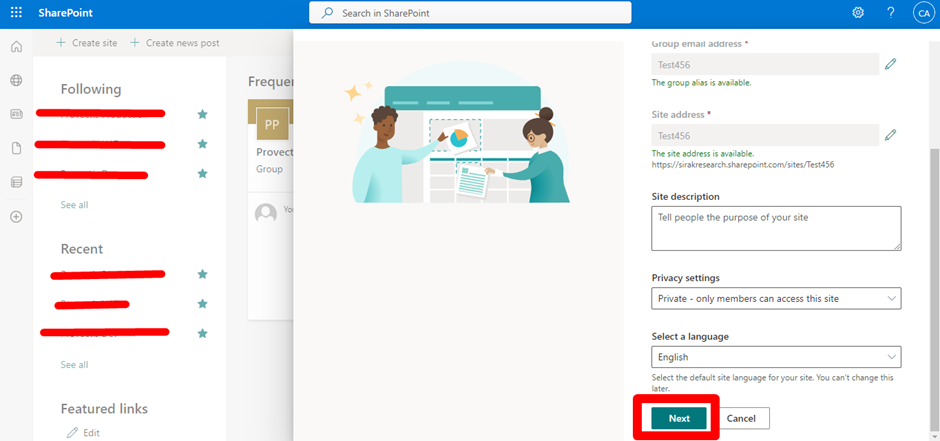
Step 4: Enter your details for your new site and once done, click on Next.
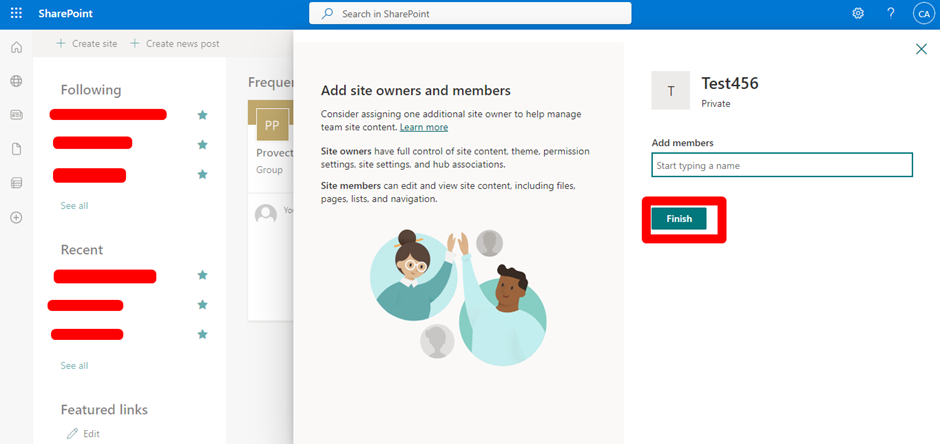
Step 5: You can also add specific members for your site(not necessary). Once done click on Finish.
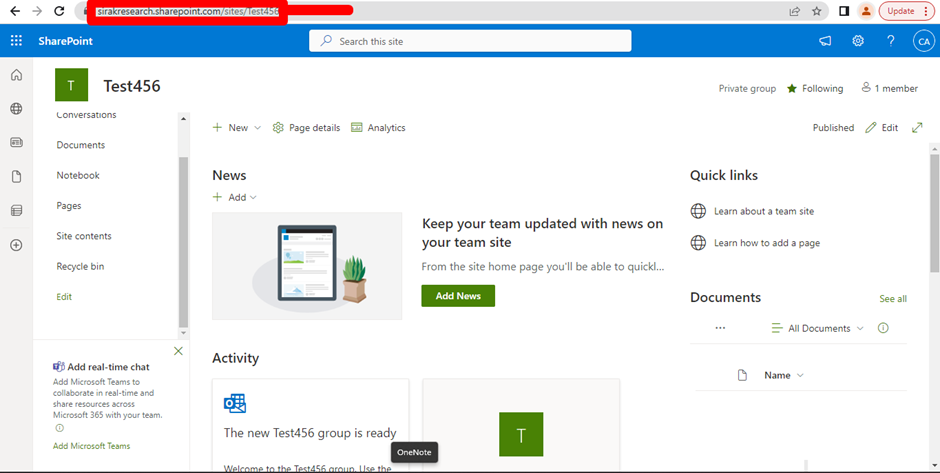
Step 6: Once you click on Finish, it will redirect it to your site which you created. Just copy the above link of your site which I highlighted. Just copy the link to your site. It will be used later.
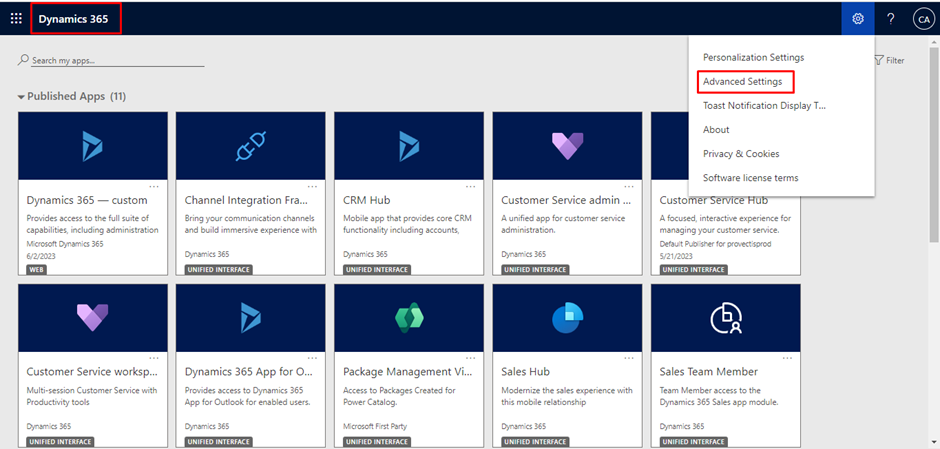
Step 7: Go into Dynamics 365 CRM and login in with your credentials OR mention your URL for e.g. abcde.crm.dynamics.com and then login. Once done, click on the ellipses(3 dots) and select Advanced Settings.
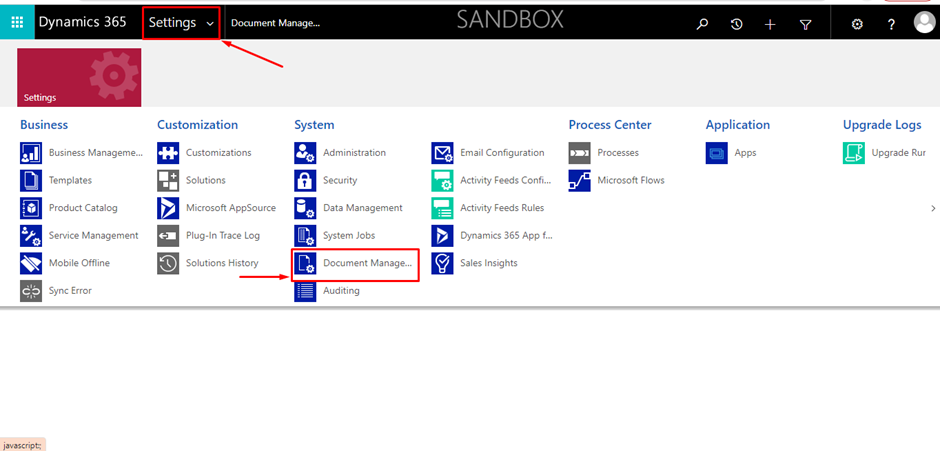
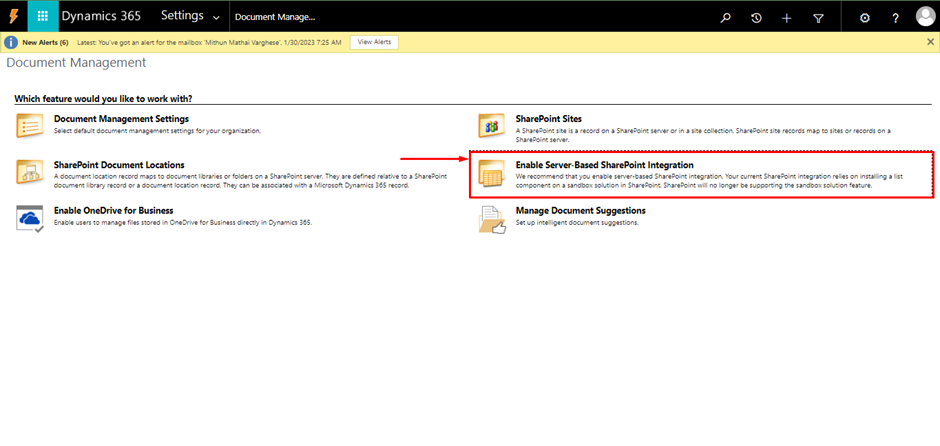
Step 8: Drop down the Settings icon and click on Document Management.
Step 9: Click on Enable Server-Based Sharepoint Integration.
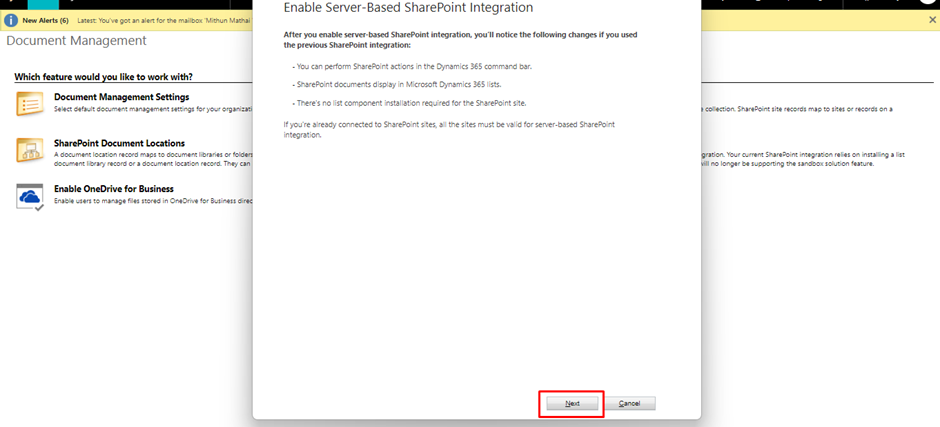
Step 10: In simple terms, what we are doing is integrating and validating the configuration of SharePoint. Click on Next.
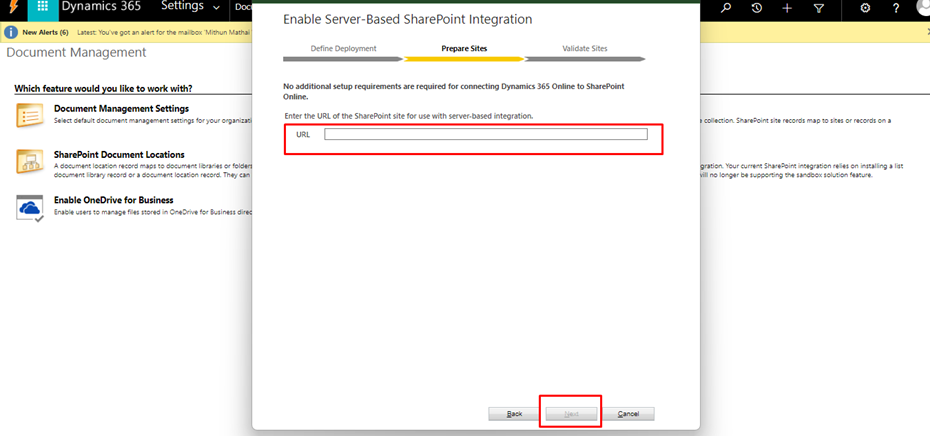
Step 11: Select Online and then click on Next.

Step 12: Enter the URL I previously asked to copy and paste(In Step 6). Paste that link here and click on Next. In the Next Step, it will validate that site. After that click on Finish and wait for 3-4 mins.
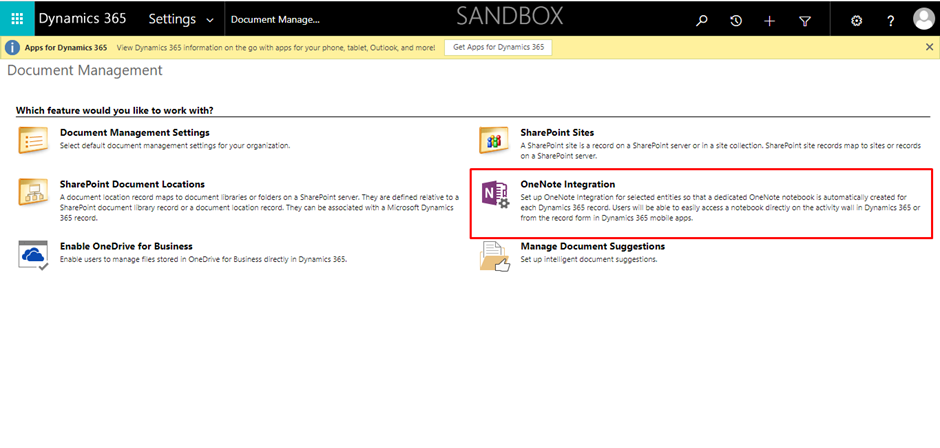
Step 13: After Refreshing you will observe that Enable Server-Based Sharepoint Integration section has changed to One Note Integration. This means that your SharePoint has been enabled and what’s remaining is to add the entities which need to be stored in Sharepoint.
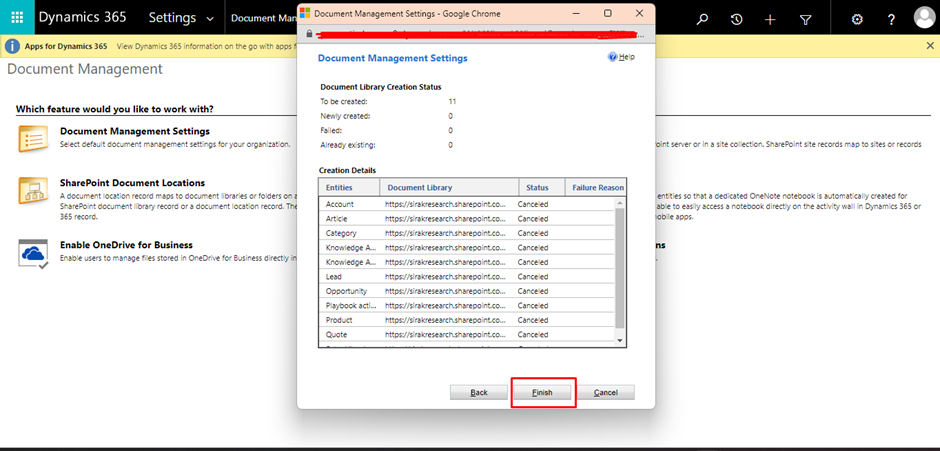
Step 14: In Order to do that, click on Document Management Settings.
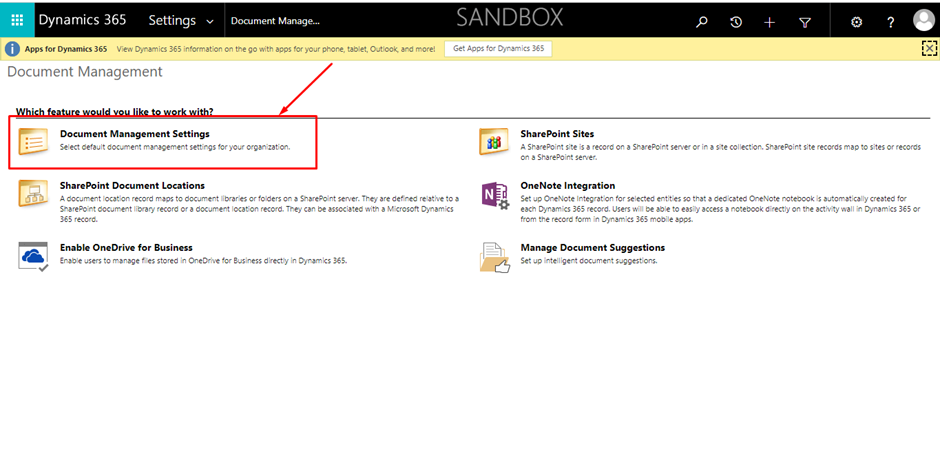
Step 15: Select the entities which you want to enable for the Document Management System.
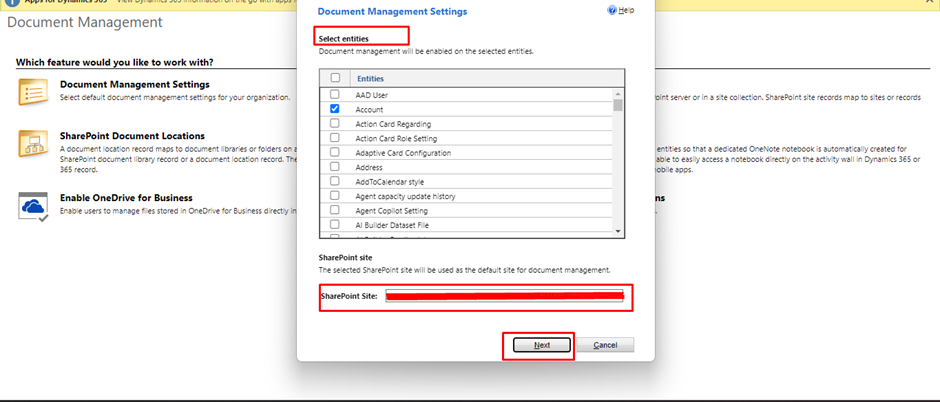
Step 16: If you want a folder structure based on a certain entity you can check the option Based on entity and select the entity you want.
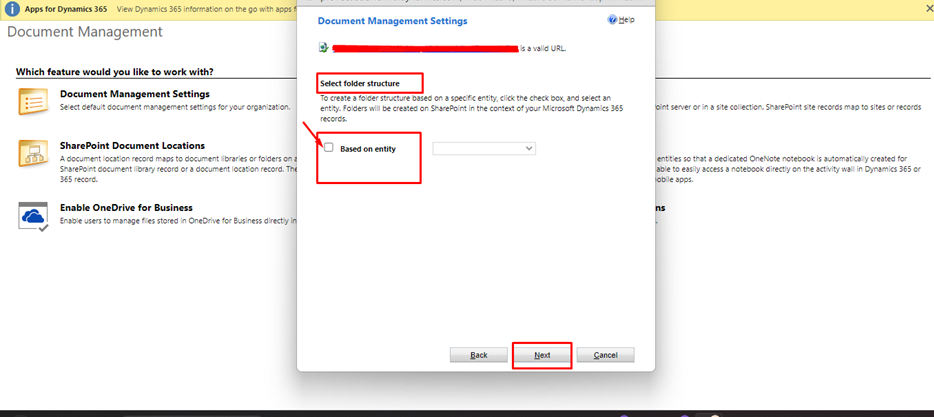
Step 17: Click OK to continue.
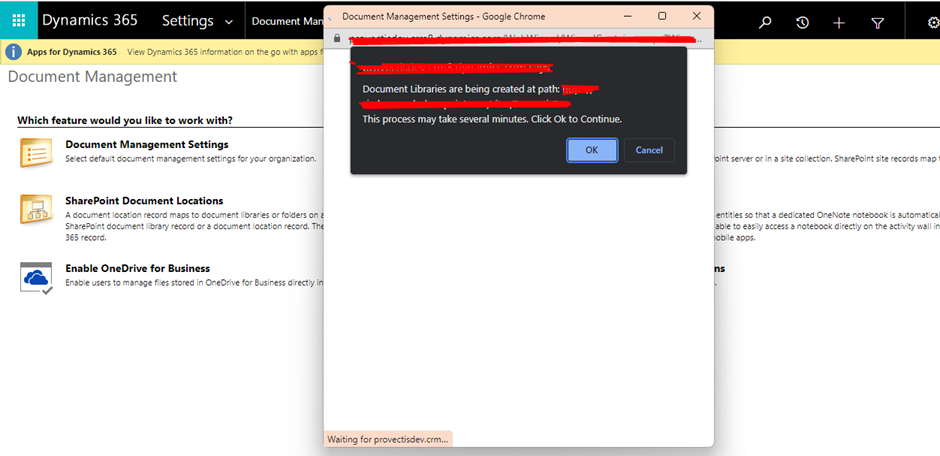
Step 18: FYI the status is showing me cancelled since I have already created the document management system for these selected entities previously. In your case, the status will show completed if you are doing it for the first time.
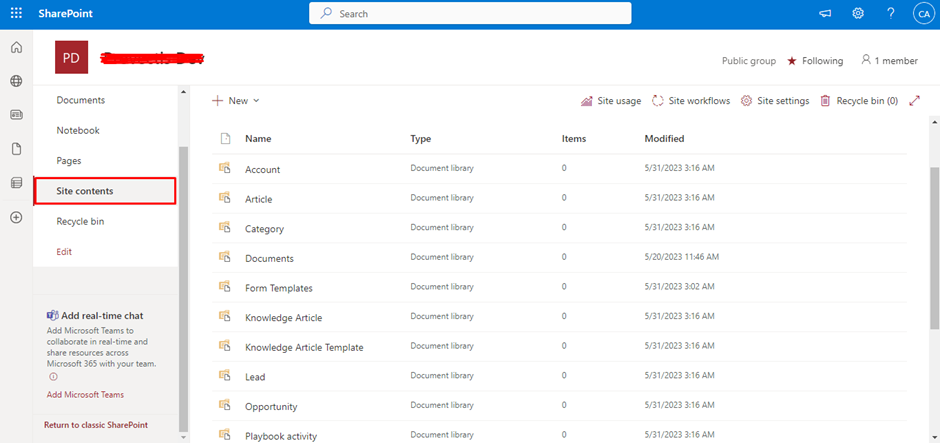
Step 19: Go onto your SharePoint site and click on Site contents
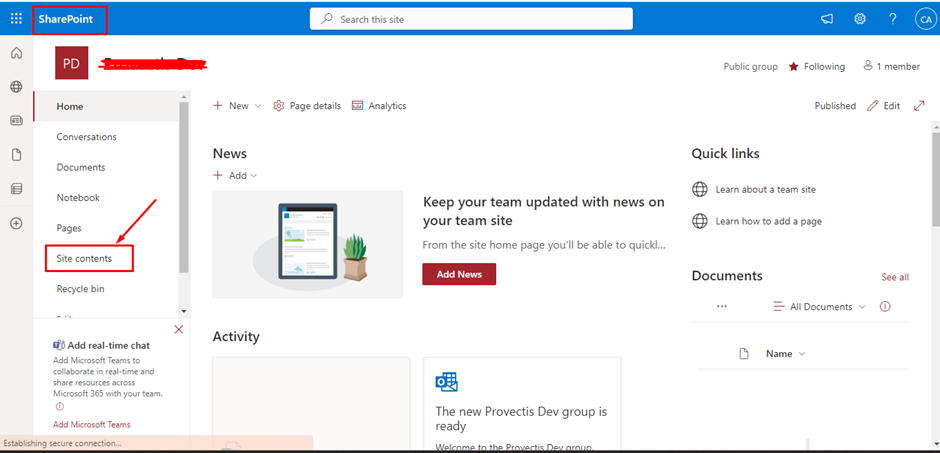
Step 20: Here you can view all the entities which were selected for the Document Management System.
Hope this Helps!!!
