Connecting Your MCP Server to Microsoft Copilot Studio – Part 2
In Part 1, we built a simple MCP server in TypeScript that exposed a “getWeather” tool. Now, let’s take the next step: connecting our MCP server to Microsoft Copilot Studio so that Copilot agents can call it directly.
This section will cover:
- Publishing the MCP server as a web app on Azure
- Creating a new Copilot in Copilot Studio
- Adding knowledge sources
- Creating a custom connector in Dataverse/CRM
- Connecting the custom connector to our MCP server
- Testing the integration with real weather querie
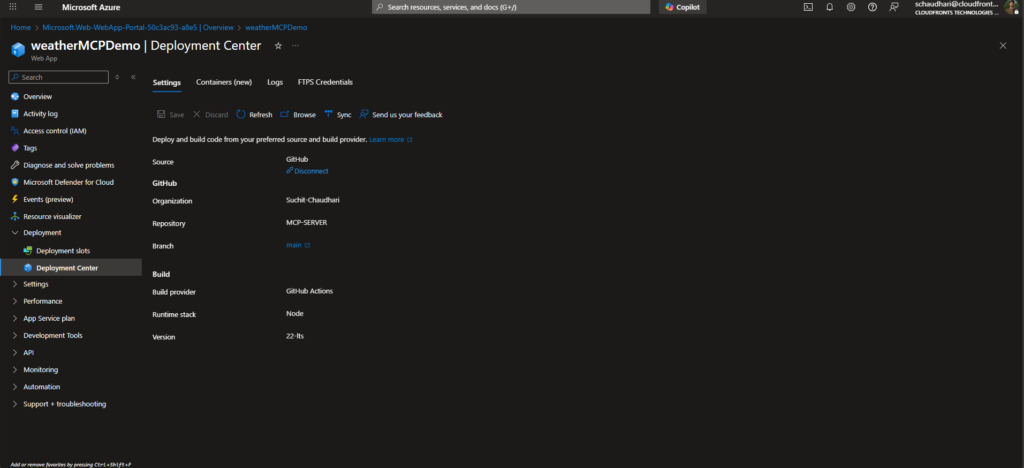
Step 1 — Publish Your MCP Server to Azure
To make your MCP server accessible to Copilot Studio, you’ll need to host it online. There are multiple ways to deploy it — Azure App Service, Azure Container Apps, or even Azure Functions if you prefer serverless.
For example, using Azure App Service:
- Push your MCP server code to GitHub (or Azure DevOps).
- In the Azure portal, create a Web App resource.
- Select Node.js runtime (matching your project’s version).
- Deploy your project either via GitHub Actions, VS Code, or Azure CLI.
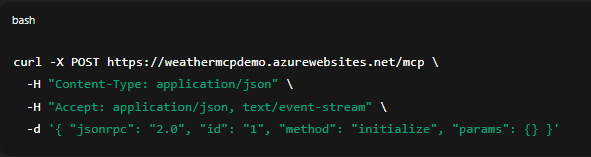
- Once deployed, verify that your server is reachable at: https://<your-app-name>.azurewebsites.net
Test using curl to ensure it responds with MCP-compatible JSON:
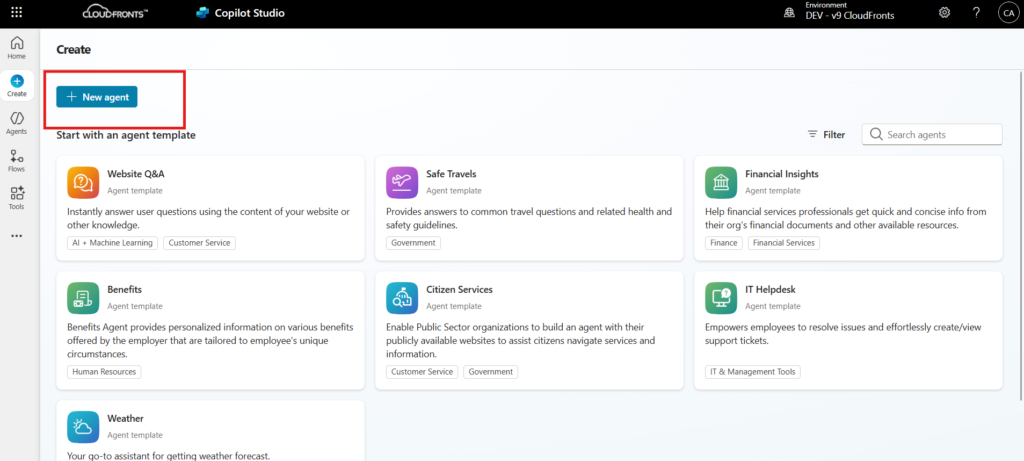
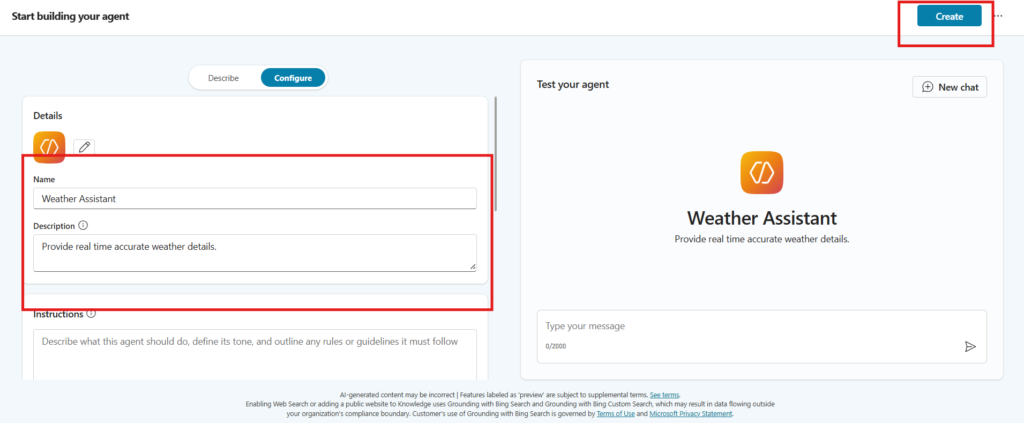
Step 2 — Create a New Copilot in Copilot Studio
- Go to Microsoft Copilot Studio.
- Sign in with your Microsoft 365 account.
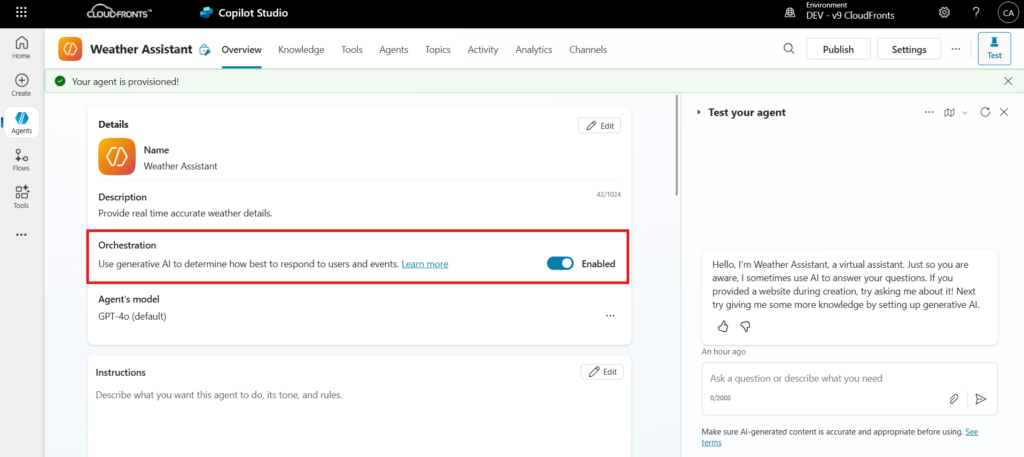
- Click New Copilot and give it a name, e.g., Weather Assistant.
- make sure to enable AI orchestration for your copilot for MCP server to work.
Step 3 — Add Knowledge Sources
Optionally, you can enrich your Copilot by adding:
- SharePoint documents
- Dataverse data tables
- Public websites
This gives your Copilot a baseline knowledge to answer broader questions, while the MCP server will handle specific tasks (like fetching live weather data).
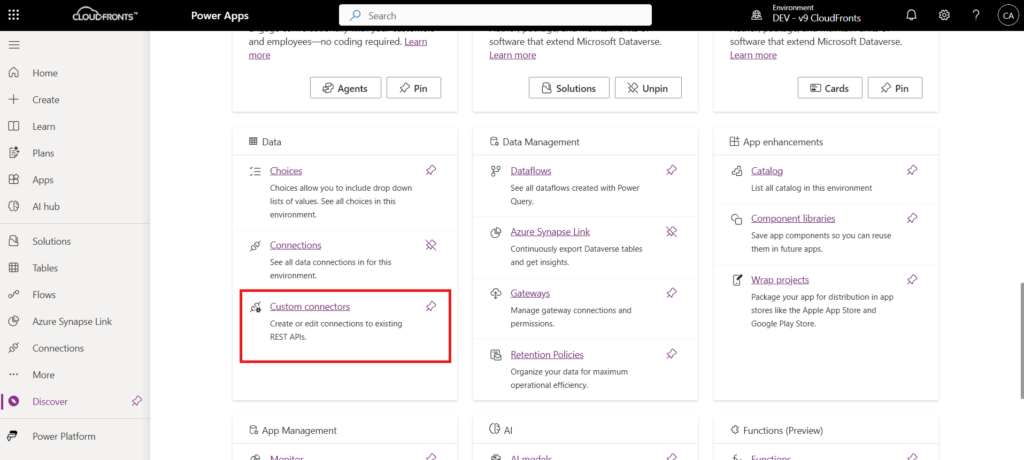
Step 4 — Create a Custom Connector in Dataverse
To let Copilot Studio talk to our MCP server, we need a custom connector inside Dataverse/CRM.
- Open Power Apps → Custom Connector
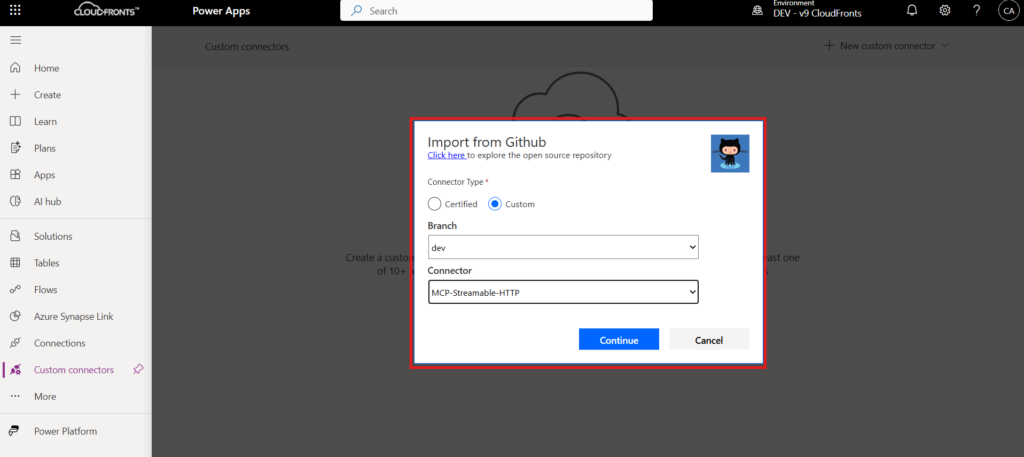
- Click New Custom Connector → Import from GitHub
- Select Connector Type: custom, Branch: Dev, Connector: MCP-Streamable-HTTP
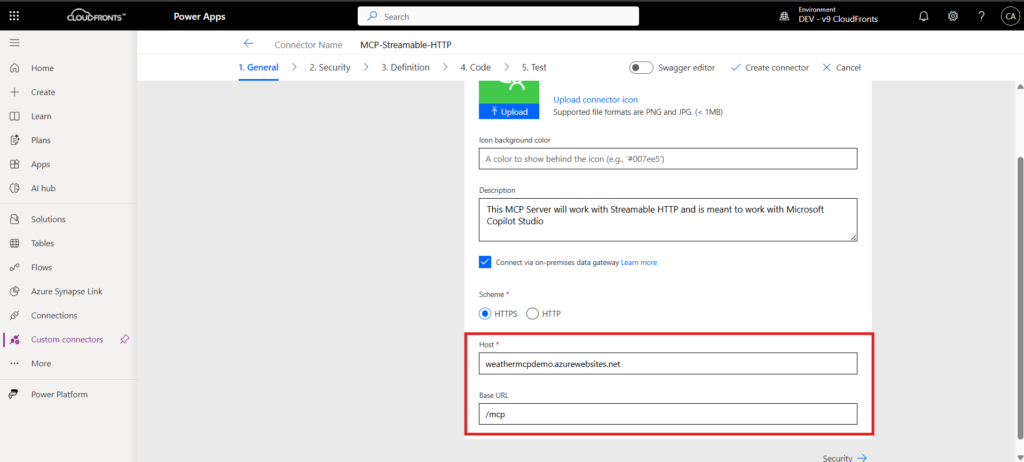
- Under Host, provide your MCP server URL
- Create Connector

Step 5 — Add the Custom Connector to Copilot Studio
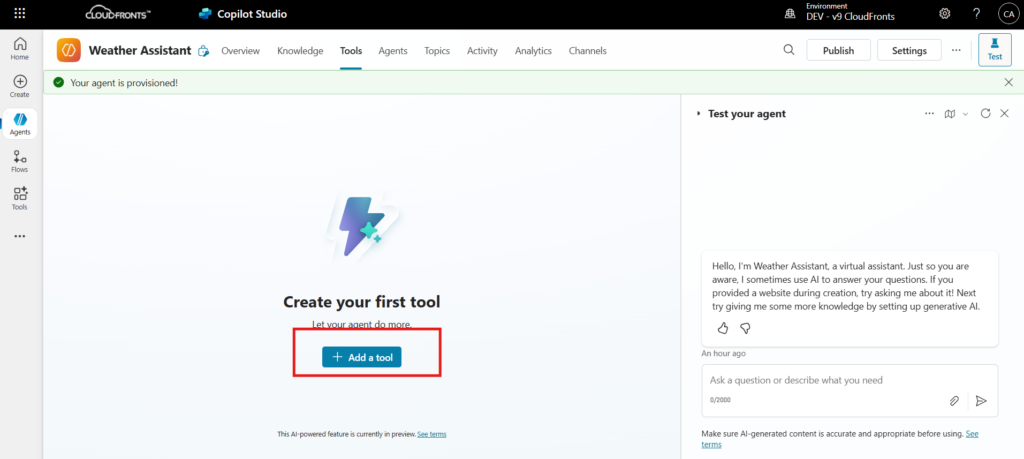
- Open your Copilot in Copilot Studio.
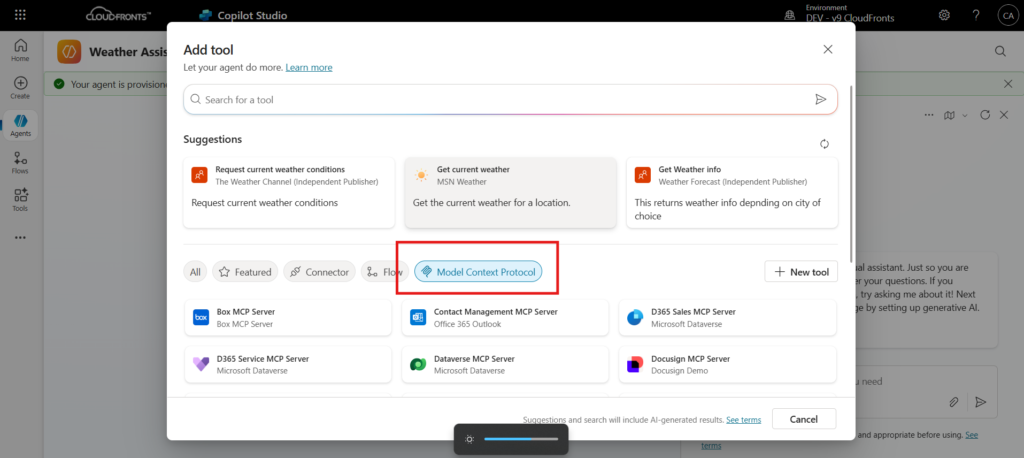
- Navigate to Tools → Add a tool → Model Context protocol
- Select the Connector you just created.

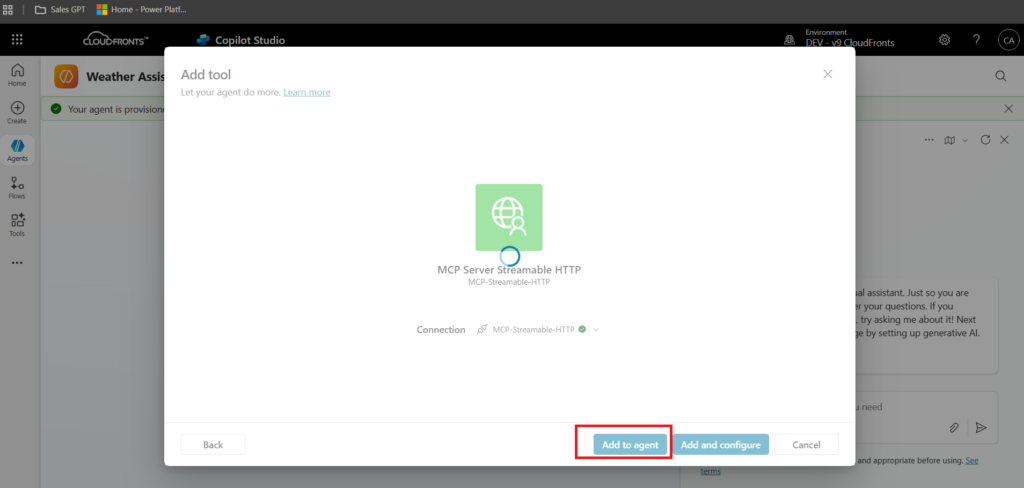
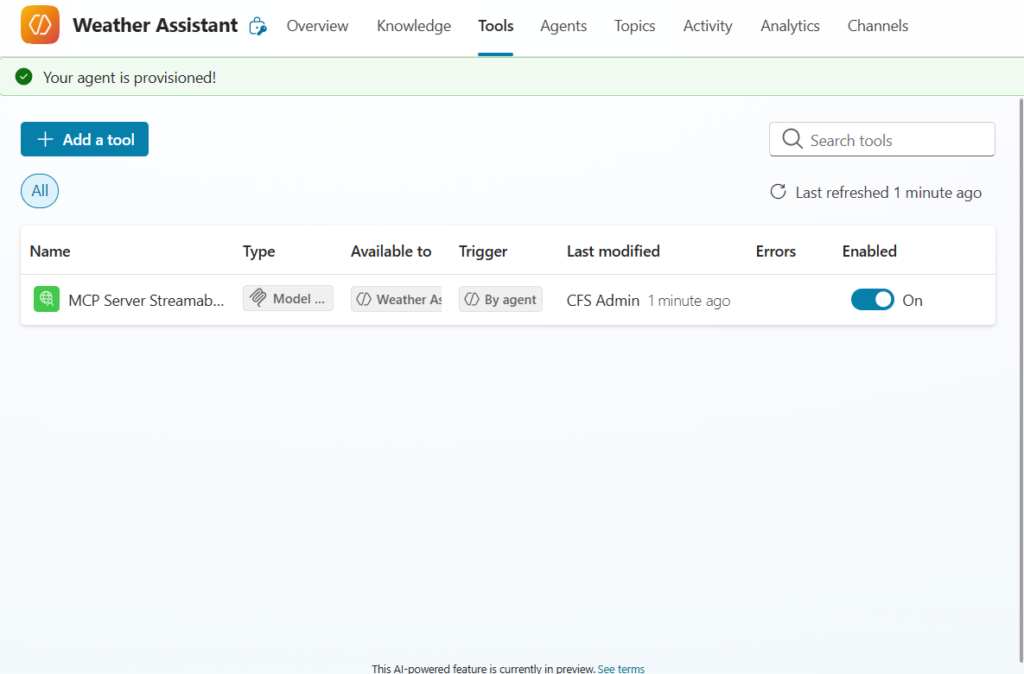
you’ll see the MCP server in your Tools section of copilot.
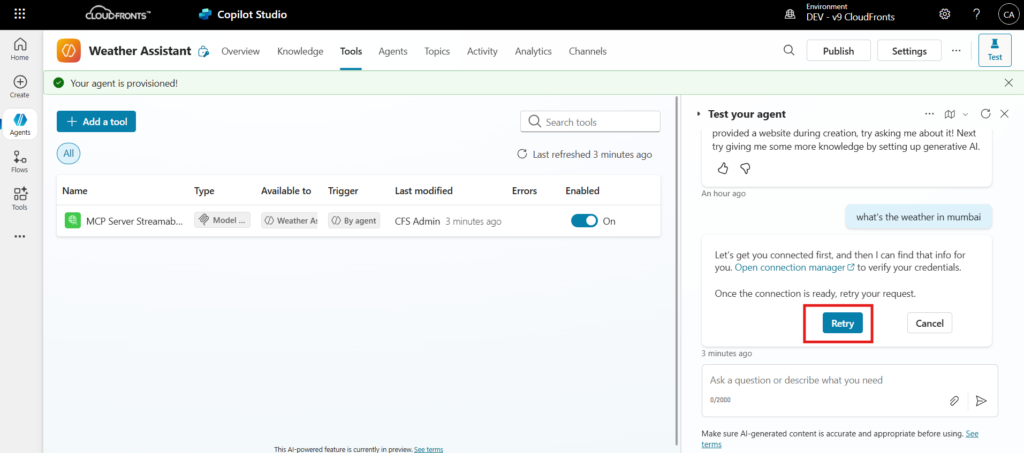
To test the setup, let’s ask Copilot: “What’s the current weather in Mumbai?”
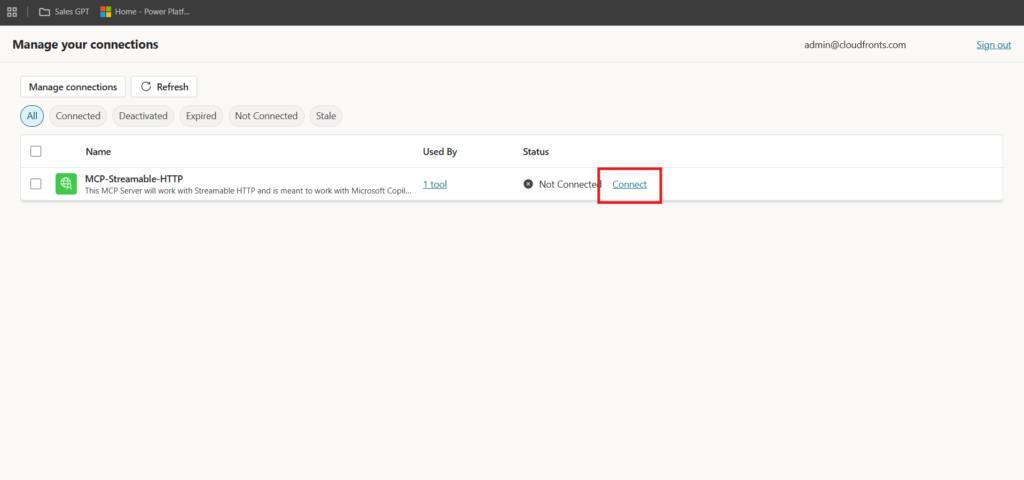
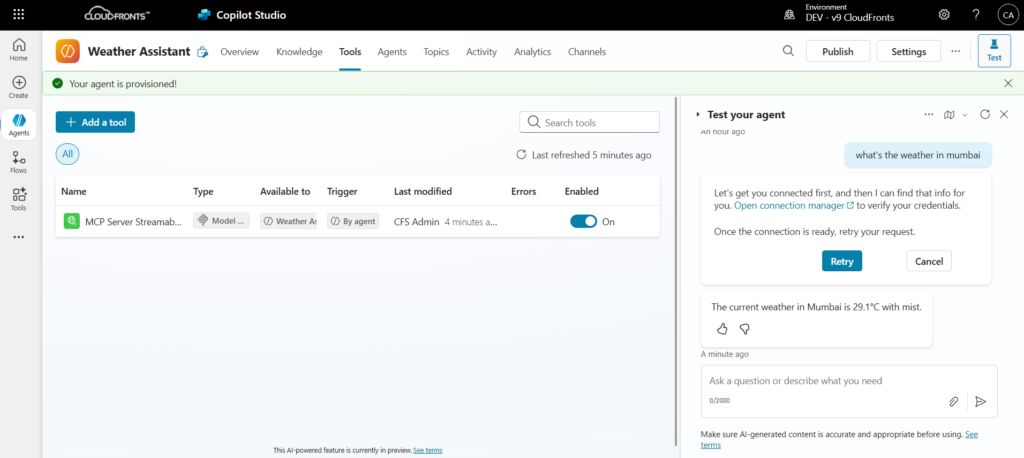
On the first attempt, Copilot will prompt you to establish a connection. Simply open the Connection Manager, click Connect, and authorize the link to your MCP server. Once connected, Copilot will fetch the live weather details for Mumbai directly from your MCP server.
and click retry on the Test window of your copilot.
And just like that, your MCP server is live and fully integrated. It can now provide real-time weather updates for any city mentioned in your conversation with Copilot. You can try out different variations of questions or phrasings — Copilot will intelligently interpret your request, extract the city name, and seamlessly call the MCP server to deliver accurate weather details.
Beyond Weather: Business Integrations
The same process works for enterprise systems. For example, instead of getWeather, you could expose:
getSalesOrder(orderNumber)→ fetch sales order details from DataversecreateInvoice(customerId, amount)→ trigger invoicing workflowsgetInventoryStatus(itemId)→ check real-time stock levels
By publishing these tools via MCP, your Copilot becomes a true enterprise assistant, capable of pulling structured business data and triggering workflows on demand.
We hope you found this blog useful, and if you would like to discuss anything, you can reach out to us at transform@cloudfronts.com.
