A Unified Approach to Developing Finance and Operations Applications
Microsoft’s Unified Developer Experience (UDE) helps developers build solutions that work across both Finance and Operations (F&O) and the Power Platform by providing a common, cloud-based environment.
Challenges Before UDE
Before UDE, developers often faced the following issues:
- 1.F&O and Power Platform were separate platforms with different development workflows
- 2.F&O development required Visual Studio on a local machine, while Power Platform was cloud-based
- 3.Debugging between X++ (used in F&O) and Dataverse (Power Platform’s database) was complex
- 4.Environment setup varied by team and was often inconsistent and time-consuming
What UDE Changes
With UDE, Microsoft combines these tools into one environment, making it easier to:
- a. Work across both platforms without frequent interruptions
- b. Create integrated solutions that connect F&O with Power Platform more efficiently
Why UDE Is Useful
Adopting UDE brings several practical benefits for developers and organizations:
- >Common toolset across all Dynamics 365 apps
- >Improved workflows and easier data sharing between systems
- >Simplified environment management
- >Faster setup times for development environments
- >Quicker identification and resolution of issues
- >Better alignment with security and compliance requirements
- >Reduced operational costs due to streamlined processes
Check Access, Licenses, and Capacity
Before starting, make sure your user role, license, and environment capacity are all set up properly. You can check this in the Power Platform Admin Center.
Starting the Setup with PowerShell

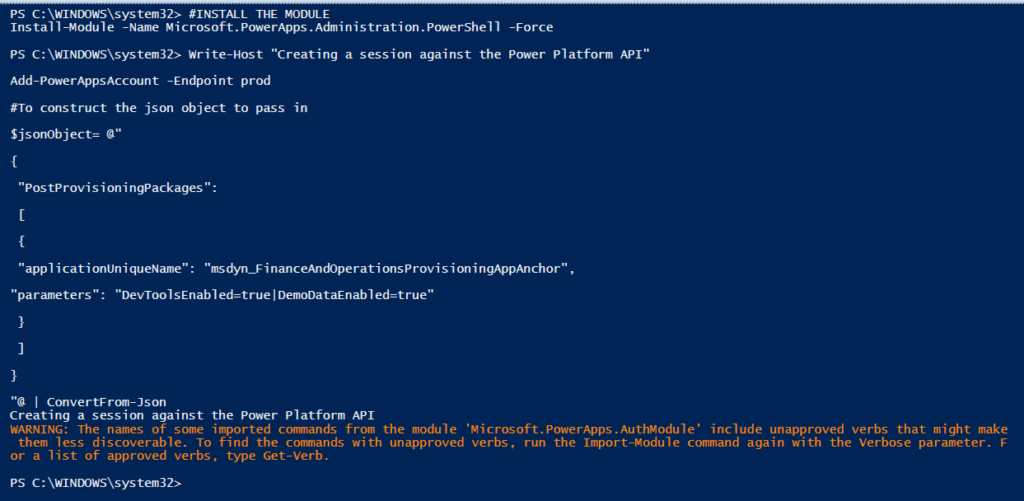
To get started, open PowerShell ISE on your laptop. If you haven’t installed the required Power Platform module yet, run this command (skip it if it’s already installed):
#Install the module
Install-Module -Name Microsoft.PowerApps.Administration.PowerShell -Force
Next, sign in to your account and prepare the JSON template that defines your environment settings.
Make sure DevToolsEnabled is set to true so developer tools are available. You can also set DemoDataEnabled to true if you want sample Contoso data included by default.
Write-Host “Creating a session against the Power Platform API”
Add-PowerAppsAccount -Endpoint prod
#To construct the json object to pass in
$jsonObject= @”
{
“PostProvisioningPackages”:
[
{
“applicationUniqueName”: “msdyn_FinanceAndOperationsProvisioningAppAnchor”,
“parameters”: “DevToolsEnabled=true|DemoDataEnabled=true”
}
]
}
“@ | ConvertFrom-Json
Finally, you’re ready to start the environment deployment.
New-AdminPowerAppEnvironment -DisplayName “EnvironmentName” -EnvironmentSku Sandbox -Templates “D365_FinOps_Finance” -TemplateMetadata $jsonObject -LocationName “unitedstates” -ProvisionDatabase
Example:
New-AdminPowerAppEnvironment -DisplayName “Basic_Env” -EnvironmentSku Sandbox -LocationName “unitedstates” -Templates “D365_FinOps_Finance” -TemplateMetadata $jsonObject -ProvisionDatabase
Make sure to use a proper name for your environment — it must be 20 characters or fewer.
Also, pick the correct data center location based on your region (for example, I used unitedstates, but you could choose India or another available region).

Alternatively: Install on an Existing Environment
If you already have a Power Platform environment with a Dataverse database, you can use it to install Finance and Operations apps. Simply select the environment, navigate to Resources > Dynamics 365 apps, and then select Dynamics 365 Finance and Operations Provisioning App.
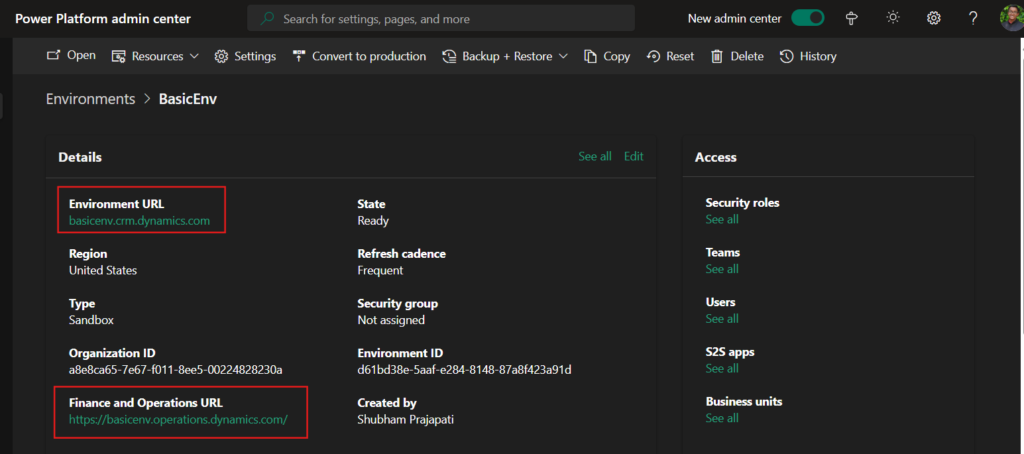
Once your environment is successfully provisioned, you’ll see it listed in the Power Platform Admin Center — just like in the screenshot above.
Here’s what the key information means:
- 1.Environment URL: This is the main URL for accessing Power Platform apps (e.g., Power Apps, Dataverse). In this example, it’s basicenv.crm.dynamics.com.
- 2.Finance and Operations URL: This link takes you to the Finance and Operations experience — where you can work with F&O capabilities. Example: https://basicenv.operations.dynamics.com.
- 3.State: This shows the status of your environment. If it says Ready, that means it’s fully provisioned and good to go.
- 4.Type: Indicates this is a Sandbox environment — ideal for development and testing.
- 5.Region: Shows where your environment is hosted (e.g., United States).
- 6.Created by: Displays the account that provisioned the environment.
You’ll also see links to manage:
- >Security roles
- >Teams
- >Users
- >S2S (Service-to-Service) apps
- >Business units
These settings help control access and structure within your environment.
This confirms your Finance + Power Platform environment is now fully functional and integrated — ready for development, testing, and customization.
Make sure your user account has the System Administrator security role in Dataverse. Once assigned, this role will automatically carry over to the Finance and Operations (F&O) environment — no need to reassign it separately.

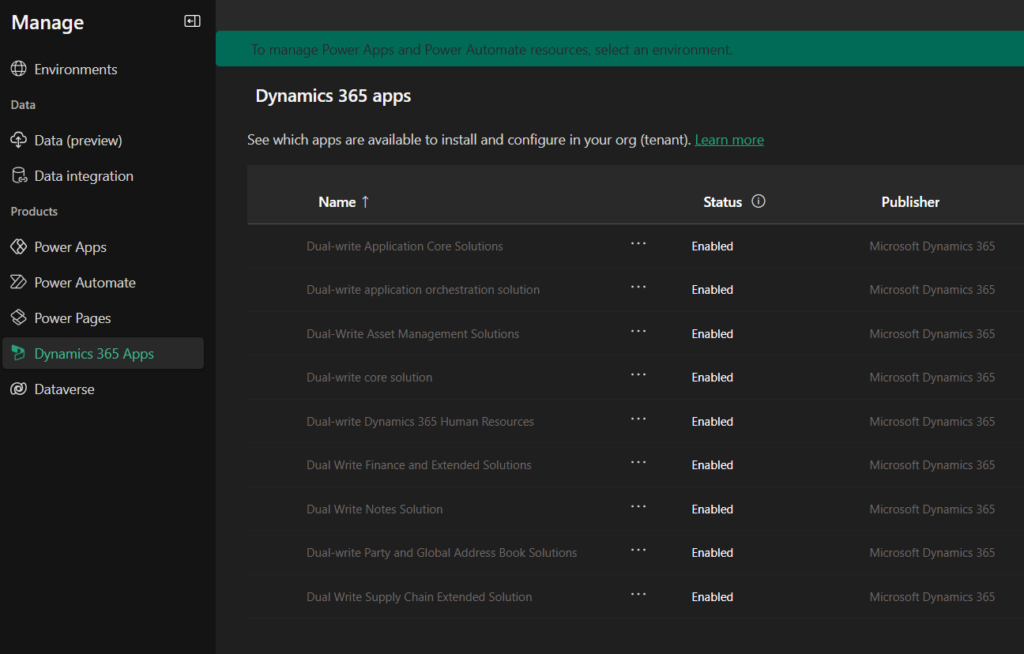
If you navigate to the Dynamics 365 apps, you’ll also find pre-configured and installed solutions available.

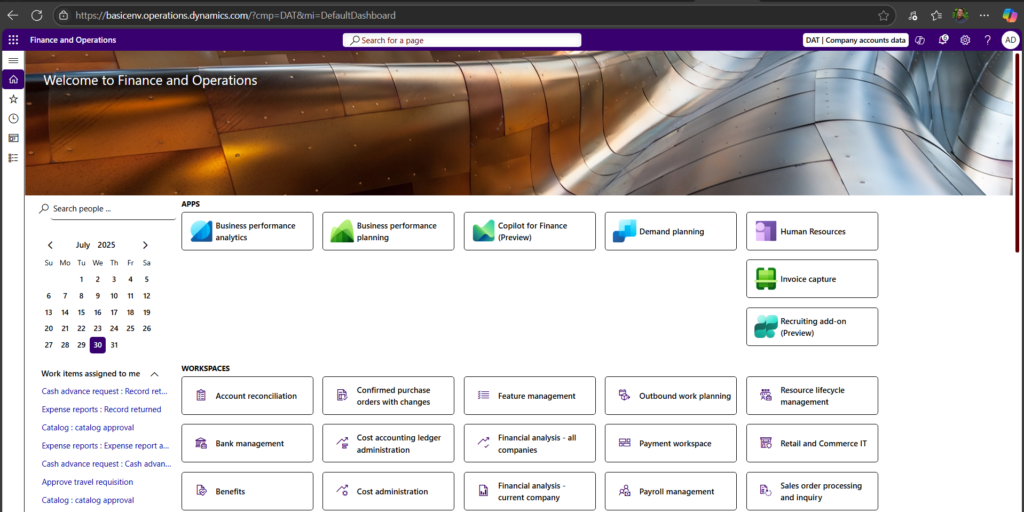
You can check out the Modules, Packages, and Operation History by simply clicking on the Environment URL.

System Requirements for Setting Up the Development Environment
Before you begin working with the Unified Development Experience (UDE), it’s important to make sure your machine meets the basic hardware and software requirements. Here’s what you’ll need:
Workstation Requirements
To ensure smooth performance while developing:
- a. Use a Windows 10 or 11 device (can be a laptop, desktop, virtual machine, or cloud-hosted setup).
- b. Minimum hardware:
- -At least 4 CPU cores
- –16 GB RAM (SSD is recommended for faster operations)
- -Stable and high-speed internet connection
- c. Make sure you have at least 16 GB of free disk space on your local system drive for tools, extensions, and metadata.
Required Software
The following software components are essential for working with UDE in Visual Studio:
- a. Visual Studio 2022 with these workloads and components:
- -.NET desktop development
- -Modeling SDK
- -DGML editor
- -Microsoft Reporting Services Projects
- b. SQL Server Management Studio (SSMS) for working with local databases and queries.
Once everything is set up, you’re ready to open Visual Studio.
Make sure to run it as Administrator and choose the “Continue without code” option when prompted. This ensures all tools load properly and you’re ready to begin your development work.
Install Power Platform VS Extension
Go to VS > Manage Extensions > Search ‘Power Platform Tools

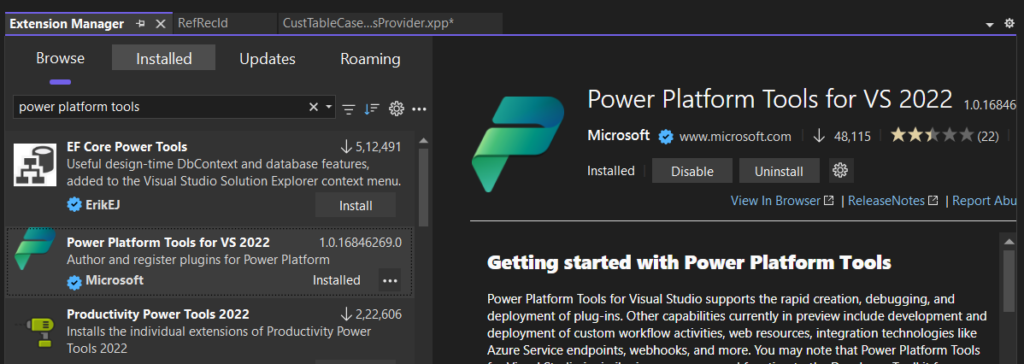
Now, navigate to Tools > Options > Power Platform Tools and enable the specified parameters.


Now, go to Tools > Connect to Dataverse


Always show the full list of organizations. Avoid signing in with your current Windows user if it’s not the same account you’ve already connected to in Visual Studio.

You can view the environments you previously created in PowerShell – just select the one you set up earlier.

Choose the default option, unless you’re planning to create specific components for D365 CE or Power Platform—in that case, it’s best to create a dedicated solution and publisher for your work.
If the X++ source code for your specific UnO DevBox version (e.g., 10.0.35) hasn’t been downloaded yet, you’ll be prompted to get it locally.
After setting up the Power Platform Tools extension and connecting to your Dataverse sandbox, you’ll see an option to install the Finance and Operations extension for Visual Studio, along with the related metadata.
If you didn’t get any option you can download it manually by going to “C:\Users\ShubhamPrajapati\AppData\Local\Microsoft\Dynamics365\10.0.2263.74”
Meanwhile, in the background, the PackageLocalDirectory is being extracted. You can monitor the progress by going to View > Output. The installation typically takes around 30 minutes.

After installation, you’ll see a few prompts the first time you open Visual Studio—just click “Yes” to continue.
As you can see, all models have been downloaded successfully.

You can switch between Classic View and Model View by right-clicking on the AOT.

Once that’s done, navigate to Tools > Options > Power Platform Tools and apply the required changes as shown in the image below.

The final step is to configure the Finance & Operations extension.

In my case, I use LocalDB for the Cross Reference (Cross Ref) Database—it’s convenient because it’s already included when you install Visual Studio.
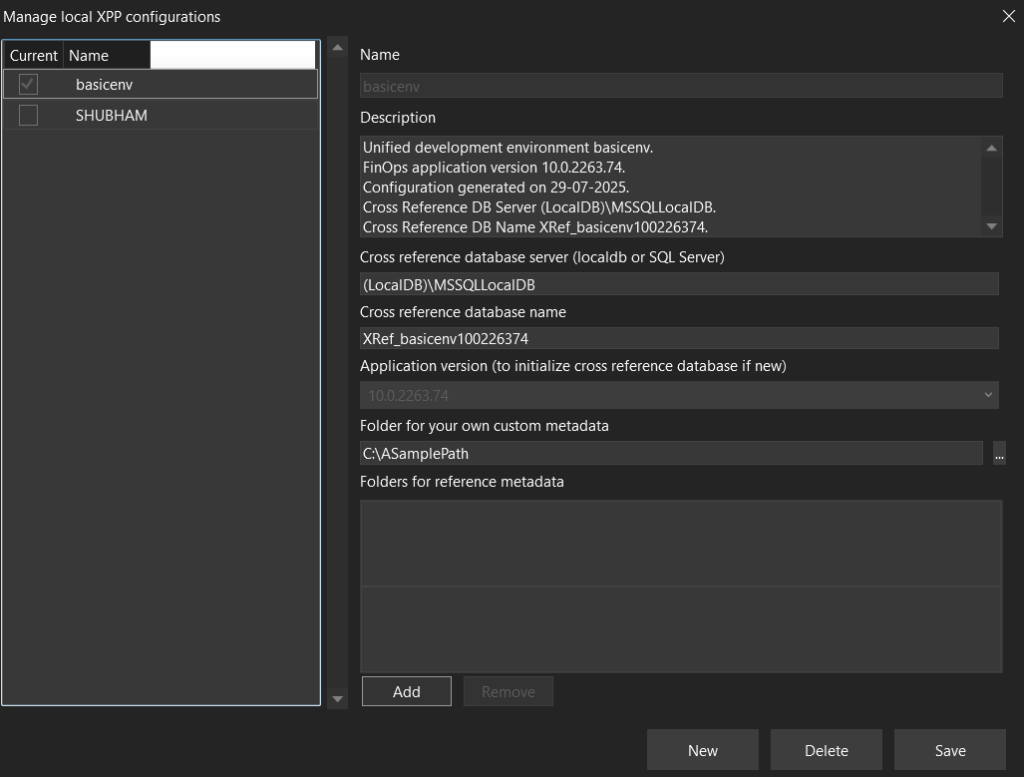
If you’re using LocalDB, ensure your connection string is correct. A typical value is:
(localdb)\
To set up LocalDB (if not already initialized), open Command Prompt and run:
sqllocaldb create MSSQLLocalDB -s
This command initializes and starts the LocalDB instance.
Once LocalDB is running, your Cross Reference Database will be restored. This enables key development features such as:
- F12 – Go to Definition
- Find All References
These features significantly enhance the development experience by improving code navigation and reference tracking.
If you receive errors when trying to open certain class files (which are XML files under the hood), it’s likely because the Modeling SDK is not installed. This SDK is essential for working with these files.
To install the Modeling SDK:
- 1. Open the Visual Studio Installer
- 2. Go to the Individual Components tab
- 3. Under SDKs, libraries, and frameworks, check and install Modeling SDK
Now that everything is set up, let’s confirm it’s working by launching the Debugger in Visual Studio.
To do this, follow these steps:
- In Visual Studio, go to the Extensions menu.
- Navigate to Dynamics 365 > Launch Debugger.
If everything is configured correctly, you’ll see that the debugger attaches successfully.

As shown in the screenshot, the debugger is now connected, and you’re able to debug X++ code. This means your development environment is good to go!

This is a great way to test if your environment is properly linked to Finance and Operations and that your configurations are recognized.
Hope this helps streamline your setup process!
We hope you found this blog useful, and if you would like to discuss anything, you can reach out to us at transform@cloudfronts.com.


