Quarantine Management Process in Dynamics 365 FnO Supply Chain Management
Hello Everyone!!! In this blog I will explain the Quarantine Management process in Dynamics 365 Supply Chain Management. Here the Product was first received in the Main warehouse and then it was moved to Quarantine Warehouse for further inspection as the Product failed to clear the Quality Test.
In this blog I will explain a scenario where the Products should be directly received in the Quarantine Warehouse for inspection and after final inspection it turns out that all the products fail the inspection so, a few products will be scrapped and the rest will be returned back to vendor.
What is Quarantine Management?
The quarantine management process in D365 aims to effectively manage and control quality issues, ensuring that only items meeting the required standards are released for use or distribution. The quarantine management process in Dynamics 365 is a systematic approach to handling items that are suspected of having quality issues or non-conformities. When an item is flagged for quarantine, it is physically segregated from the regular inventory and moved to a designated quarantine location. The quarantined item undergoes thorough inspection and testing to assess the extent of the quality issue. Based on the evaluation, decisions are made regarding the item’s disposition, which may include repair, return to the vendor, or scrapping. If the item is repairable, necessary actions are taken to rectify the identified issues. In cases where the vendor is responsible, the item can be returned for resolution. Once the necessary actions are completed, and the item meets the required quality standards, it is released from quarantine and reintegrated into the regular inventory for use or distribution. This process ensures that only items meeting quality criteria are allowed for further processing, while mitigating the risk of non-conforming products entering the supply chain
Let’s start with the setups first:
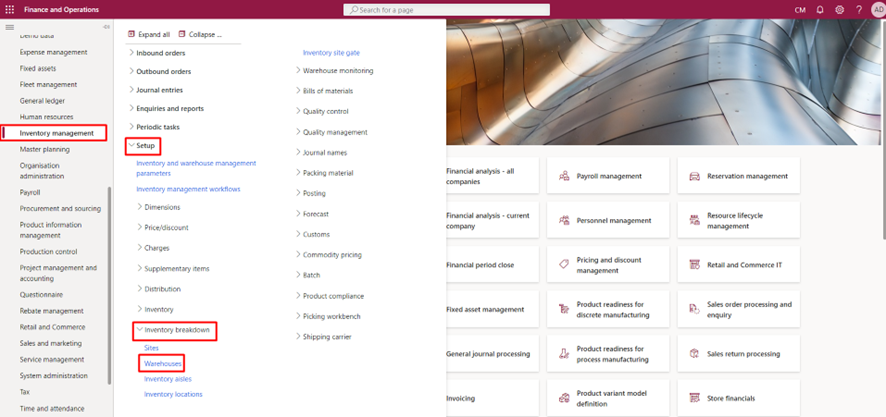
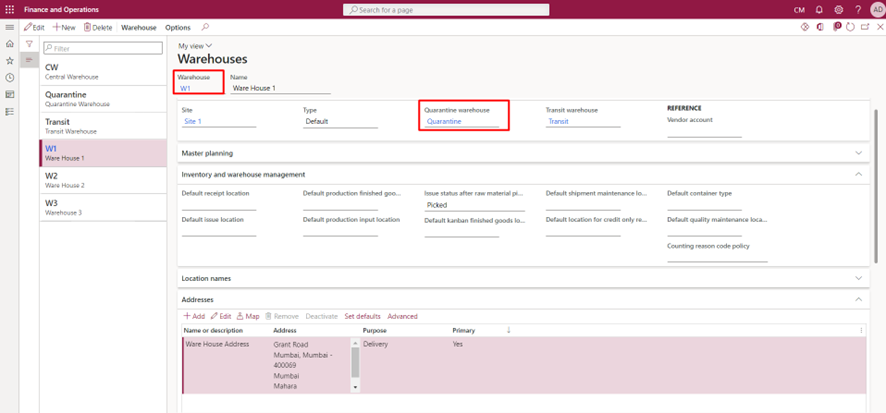
Step 1: Map the Quarantine Warehouse to the Main Warehouse. For that the Pathway is:
Go to Inventory Management>Set Up>Inventory Breakdown>Warehouses.
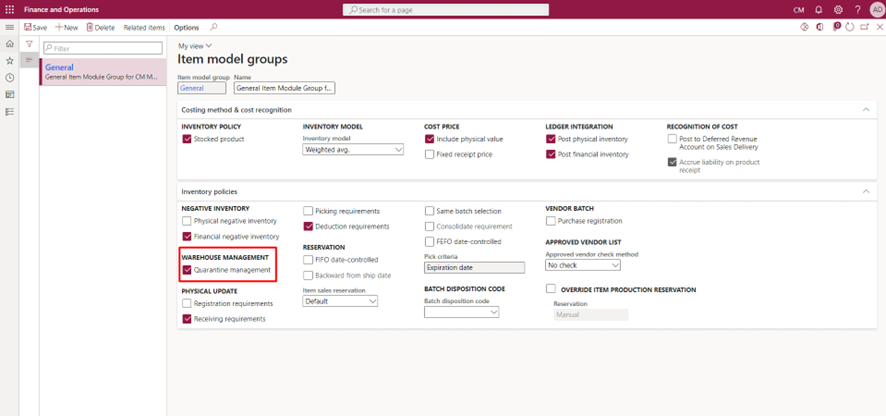
Step 2: The next step is to Enable the “Quarantine Management” parameter in the Item Model Group
Quarantine Management Process:
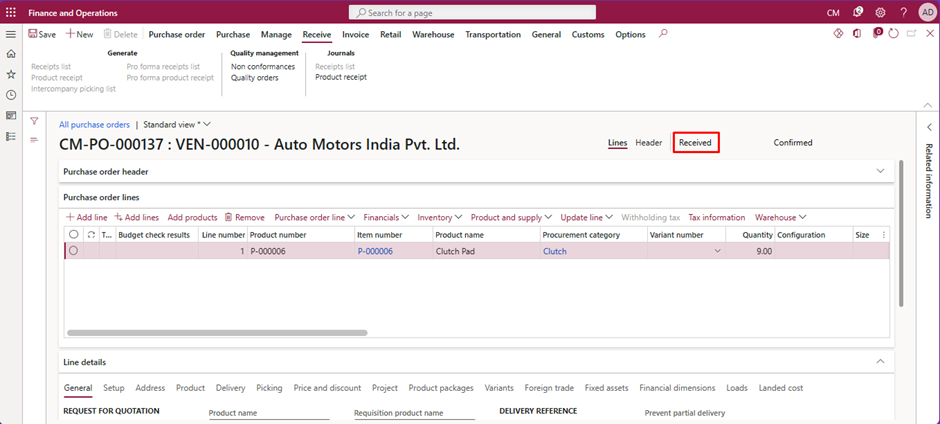
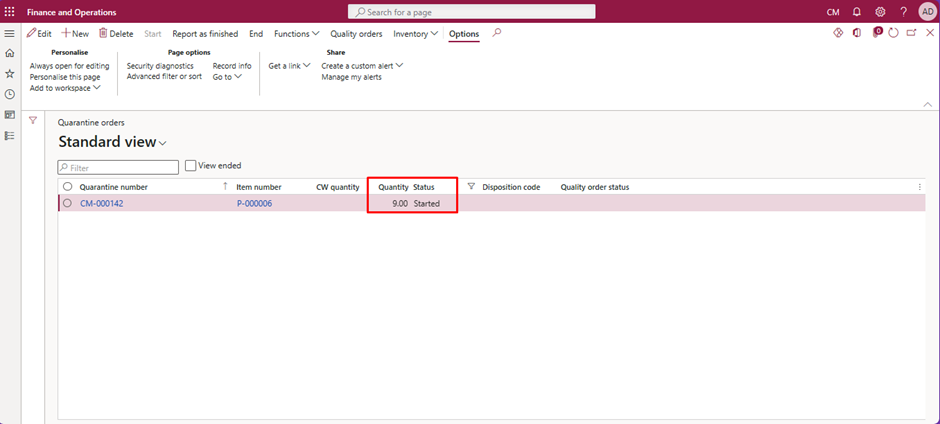
The below Purchase Order CM-PO-0000137 has been received in the Quarantine Warehouse as per the setup, hence a Quarantine Order CM-0000142 with 9 quantities has been created.
Now if I go to the Quarantine Orders page, I can see that a new Quarantine Order has been created.
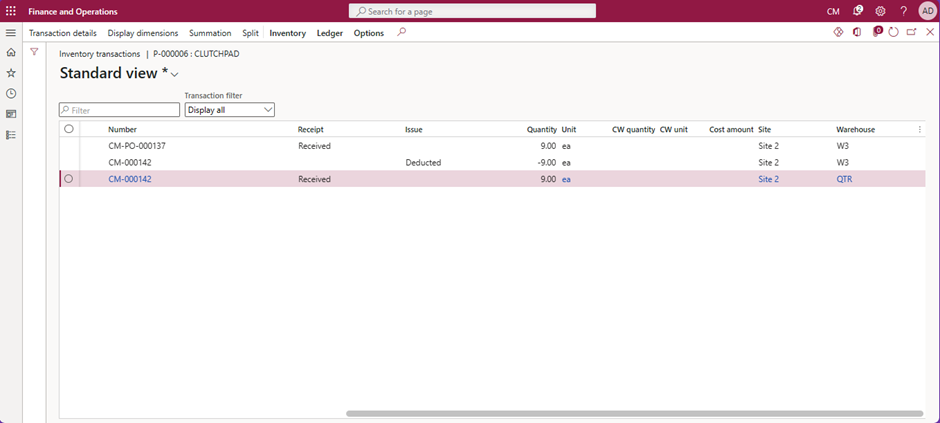
The below screenshot shows the Transactions that took place after the Product Receipt was posted.
After Inspection it was found out that 5 quantities were damaged, 4 quantities were to be returned back to the Vendor which means that all the 9 quantities failed to pass the Quality Inspection. So, what I will do is Scrap the 5 quantities and return back the 4 quantities to the Vendor by creating a Purchase Return Order.
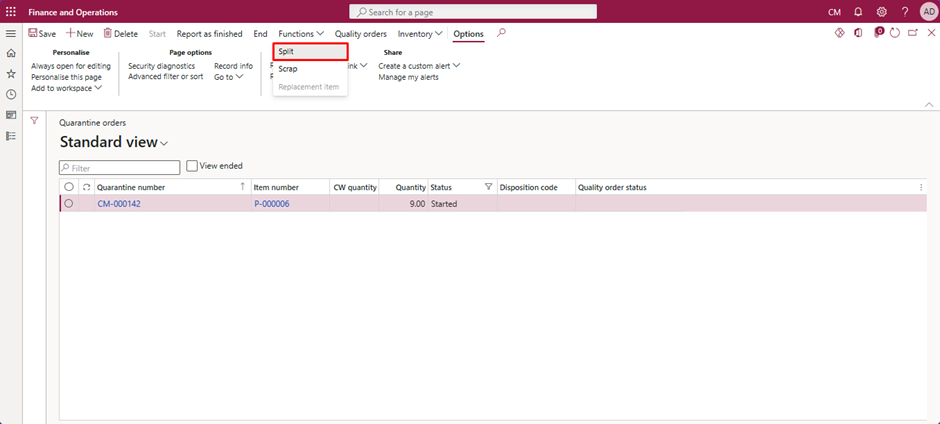
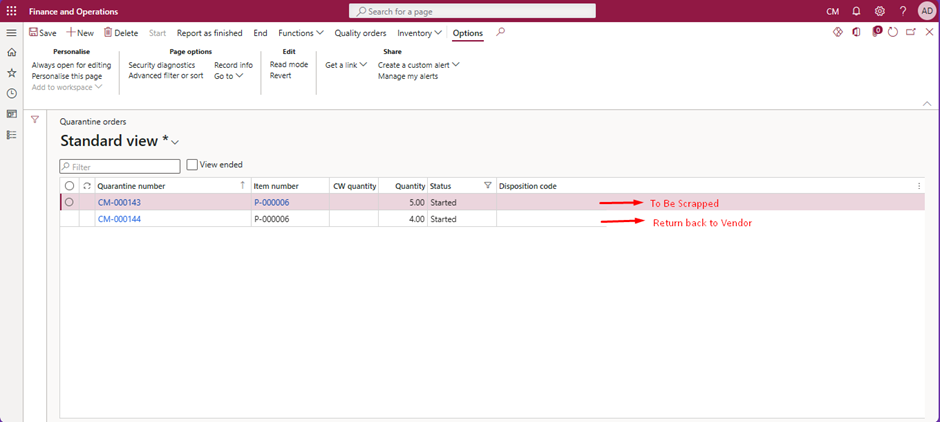
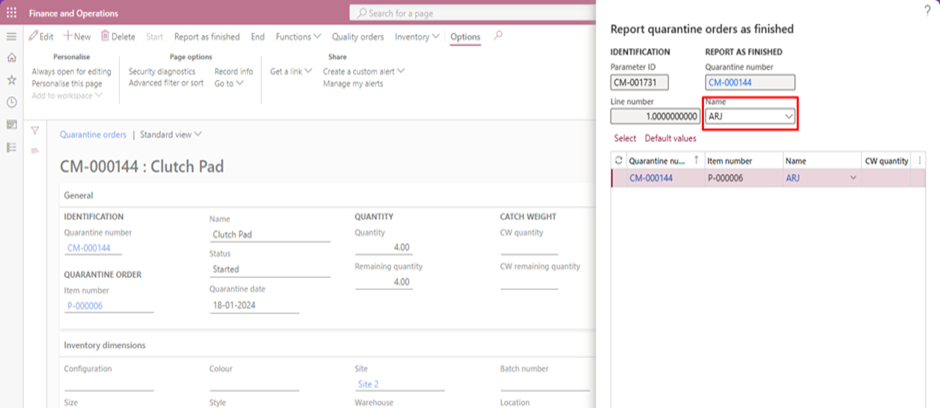
Now I will split the Quarantine Order CM-0000142 into 2 separate Quarantine Orders. For that I will use the Split function which is available at the Top of the screen under the Functions Tab.
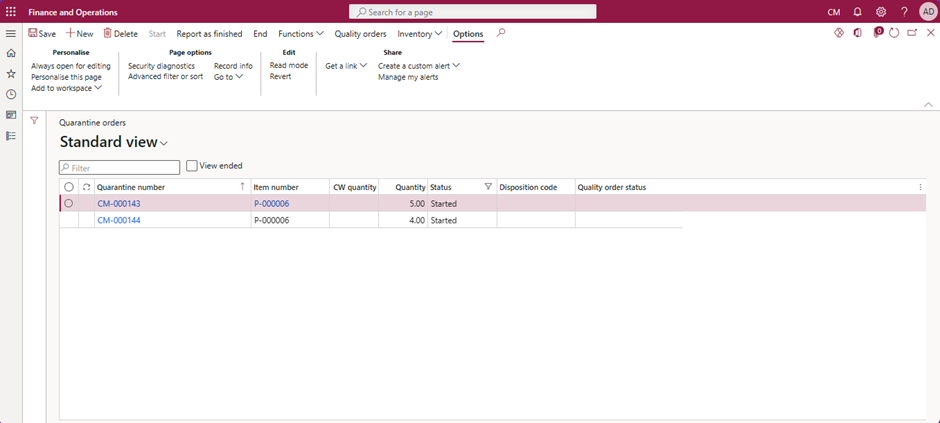
In the above image you can see that I have split the Quarantine Order CM-0000142 into 2 different Quarantine Orders that is CM-0000143 and CM-0000144 for further processing.
Now let’s begin the further processing.
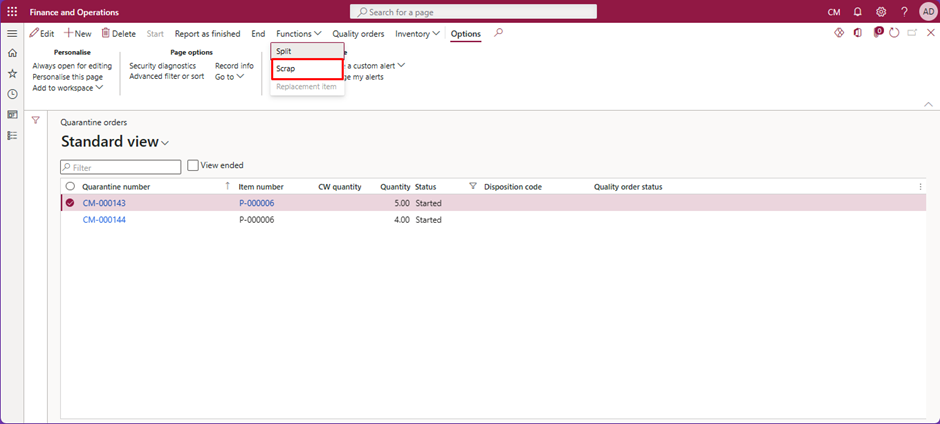
- Scrap Quarantine Order CM-0000143:
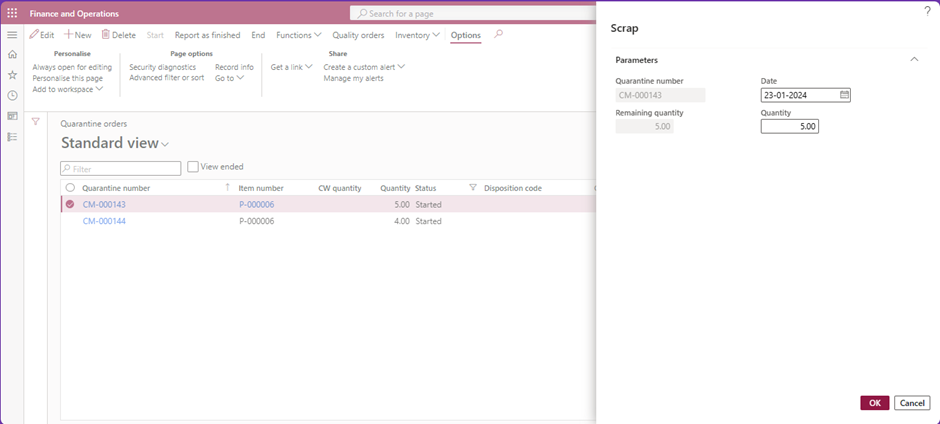
To scrap this order, I will use the Scrap functionality.
To Scrap this order, click on Function and then select Scrap.
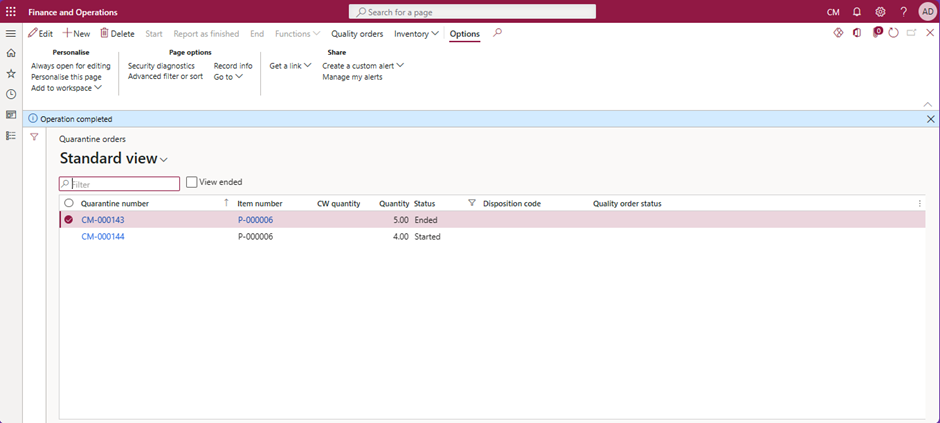
Here, you can see that the Quarantine Order CM-000143 has been ended as it has been scrapped.
2. Return the Items back to vendor:
Now in order to return the Items back to vendor I will first the Invoice the existing Purchase Order which is CM-PO-0000137. Then I will receive the Items from the Quarantine warehouse to the W3 warehouse.
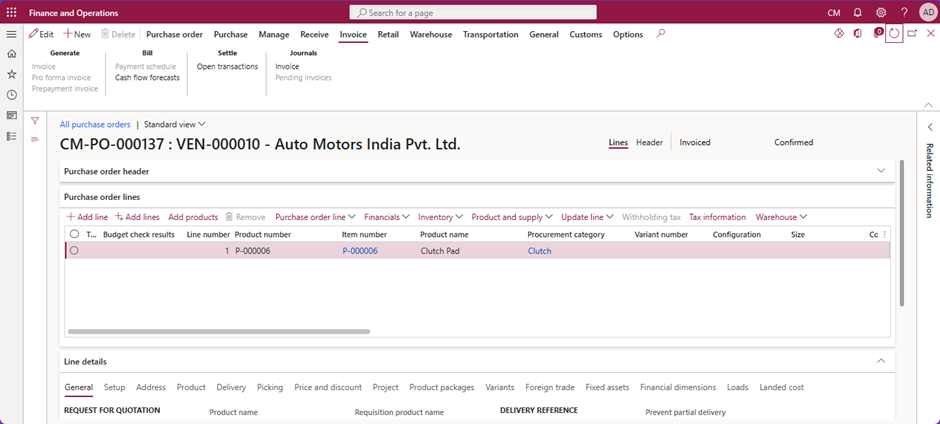
Below you can see that I have invoiced the purchase order CM-PO-0000137.
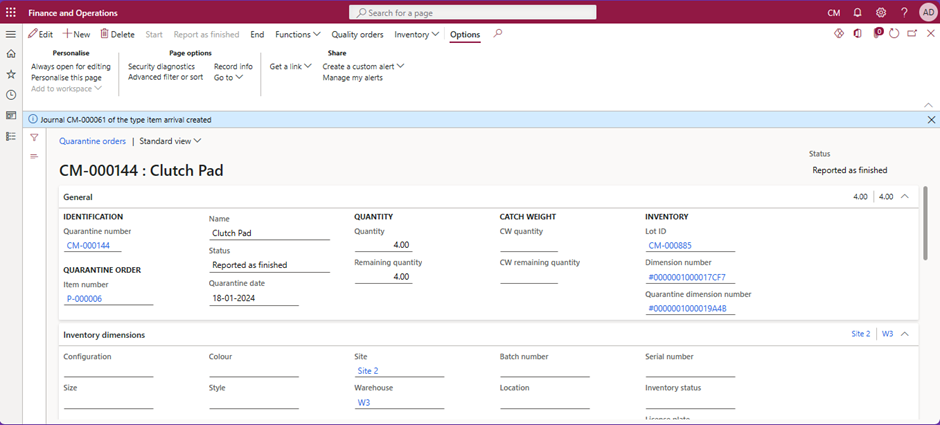
Now let’s receive the items from the Quarantine Warehouse to the Central Warehouse, for that I will use the Arrival Journal.
As you can see that a New Arrival Journal has been created.
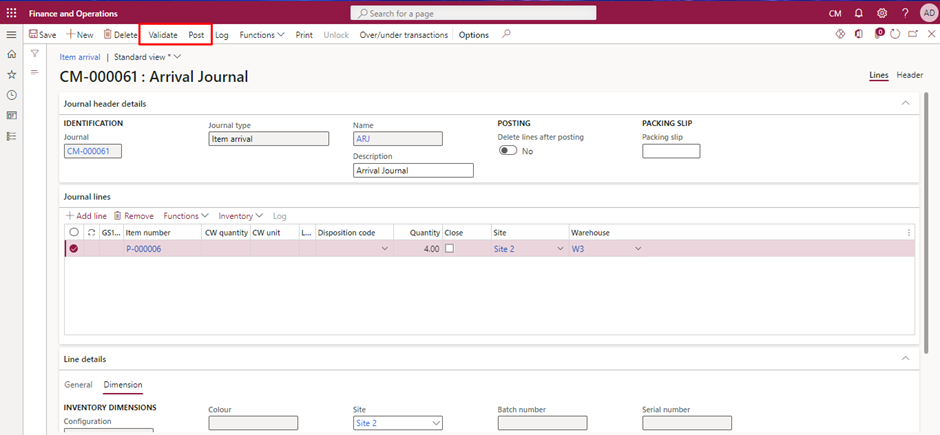
Validate and Post the Journal.
Vendor Return Process:
After posting the Journal create a New Purchase Order with the type as Return Order. For that go to Procurement and Sourcing>Purchase Orders>All Purchase Orders.
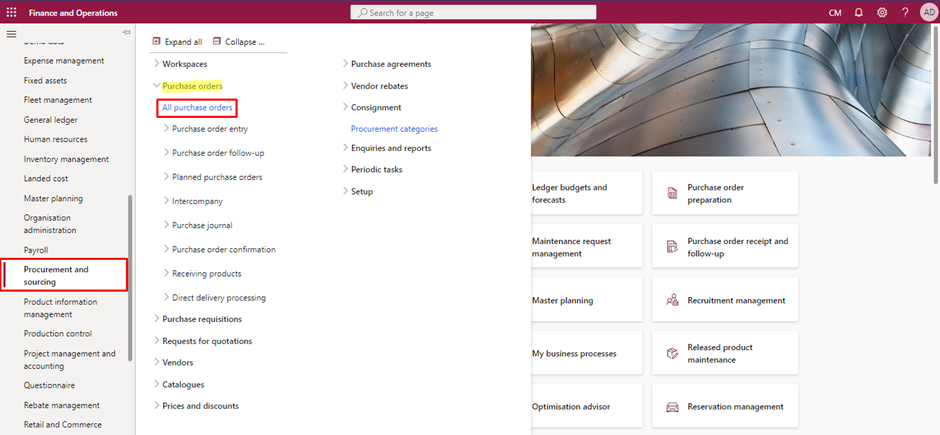
Then select the Vendor to whom the Items will be returned and select the Purchase Type as Return Order.
Enter the Site and Warehouse from which the Items will be returned back to the Vendor. Then enter the RMA number provided by the Vendor and then Click OK.
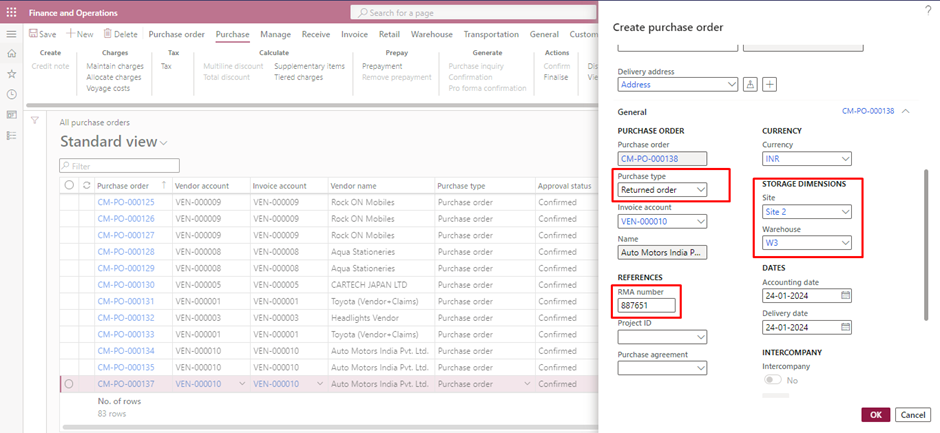
Click on the Purchase Order line, select Credit Note, choose the specific invoice, input the quantity as a negative value, and then click OK.
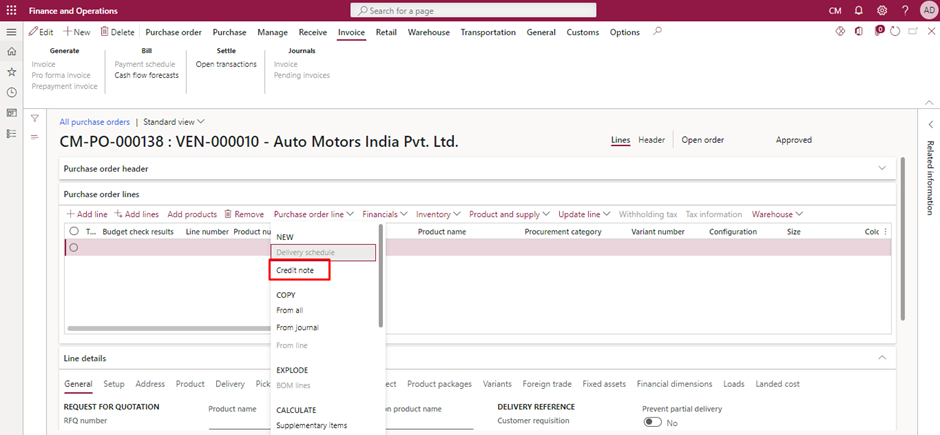
In my case the Invoice Number was 311711, so I will select that and then click OK.
Then proceed with the normal purchase order processing which will be Product Receipt and Invoicing.
After Invoicing the Return Order aa credit note will be created which will be deducted from the Vendor Balance.
The below screenshot represents the On hand List before and after posting the Return Order Invoice.
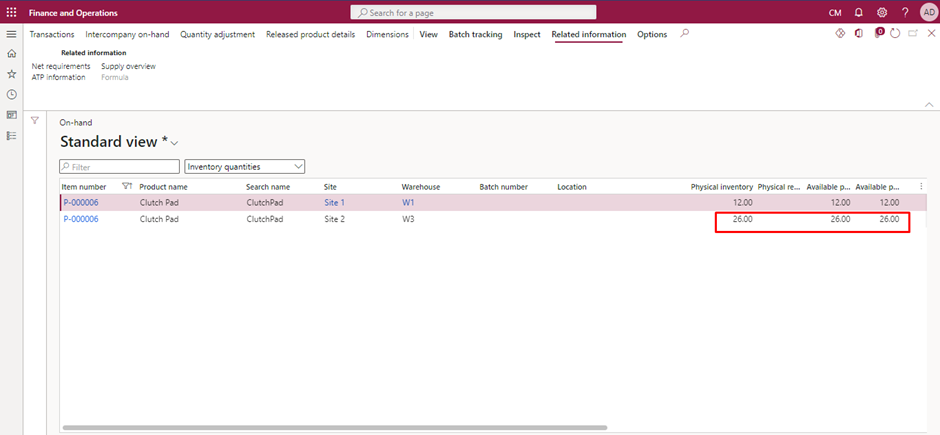
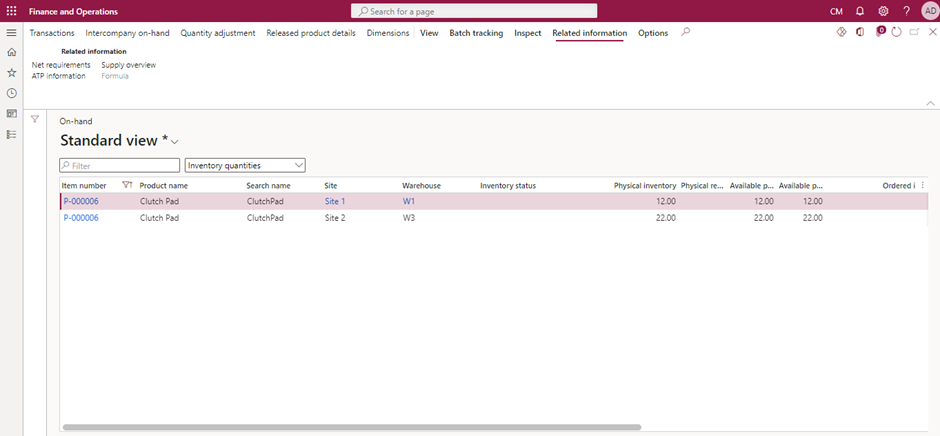
In the above screenshot you can see that the On hand Quantity changed from 26 to 22 since 4 quantities have been returned back to vendor.
That’s it for this blog. Hope this helps you!
Thank You!
