Item Master Data Mass uploading via Data Management in Dynamics 365 Finance and Operations
Item Master Data Mass uploading via Data Management
In the world of data management, it has become essential that the business users are provided solution for mass data uploading. Where the data is managed by very less expert users who’re required to upload and download data in bulk at very less given time. Today I am going to show you the way to upload Item Master Data quickly and with no errors via Data Management in MS Dynamics Commerce and Retail.
Note: Masters as Item group, tax codes, units, category, item model group etc should be pre-configured or created for this to work accurately otherwise this operation will fail with errors as the masters are not created/configured.
For this operation to work first we need to identify the fields that are required to do two steps.
First, Item Master Creation
Secondly, Item Master release in released products.
So now to identify the necessary “importable” fields first we will export the required fields in excel as below.
- Goto Workspaces> Data Management and in Data Management click Export Button.
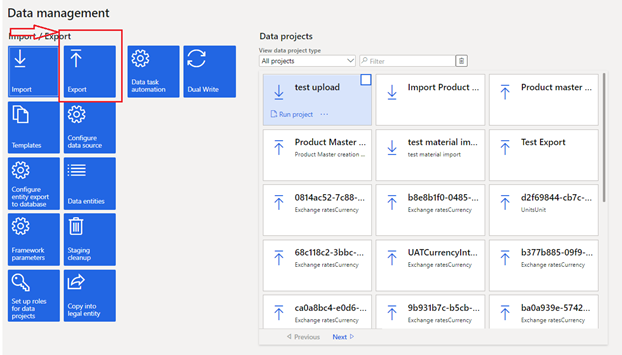
- Upon Clicking “export” create project as data filled in below.
- Desired Project name in my case I have named it “product master fields”
- Generate Data package to be set as No.
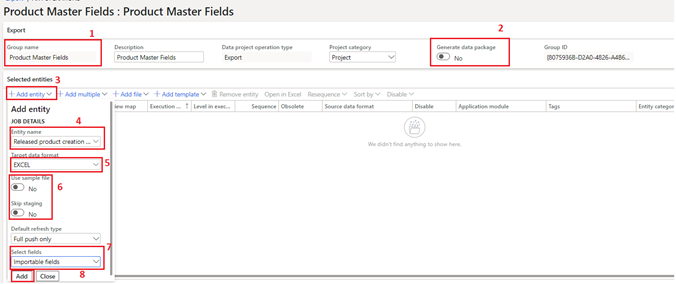
- Now when project is created click on “add entity”
- Select entity as “Released product creation V2” or anything as “Released product creation” whichever is latest according to your version of D365.
- Select output as “EXCEL”.
- Use sample file and skip staging to be set as NO.
- Very important step to select fields to be set as “Importable Fields”
- And “add” the entity to the project.
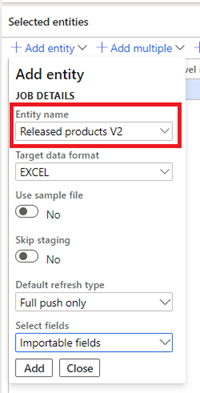
- Now again click on “add Entity”, select the rest of the fields as mentioned in pt. II., and select “released products V2) in entity name and click on add.
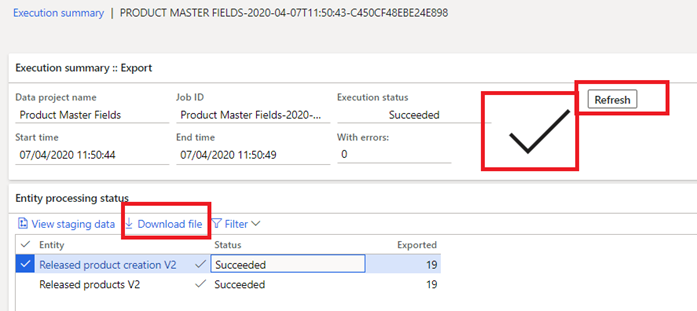
- Now click on export button as below
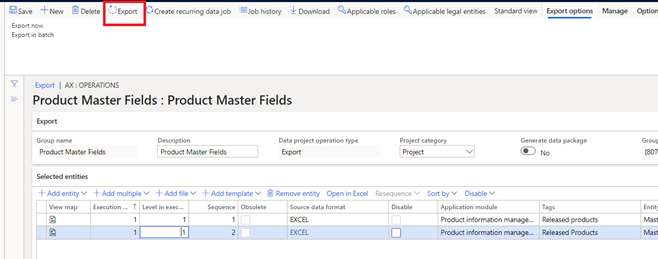
- Now on export screen Click on “refresh” button until you see
mark on thee screen, and then “download File” to obtain excel file. Note: click each project one by one to download table fields.
- After downloading file replace the data with required information that you want in your product master so that we can Import the Master data.
(Note: You can hide fields that doesn’t require user to input any data but are required by AX this you will identify in released products format).
- Assuming that you have created your files for upload we will now continue with “Import” data,
Goto Workspaces > Data Management and in Data Management click “Import” Button.

- Upon clicking “Import” create a project and add entity as below.
- Add group name, in my case added as “import Master Data”
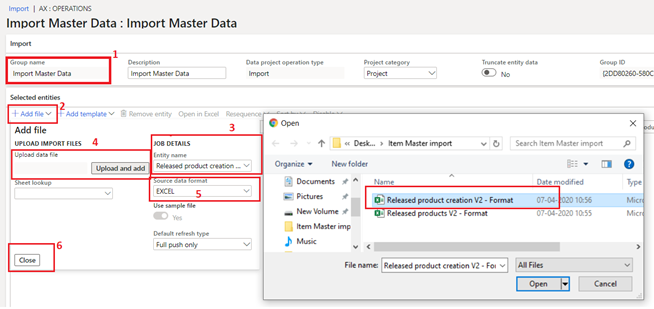
- Now when project is created click on “add File”
- Select entity as “Released product creation V2” or anything as “Released product creation” whichever is latest according to your version of D365.
- Click the upload data file and select the appropriate file, in my case it is “Released product creation V2 – Format.xlsx”
- Select “Source data format”
- Click close.
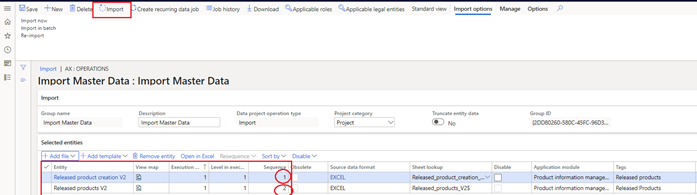
- Now again click on “add File”, select the rest of the fields as mentioned in pt. VIII., and select “released products V2) in entity name and click on Close.

- After adding both the files, now its time to click on “import”, but first ensure that the sequence of the below files are as such 1st for Released Product Creation and 2nd for Released products. If this is not in sequence the above operation will fail.
- After Clicking on Import, you will have to click on refresh button until the come. Upon success you can see the validation message that the master data has been uploaded successfully and released the product for use.
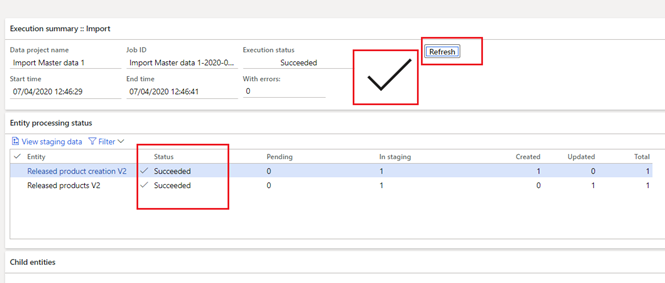
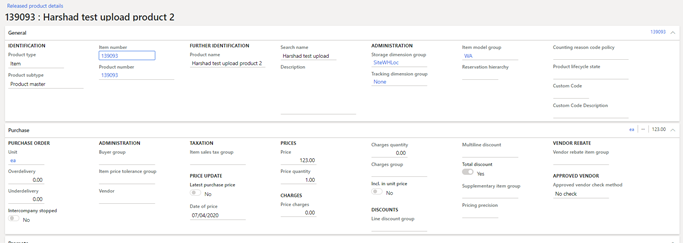
- In my case I had uploaded a test product which got successfully uploaded to the system.
Hope this helps!
