Managing Post-Delivery Service and Repairs Using Cases in Dynamics 365 CRM
Why This Matters
Imagine you’ve just delivered an order, and now there’s a service issue or repair request from the customer. What’s the best way to track and resolve that? That’s where Cases come in.
This blog walks you through how your company can use Cases in Dynamics 365 CRM to efficiently handle post-delivery service and repair requests—directly linked to the order fulfillment process for better visibility and control.
Let’s break it down step by step.
Step 1: Navigate to Cases from an Order Fulfillment Record
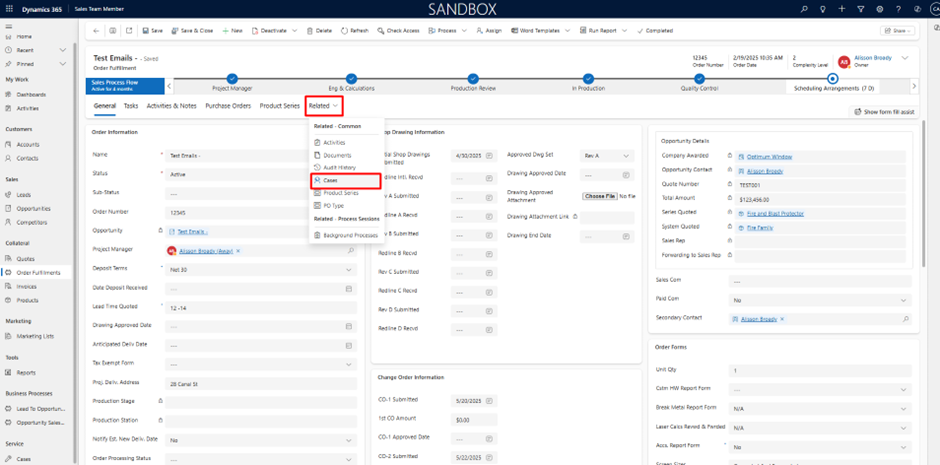
Start by opening the Order Fulfillment record.
Click on the “Related” dropdown and select “Cases” from the list.
This takes you directly to all service cases related to that order.
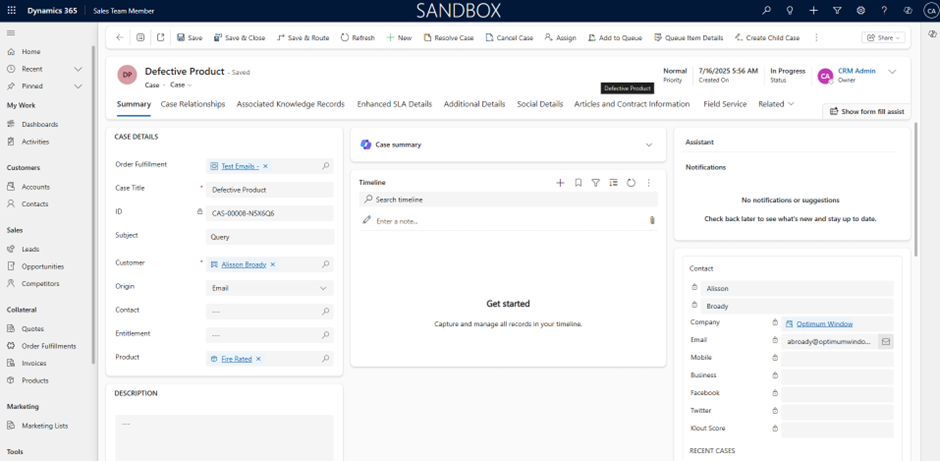
Step 2: Create a New Case
Click on the “New Case” button in the Cases tab.
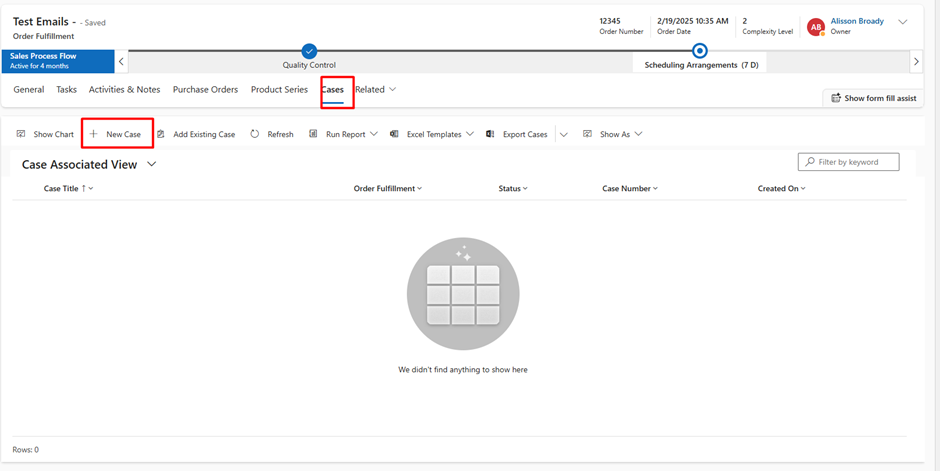
A Quick Create: Case form appears.
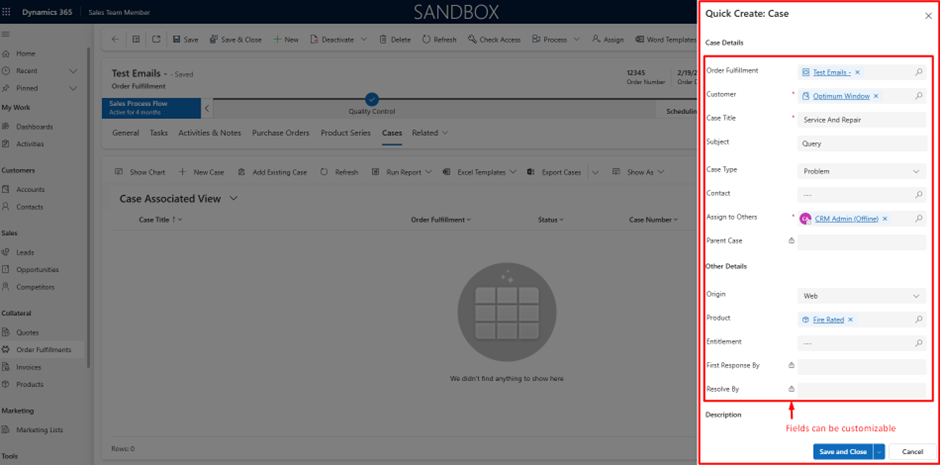
Here’s what you’ll see and fill in:
- –Order Fulfillment → Auto-linked to the current order
- –Customer → Automatically populated
- –Case Title → Give it a relevant title like “Defective Product”
- –Case Type → Choose between Problem, Request, etc.
- –Subject → A brief summary of the issue
- –Assign to Others → Choose the responsible CRM user (e.g., CRM Admin)
- –Product → Select the relevant product (e.g., Fire Rated)
Optional fields like Contact, Origin, Entitlement, and others can be filled in if needed.
You can also include details such as First Response By, Resolve By, and Description, depending on your business requirements.
Once done, hit Save and Close.
Step 3: View All Related Cases
After saving, you’ll see a list of all Cases associated with the order under the Case Associated View.
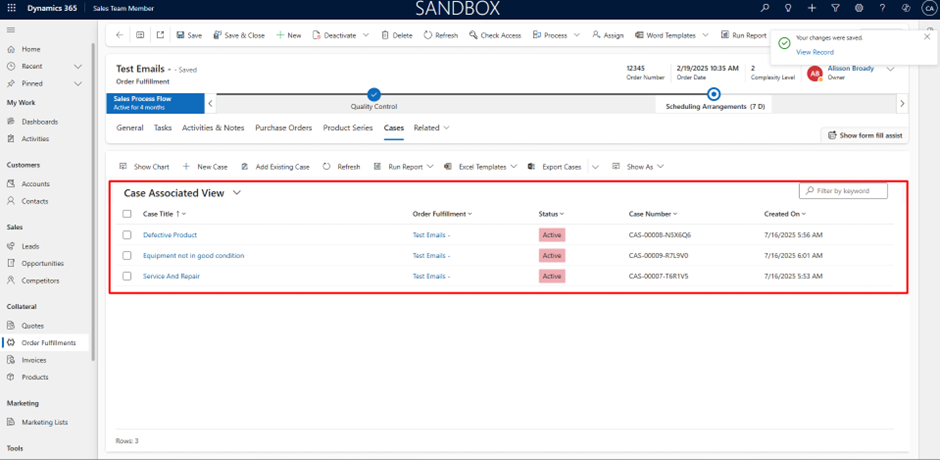
Each entry includes key info like:
- –Case Title
- –Status
- –Order Fulfillment Link
- –Case Number
- –Created On timestamp
This makes it easy to monitor all service activity related to an order at a glance.
Step 4: Manage Case Details
Click on any Case Title to open the full Case record.
From here, you can:
- -View or update key fields (Customer, Origin, Product, etc.)
- -Add notes, timeline updates, or CRM activities
- -Assign or reassign the Case to someone else
- -Create child Cases if the issue is split across teams
- -Resolve or cancel the Case when it’s completed
Step 5: Monitor Service Performance
Navigate to Dashboards > Service and Repair to track ongoing Case performance.
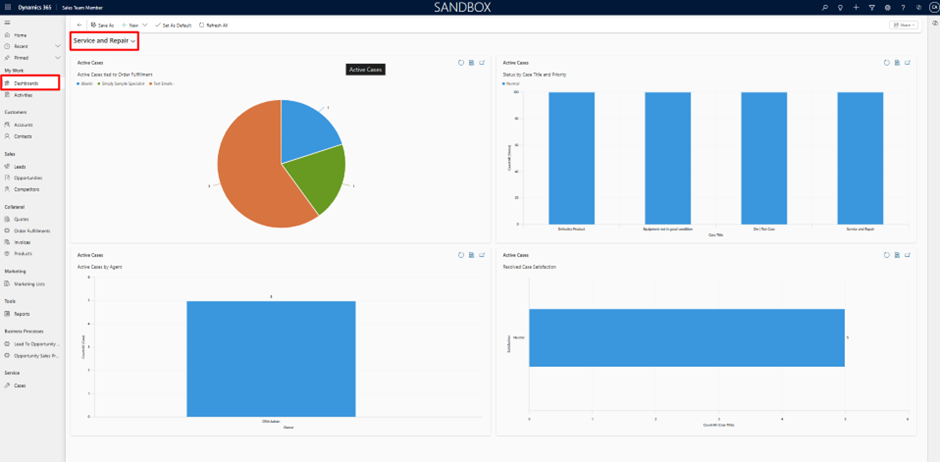
Here’s what you’ll see:
- –Active Cases by title or assigned agent
- –Case Priority breakdown
- –Resolved Case Satisfaction insights
- -And more performance metrics, depending on dashboard configuration
This allows your company’s service team to monitor progress, manage workload, and identify recurring product or fulfillment issues.
To conclude, by following this process, your company ensures that every post-delivery service or repair request is captured, tracked, and resolved—while keeping everything connected to the original order.
It’s simple, efficient, and fully integrated into Dynamics 365 CRM.
Hope this helps!!!
I hope you found this blog useful, and if you would like to discuss anything, you can reach out to us at transform@cloudfronts.com.
