Microsoft Dynamics 365 Business Central and Microsoft Dynamics 365 for Sales Integration
Introduction:
If you use Microsoft Dynamics 365 for Sales for customer engagement then you can use Microsoft Dynamics 365 Business Central for order processing and finances and have seamless integration in the lead-to-cash process. When you integrate you application with sales, you can have all the access to Sales data from Business Central and the other way around in some cases. Thus, Integration enables you to work with and synchronize data types that are common to both services, such as customers, contacts, and sales information, and keep the data up to date in both locations.
Pre-requisites:
Microsoft Dynamics 365 Business Central
Microsoft Dynamics 365 for Sales
Demonstration:
Steps for Integration:
1. Business Central and Microsoft Dynamics 365 Setup
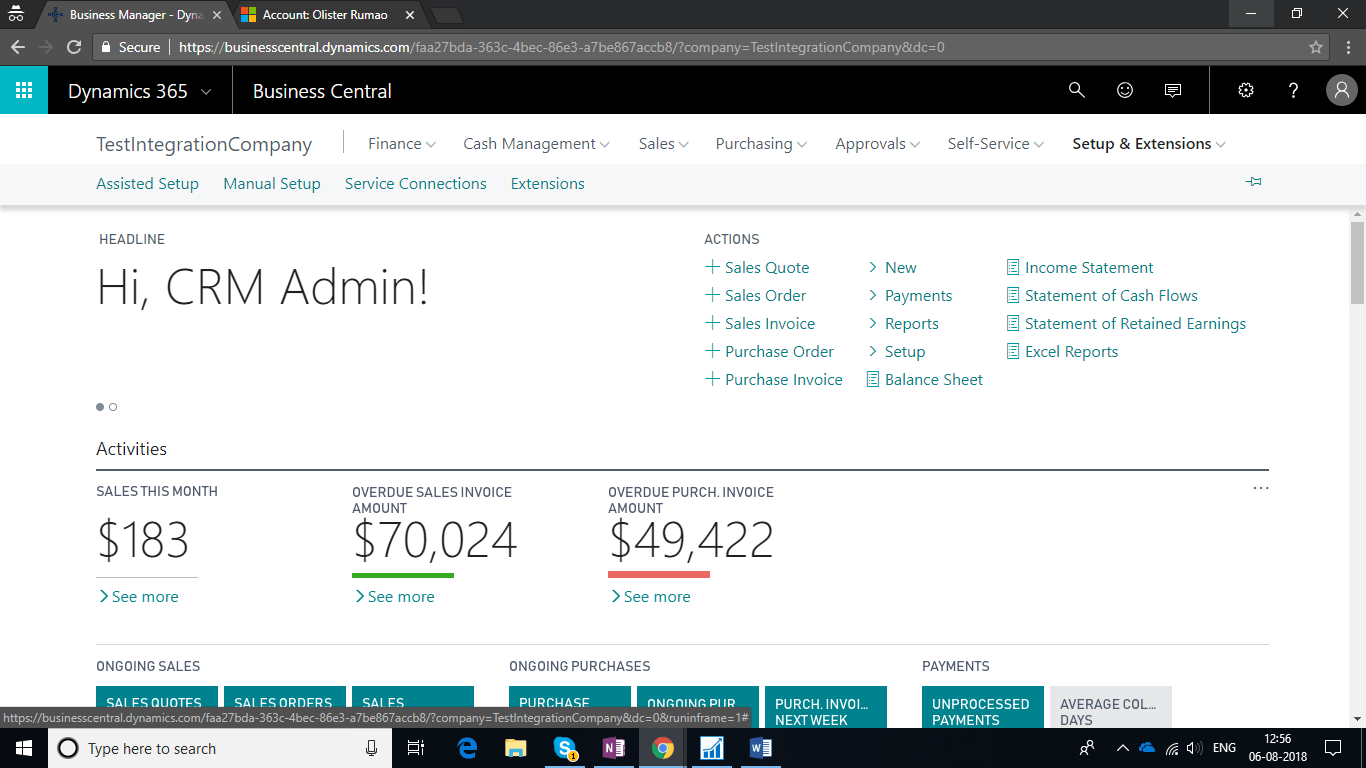
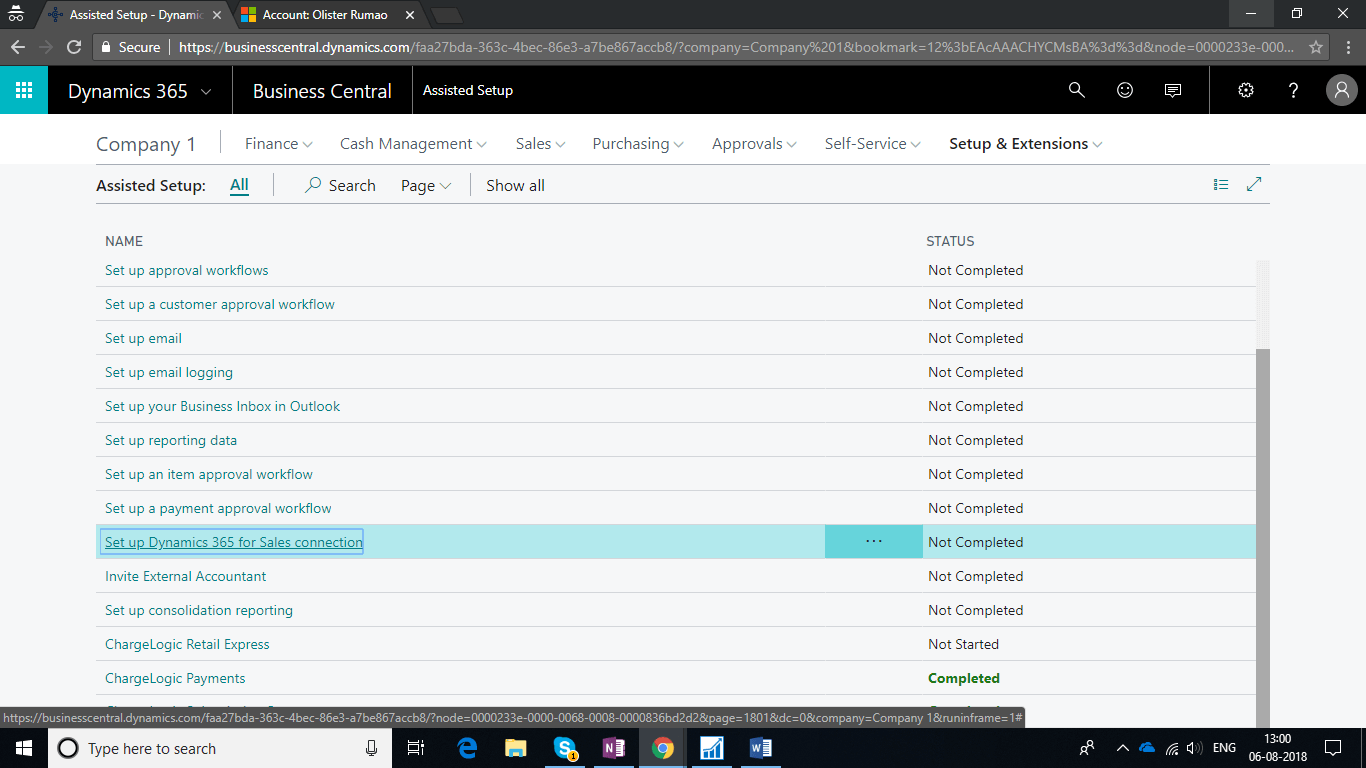
- Go to Business Central, in the Setup and Extensions select Assisted Setup.
- Select Set up Dynamics 365 for Sales Connection for establishing a connection between Business Central and Sales in Microsoft Dynamics 365.
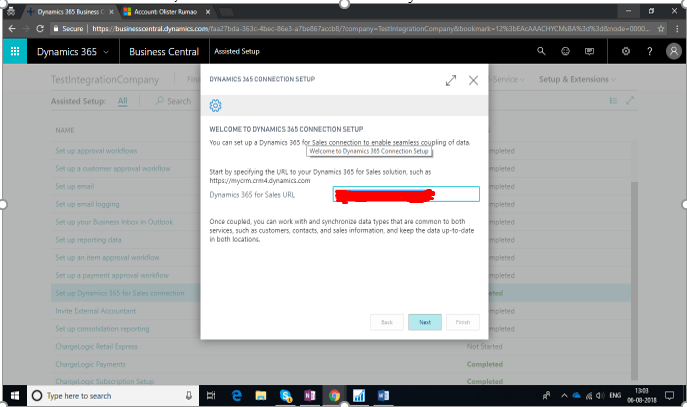
Setup Page - In the textbox, Insert the link of the Microsoft Dynamics 365 Sales.
- Click on Next and insert the Email and Password for the user that will be used for Synchronization between Business Central and Microsoft Dynamics 365 Sales.
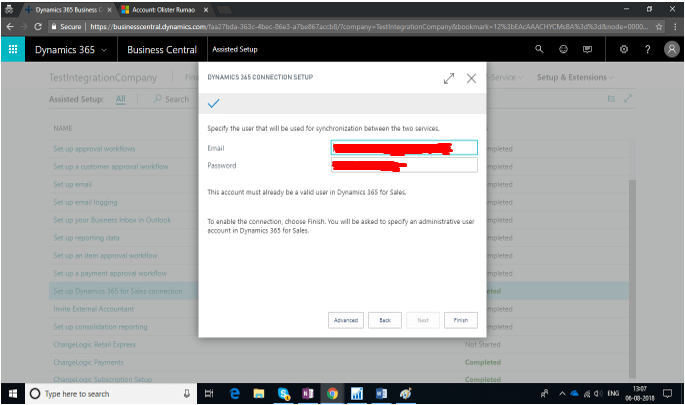
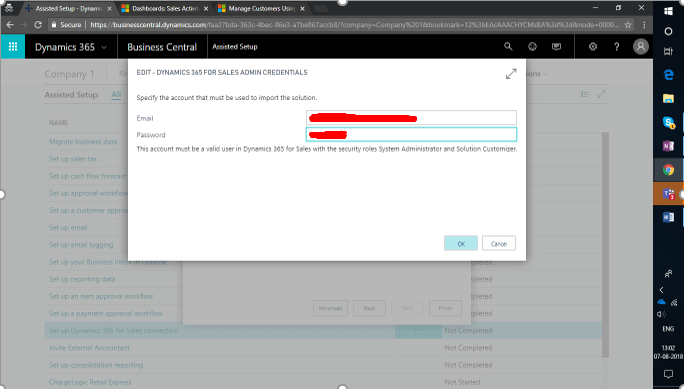
- Click on Finish. Then insert the credentials of the user account which must be used to import the solution. The user account must have Security Roles of System Administrator and Solution .
2. Couple Business Central Salespeople to Microsoft Dynamics 365 User
- Before a customer can be synchronized to an account, the salesperson that is assigned to the customer must be coupled to a user in Sales. Go to that Salesperson and in navigate select Coupling. A coupling provides the basis for integrating records in Microsoft Dynamics 365 with records in Business Central. Essentially a coupling associates or links a Microsoft Dynamics 365 record to a Business Central record. Hence, coupling needs to be setup for integration.
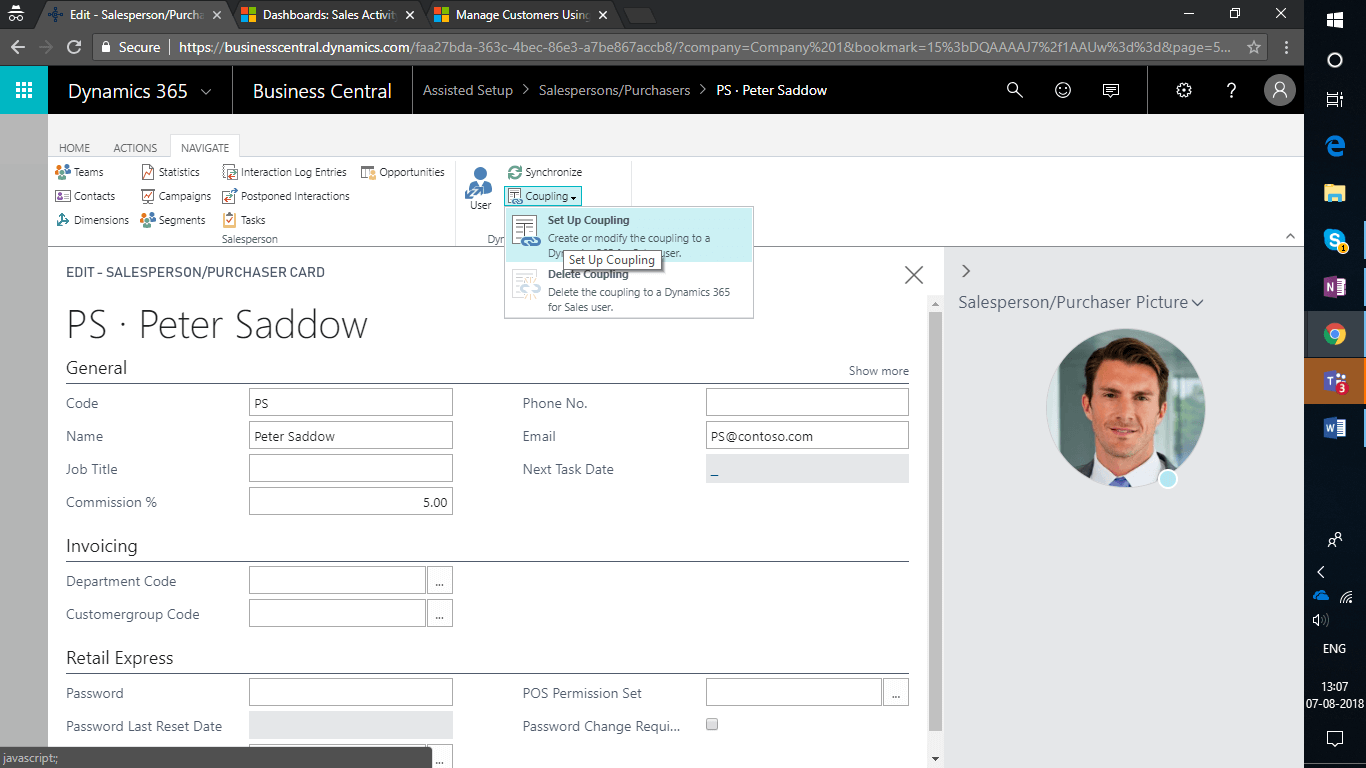
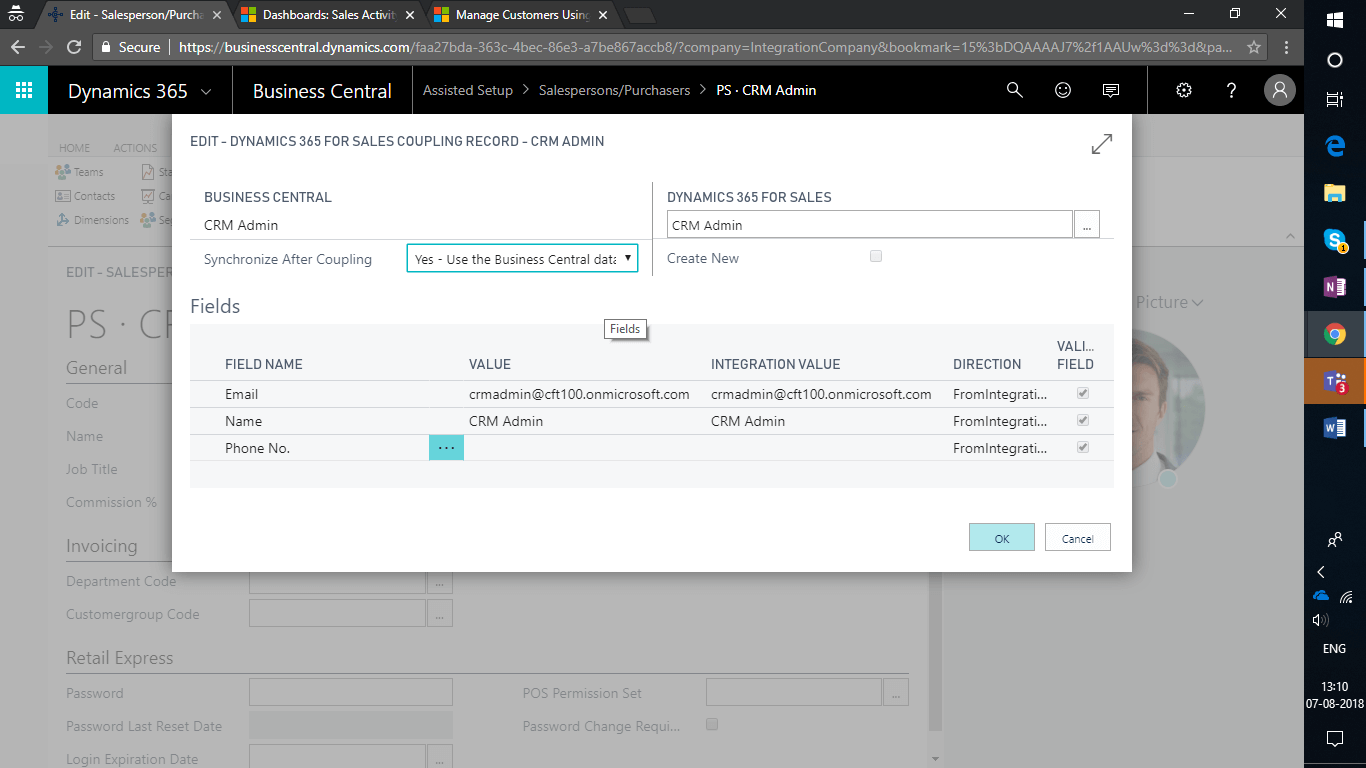
- Select the CRM user you want to synchronize the Salesperson with and click on OK. If you want to synchronize data in the account in Microsoft Dynamics 365 and the customer in Business Central, set the Synchronize After Coupling field to one of the following options.
- Yes – Use the Business Central Data : Copies the data from mapped fields of the customer in Business Central to the account in Microsoft Dynamics 365.
- Yes – Use the Dynamics 365 Sales for Data: Copies the data from mapped fields of the account in Microsoft Dynamics 365 to the customer in Business Central.
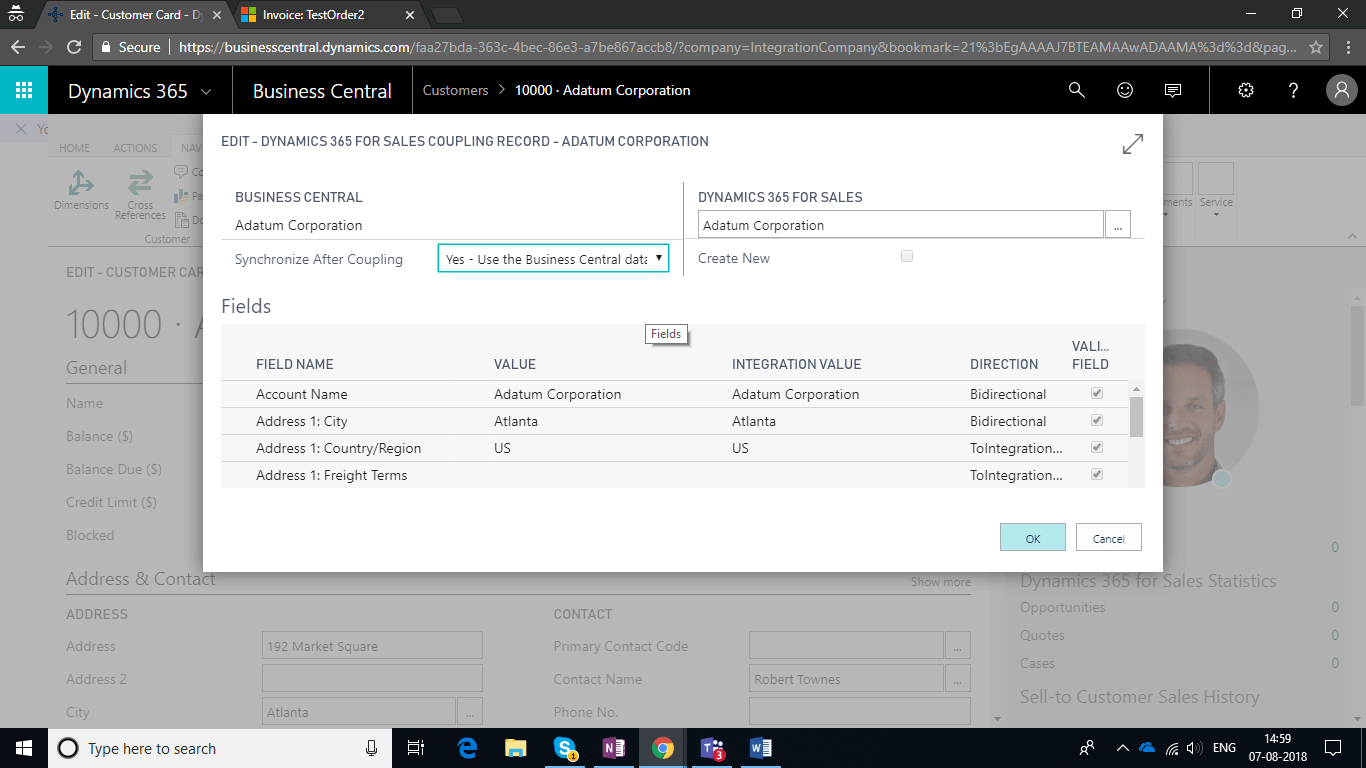
3. Couple Business Central customers to Microsoft Dynamics 365
- In the Customer table of Business Central, select the customer you want to couple with Account in Microsoft Dynamics 365 Sales.
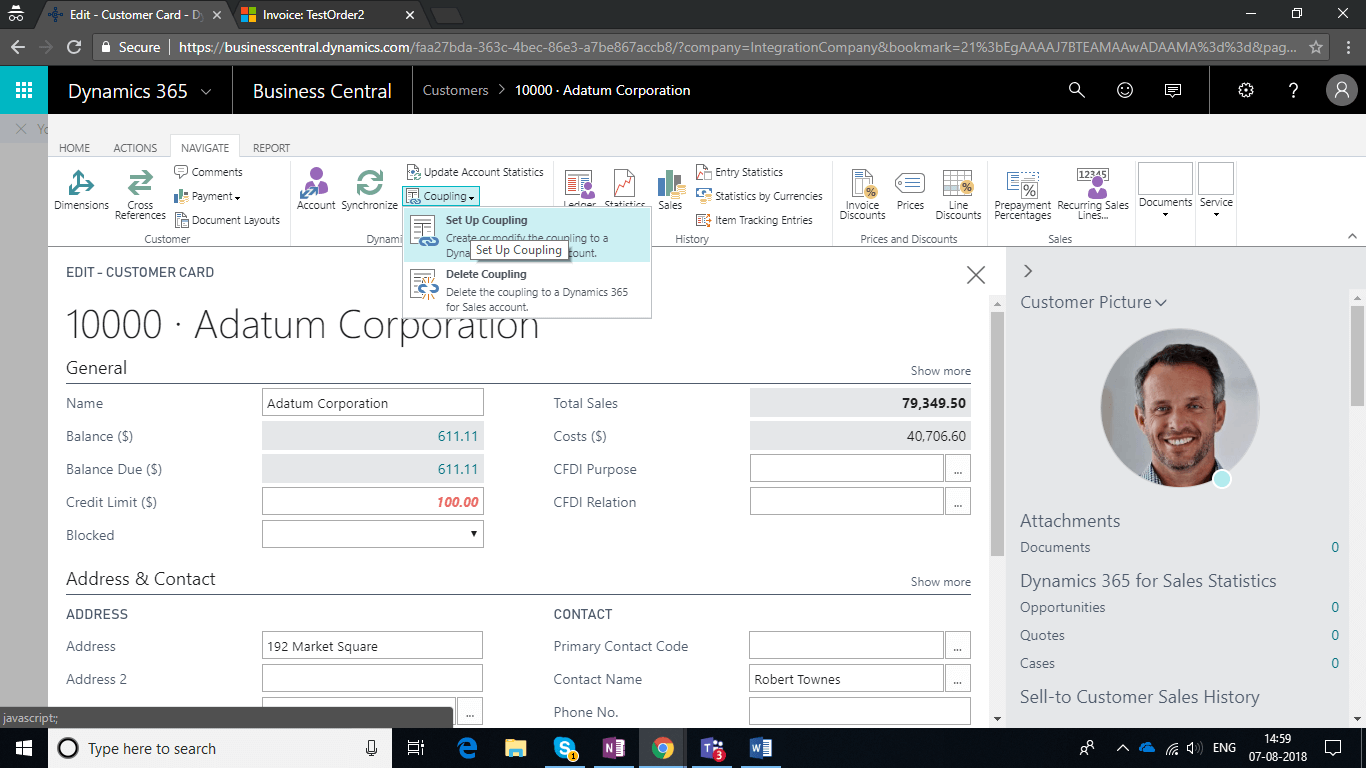
- Set the Coupling of the Customer with the related Account in Microsoft Dynamics 365 and click on OK.
4. Couple Business Central Unit of Measures to Microsoft Dynamics 365 Units Groups
- In the Unit of Measure table of Business Central, select the Unit of Measure you want to couple with the Unit Group in Microsoft Dynamics 365 Sales.
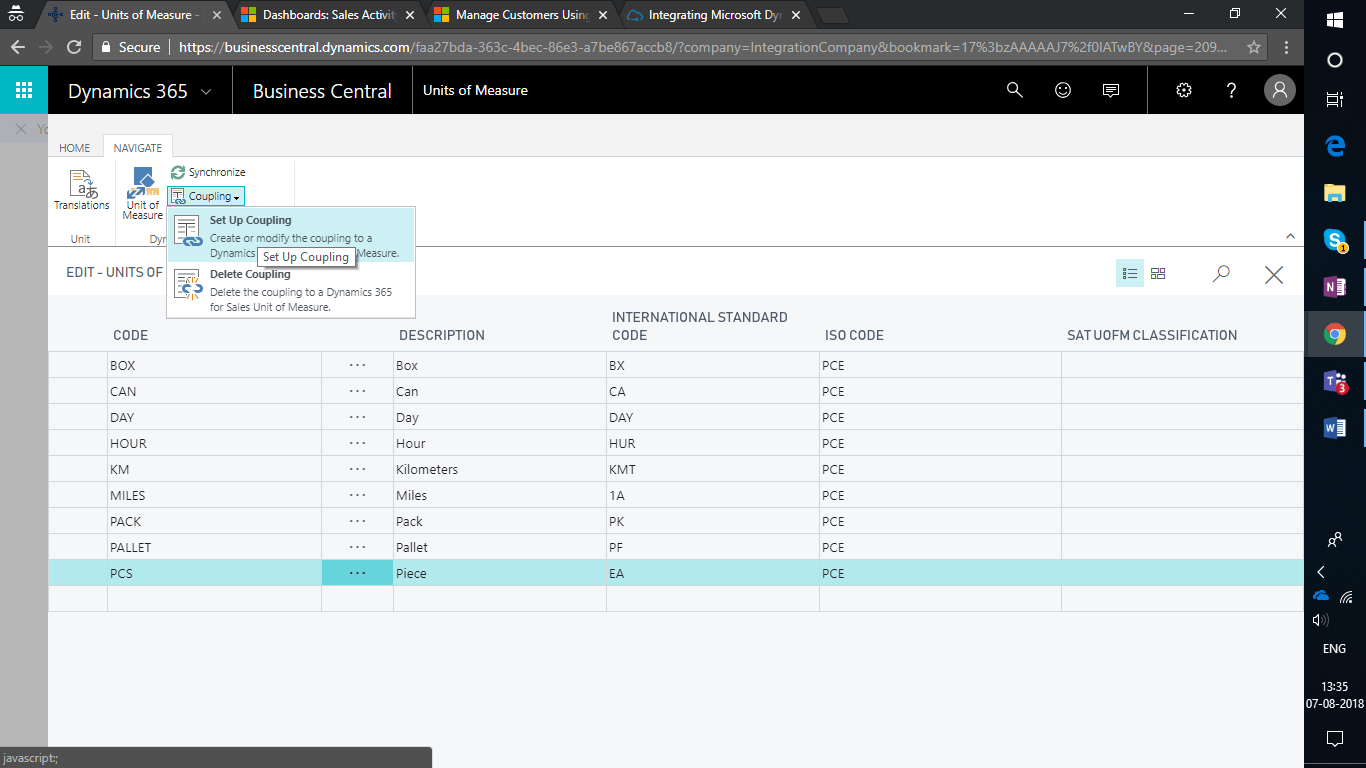
- Set the Coupling of the Measure with the related Unit Group in Microsoft Dynamics 365 and click on OK.
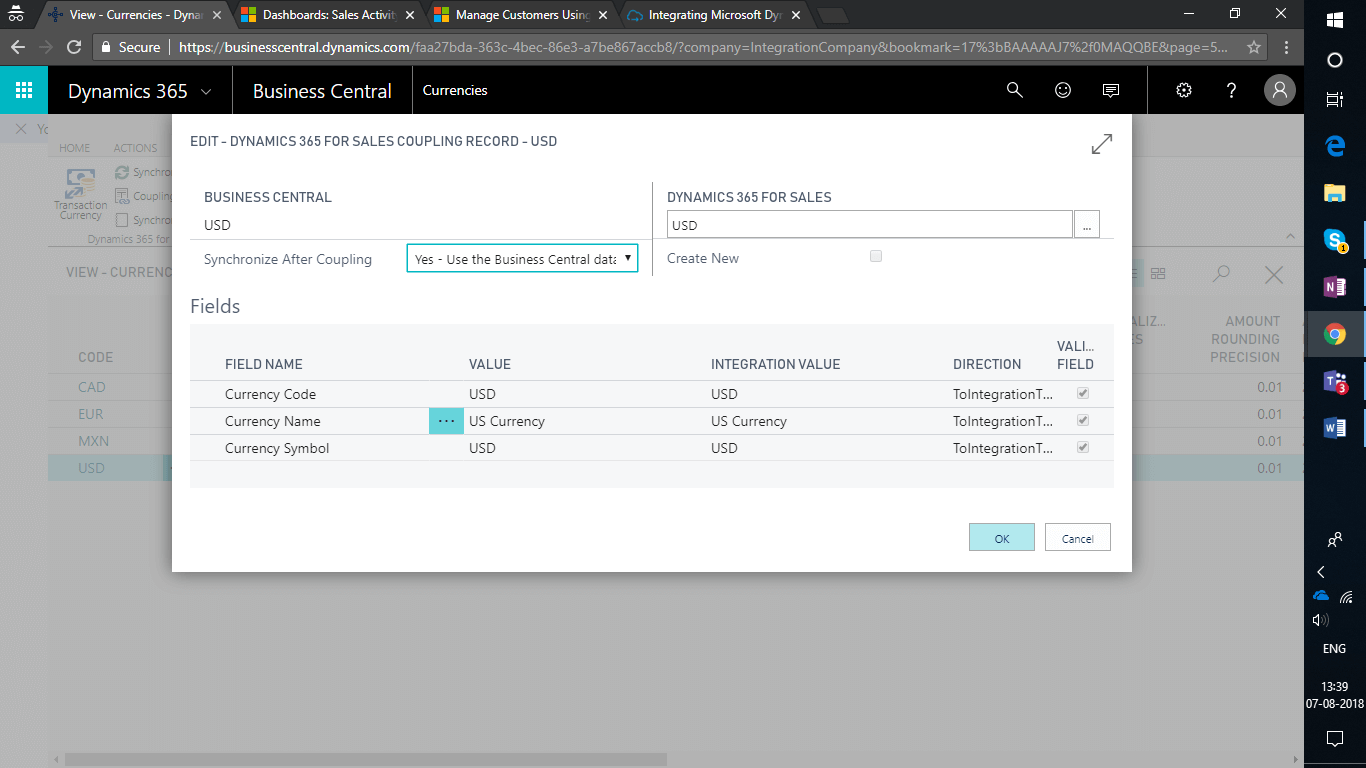
5. Couple Business Central Currencies with Microsoft Dynamics 365 transaction Currency
- In the Currencies table of Business Central, select the Currency you want to couple with the Transaction Currency in Microsoft Dynamics 365 Sales.
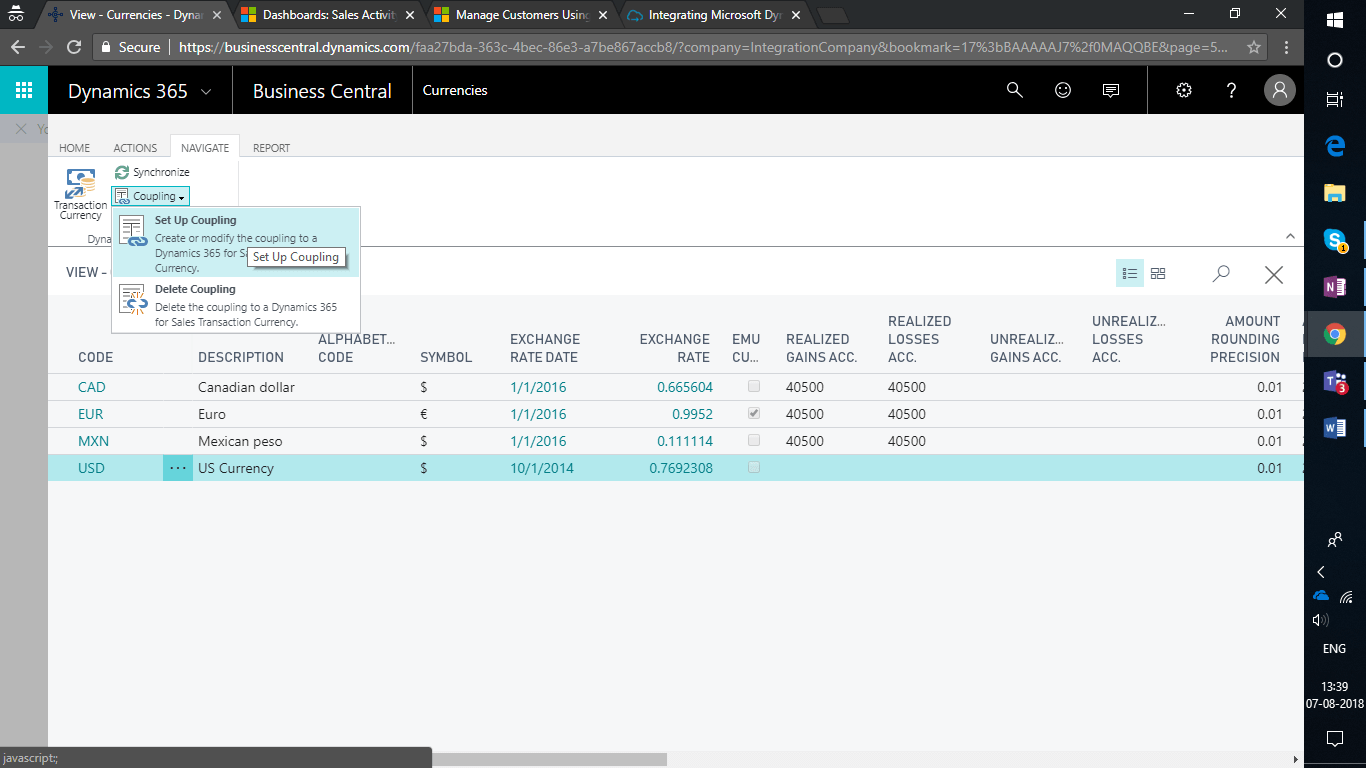
- Set the Coupling of the Currency with the related Transaction Currencies in Microsoft Dynamics 365 and click on OK.
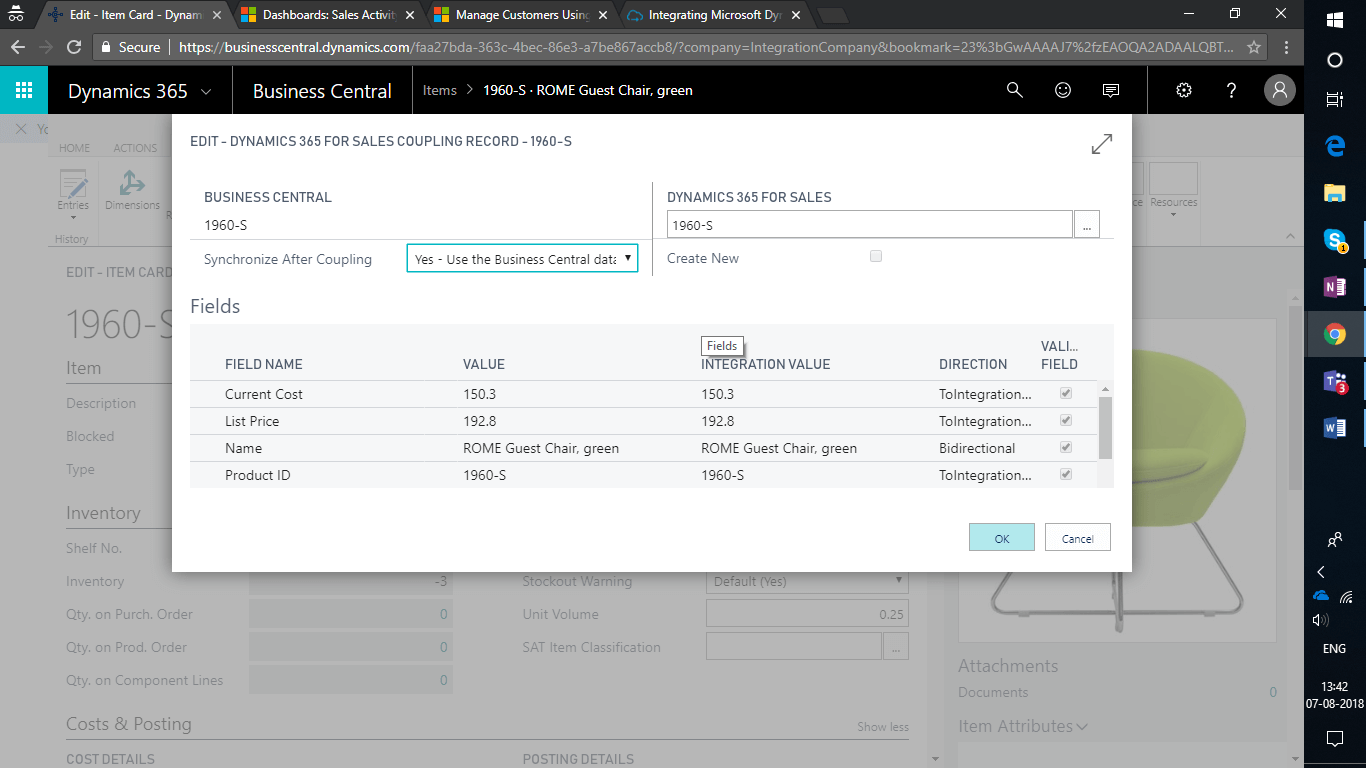
6. Couple Business Central items to Microsoft Dynamics 365 products
- In the Items table of Business Central, select the item you want to couple with the Product in Microsoft Dynamics 365 Sales.
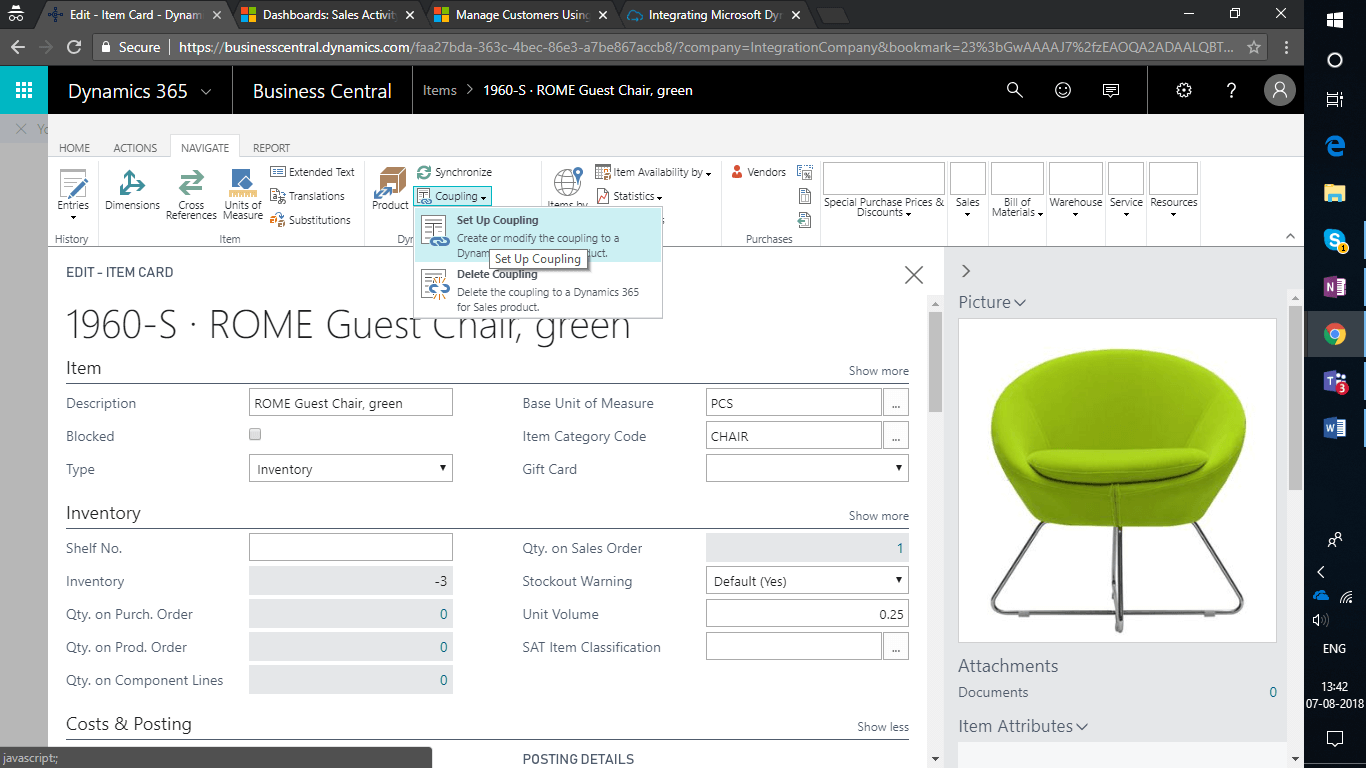
- Set the Coupling of that item related to the Product in Microsoft Dynamics 365 and click on OK.
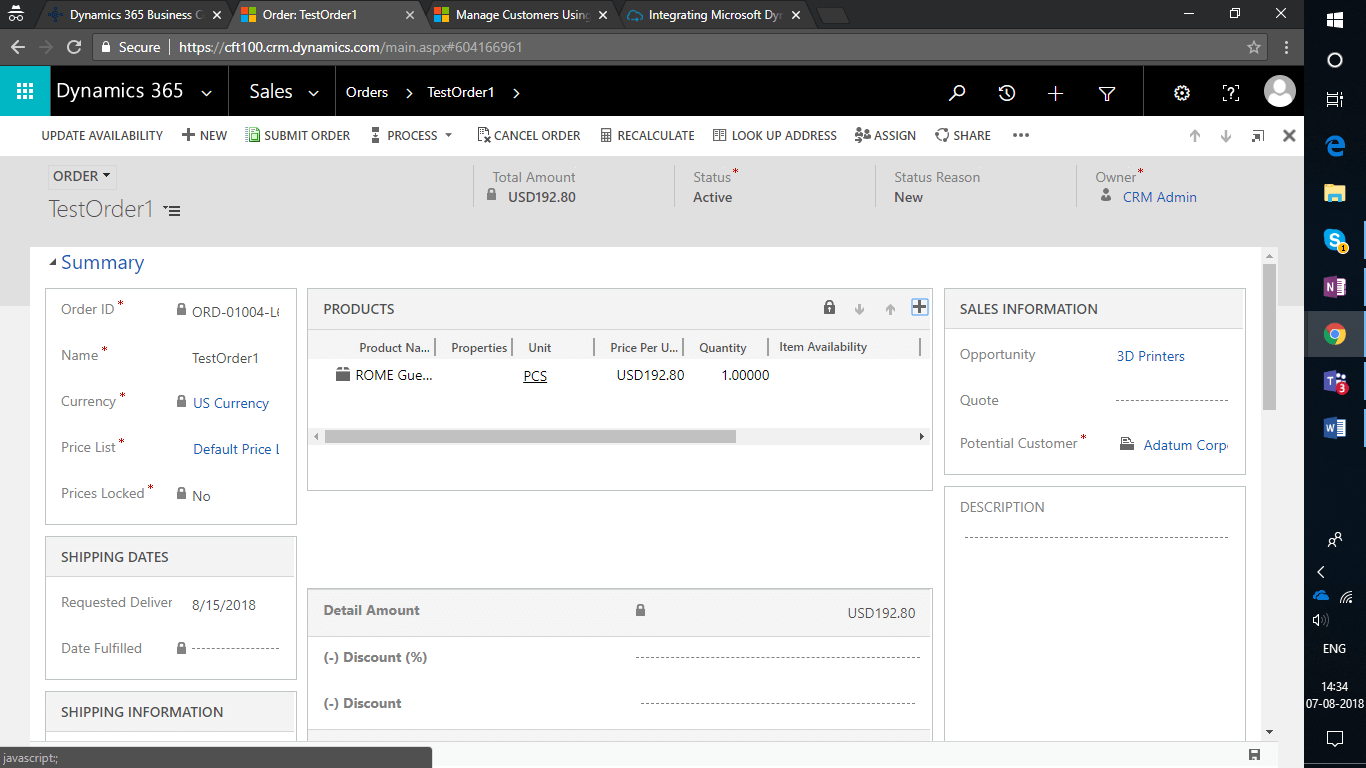
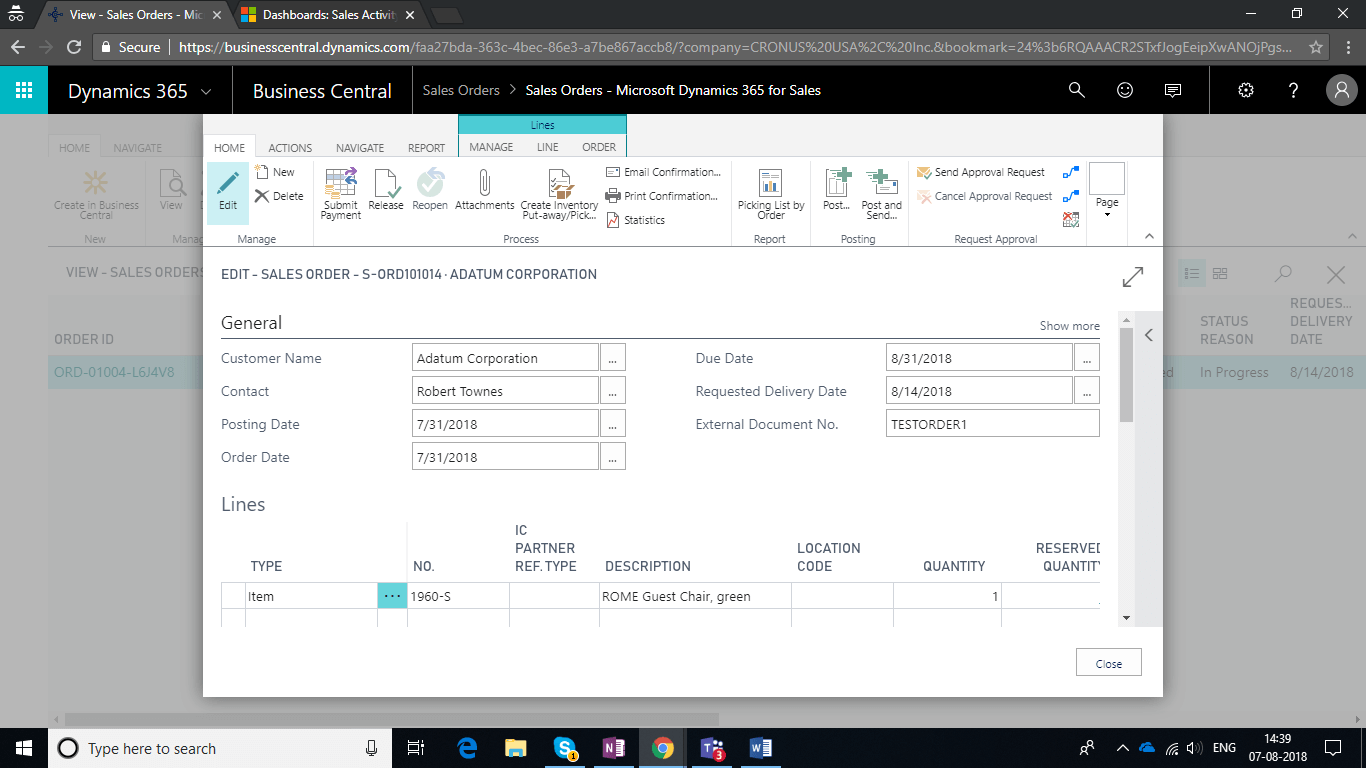
7. Sales Order Integration
- Create a Sales Order in Microsoft Dynamics 365 and when submitted it appears in Business Central.
- After submitting sales order, in the search box of Business Central enter Sales Orders, and then choose the related link. In the Sales Orders window, on the Navigate tab, in the Dynamics 365 for Sales group, choose Sales Order List.

- The Microsoft Dynamics 365 Sales Orders windows opens to display a list of only sales orders in Microsoft Dynamics 365 that have their status as Submitted.
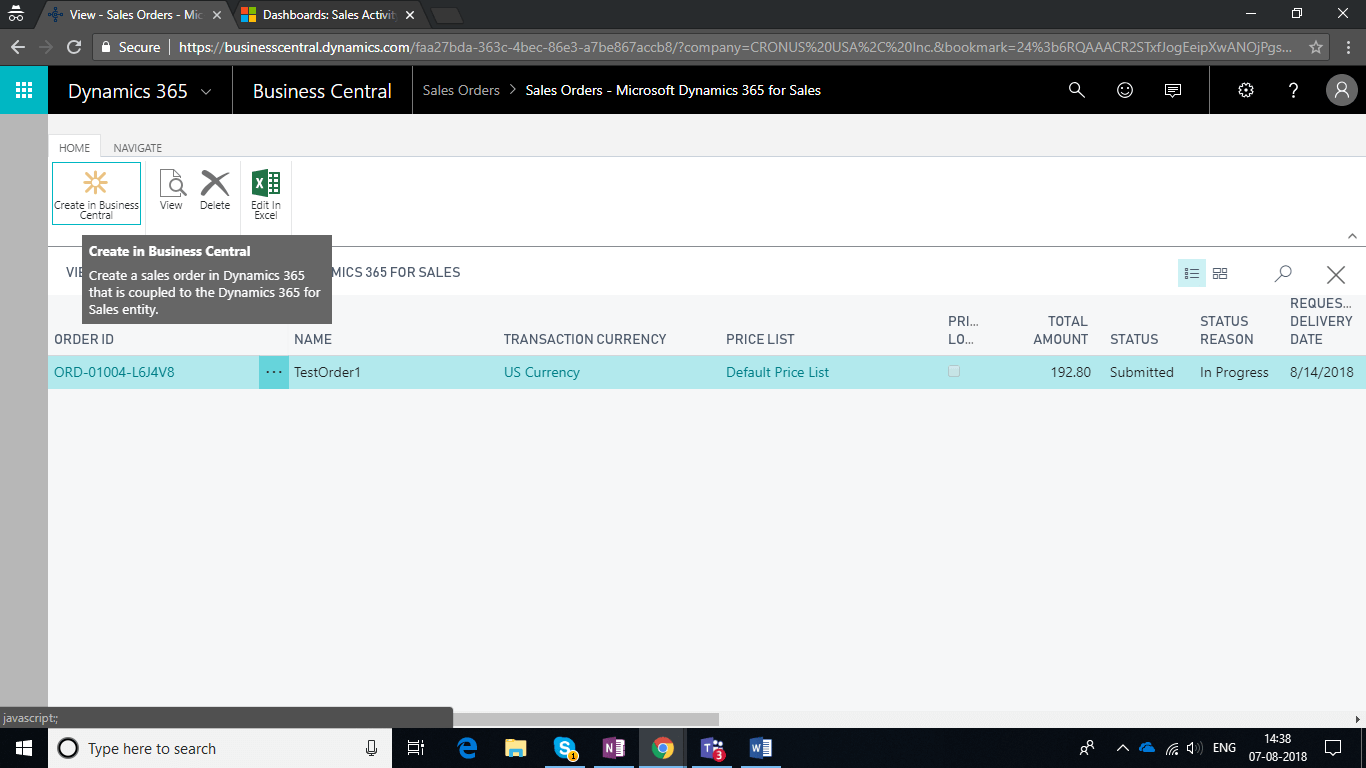
- Select the Create in Central Business Action to get the Sales Order in Business Central.
8. Sales Invoice Integration
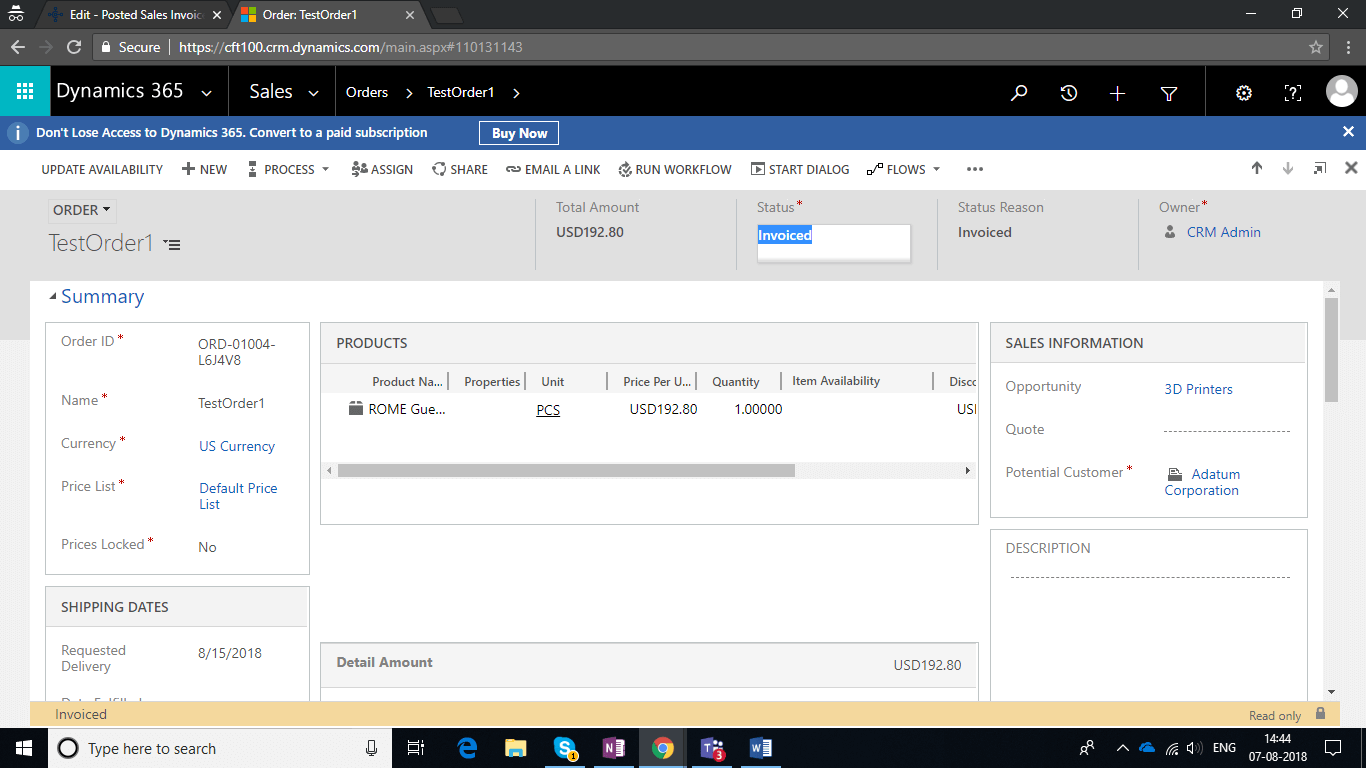
- On selecting the post action, a posted invoice is generated in Business Central and the status of the Order changes from Submitted to Invoiced.
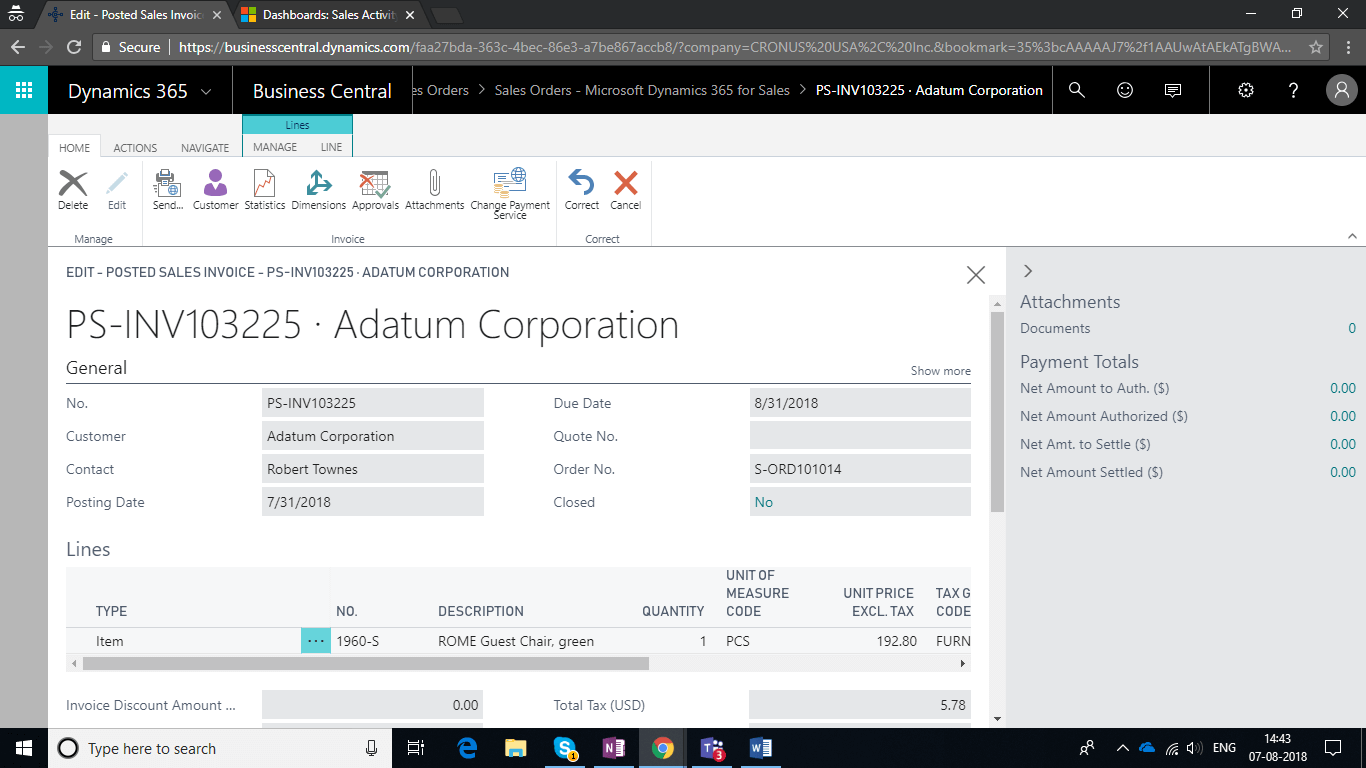
- Status changed to Invoiced.
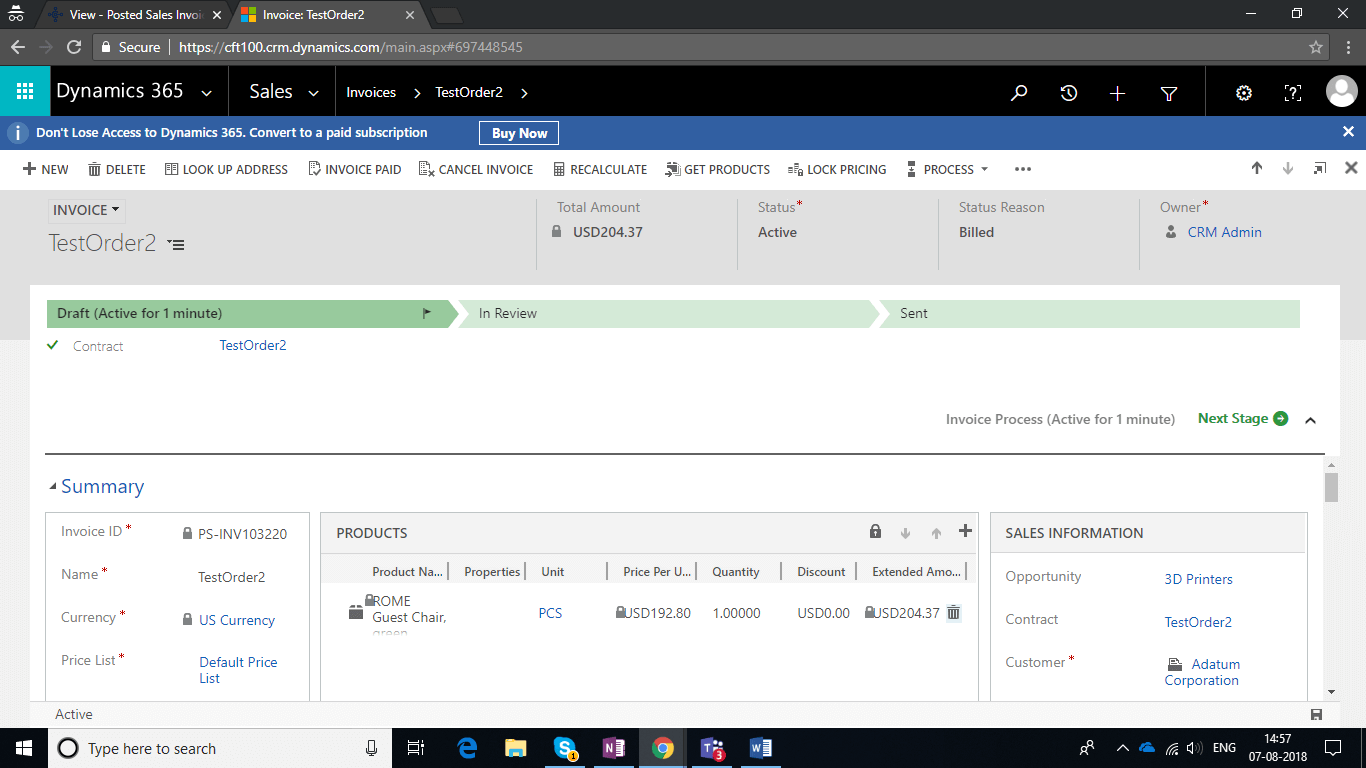
- In the Posted Sales Invoice window of Business Central, on the Navigate tab, in the Dynamics 365 Sales group,choose Create Invoice in Dynamics 365 for Sales.
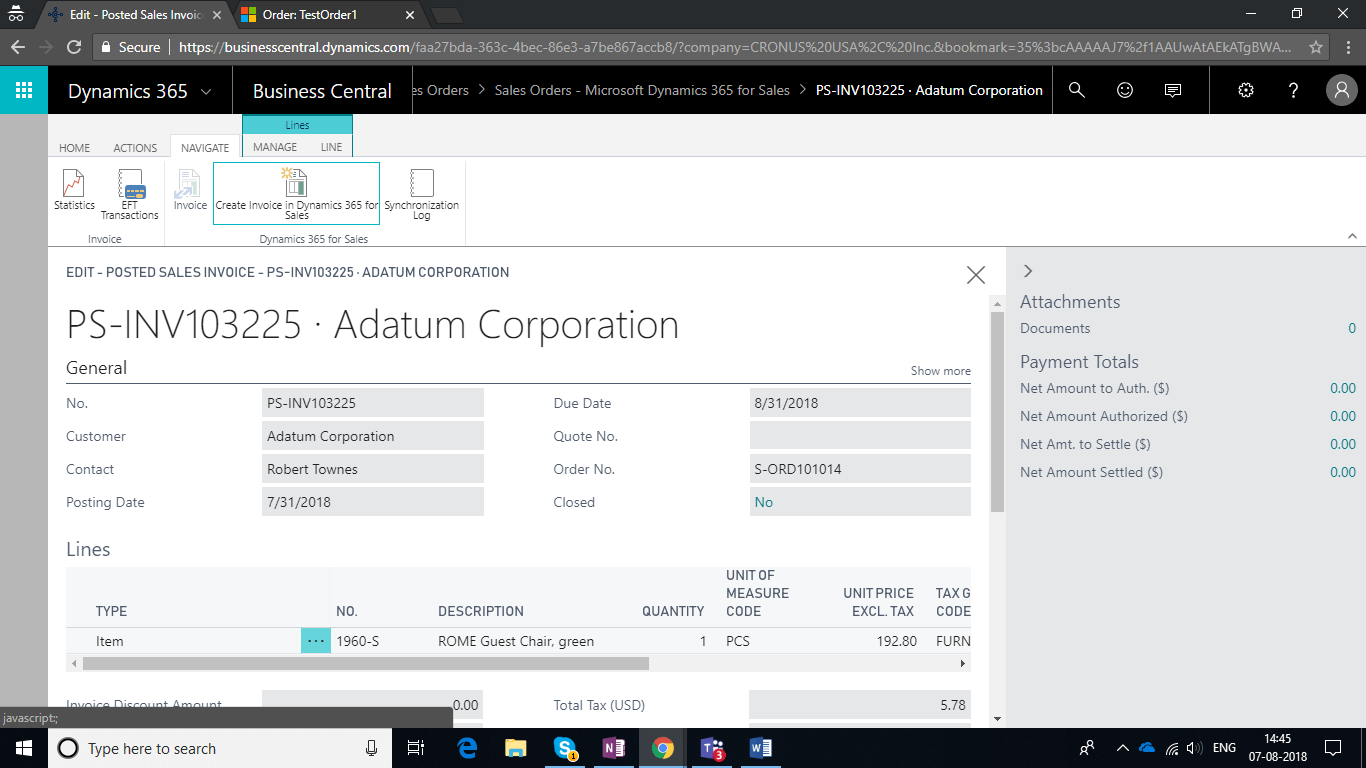
- Go to Microsoft Dynamics 365 check the Invoices.
Conclusion:
Thus, we have integrated Microsoft Dynamics 365 Business Central and Microsoft Dynamics 365 for Sales. The table below indicates the direction of mapping of different Data Types.
|
Sr No. |
Business Central Entity | Mapping Direction | D365 Entity | Default Filter |
| 1 | Salespeople/Purchaser | Sales -> Business Central | User | Sales contact filter: Status is No, User Licensed is Yes, Integration user mode is No |
| 2 | Customer | Business Central -> Sales and Sales -> Business Central | Accounts | Sales account filter: Relationship Type is Customer and Status is Active. |
| 3 | Unit of Measure | Business Central -> Sales | Unit Groups | |
| 4 | Currency | Business Central -> Sales | Transaction Currency | |
| 5 | Items | Business Central -> Sales and Sales -> Business Central | Product | Sales contact filter: Product Type is Sales Inventory |
| 6 | Sales Order | Sales -> Business Central | Sales Order | |
| 3 | Posted Sales Invoice | Business Central -> Sales | Invoice |
