Creating Entity Lists OData Feed Using Custom JavaScript in CRM Portals
Introduction:
In this blog, we shall see how can a user create an Entity List OData Feed using custom JavaScript in CRM Portals.
Pre-Requisites:
- D365 CRM Portals
- D365 CRM Environment
Why Use OData (Open Data) Protocol?
- OData provides external access to a data source via a website.
- Recommended for the Open Government Data Initiative.
- Data API for Microsoft Azure
- Data is delivered in JSON format unlike XML format.
- Use of OData for custom live reports, new feeds, external applications, or leveraged by client-side AJAX for unique Entity List UI.
Scenario:
In the following scenario the user will learn how to configure an Entity List OData Feed and Configure OData Display Using Client-Side JavaScript. The following below image shows the OData feed from an Account Entity List, that we are going to create using client-side JavaScript.
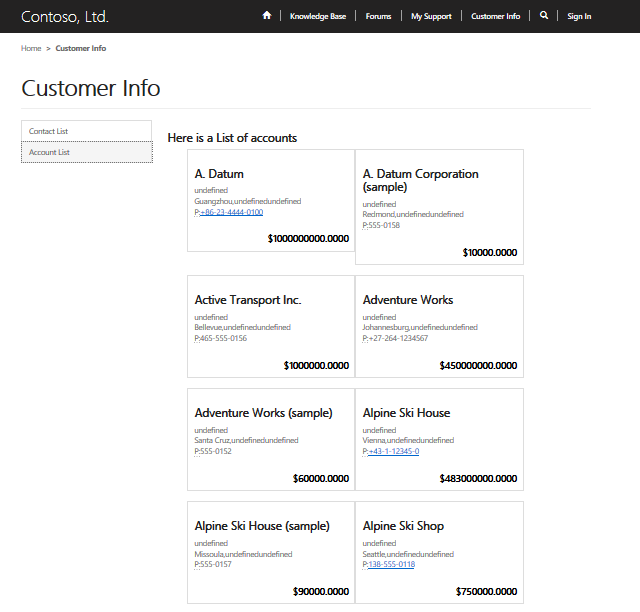
Fig 1. The OData to be configured using client-side JavaScript
Steps for Implementing Above Scenario
Step 1: The user will have to first create a new ‘Entity List’ in this case a ‘Account’ Entity List by going to Portals>Entity List and click on ‘New’ and in the Entity Name input select ‘Account’ and create a view Name “Active Accounts” that will display a grid view of all the Active Accounts as shown below in the following two images.
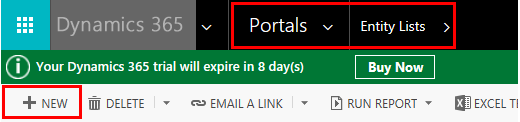
Fig 2.1 Creating a New Entity List
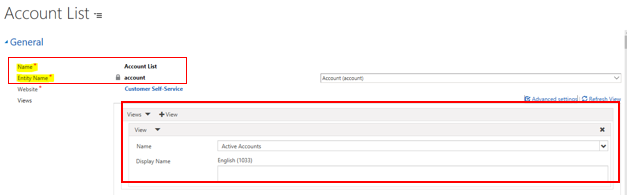
Fig 2.2 Setting Properties for the Entity List
Now, user will have to enable the Entity List for OData Feed by checking on the ‘Enable’ option and entering the details into the input fields in the OData Feed Section for the Entity List as shown below:
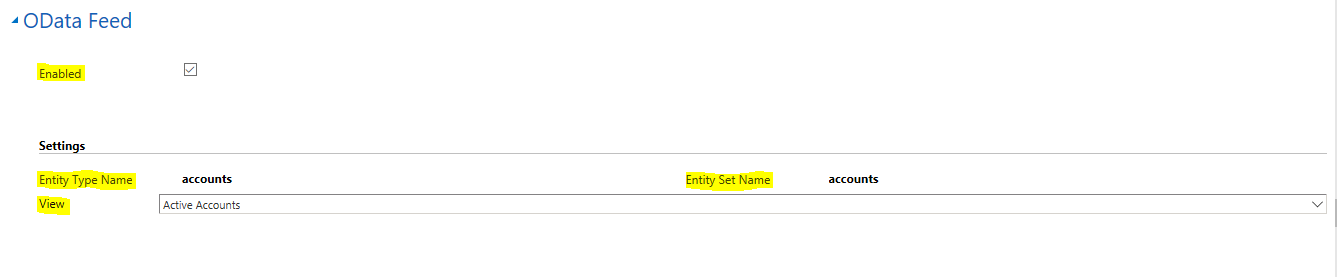
Fig 2.3 Setting Properties of OData Feed for the Entity List
Step 2: The user will have to create a Page on the CRM Portals to display the following Entity List. The user will have to use the Admin panel and click on ‘Child Page’ to create a new Page which will display the Entity List after setting the properties of the page as shown below.

Fig 3.1 Setting Properties for the Portal Page that will display the Entity List
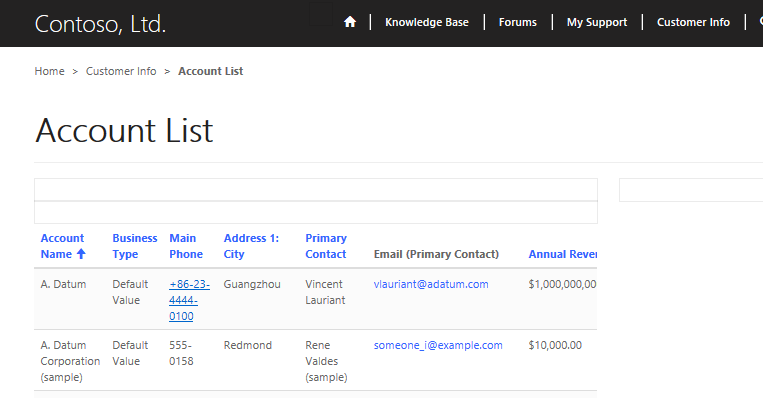
Fig 3.2 Setting up the Account Entity List Page
Step 3: The user will now have to obtain the OData Feed by entering ‘/_odata’ to the end of the Portal URL that the user uses to open the CRM Portals which will open a XML page as shown below.

Fig 4.1 OData URL of the CRM Portal
Note: The user will have to save the odata xml format and open it in another application like ‘Notepad’.

Fig 4.2 XML Format of the OData Feed on CRM Portals
Now in the above XML format we can see that accounts is being used as the href. To obtain the JSON format of the OData Feed the user will have to add the href used in the XML format to the end of the previously seen OData URL which is shown below.
![]()
Fig 4.3 URL to obtain JSON format of the OData Feed
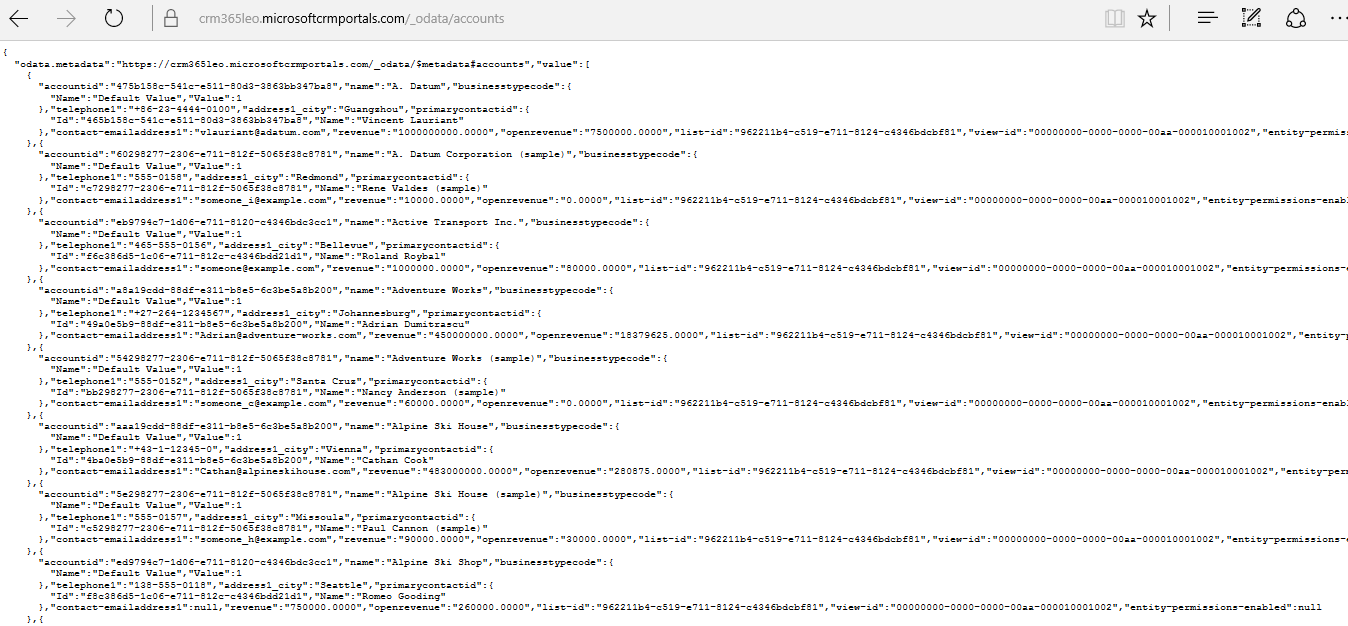
Fig 4.4 JSON Format of the OData Feed on CRM Portals
Note: The user will obtain a URL to the bottom of the JSON Format of the OData Feed which will provide the user to go to next set of records for the Entity List
Step 4: Once the user has obtained the OData Feed the user will have to render the following OData Feed with a unique UI provided by ajax JavaScript on the client Side. The following is the Custom JavaScript containing the ajax call function against the OData Feed as shown below.
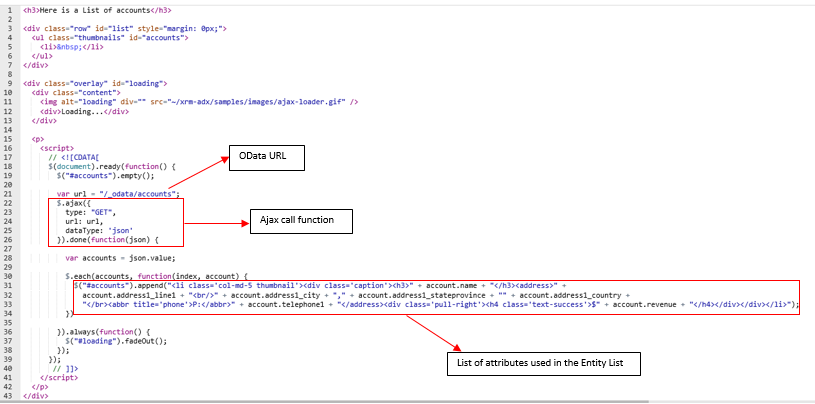
Fig 5.1 Custom JavaScript to display OData Feed on CRM Portal Page
The user will have to paste the code into the source code of the CRM Portal Page as shown below to which he wants to display the OData Feed as shown previously in the Scenario above and click on Save as shown below.
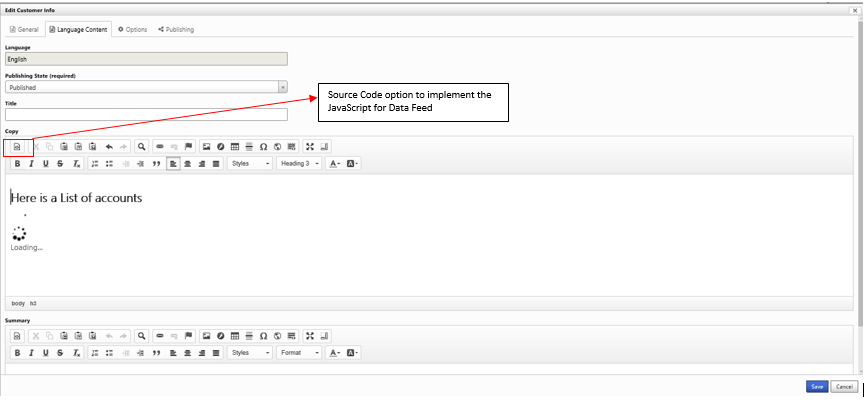
Fig 5.2 Pasting the JavaScript into the Source Code
Conclusion:
In this way the user can implement a simple Entity List OData Feed on CRM Portals using a client side custom JavaScript.
