Installing BizTalk Server 2016
In this article, we will be going through the steps for installation of BizTalk Server 2016. Below steps are for installation of BizTalk Server (Standard Edition) 2016 with Microsoft SQL server 2016 Standard edition. The environment is Windows Server 2016 on Azure.
Windows Server configuration is as below:

If your computer name is longer than 15 characters, BizTalk Server configuration fails. You can rename using power shell or from Server Manager (Dashboard -> Local Server -> Properties)
Before installing BizTalk Server 2016, we will need to install the SQL Server. Below are the steps for the installation of SQL Server 2016 Standard edition.
Here we are installing BizTalk server and SQL server on same machine. If these are on separate machine, additional pre – requisites steps are required.
What are the pre-requisites for BizTalk server 2016 installation?
- Account should be part of administrators group, with which you are doing the installation.
- IIS should be enabled.
- WIF (optional) If you intent to use SharePoint Services Adapter.
- SMTP Server (optional), EXCEL 2013 (optional), SQL Server Database Mail (optional), If you intent to use BAM Alerts (Business Activity Monitoring)
- Visual Studio 2015 (Optional) (For creating BizTalk Projects)
During installation these pre-requisites components gets auto installed:
- Microsoft SQL XML 4.0 with Service Pack 1
- Microsoft Office Web Components
- Microsoft SQL Server 2016 ADOMD.NET
- Setup runtime files for AMD64 platform
- Setup runtime files
- Enterprise Single Sign-On Server
- Enterprise Single Sign-On Administration
- Microsoft Document Explorer 2008
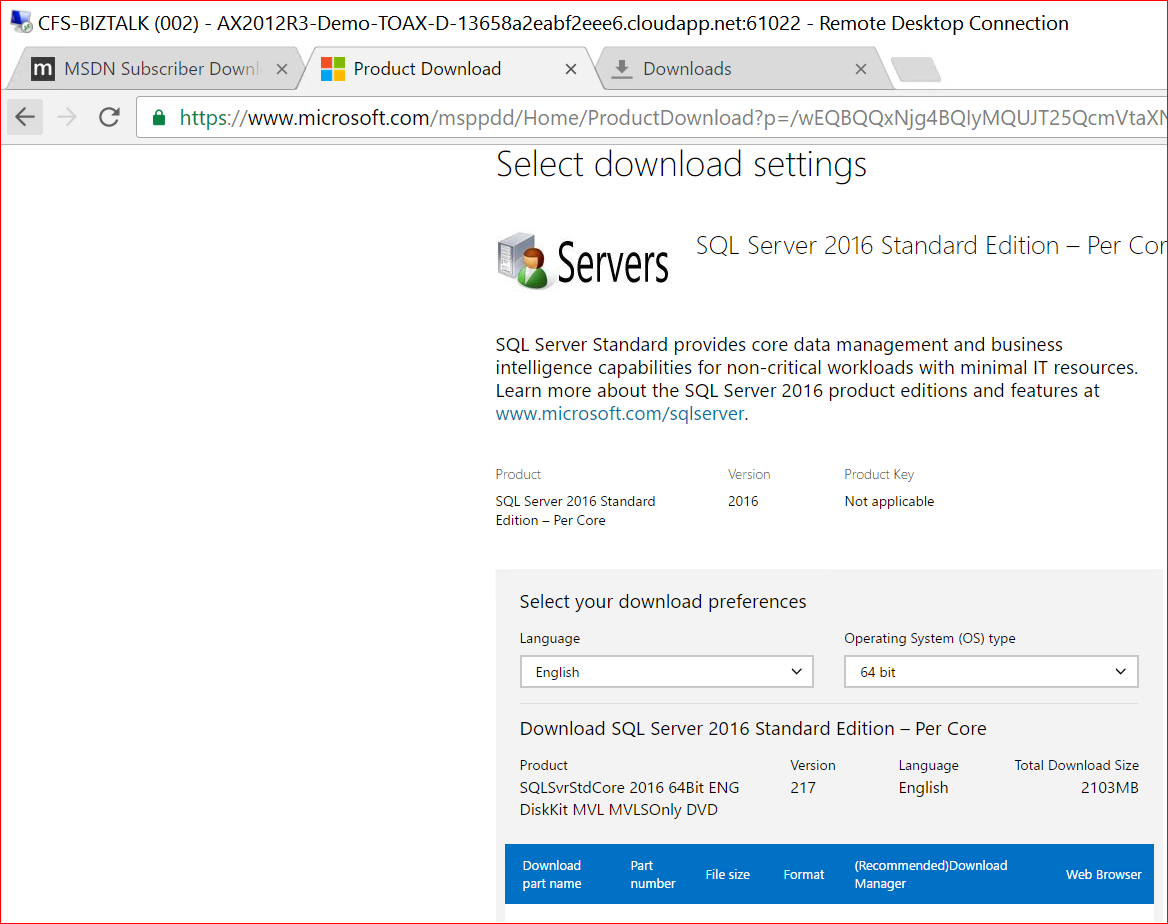
Installation of SQL Server 2016 (Standard Edition) File Size – 2.1 GB
Installation of SQL Server 2016
- Download SQL Server 2016 from msdn.
- After the download is completed, mount the ISO file and select setup.exe to install. Run as administrator to start the installation.
- Accept the License Terms. Click in Next
- Install setup files – SQL server setup files are installed in system in this step. Time Taken – 32 Min


In Features Selection, select only as ticked below.

Provide a name to the names Instance. If you choose Default Instance, it defaults the Instance ID as MSSQLSERVER
Named instance CFS_BIZTALK

Provide the Account name and Password for the SQL services.

You can choose either to have windows authentication Mode or Mixed Mode (SQL + Windows Authentication Mode)
Specify the SQL server administrator.

Click on ACCEPT in tab for “Consent to install Microsoft R Open”. Click Next.

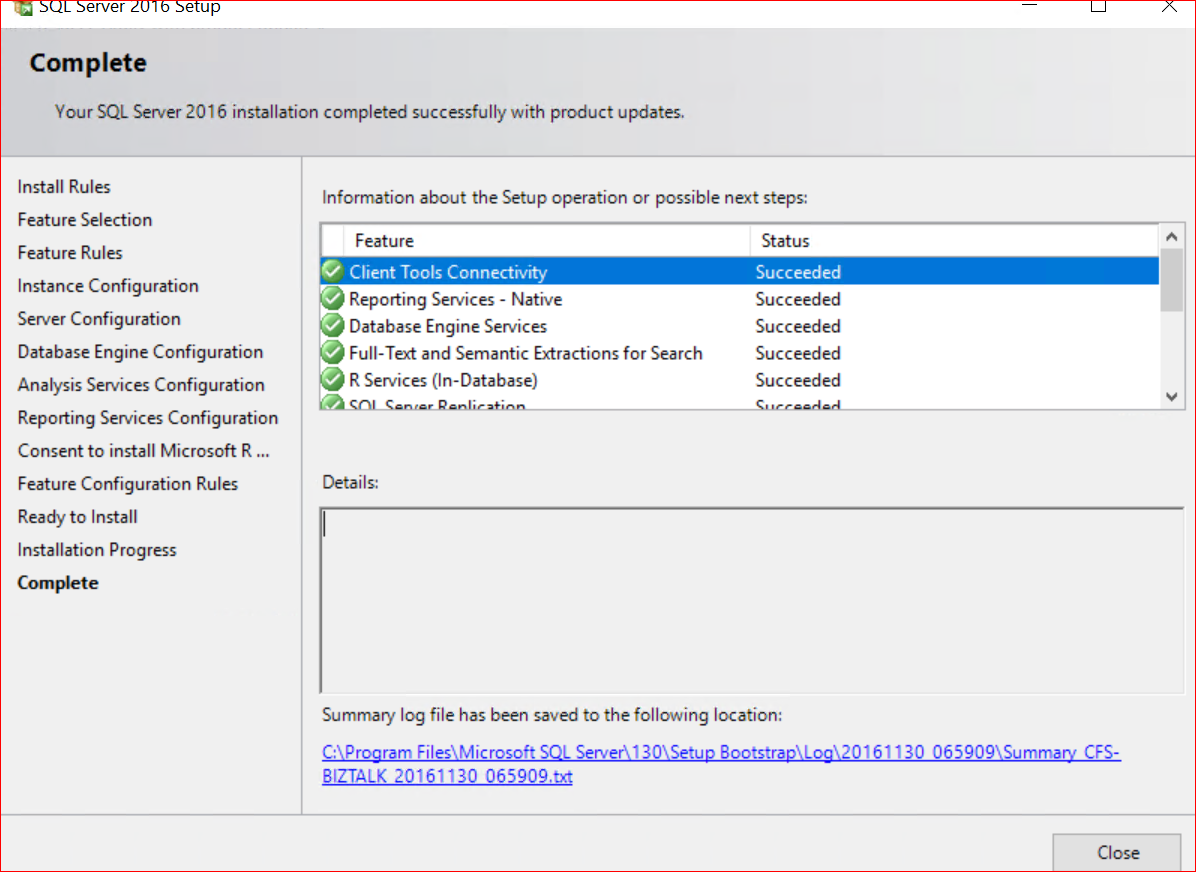
In “Ready to install” tab — click on Install.

You will need to separately download SSMS as its not part of the installation setup.
** Download and Install SQL Server Management Studio version 16.5 (https://msdn.microsoft.com/en-us/library/mt238290.aspx)
File Size – 894 MB
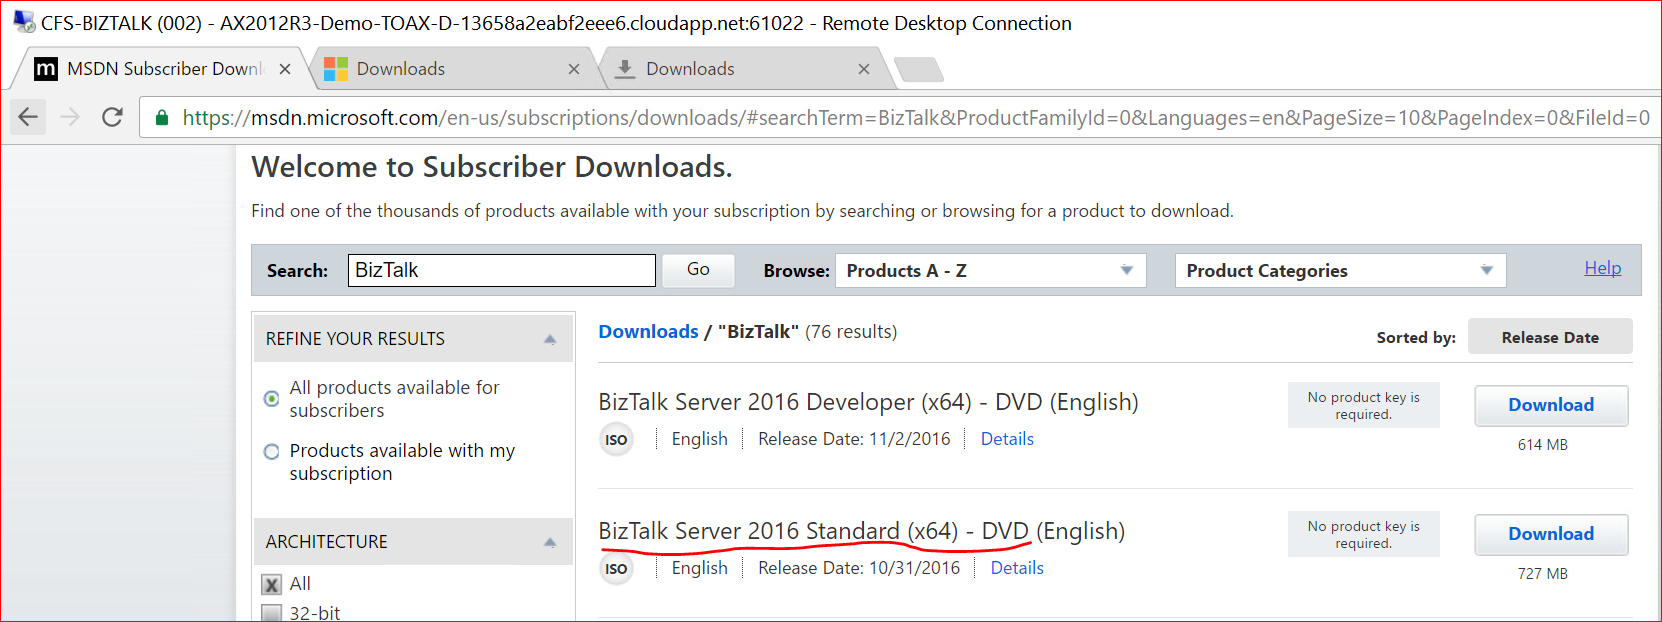
Download the BizTalk server 2016 Standard Edition from MSDN. (File Size – 727 MB)
Mount the downloaded file en_biztalk_server_2016_standard_x64_dvd_9503266.iso
(Right on file and select the “Mount” option.

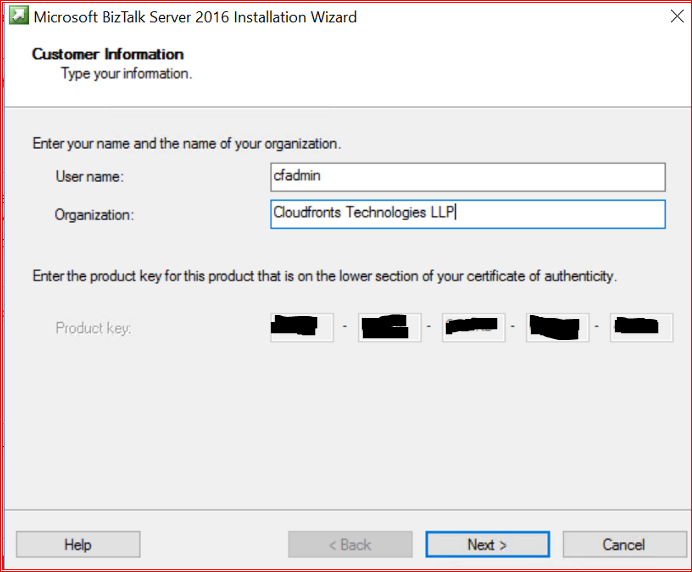
Accept the License terms and conditions
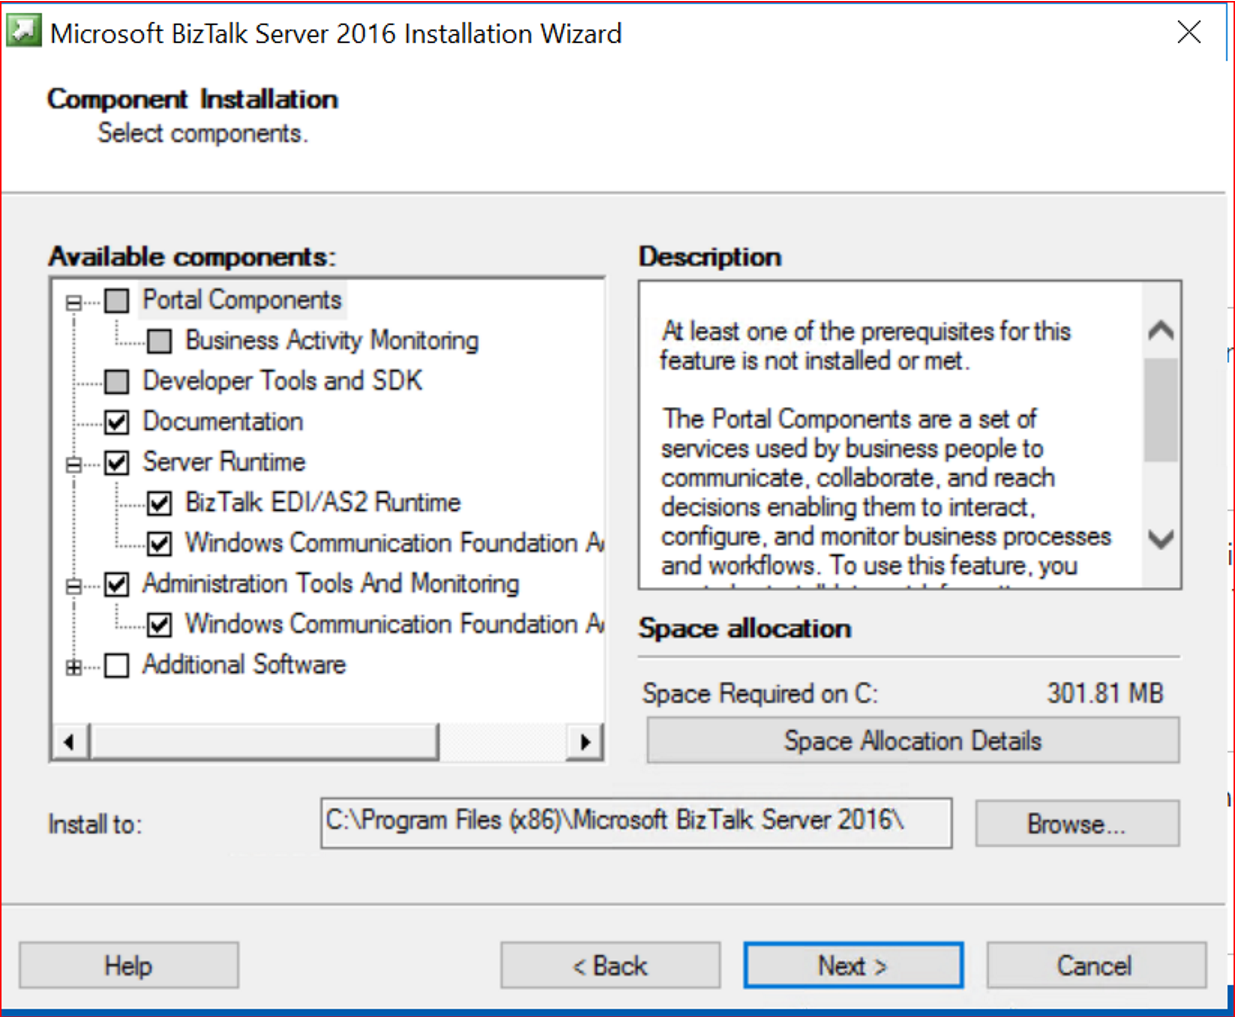
Below is the list of Microsoft BizTalk Server 2016 Components that will be installed.
- BizTalk EDI/AS2 Runtime
- Documentation
- Server Runtime
- Windows Communication Foundation Adapter
- Windows Communication Foundation Administration Tools
- Administration Tools and Monitoring
- Enterprise Single Sign-On Administration Module
- Additional Software
- Enterprise Single Sign-On Master Secret Server
- Business Rules Components
- BAM Alert Provider
- BAM Client
- BAM-Eventing
- Project Build Component
It may be necessary to stop one or more system services during installation. For information on the affected services, click Help.
You can add or remove additional components after this installation using the “Microsoft BizTalk Server 2016” entry in the Add/Remove section of the Control Panel.
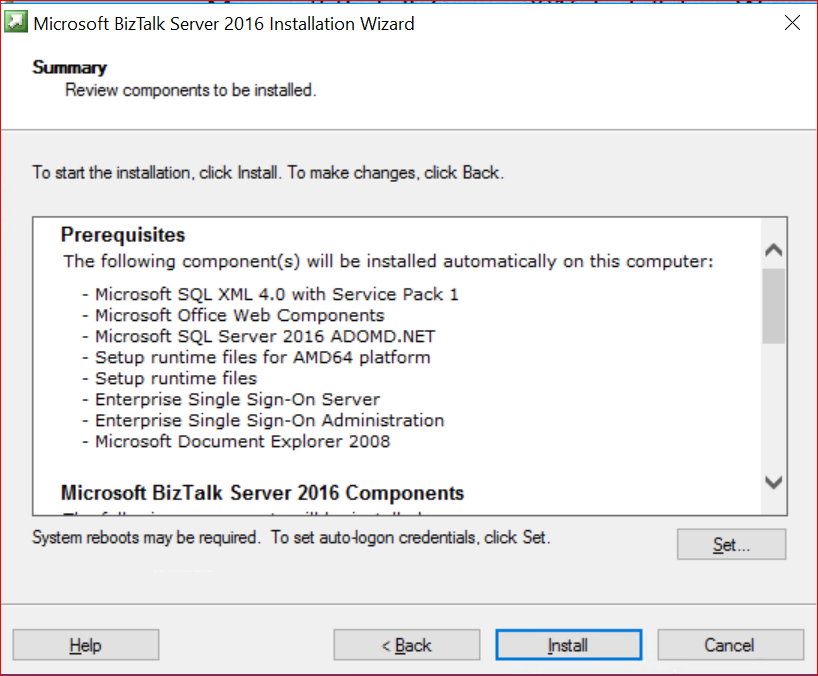
During installation, you may be prompted for server reboot. To ensure you get automatically logged in you can provide the credentials using the set option.

During installation, the first component is the SQL XML 4.0 SP1. It gets fails and comes back with error message as below.
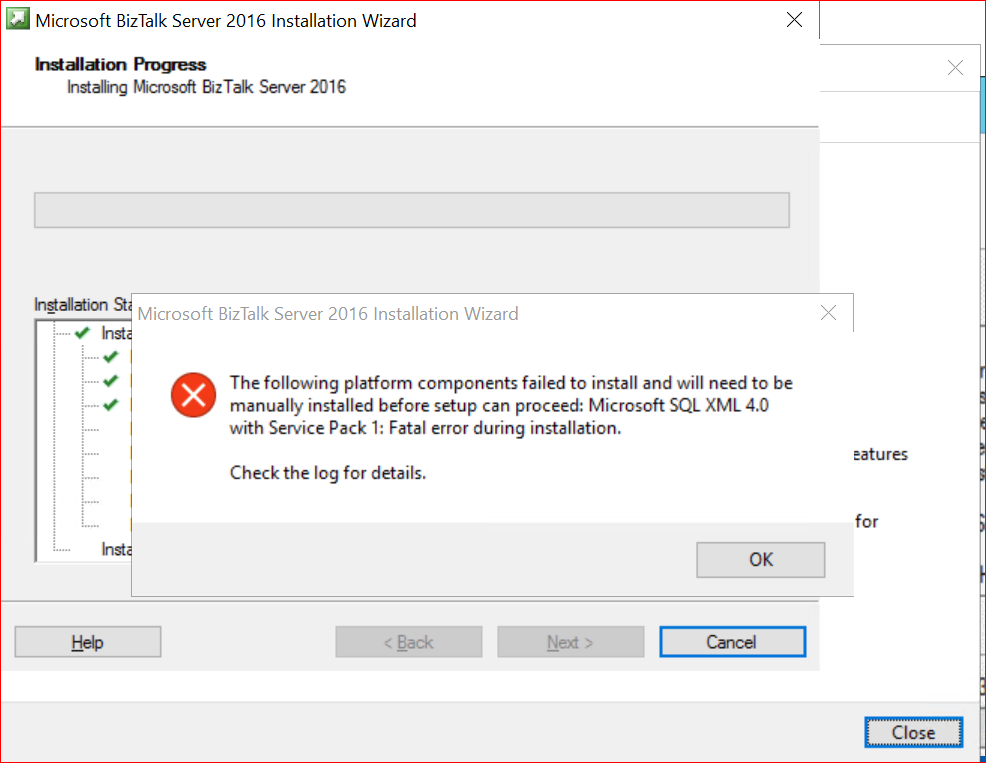
For resolution, if you download and install Microsoft SQL XML 4.0 with SP1, you will again get error as below.

Error indicates that it is looking for .Net Framework version 2.0. (This error comes even though your system has 4.5 or higher version of .Net Framework.
Resolution:
Install the .Net Framework 3.5 Features (Includes 2.0 and 3.0) from Windows server manager -> Roles and Features -> .NET Framework 3.5 Features -> .NET Framework 3.5 (includes .NET 2.0 and 3.0)


Select the components for installation as below:


Finally, we get the window as below indicating we have installed Microsoft BizTalk Server Successfully.

Tick the box for “Launch BizTalk Server Configuration”
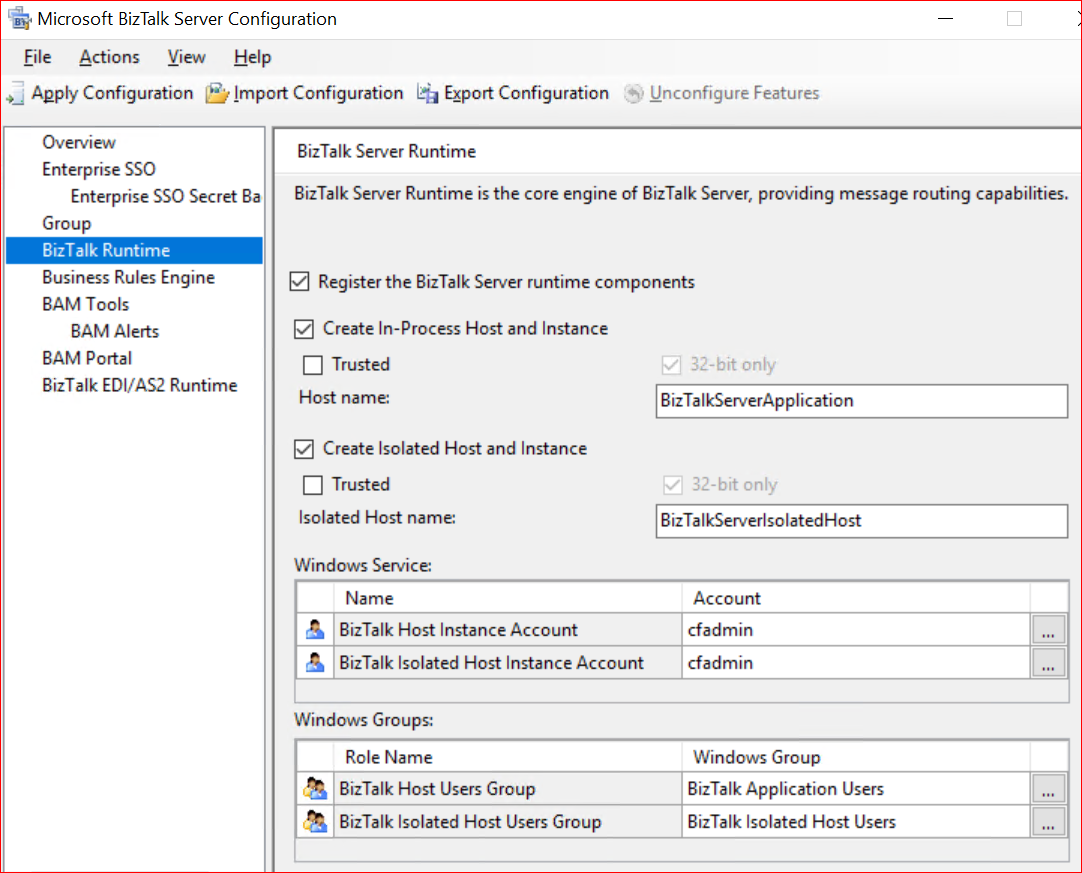
Configuring BizTalk Server 2016
Select the Custom configuration and provide the user name and password. All BizTalk services will run under these credentials.

You will be greeted with below pop info window message if you choose the same windows user with which yoo installed the BTS2016.


This is important step, you need to provide the encryption password and reminder text.

Default location of Backup location is as below:
Back up file location: C:\Program Files\Common Files\Enterprise Single Sign-On\SSO056B.bak
If this is first installation, you will be creating a new BizTalk Group.

After Group creation, you will be registering the run time components by selecting options as below.


You can configure Business Activity Monitoring alerts in this option. (Since I have not configured the SQL Mail, I am skipping this step).


This is the final and important configuration step for configuring EDI and AS2 protocol for message exchange.


You will see configuration wizard with success message. Open the Overview tab, you will see as below indicating successful configuration. (I have not configured BAM Portal)

You can check the version of the BizTalk server installed through Registry key at path
“HKEY_LOCAL_MACHINE\SOFTWARE\Microsoft\BizTalk Server\3.0”

At the end of installation, you can also review the log file for detail of installation or troubleshoot any error or warning during installation process. It is advised to export and back up the configuration of BTS2016. (Default path of back up is “C:\Program Files (x86)\Microsoft BizTalk Server 2016”)
