Creation of ACS and SAS in Azure
ACS is an Azure service that provides an easy way to authenticate users to access web applications and services without having to add complex authentication logic to code. While SAS is used to access resources in storage account which includes both primary and secondary keys.
Assumptions
Azure Account should be added in PowerShell with respective User’s Credentials.
Note: For Adding account In Microsoft Azure PowerShell refer to following link:
https://www.cloudfronts.com/azure-console-login-logout-using-azure-powershell/
Steps in Microsoft Azure PowerShell for ACS
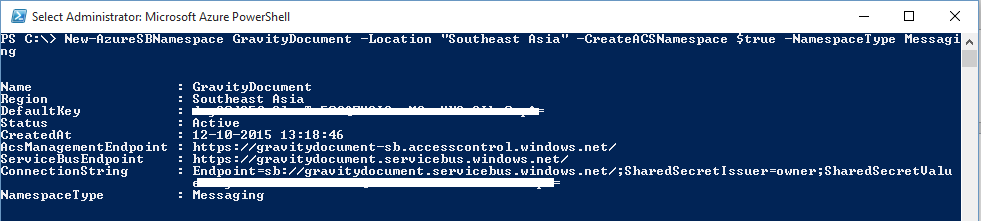
Step 1: Write ACS Command in PowerShell
ACS Key can be created using Azure PowerShell following command,
New-AzureSBNamespace GravityDocument -Location “Southeast Asia” -CreateACSNamespace $true -NamespaceType Messaging
Command requires Service Bus Namespace Name, Location and Messaging type.
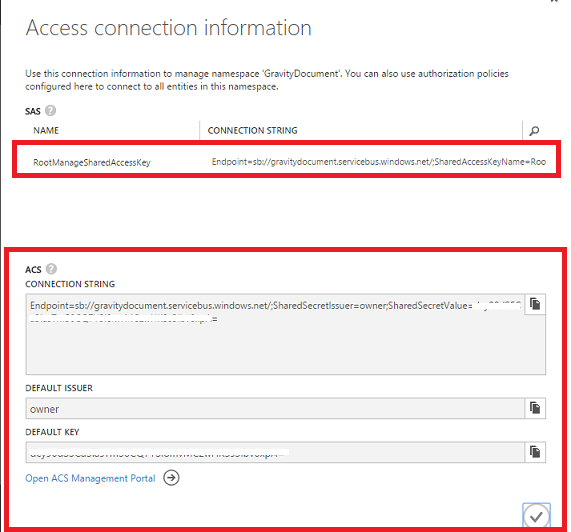
Step 2: ACS Information on Azure Portal
This ACS Key information can be seen on Microsoft Azure Account with that corresponding service bus namespace provided in the command above.
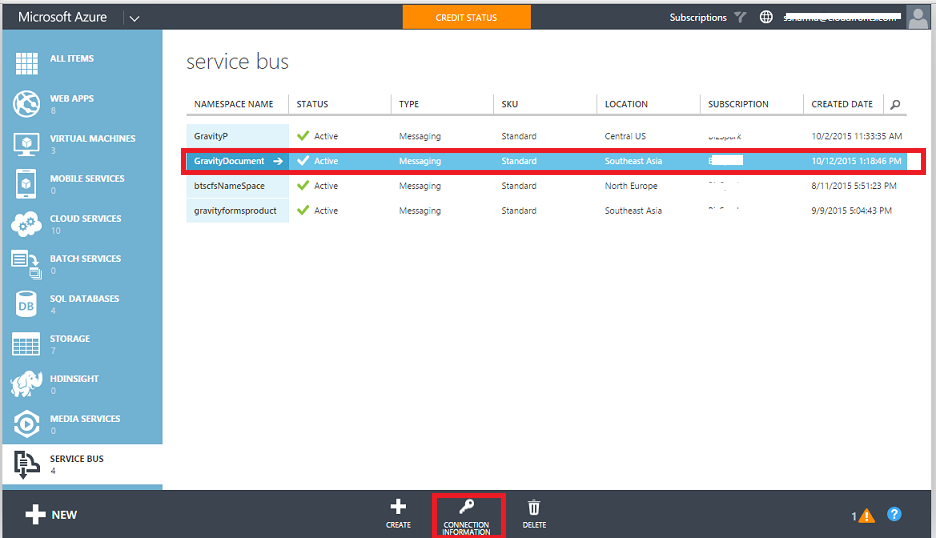
Once the Namespace is created the corresponding Connection Information is available at the bottom under Connection Information.
Steps in Microsoft Azure for SAS
Here for SAS Key we have created Queue inside the namespace.
Step 1: Creation of Queue
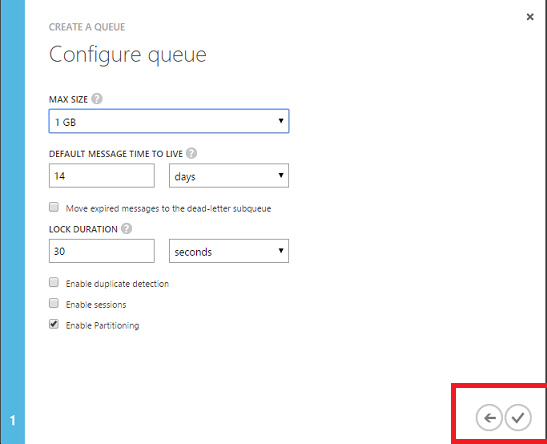
Now Queue can be created inside this specified Namespace, for that follow the below screenshots
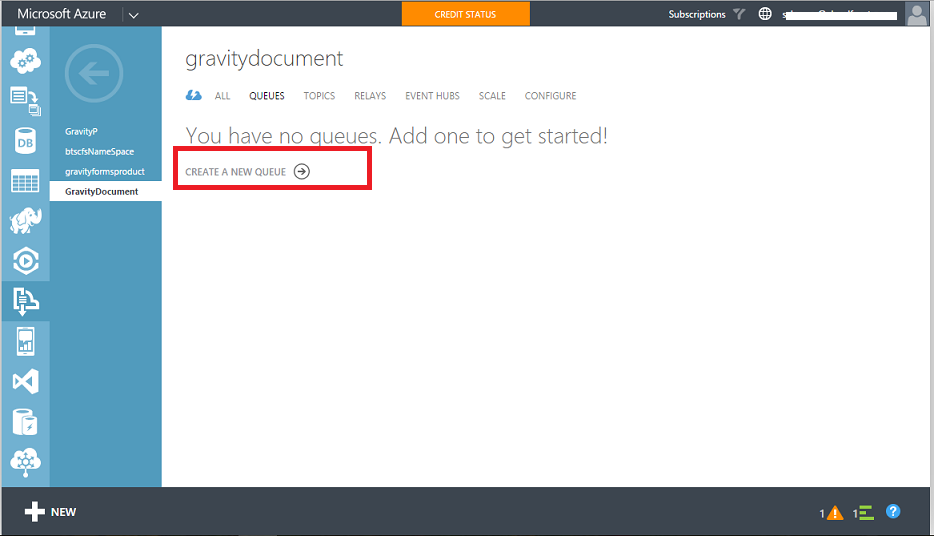
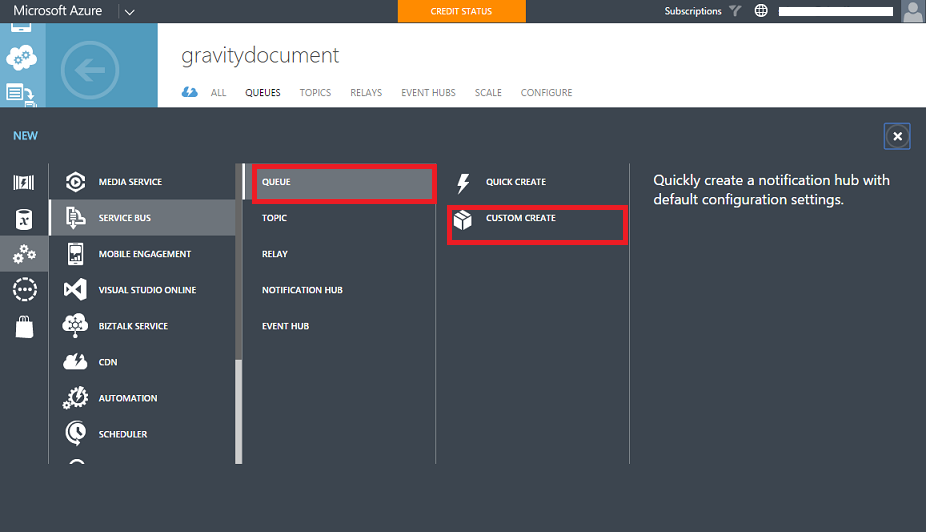

Specify the required details i.e. the Queue name under the specified namespace.
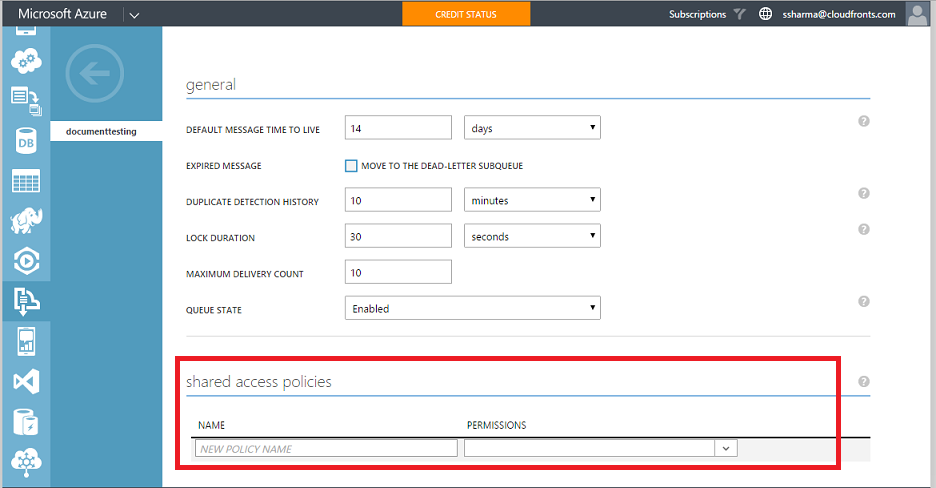
Step 2: Key with Permissions
Now since the queue is created SAS key can also be generated with different permissions like Manage, Listen & Send.
So under Configure option, under Shared Access Policies specify the name and permission to be given for that particular queue.
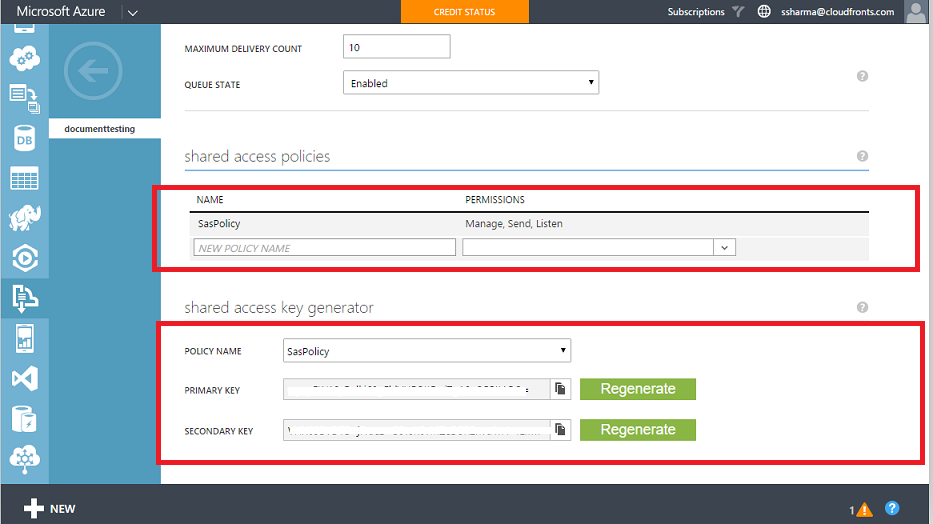
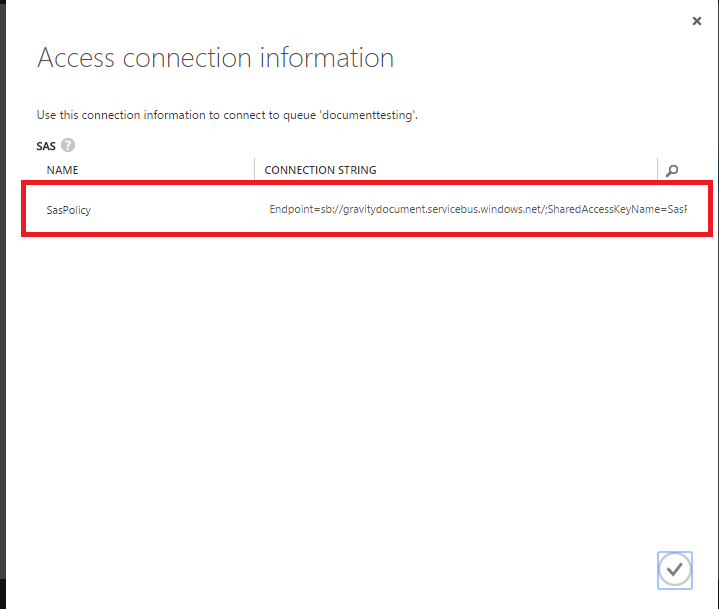
Now SAS key for that particular queue can be obtained from Connection Information of Queue with SAS key.
Conclusion
Thus, we can Create ACS and SAS requests as per requirements using Microsoft Azure PowerShell and Azure Portal.
