UCC SAN SSL Certificate–GoDaddy/Azure
Introduction
Adding sub-domain to UCC SSL 5 certificate and revoking existing SSL Certificate.
Problem Statement:
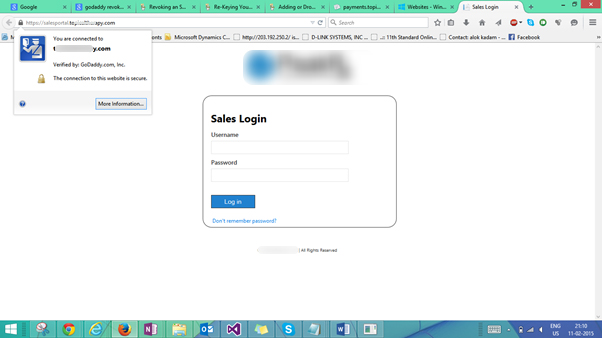
We have sub-domain called salesportal.mywebsite.com hosted on windows azure. Salesportal.mywebsite.com associated with SSL binding but that SSL is expired and we want to revoke that certificate and add it to UCC SSL 5 certificate from Go-daddy.
=> We have salesportal.mywesite.com hosted on windows azure.
=> SSL certificate purchase from Go-Daddy. In our case we want to remove standard certificate and add it to UCC 5 Certificate.
Please follow below steps to revoke existing SSL and add it to New SSL certificate
Installation
To proceeds with SSL, first step is to download Open SSL. This is Open source software that will help us to create CSR request.
Download Open SSL from following link:
Generate CSR
Create CNF file for CSR
For more detail visit following URL. http://azure.microsoft.com/en-in/documentation/articles/web-sites-configure-ssl-certificate/
Let’s understand how to apply SSL Certificate to multiple Domain. Download Sample code from http://azure.microsoft.com/en-in/documentation/articles/web-sites-configure-ssl-certificate/#bkmk_subjectaltname
Example:
# ————– BEGIN custom sancert.cnf —–
HOME = .
oid_section = new_oids
[ new_oids ]
[ req ]
default_days = 730
distinguished_name = req_distinguished_name
encrypt_key = no
string_mask = nombstr
req_extensions = v3_req # Extensions to add to certificate request
[ req_distinguished_name ]
countryName = Country Name (2 letter code)
countryName_default =
stateOrProvinceName = State or Province Name (full name)
stateOrProvinceName_default =
localityName = Locality Name (eg, city)
localityName_default =
organizationalUnitName  = Organizational Unit Name (eg, section)
organizationalUnitName_default  =
organization = Organization Name
organization__default=
commonName              = Your common name (eg, domain name)
commonName_default      = www.mydomain.com
commonName_max = 64
[ v3_req ]
subjectAltName=DNS:payments. mydomain.com, DNS:blog.mydomain.com
# ————– END custom sancert.cnf —–
Note:
=> subjectAltName contains sub domain name. It can also contains main domain name as well.
Example. www.crmonline.com
File start with # ————– BEGIN custom sancert.cnf —–
Above example can be tricky
Problem statement 1:
We have UCC SSL 5 certificate connected to payments.mywebsite.com and its running. We are adding salesportal.mywebsite.com domain to UCC SSL 5 certificate. In that case your Common Name will be payments.mywebsite.com and subjectAltName will be salesportal.mywebsite.com.
Note: common name need to add from console window and subjectAltName in the cnf file.
Example:
# ————– BEGIN custom sancert.cnf —–
HOME = .
oid_section = new_oids
[ new_oids ]
[ req ]
default_days = 730
distinguished_name = req_distinguished_name
encrypt_key = no
string_mask = nombstr
req_extensions = v3_req # Extensions to add to certificate request
[ req_distinguished_name ]
countryName = Country Name (2 letter code)
countryName_default =
stateOrProvinceName = State or Province Name (full name)
stateOrProvinceName_default =
localityName = Locality Name (eg, city)
localityName_default =
organizationalUnitName  = Organizational Unit Name (eg, section)
organizationalUnitName_default  =
organization = Organization Name
organization__default=
commonName              = Your common name (eg, domain name)
commonName_default      = www.mydomain.com
commonName_max = 64
[ v3_req ]
subjectAltName=DNS:salesportal.mywebsite.com,
# ————– END custom sancert.cnf —–
Problem Statement 2:
We have UCC SSL 5 certificate connected to www.mywebsite.com and its running. We are adding salesportal.mywebsite.com domain to UCC SSL 5 certificate. In that case your Common Name will be www.mywebsite.com and subjectAltName will be salesportal.mywebsite.com.
Please note: your common name you have to add from console window and subjectAltName in the cnf file.
Example:
# ————– BEGIN custom sancert.cnf —–
HOME = .
oid_section = new_oids
[ new_oids ]
[ req ]
default_days = 730
distinguished_name = req_distinguished_name
encrypt_key = no
string_mask = nombstr
req_extensions = v3_req # Extensions to add to certificate request
[ req_distinguished_name ]
countryName = Country Name (2 letter code)
countryName_default =
stateOrProvinceName = State or Province Name (full name)
stateOrProvinceName_default =
localityName = Locality Name (eg, city)
localityName_default =
organizationalUnitName  = Organizational Unit Name (eg, section)
organizationalUnitName_default  =
organization = Organization Name
organization__default=
commonName              = Your common name (eg, domain name)
commonName_default      = www.mydomain.com
commonName_max = 64
[ v3_req ]
subjectAltName=DNS:salesportal.mywebsite.com,
# ————– END custom sancert.cnf —–
CSR Generation
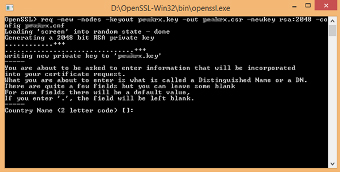
Write following command in Open SSL Console window.
req -new -nodes -keyout myserver.key -out server.csr -newkey rsa:2048 -config sancert.cnf
Note: sancert.cnf is above sample.
myserver.key file is used to generate .pfx file.
Steps 1:
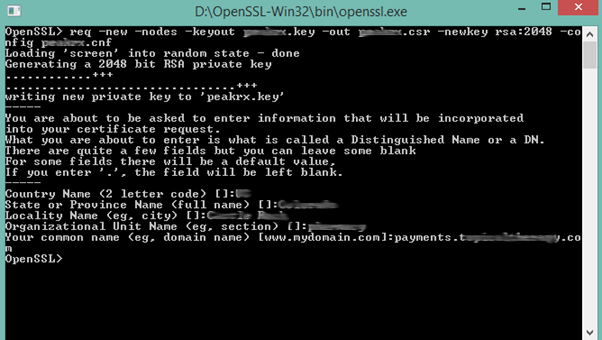
=> Please fill basic information like Country name, State etc.
=> I have entered common name like payments.mywebsite.com because first time UCC SSL certificate is associate with payments.mywebsite.com.
=> If you are first time creating csr request then common name will be www.mywebsite.com
If you want to check your CSR request then open CSR file in notepad and copy all code paste in following website. https://www.sslshopper.com/csr-decoder.html
Revoke Expired SSL Certificate (GoDaddy)
Always it’s better to revoke SSL certificate after it is expired. Please refer following URL for more support. https://support.godaddy.com/help/article/4747/revoking-an-ssl-certificate?countrysite=in
Login to GoDaddy account:
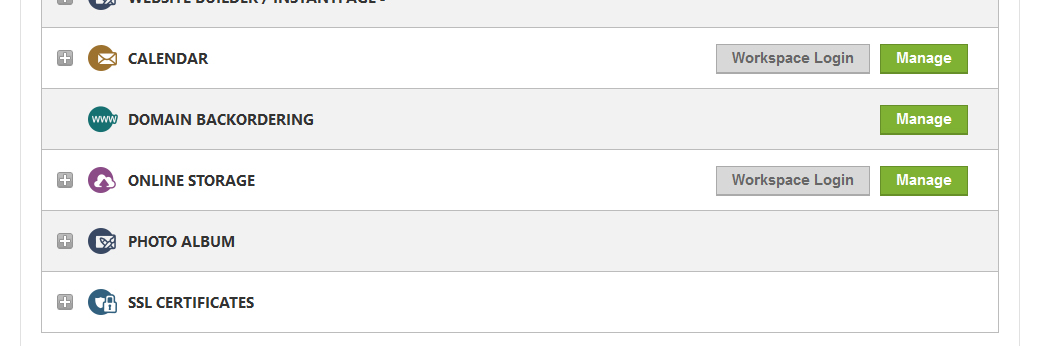
1. Click on SSL Certificate:
2. Click on manage
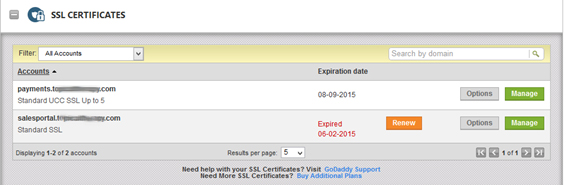
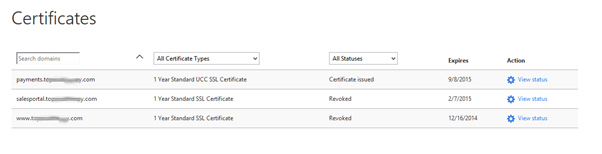
You can see we have one sub-domain Standard SSL is expired and another sub-domain has standard UCC SSL 5 certificate. We are going to add expired sub domain to standard UCC SSL certificate.
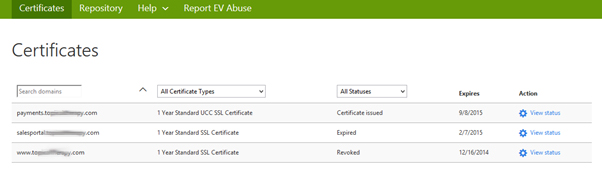
3. Click view status of expired domain.

4. Click on conform after that following window will appeared.
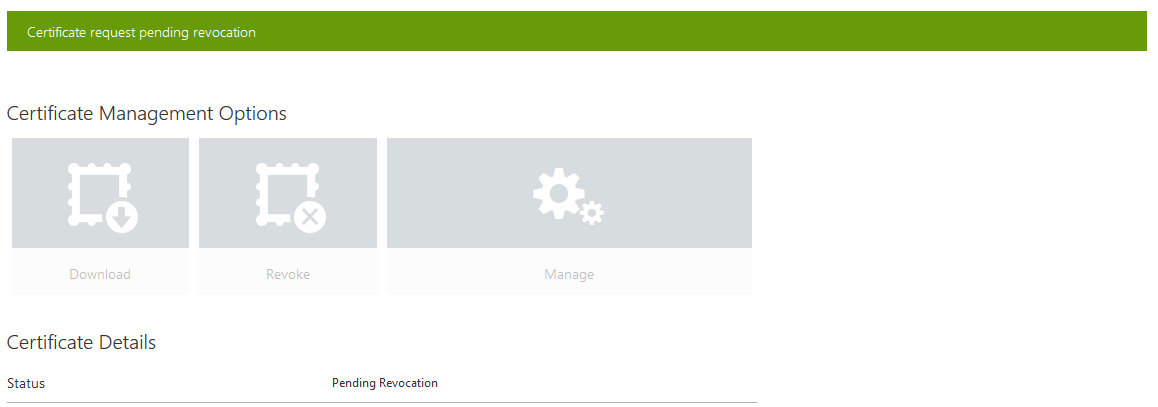
5. Wait for few minutes and refresh page.
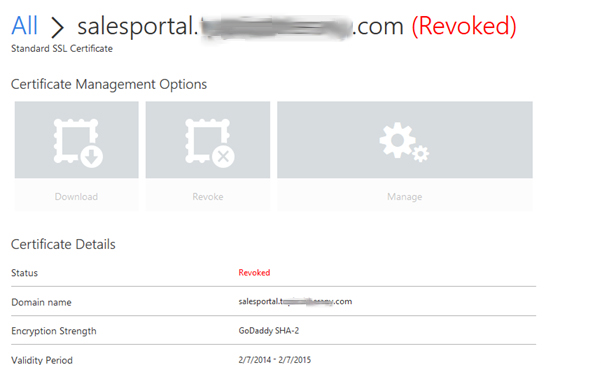
Certificate is expired successfully.
6. Following is status of certificate
Add Domain to UCC 5 Certificate
Click on domain which has UCC 5 certificate. If you have just purchase UUC 5 certificate then open that certificate and paste csr request.
(Which also include # ————– BEGIN custom sancert.cnf —–# and # ————– END custom sancert.cnf —–#).
Then click on manage.

To add domain to UCC 5 Certificate, first we need re key that certificate
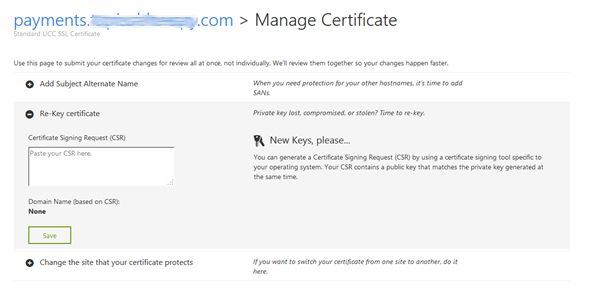
Copy and paste your CSR in a text box
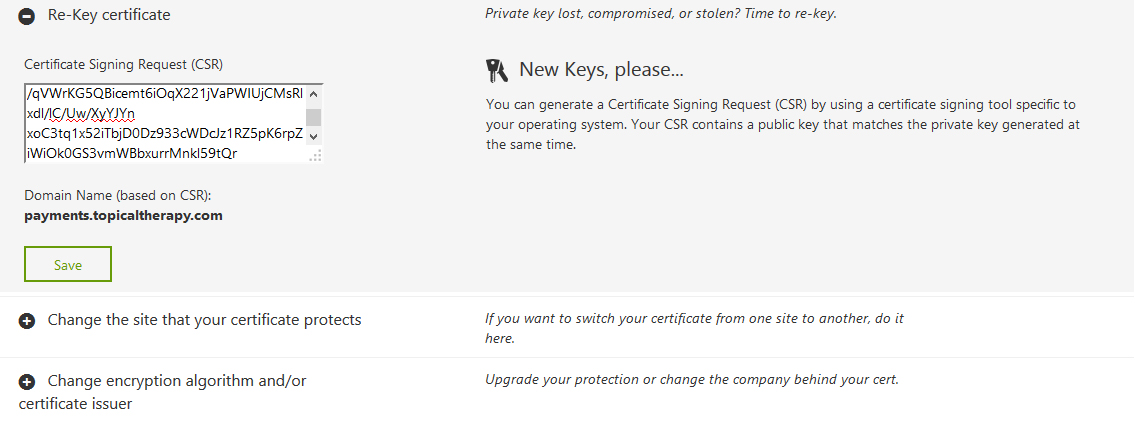
Then Click on submit changes that will submit your New CSR request to GoDaddy
Verification window will appeared.
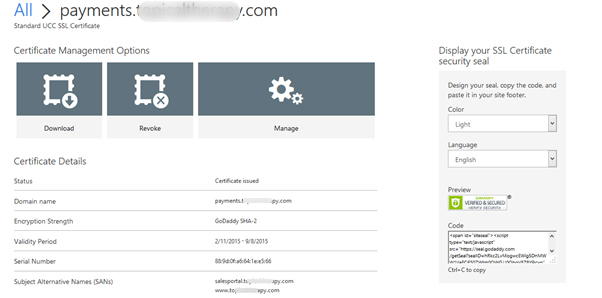
Refresh this page, you can see new Domain is successfully added to this certificate.
Install certificate to Azure
Download certificate from GoDaddy
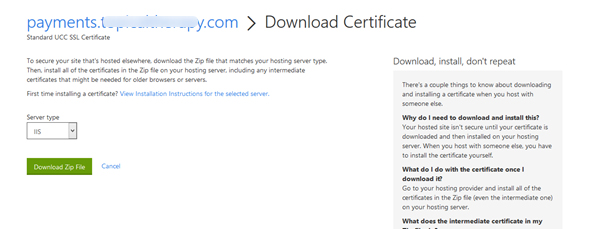
=> Select Server type IIS and download zip file.
=> Important file is .crt extension and Ignore other files contain in zip
=> Open OpenSSl and click run as administrator(Run as administrator is IMP)
Type following command in command line
pkcs12 -export -out salesportal.pfx -inkey myserver.key -in 889d0fa6641ee566.crt
myserver.key is file when first time we generate CSR request.
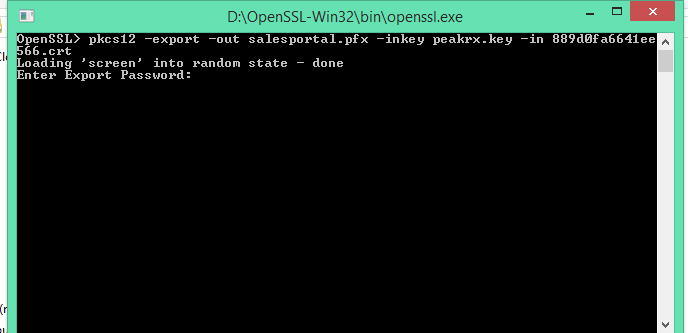
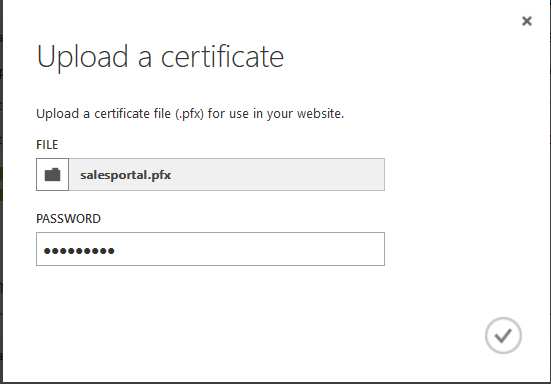
After password is entered .pfx file will generate in the same folder. (Note password will required for azure)
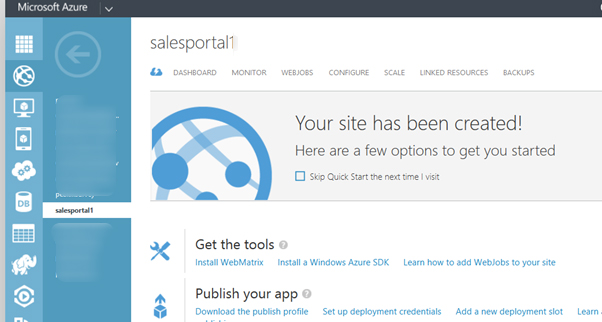
Azure Setup
Open Azure account and click on configure
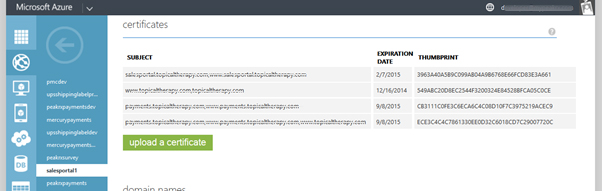
=> Please ignore existing certificate file as you see in this image.
=> Click on Upload a certificate button. Select pfx file and type password. (Password will be same password that enter to generate .pfx file)
When certificate is install it will appeared on Azure account and list of domain will also shows to us.
SSL Binding:
Select certificate that you want to bind with domain.
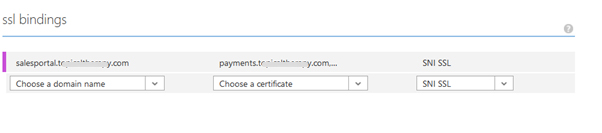
Click on save. Certificate will bind to your domain
Type domain name with https prefix to see latest changes