How to login Windows Client and Web Client using ‘NavUserPassword’ Authentication in Microsoft Dynamics NAV
Incorporating your Microsoft dynamics nav upgrade isn’t something you do in only a day or two. It takes a cautious arrangement and the correct assets. At the point when done quickly or without appropriate exploration, retailers can be left with expensive tasks that last months and never appear to work accurately. That is the reason a few dealers frequently dread incorporation.
Notwithstanding, these feelings of trepidation shouldn’t prevent you from capitalizing on your retail frameworks. You simply need to accomplish some work forthright and pick the best mix answer for your business. Merchants with in-house IT groups of NAV will here and there decide to assemble their joining themselves.. This requires your group to have top to bottom information on the specialized foundation of NAV and some other frameworks you need to incorporate.
Introduction:
Generally, when we set up Microsoft Dynamics NAV, the authentication method by default is ‘Windows’.
Windows Authentication : This method allows you to connect to NAV as the current Windows user.
Username Authentication : This method requires that the user provide a User name, Password, and Domain name. Users are authenticated using their Windows account
NavUserPassword Authentication : Users are authenticated using their Username and password instead of windows authentication
AccessControlService Authentication : Users are authenticated using Access control Service. The Username and web service key must be specified.
This blog provides a step wise procedure to authenticate Dynamics NAV using NavUserPassword
Pre-requisites:
Microsoft Dynamics NAV 2017
Steps:
1. Create a self-signed certificate or use a SSL certificate.
To create a self-signed certificate follow the below steps:
- Download Self-signed certificate generator (PowerShell) from Technet.
- Open Windows Powershell ISE as administrator.
- Go to the directory where you saved the New-SelfSignedCertificateEx.ps1 file.
- Run the following command:
Import-Module .\New-SelfSignedCertificateEx.ps1.
New-SelfSignedCertificateEx –Subject “CN=<your site name>” –IsCA $true –Exportable –StoreLocation LocalMachine
Here <your site name> is the name of your computer.
- Save the thumbprint generated in a notepad for future reference.
2. Manage the certificate
-
- Open the mmc.exe from Start
- Go to the File menu, and then choose Add/Remove Snap-in.
- Select Certificates and choose Add
- Select the computer account.
- Choose Finish and then OK.

- The Expiration Date of the certificate will be 1Y-2D (01 Year – 02 Days) valid From 1 Day Before you create Certificate.
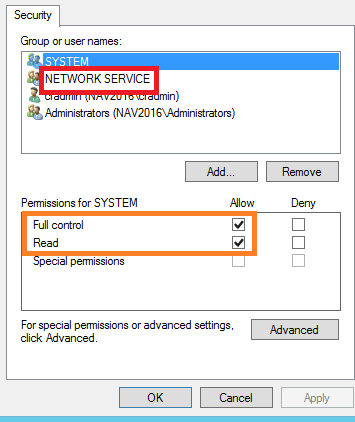
3. Add Permissions to certificate
-
- Right Click Certificate.
- From All Tasks Select Manage Private Keys.
- Add NETWORK SERVICE permission to the certificate
4. Copy the Certificate
- Copy the Certificate from Personal / Certificate Node.
- Paste the certificate into the Trusted Root Certification Authorities/Certificates folder, Enterprise trust, Trusted publishers and Trusted people.
5. Enter the Certificate Thumbprint
-
- Open the Microsoft Dynamics NAV 2017 Administration.
- Click on the NAV instance and enter the Certificate Thumbprint.

6. Configure IIS(Internet Information Service)
-
- Open IIS and click on Microsoft Dynamics NAV 2017 under Sites folder
- Click on Bindings
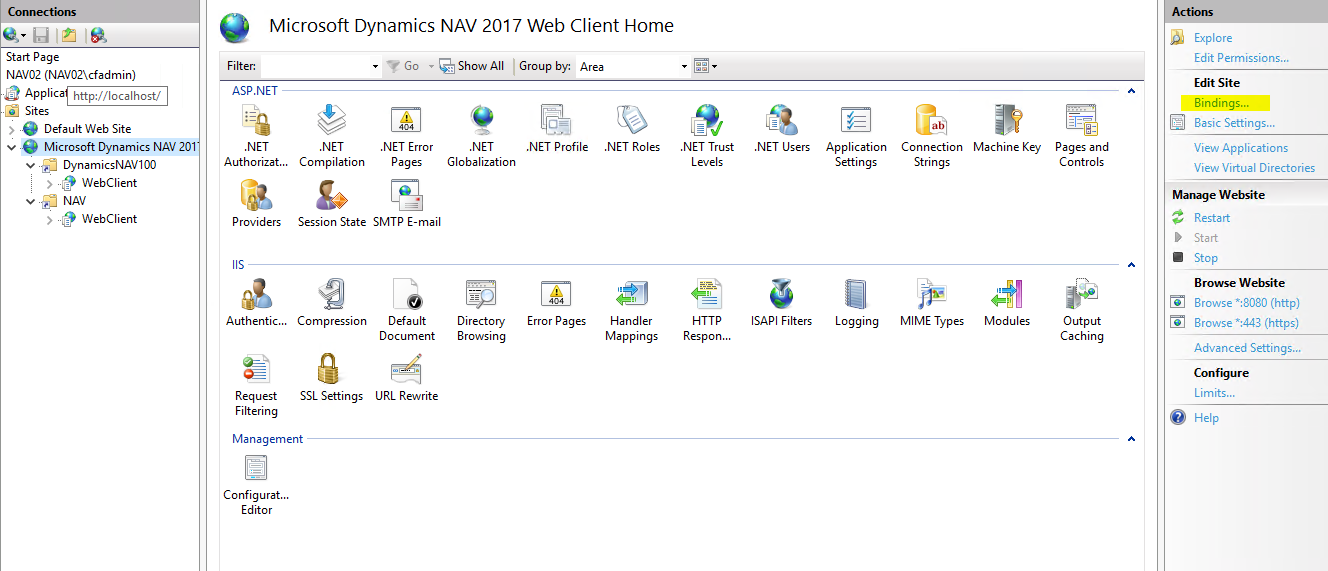
- Click on Add, select https under type and select the certificate under the SSL certificate

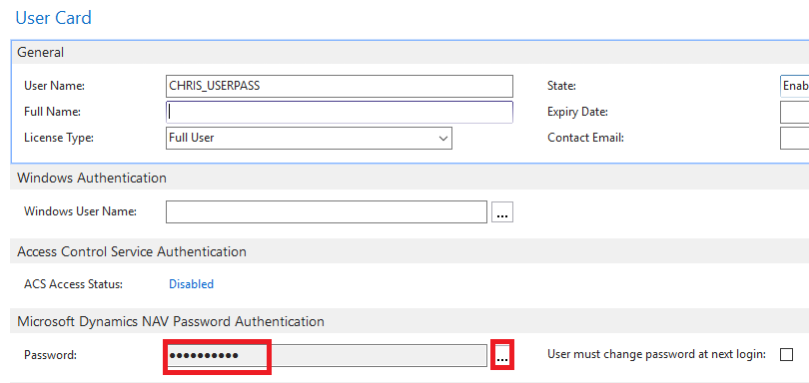
7. Create a User in NAV
-
- Navigate to CRONUS International Ltd./Departments/Administration/IT Administration/General/Users and create a new user.e.g Username : CHRIS_USERPASS and click on Password and set an appropriate password with a combination of one uppercase alphabet, one number and special character
- Set Permission to SUPER under User Permission Set tab.
- Navigate to the ClientUserSettings file of the user and make the following changes.
- Navigate to CRONUS International Ltd./Departments/Administration/IT Administration/General/Users and create a new user.e.g Username : CHRIS_USERPASS and click on Password and set an appropriate password with a combination of one uppercase alphabet, one number and special character

- Change ClientServicesCredentialType parameter value from ‘Windows’ to ‘NavUserPassword’.
- If you are creating a new server instance mention the Client service port and Server Instance Name.
- In the web config file(C:\inetpub\wwwroot\<webclientname>) change the “ClientServicesCredentialType” value=”NavUserPassword” also change the ClientServicePort and Server instance if you are configuring the ‘NavUserPassword’ for a new server instance
8. Launch Windows Client
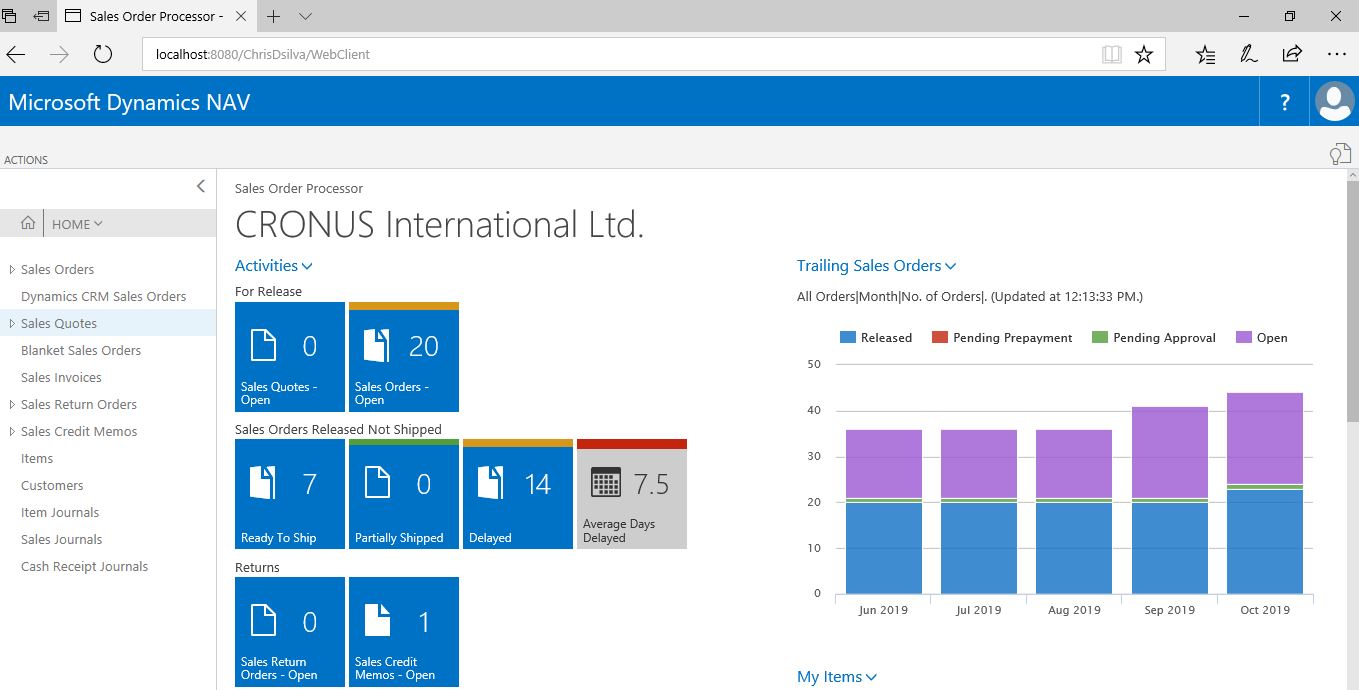
This will prompt for username and password after which Windows client will launch successfully.


9. Launch Web Client

Conclusion:
To summarize the blog, create a self signed certificate, assign it permissions and copy the certificate to the necessary folder. Copy the thumbprint in the NAV instance and bind the certificate in IIS. create a user with password and make necessary changes in the ClientUserSettings and web config file.
