Creating a Web Template Page Template Using Liquid in CRM Portals
In this blog , we will see how can a user create a custom Page Template Web Template Using Liquid template code in CRM Portals.
Pre-Requisites:
1. Dynamics 365 Portal(CRM)
2. D365 CRM Environment
Scenario:
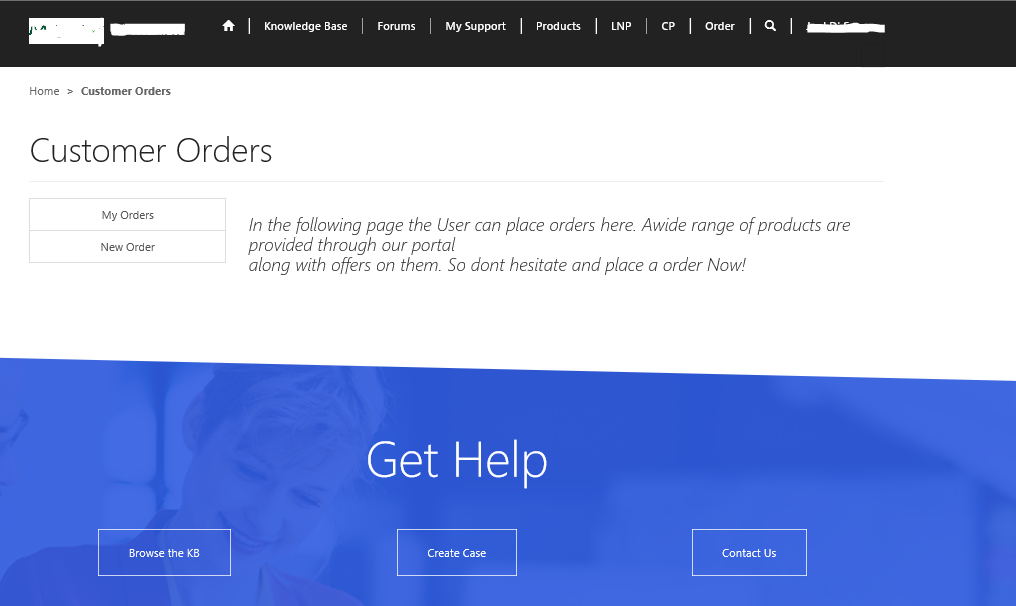
The user will have to create a simple two-column template that WebLink Set as left -Side navigation, with the page content to the right. The Web Template Page Template that we are going to create is shown below.
Steps for Implementing Above Scenario
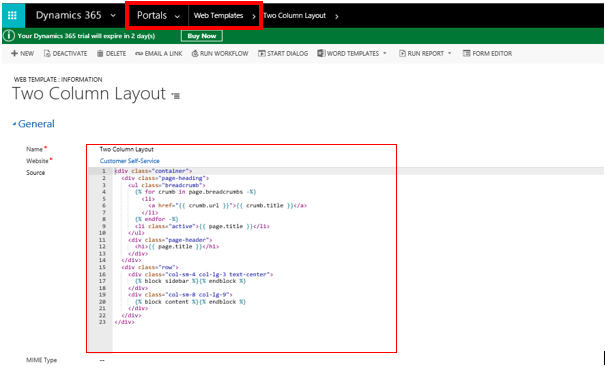
Step 1: The user will first have to create two Web Templates one which will have the layout design and the other will have the content to the layout designed previously. In the Layout web template the user has to go to Portals > Web Templates on the dashboard and select new in the CRM Environment. The user has to enter the following details along with the Liquid Template code as shown below.
Step 2: In this step the user has to create the second Web Template as shown below which will contain the Liquid Template code for inserting data content in to the Web template layout designed previously.

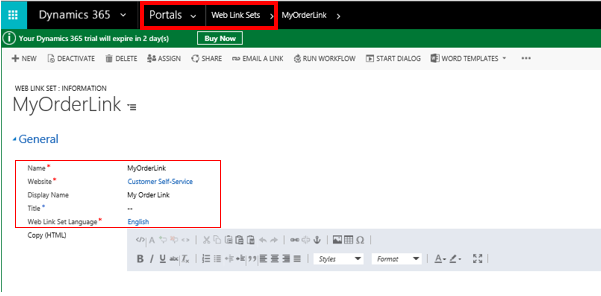
Step 3: Now the user will have to create a new web link set according to the Web Link Set that the user has defined and intends to use in his Web Template. Over here the user has referred to Web Link Set ‘My Order Link’. The user has to go to Portals > Web Link Sets and click on New and enter the details as shown below.
The user needs to add Links to the Web Link Set as shown below by clicking on the ‘+’ button to the right after the Web Link Set is saved.

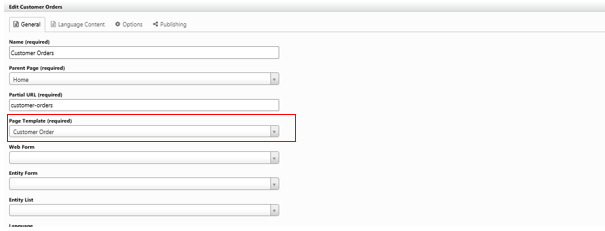
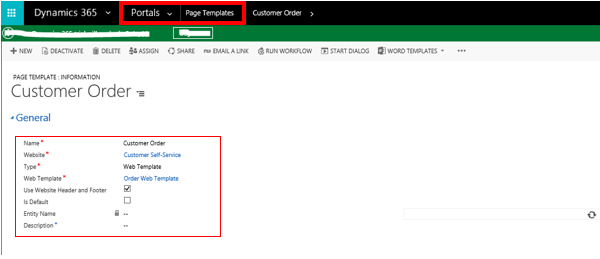
Step 4: Once this is done the user now has to create a Page Template that will include the web templates that we have created previously. In order to create a new Page Template the user has to go to Portals > Page Template. The user will enter the details of the Page template as shown below and click on ‘Save’.
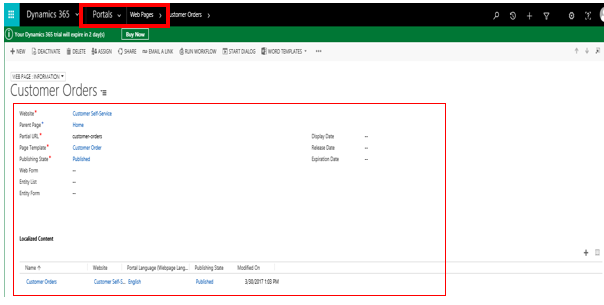
Step 5: Now the user will create a Web Page that will utilize the Page Template that we have designed. The user can create a Web Page directly form a Page Template by clicking on the ‘+’ button to the right on the Web Page Tab or by going to Portals > Web Pages and clicking on New.

The user has to enter the details of the Web Page as shown below.
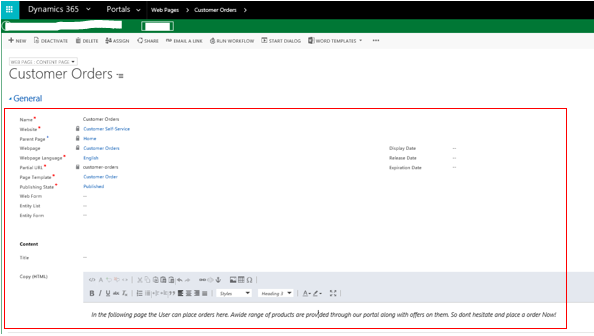
The user can create a custom Localized Content that will be used in the 2nd section of the layout of the Web Template. The user can create a new localized content for the following Web Page by selecting the ‘+’ option.
Step 6: The user will have to go to the Dynamics 365 portal environment and create a new child page that will display the result. While Entering the details of the child page the user will have to specify the Page Template that we have created previously as shown below.