Sales Return process in Dynamics 365 Finance and Operations Part 2
In the previous part of my blog, I explained about the Credit Only process. In this part of my blog, I will go through the Physical Return process. The Physical return process is determined based on the Disposition Code that is assigned to that Return Order.
Disposition Codes in D365 Finance and Operations:
Disposition codes in Dynamics 365 Finance and Operations (D365FO) are essential tools used to categorize and manage returned items. These codes help businesses decide what to do with products that customers send back, whether it’s restocking, repairing, or scrapping them. By using disposition codes, companies can streamline their return processes, maintain accurate inventory records, and ensure that returned items are handled efficiently and appropriately. This not only enhances operational efficiency but also helps in improving customer satisfaction by managing returns in a clear and organized manner.
Below is the List of Dispositions Codes that are available in D365 FNO:
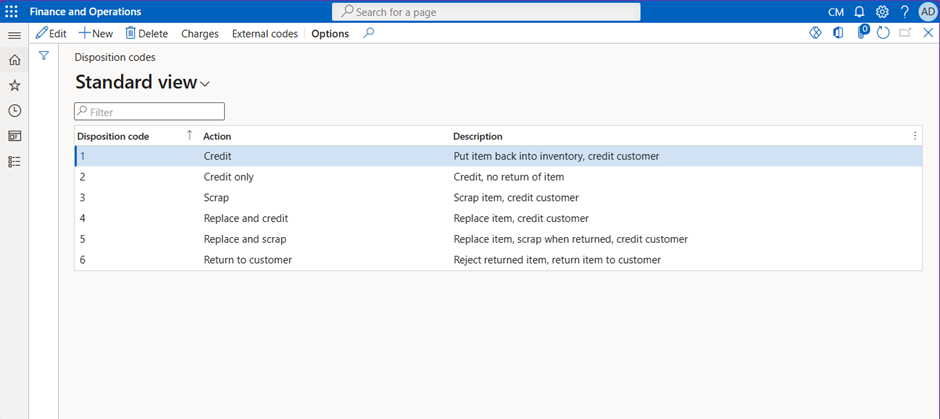
These Disposition codes are available as Standard Functionality in D365 FNO. You can also create new codes based on the business requirements.
In this part of the blog, I will walk you through the Replace Item and Credit Customer scenario. Let’s take a scenario where we have sold 5 items to the customer and after delivery the customer does the Quality check in which 2 products fail due to quality issues. The customer has Scrapped those products on our behalf and now we will provide the customer with the replacement items. For that:
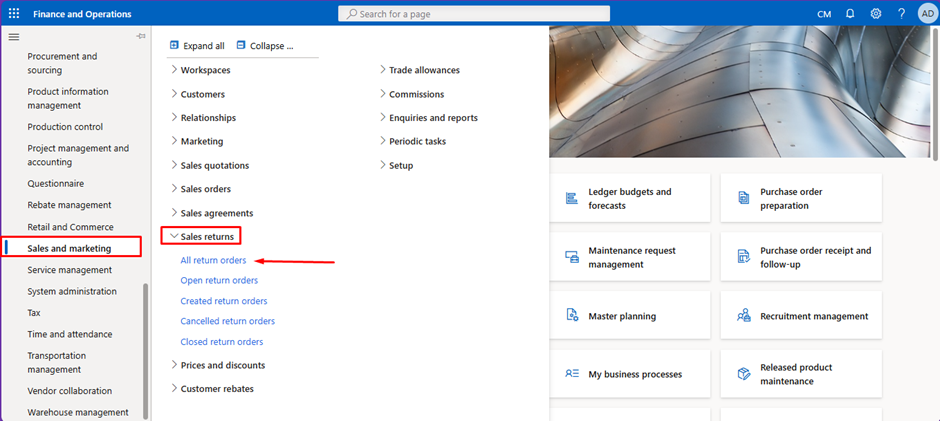
Go to Sales and Marketing>Sales Returns>All Return Orders.
On the All return orders page click New to create a New Sales Return Order.

Select the Customer for which the Return Order is to be created. Enter the Site, Warehouse, RMA number and other details and click OK.
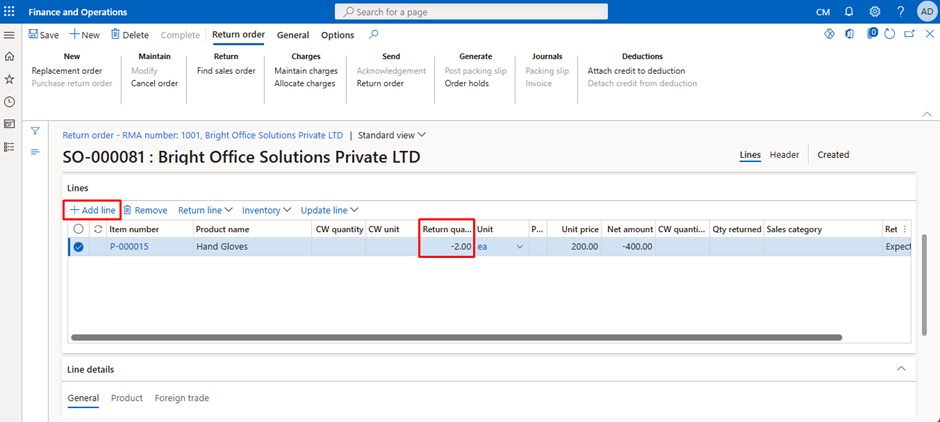
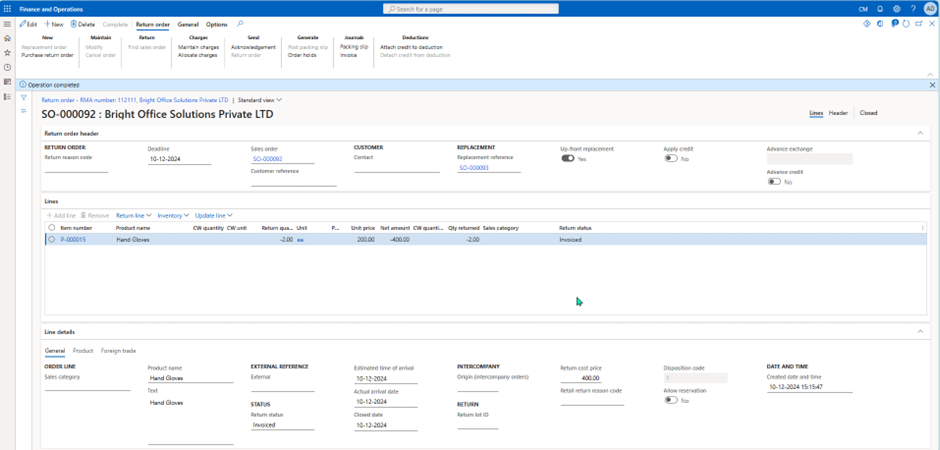
In the first part of the blog I created the Return order using the Find Sales Order function so in this part I will directly add the line with negative quantity. In the below screenshot you can see that I have added a line for the Product P-000015 with negative quantity.
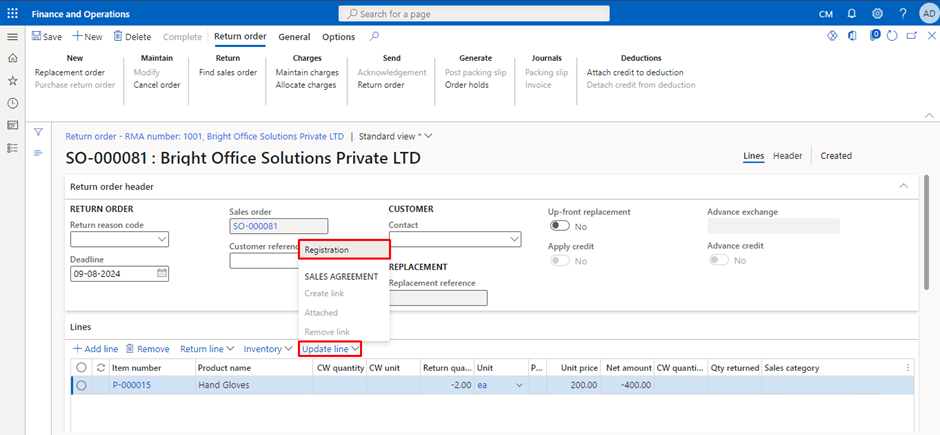
The next step is to register the Line with the Replace and Credit customer Disposition code. For that click on the Update Line option in the Lines tab then from the drop down click on the Registration option.

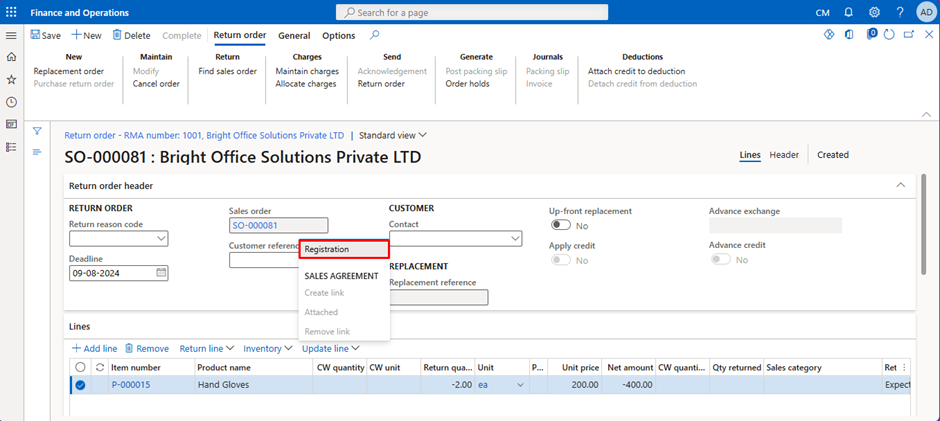

Then from the Disposition Code drop down select the Replace and Credit Customer option.
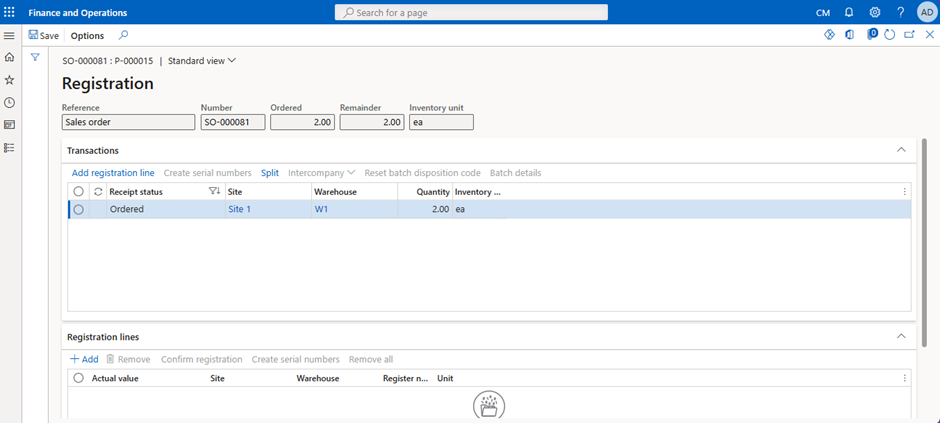
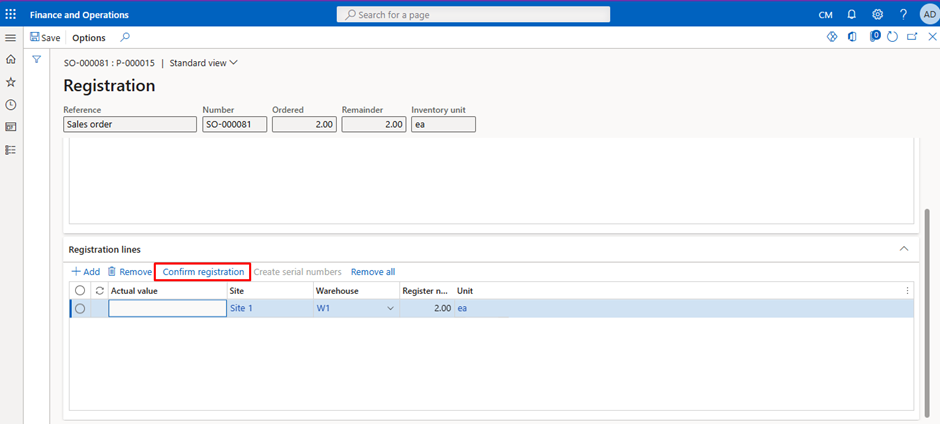
Then add the registration line then click on Confirm Registration.
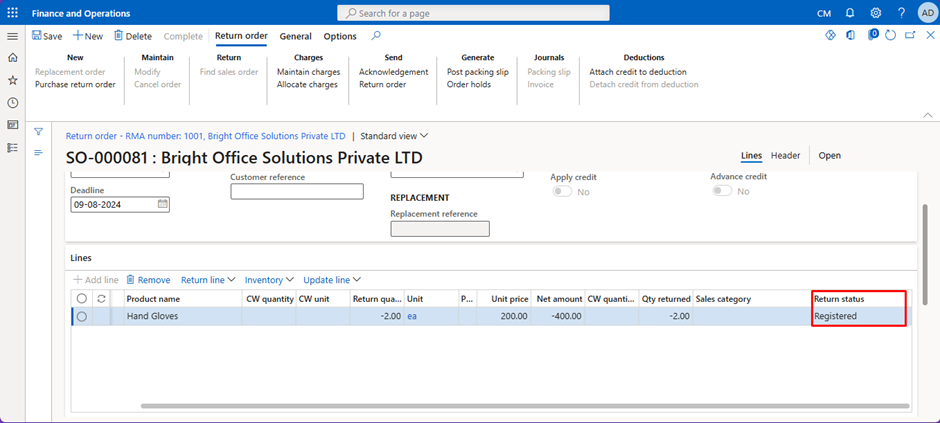
In the below screenshot you can see the Line status is changed to Registered and the Return order status is changed to Open.
Now if you go to the All-Sales Order Page you can see that a New Sales Order is created with the Order type as Returned Order with the Status as Open Order.

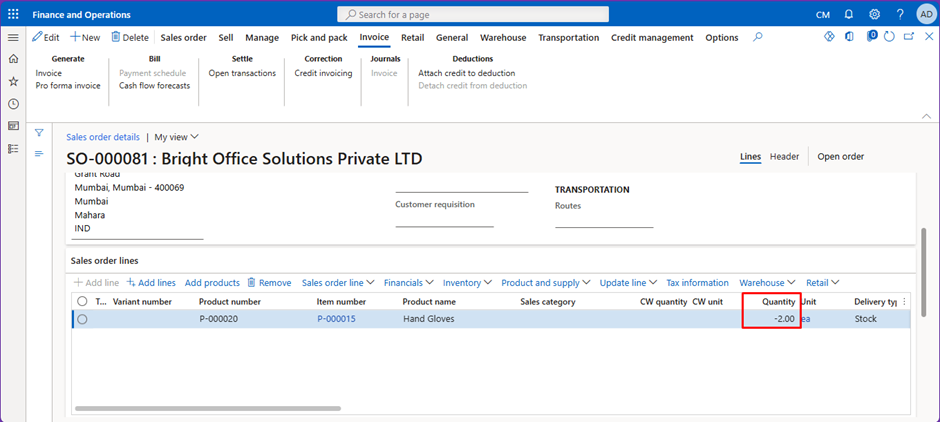
Now if you open the Sales Order and check the lines the quantity of the line will be exactly same as that of the Return order.
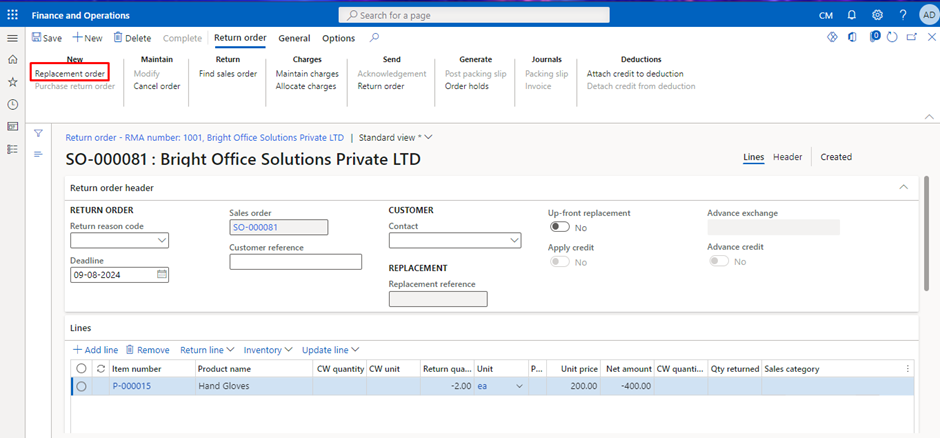
The next step is to create a Replacement order as we have selected the Disposition Code of Replace and Credit. For that click on Update Line and Click Registration which will change the Line status from Registered to Expected.
As you do this you will notice that the Post Packing Slip button is now disabled, and you can see that the Replacement Order button is now available.

As our disposition code is Replace and credit Customer the next step is to create a Replacement Order. For that click on the New Replacement Order button.
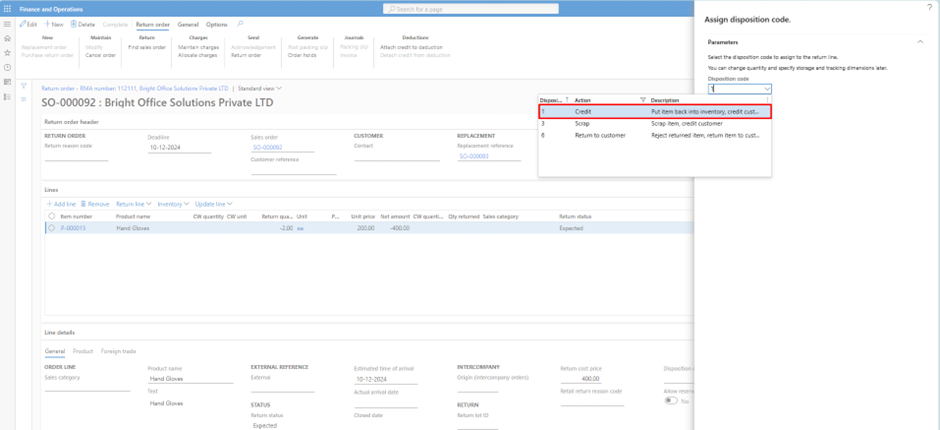
Add the same site and Warehouse as Return order and click Ok this will create a Replacement Order. After Replacement Order is created go back to the Return Order again and Click Registration and select the Credit disposition code which will Credit the Amount back into the Customer’s account.
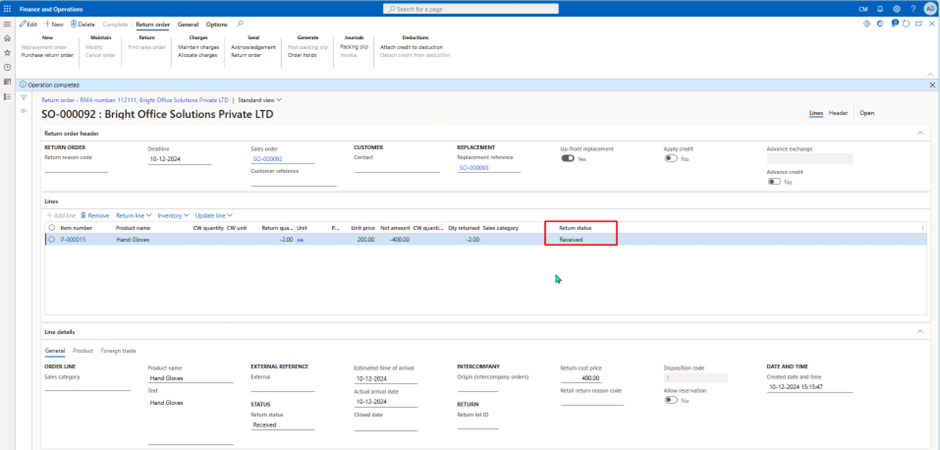
Now after that Post the Packing slip for the Return order which will change the Return Order status to Received.
Then go ahead and Invoice the Return Order from the All-Sales Order page which will again change the Return Order status to Closed.
Then go ahead and process the Replacement Sales Order. If you go to the Customer transaction and check, you can see that the Amount is credited back in to the Customer Account.

So, this completes the Sales Return Process of Return and Credit to customer.
We hope you found this article useful, and if you would like to discuss anything, you can reach out to us at transform@cloudfronts.com
