Developing and Deploying an OLAP Cube
In this blog article, I will explain you how to develop and deploy an OLAP Cube. This article is help to learn creation of OLAP Cube in SSAS.
An OLAP cube is a technology that stores data in an optimized way to provide a quick response to various types of complex queries by using dimensions and measures.
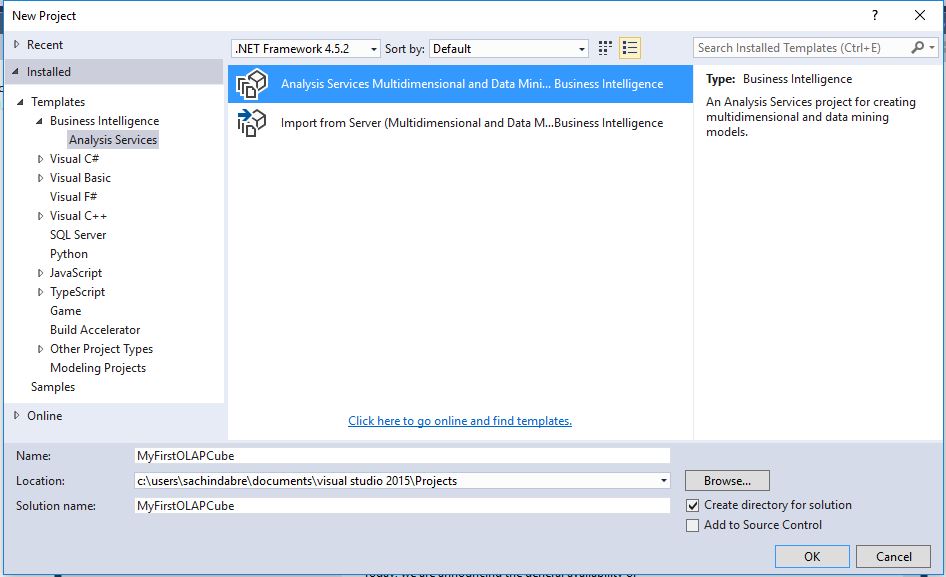
Step 1: Start Analysis Project
Click on File -> New -> Project -> Business Intelligence -> Select Analysis Service -> Analysis Services Multidimensional and Data Mining -> specify name for the project -> click Ok.
Step 2: Creating Data Source
In Solution Explorer, right click on Data Source -> Click on New Data Source -> click Next -> click on New button.
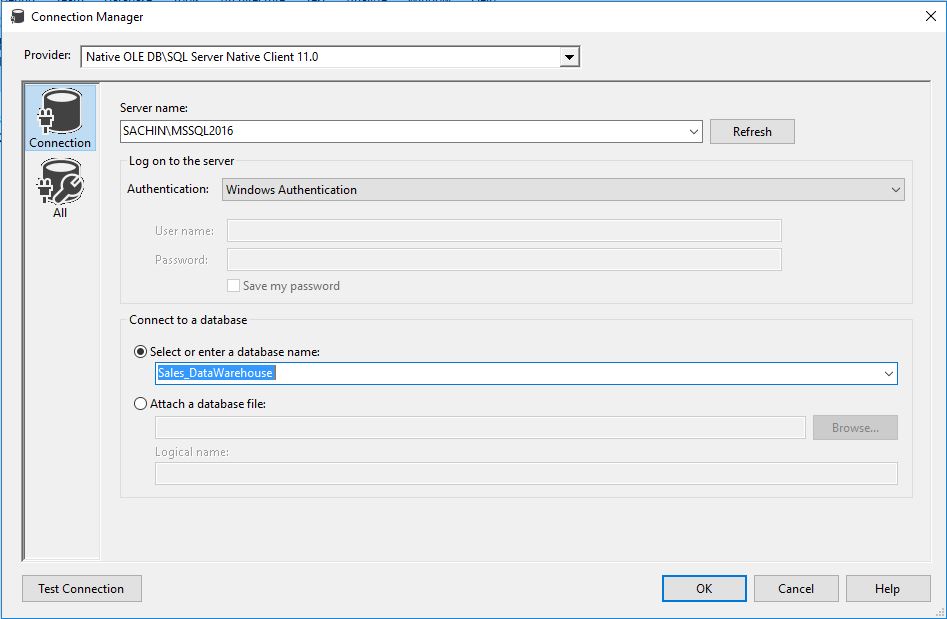
For Creating a new connection:
1) Specify Your SQL Server Name
2) Select the log on option
3) Select the database name from the server

Then click on Next -> Next -> Assign name for Data Source -> Finish.
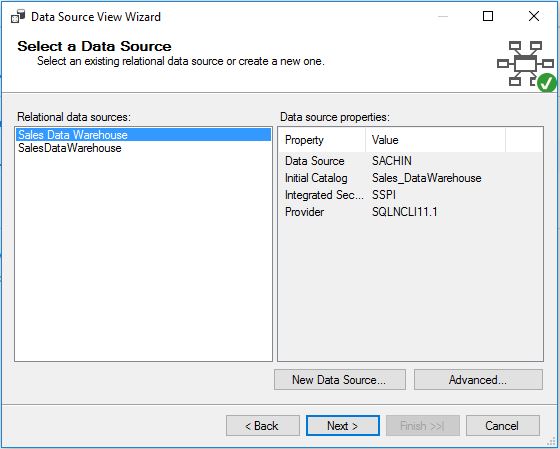
Step 3: Creating Data Source View
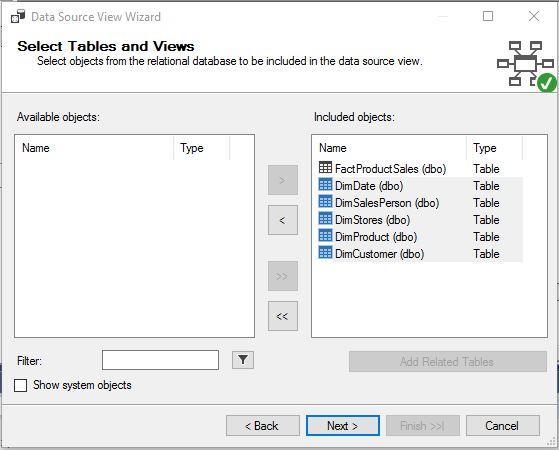
In the Solution Explorer, Right Click on Data Source View -> Click on New Data Source View -> Select Relational Data Source which we have created in Step 2. -> Click on Next.
First move your Fact Table to the right side to include in object list.
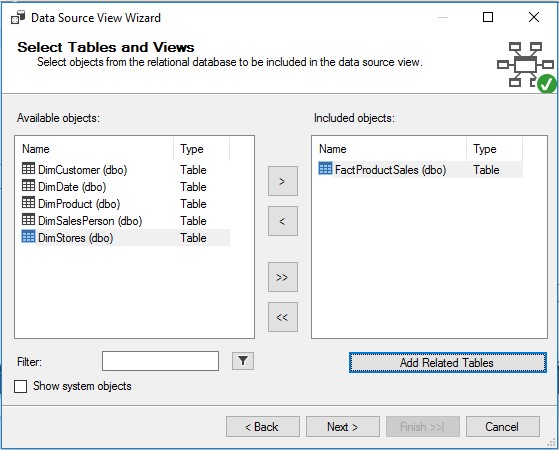
Select Fact Table in Right Pane (Fact product Sales) -> Click On Add Related Tables
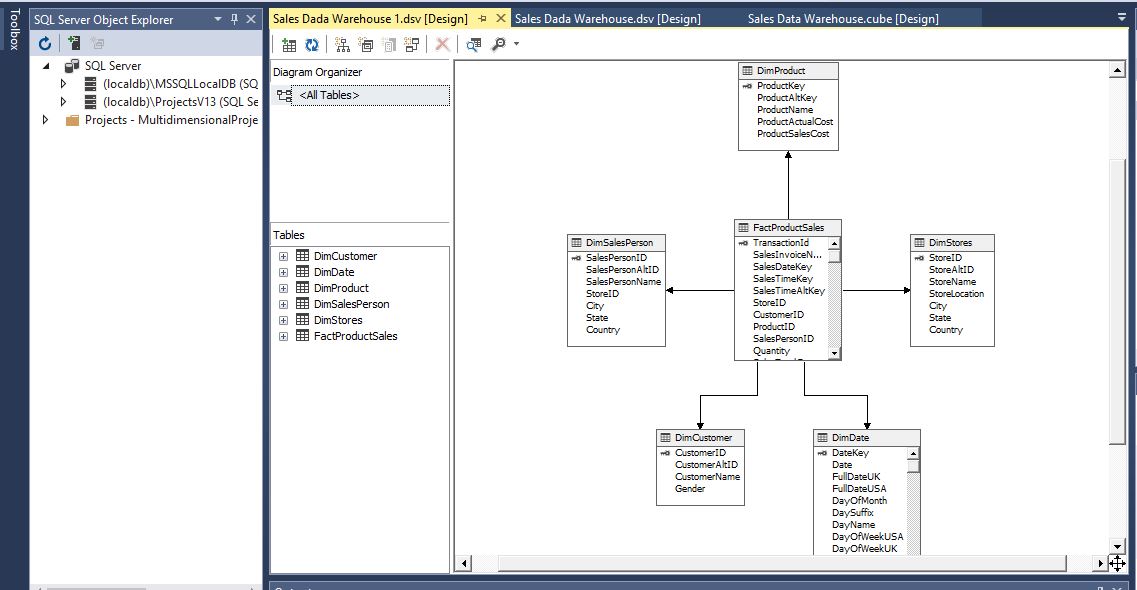
Then click on Next -> Finish
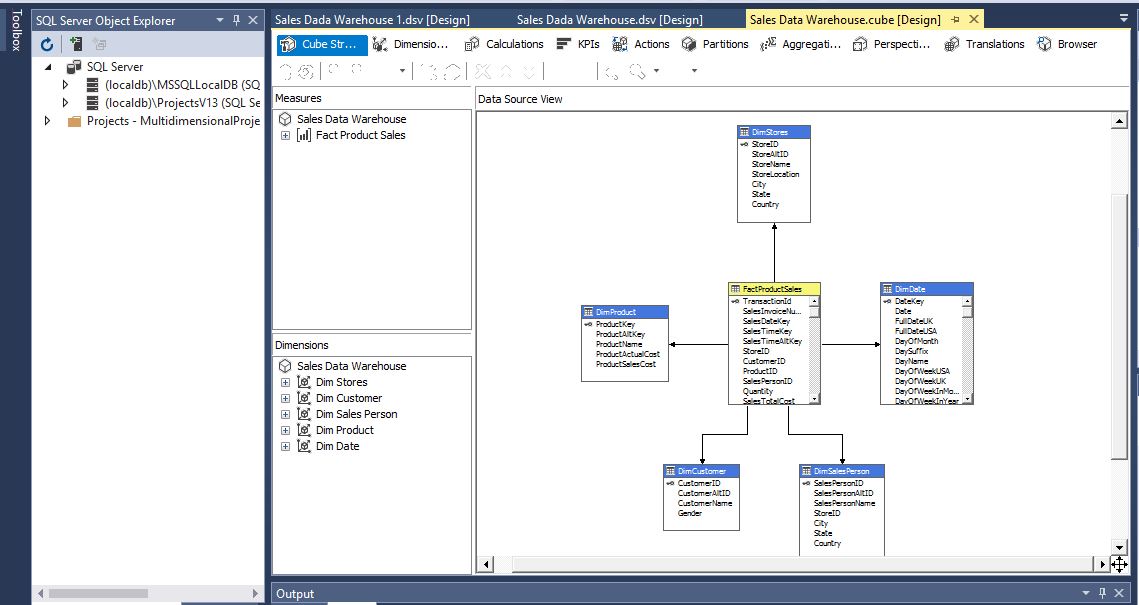
Data Source View is ready.
Step 4: Creating New Cube
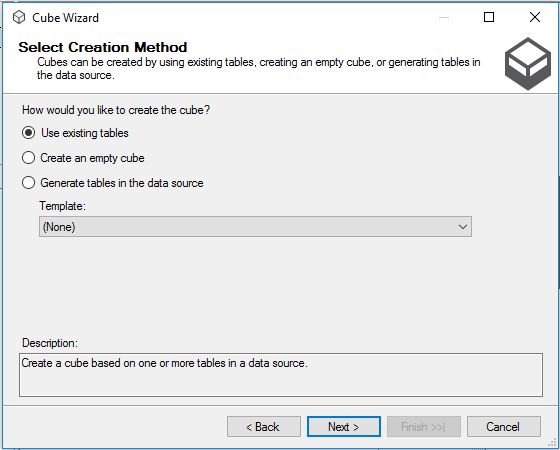
In Solution Explorer -> Right Click on Cube-> Click New Cube -> Click on Next -> click on Use existing tables -> Next.
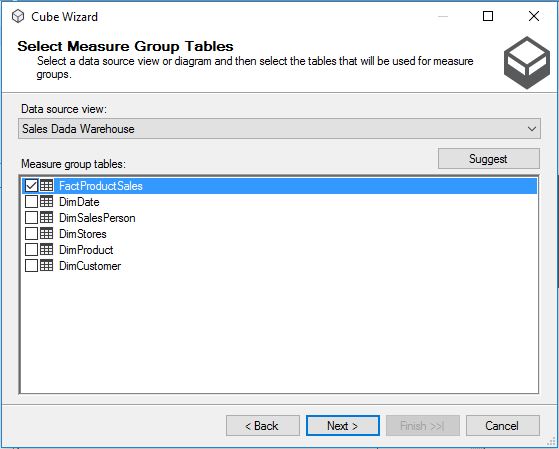
Select Fact Table Name from Measure Group Tables -> Click Next.
Choose Measures from the List which you want to place in your Cube -> Click Next
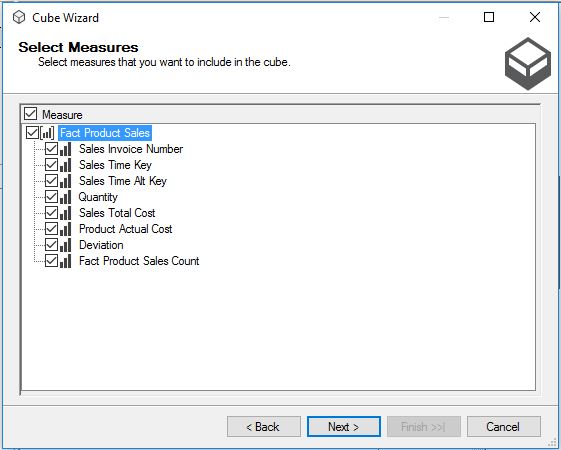
Then click Next -> Next -> Assign Cube name -> Finish.
Your Cube is ready and you can see the newly created Cube and dimensions added in solution explorer.
Step 5: Deploy the Cube
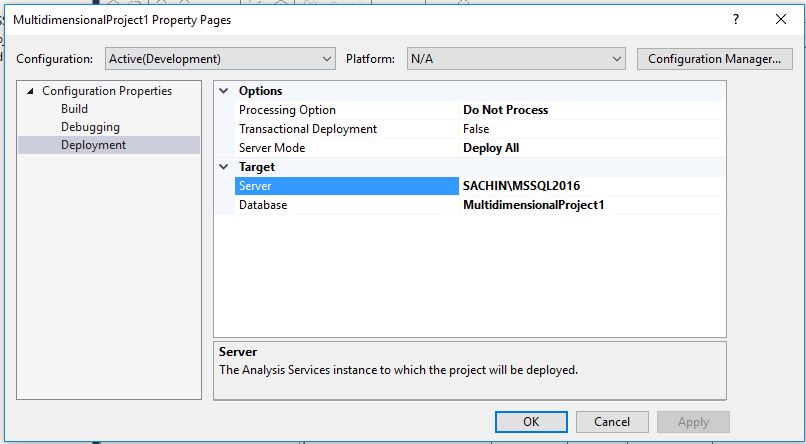
In Solution Explorer, right click on Project Name -> Click Properties.
Specify the target Server name and server mode.
In Solution Explorer, right click on Project Name -> Click Deploy
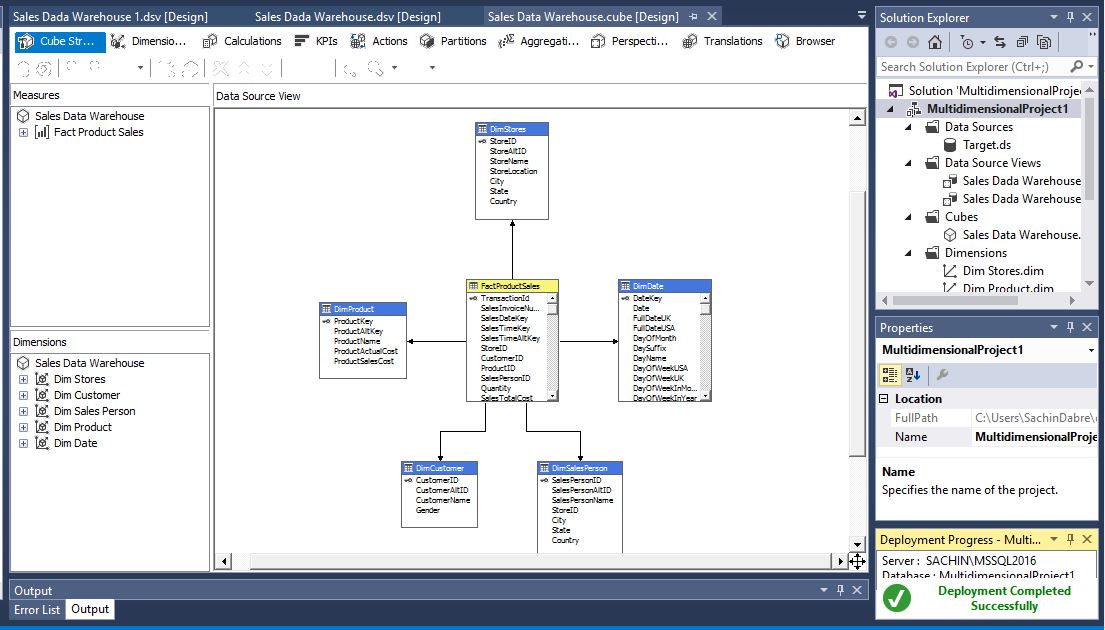
Once Deployment will finish, you can see the message Deployment Completed in deployment Properties.
