Setup and Design of Receipts in Dynamics 365 Operation Retail
Dynamics 365 for finance and operations is an ERP system built and designed to match your business needs in this modern day business scenario. Elements are currently as much a business system as it is innovation deliverable, some portion of a bigger biological system where data pulled from unique channels, (for example, social, IoT, and Office) is caught, investigated, and spread so as to help explicit business objectives. Make planning simpler by giving your spending chiefs simple to-utilize apparatuses. A wizard causes them to make spending plan worksheet formats for Microsoft Excel.
This cloud-based ERP framework gives the pertinent data you have to convey vital, information-driven bits of knowledge to key divisions. Additional quick monetary bits of knowledge drive corporate procedure and development, declining obligation through effective assortment of the board.
Introduction:
Blow blog, describe you about how to create, modify Receipts, invoice, Order summery report and rest of other document for MPOS and CPOS. You can create multiple receipts with different layout for single entity.
Let begin with this Exercise.
Step 1:-
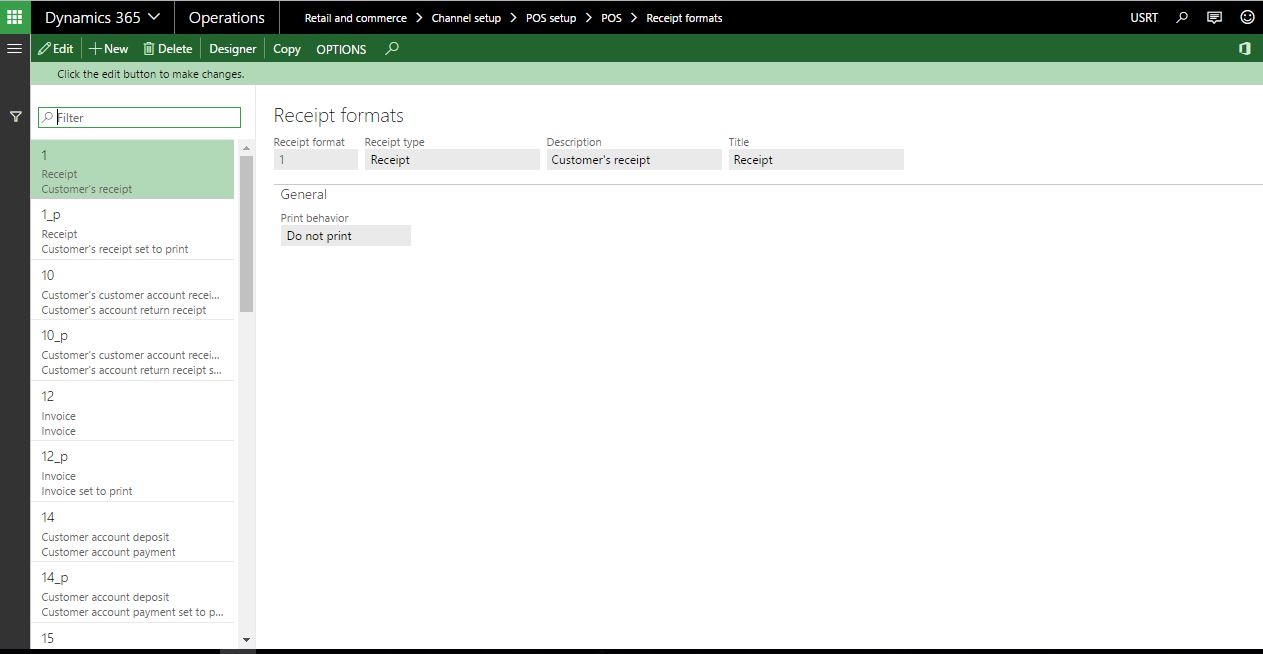
Go to the Retail and commerce > Channel setup > POS setup > POS > Receipt formats.
Step 2 :-
Select Receipt format 1 and click on design button.
Once you click on Design button browser will ask to Open Microsoft.Dynamics.Retail.RetailDesigner Host.application

Click on Open Button. And sign in Dynamics Workflow Editor.
Step 3:-
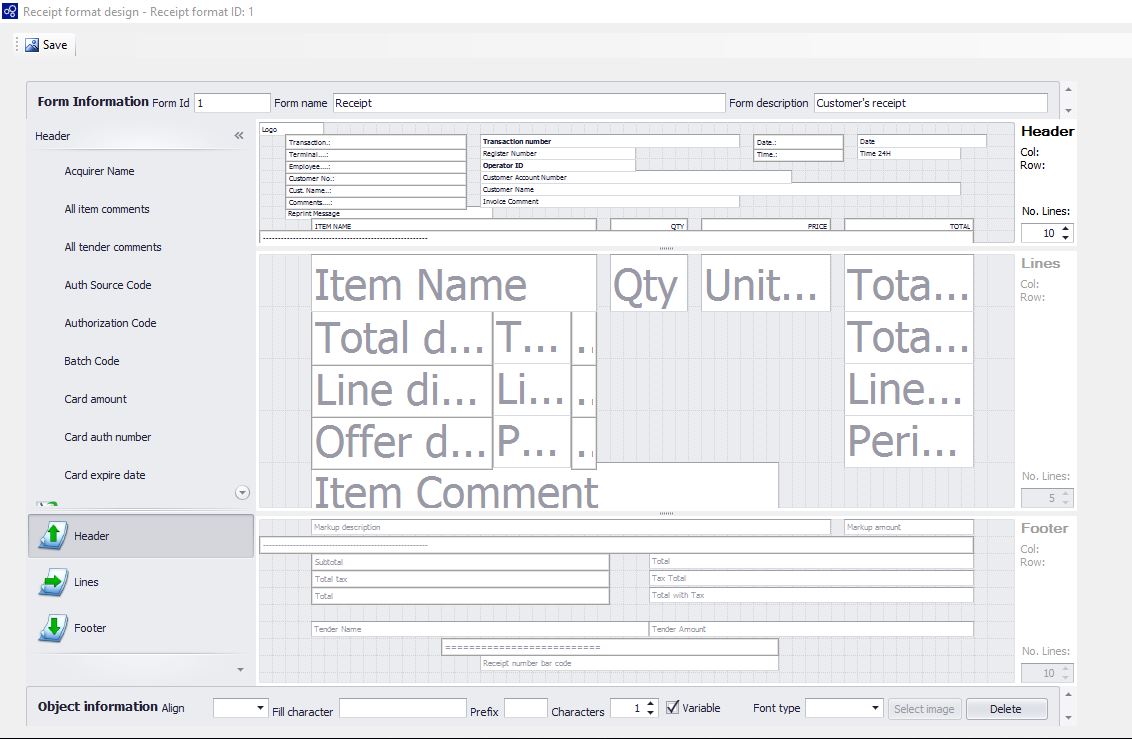
Designer window is look like below screen shot.
Step 4 :-
In Designer window you can able to see Form Information.
Form ID :- ID of receipts , Form Name :- Name of Form , Form Description :- Description of From.
![]()

Step 5:-
On Left Side, you can able to view Header, Line, Footer.
In Header you can click on drag listed element in design work space. For E.g. Store ID, Staff Name, Receipts No. Transaction ID. Header element will print on top of the receipts and will print only at once.

Step 6:-
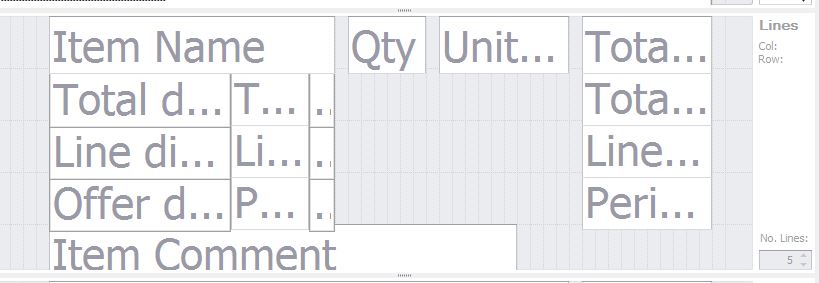
In Lines, you can click on drag listed element in design work space. For E.g. Product ID, Description, Unit Price, quantity. Line element will print on middle of the receipts.
Step 7:-
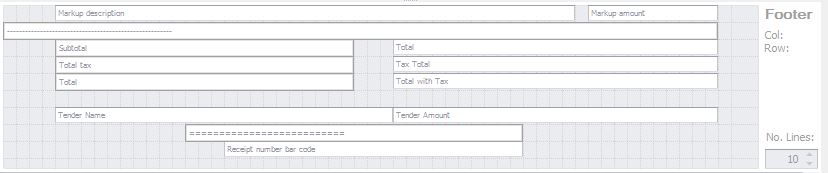
In footer, you can click on drag listed element in design work space. For E.g. Total, TAX Amount, Tender Name . Footer element will print on bottom of the receipts.
Step 8:-
Object Information is used to set property of Element of Header, Lines and footer which is
Align – Set the alignment of the field to either Left or Right.
Fill char – Specify the white space character. By default, an empty space is used, but you can enter any character.
Prefix – Enter the value that appears at the beginning of the field. This setting applies only to the Lines section of the layout.
Characters – Specify the maximum number of characters that the field can contain if the element contains a variable. If the text in the field is longer than the number of character that you specify, the text is truncated to fit the field.
Variable – This check box is selected automatically if the element contains a variable and can’t be customized.
Font type – Set the font style to either Normal or Bold. Bold letters use two times as much space as normal letters. Therefore, some characters might be truncated.
Delete – Click this button to remove the selected part from the form layout.
![]()
Step 9:-
Click on Save button. You receipt Layout will be save.
Conclusion:
Follow this steps to Create or modify receipts layout which is used in CPOS and MPOS.
