How to map Azure File Share as a Network Drive?
In this article, we will see how we can map a Network Drive on our system to a file stored on the cloud using Azure File Share. Using Azure File Share is useful when you want to share files on multiple systems and all the data will be on the cloud.
IT Considerations:
- You must have an Azure subscription for using Azure File Share.
- You must be a Global Administrator for Azure to perform these steps.
- You should have a Resource Group created on Azure.
- You will need to have an Azure subscription, if you trying it for the first time, you can also take a trial for a month.
Azure Files offers fully managed file shares in the cloud using Server Message Block (SMB) protocol. The advantage of using File Share is that you can replace on-premise file shares with Azure file shares, begin able to share file systems across multiple systems. You do not have to deal with any kind of hardware.
Step 1:
Creating Storage Account on Azure: For using Azure File, you can use a storage account that is already created or else you can create a new one. Let’s see how to create a new Storage account below.
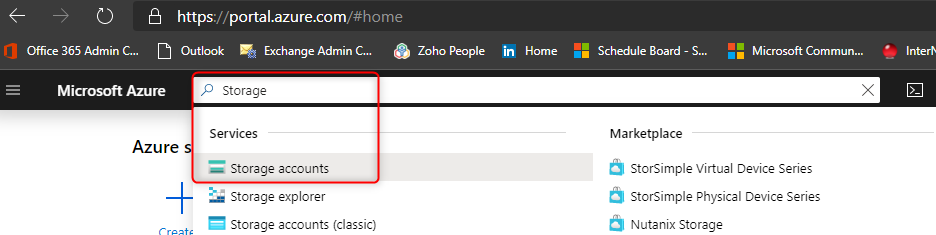
- Go to portal.azure.com.
- In the Search bar, search for Storage accounts.
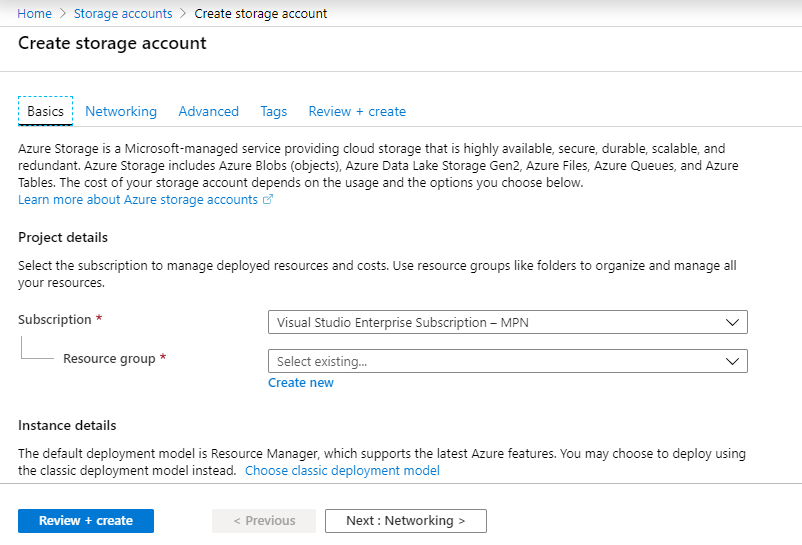
- Click on “Add” and then provide all the required details.
- Choose Subscription.
- Select Resource Group, if you haven’t created it yet, create a new one.
- Under Instance details, provide Storage account name. This should be unique.
- Select your location.
- You can leave the other fields set to their default value.
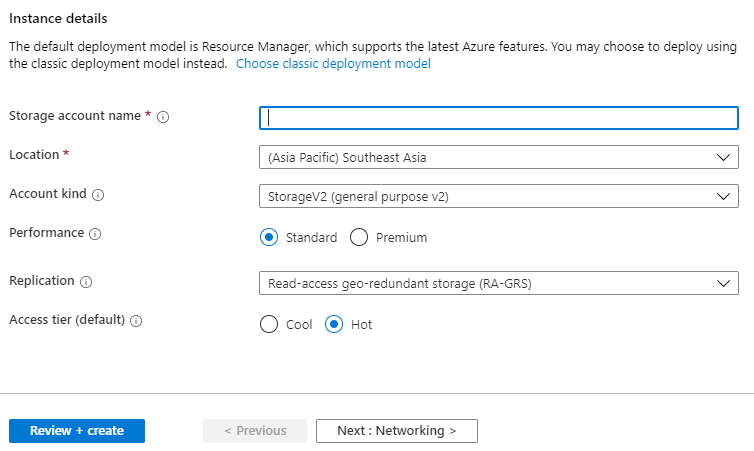
- Choose Review + Create, to review the Storage Account settings and create the account.
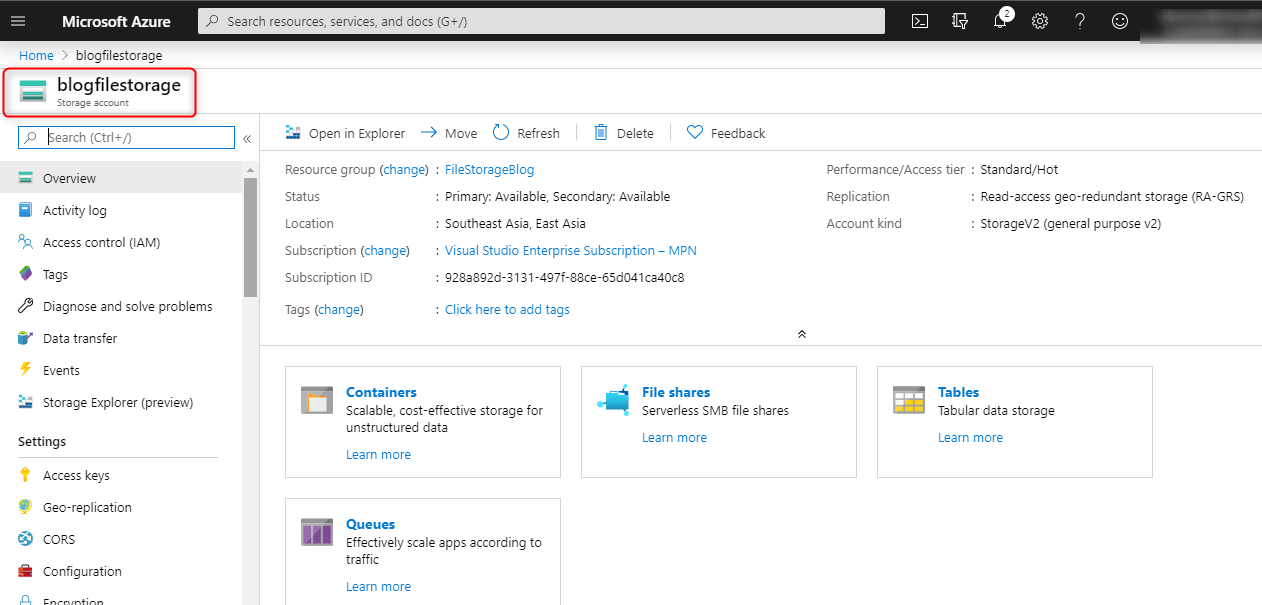
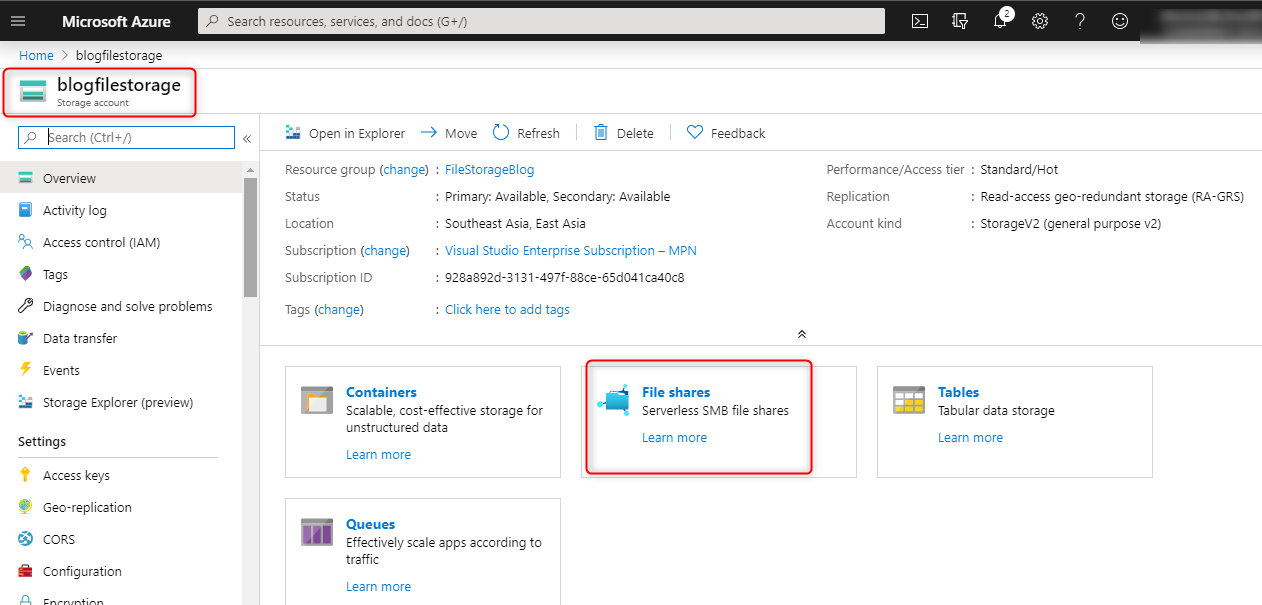
- Once the Storage account is created, it will look like this.
Step 2:
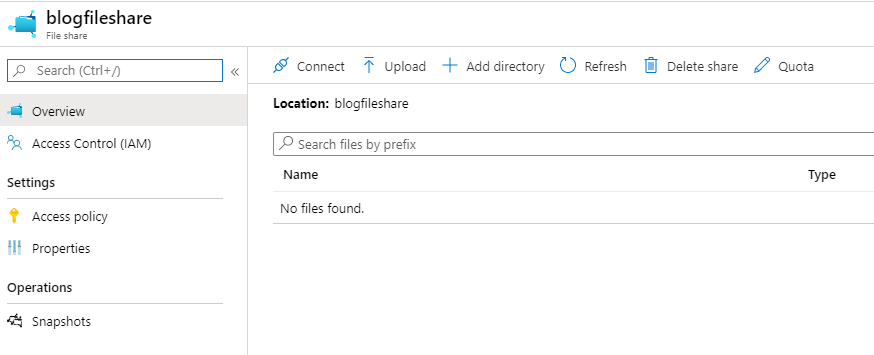
After the Storage account is created, you will need to create a File Share.
- Go to the Storage account which you created, select File Shares.
- Click on “+File Share” to get started. Name the File Share and set a quota in GiB to limit the total size of the files on File Share. Click Create.

Step 3:
We had created a File Share in Step 2, now we will map the Azure File Share as a Network Drive on the system.
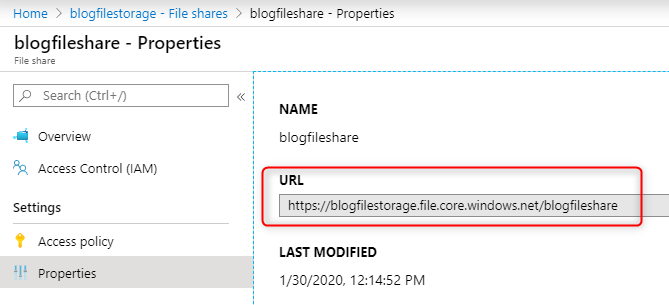
- To map Azure File Share as a Network Drive, you need the following information.
- The URL of your FIle Share – Open File Share > Properties.
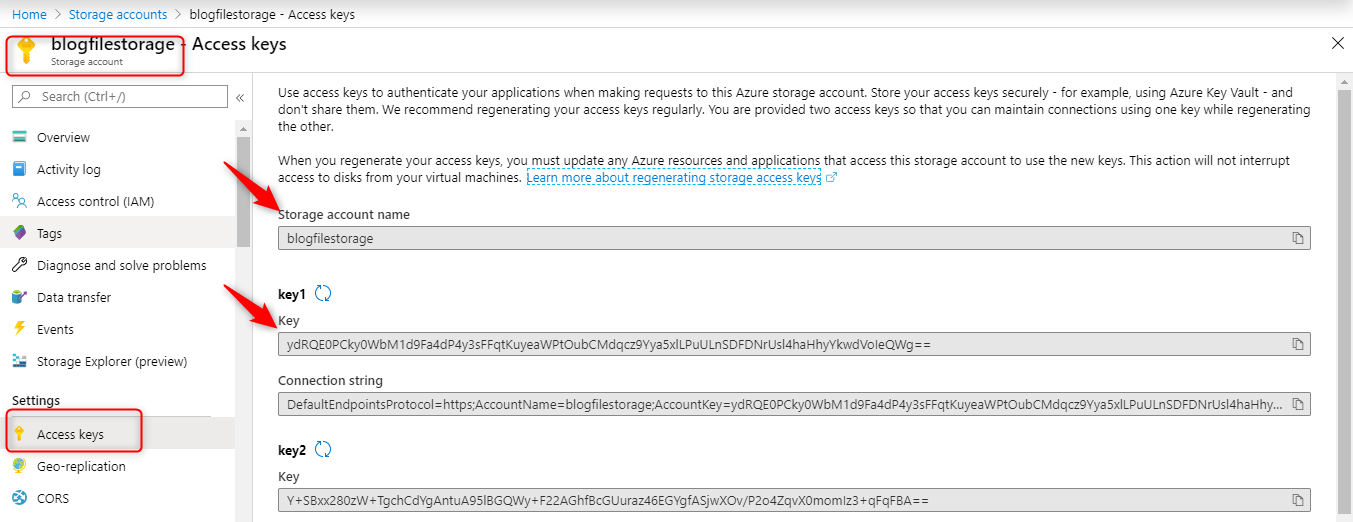
- The Storage Account name and Storage Account key to allow access – Go to the Storage Account which you created > Access Keys.
- The URL of your FIle Share – Open File Share > Properties.
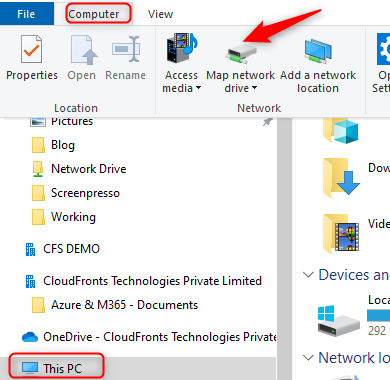
- Open Windows Explorer > Click on This PC > Computer > Map Netwrok Drive.
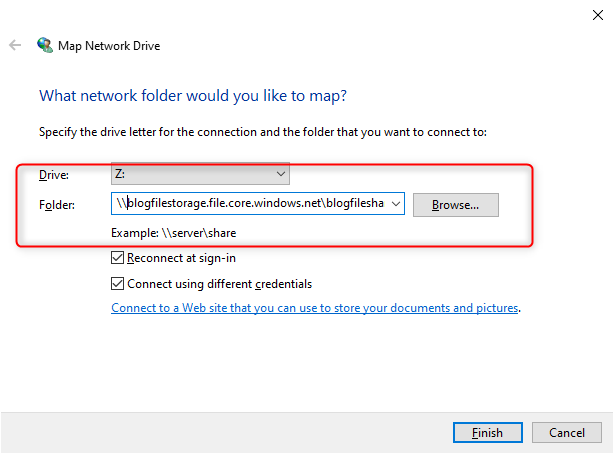
- Select the Drive (Choosing Z:) then provide the File Share URL, which we got from Point 1. Please find the screenshot below.
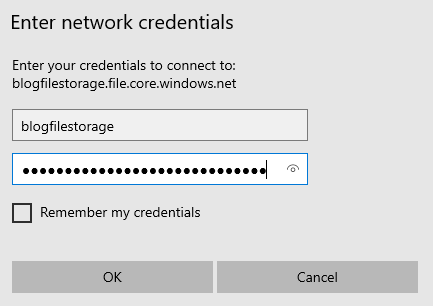
- Once you click on Finish, a pop-up will open, which will ask for the credentials.
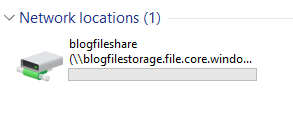
- You will find a Network Drive created in the system mapped with Azure File Share which we created.
- You can now save any file in your Network Drive, which will appear in the Azure File Share and on all the connected devices.
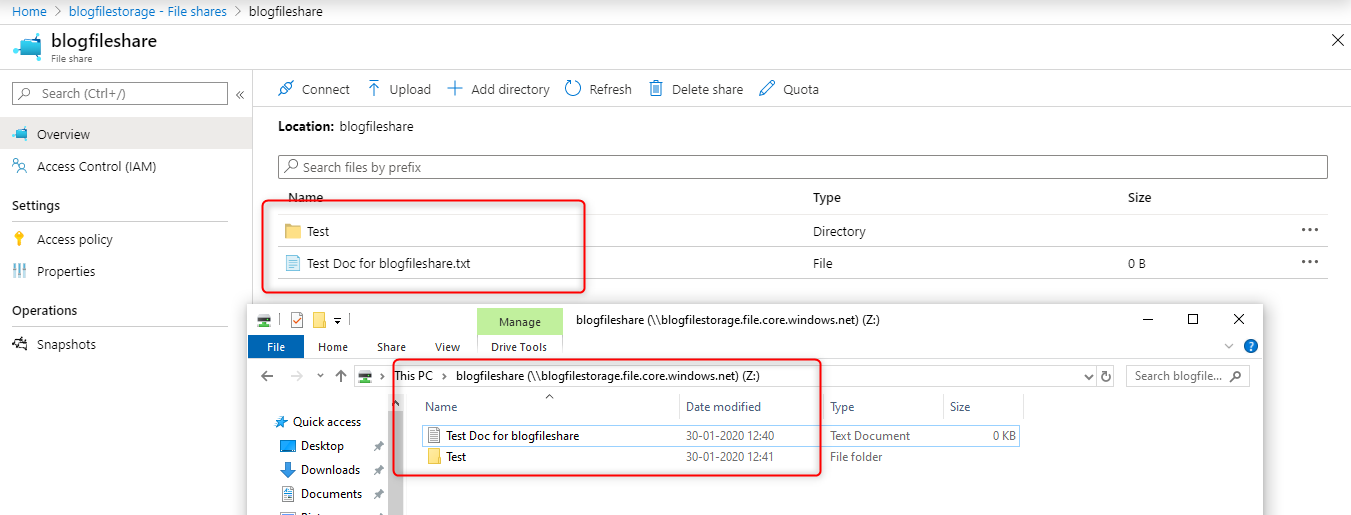
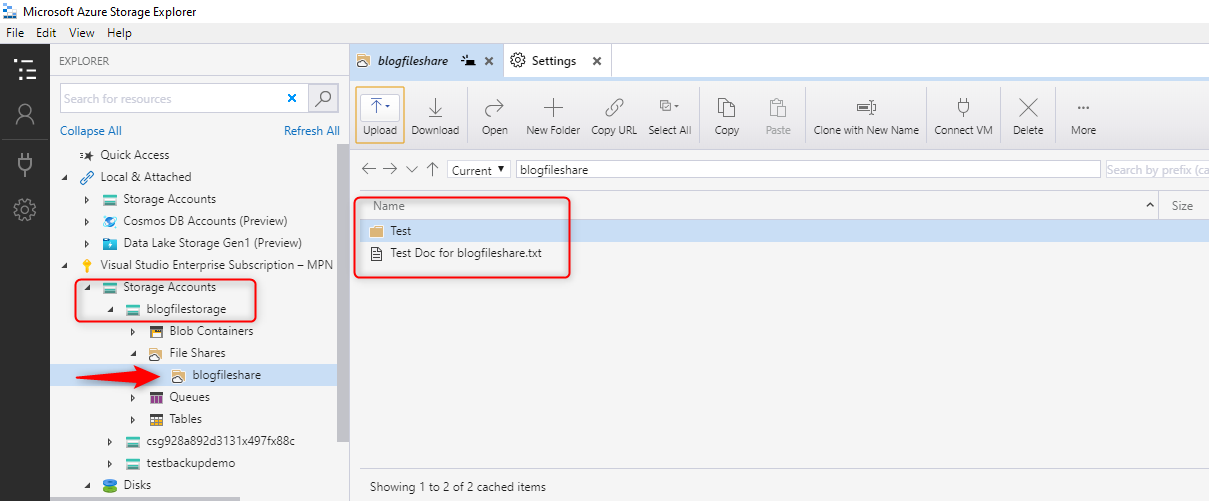
- You can also use Microsoft Azure Storage Explorer to upload, download and manage Azure blobs, File Shares and other storage entities. You can download the same from https://azure.microsoft.com/en-in/features/storage-explorer/
This is how you can utilize Azure File Share by mapping it to a Network Drive on your system to have shared access and being able to share a file system across multiple machines, no hardware to manage. You can go through the above 3 steps to easily create the same without having any difficulties.
