Microsoft Teams PowerShell Module Overview
Introduction:
In this article, we are going to take a quick overview of the Microsoft Teams PowerShell module and will cover a few things which we can perform in Microsoft Teams with the help of PowerShell.
There are two different PowerShell modules to manage Microsoft Teams.
1. Microsoft Teams PowerShell Module – You can get this module from here: https://www.powershellgallery.com/packages/MicrosoftTeams/1.0.0
2. Skype for Business PowerShell Module – You can download it from here: https://www.microsoft.com/en-us/download/details.aspx?id=39366
Teams PowerShell module contain all the cmdlets needed to create and manage teams whereas Skype for Business module contains the cmdlets to manage policies, configuration, and other tools.
Connecting to Microsoft Teams PowerShell:
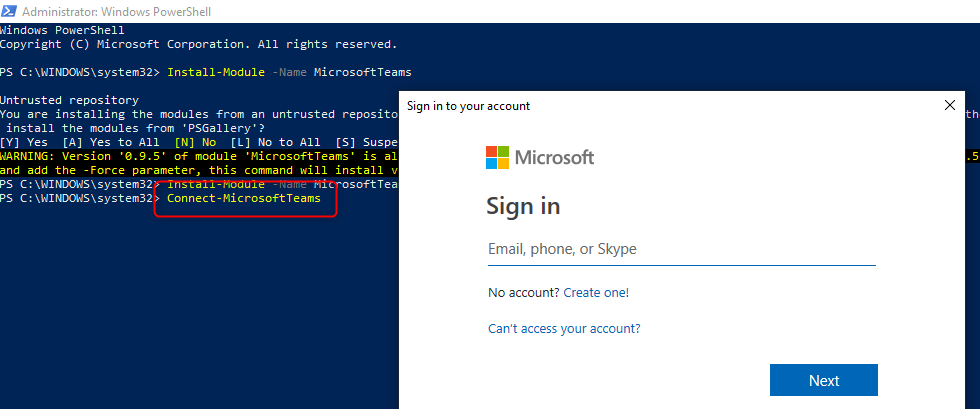
1. Install the Microsoft Teams PowerShell Module. Open Windows PowerShell and run the command “Install-Module -Name MicrosoftTeams” and then enter Y.

Module was already installed on my system, that’s why I got the messages highlighted in the above image. The version was old, so I re-entered the command and added the -Force parameter “Install-Module -Name MicrosoftTeams -Force”
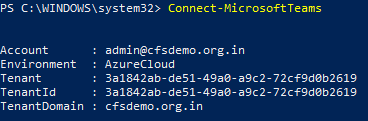
2. Connect with Microsoft Teams. Run command “Connect-MicrosoftTeams” and enter the credentials.
After login, you will be able to see your tenant details.
3. After the PowerShell Module relates to your Microsoft Teams, you can use the cmdlets for creating and managing teams.
For e.g,
-
- To get all your teams list, run command “Get-Team”

-
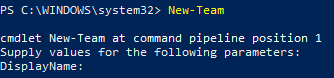
- For creating a new team, run command “New-Team”
-
- For managing Team users, run command “Add-TeamUser”. You will be asked to provide GroupId.

After providing the GroupId, it will ask to provide the user, which needs to be added to the team.
- For managing Team users, run command “Add-TeamUser”. You will be asked to provide GroupId.

4. Similarly, you can remove the user from a team, create a new channel or remove any team channel or else remove any group, etc. All these cmdlets can be run as end users, but it will only work for the teams you own, or you are a member of that team. As a global admin, you will be able to act on all the teams.
Managing MS Teams policies via PowerShell:
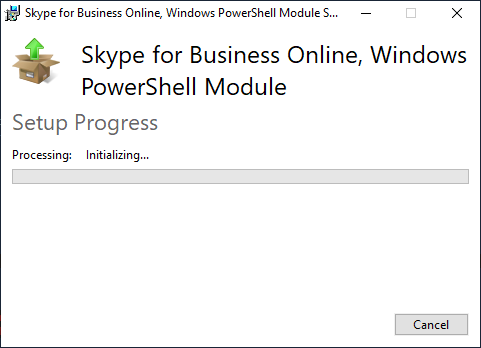
1. Download and install Skype for Business PowerShell Module.
2. Connect with Skype for Business PowerShell Module. Open Windows PowerShell and run the following commands:
“Import-Module SkypeOnlineConnector”
“$userCredential = Get-Credential”
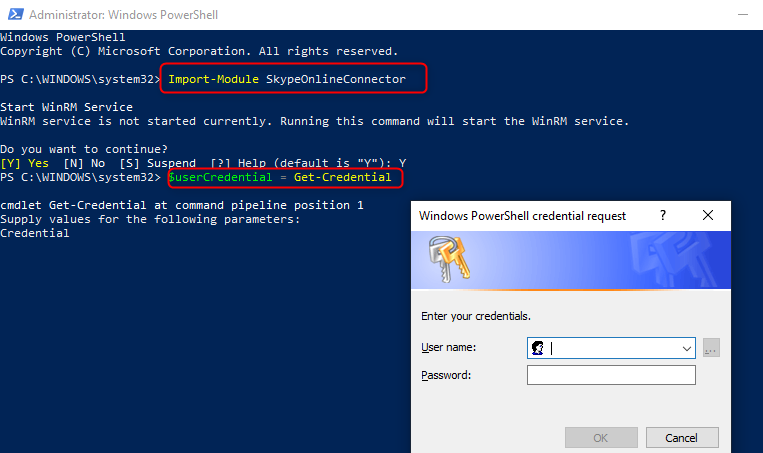
“$sfbSession = New-CsOnlineSession -Credential $userCredential”
“Import-PSSession $sfbSession”

Now you are connected to Skype for Business PowerShell Module.
3. There are basically 5 commands to manage the policies.
- GET – Get the details of the policy.
- NEW – Create new policies.
- SET – Lets you set particular values on a given policy.
- REMOVE – Delete the customs policy.
- GRANT – Assign policy to particular user.For e.g, you want to get the details of all the meeting policy, run command “Get-CsTeamsMeetingPolicy”
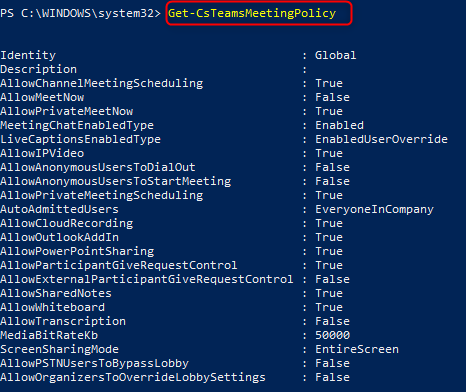
You will be able to get the details of the all the meeting policy whether it has been created by Microsoft or it is a custom policy that will be shown.
Similarly, for Messaging policy run command “Get-CsTeamsMessagingPolicy”
Managing configurations via PowerShell:
-
- Connect to Skype for Business PowerShell Module. You have seen above how to connect to Skype for Business PS Module.
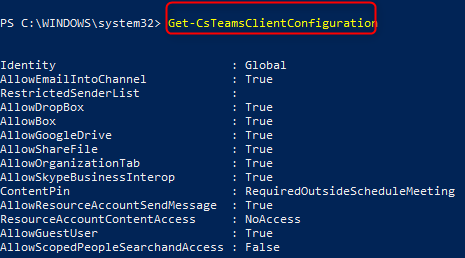
- Run command “Get-CsTeamsClientConfiguration”. This is basically your Teams settings in the admin center.
Conclusion:
Administrators can manage a good set of tools in Microsoft Teams through Microsoft Teams admin center and also through PowerShell. In this article, we have seen how easily we can connect through PowerShell and can manage things.
