Steps to create and use a Client Control Add-in in Microsoft Dynamics NAV
Since integrating your ERP takes time and resources, you want to make sure the project is worth it before you dive in. There are many common signs that indicate that you need microsoft dynamics nav upgrade .
Without integration, retailers rely on manually entering the same data into multiple systems. If you have teams or individuals solely dedicated to spending hours manually moving data, then you’re ready for automation. All these hours moving the data yourself could be better spent, like improving your customer experience.
Relying on manual data entry is also more prone to human mistakes. All it takes is a typo in one system to offset your data. Bad data can lead to inconsistent product information across sales channels, inaccurate delivery addresses for online customers, and wrong inventory counts
Introduction:
Microsoft Dynamics NAV control add-ins can be created using the NAV .dll assembly viz. Microsoft.Dynamics.Framework.UI.Extensibility.dll assembly. This .dll binds the NAV control add-in and the NAV environment. This control add-in has to be implemented in Visual Studio and then registered in Dynamics NAV by navigating to Control Add-ins.
Pre-Requisite:
Microsoft Dynamics NAV
Purpose:
In this article, I will be demonstrating the steps to create and use a Client control add-in in Microsoft Dynamics NAV.
Procedure:
- Open Visual Studio. Create a new C# class library project and add a reference to the Dynamics.Framework.UI.Extensibility.dllassembly. This assembly is present in the following directory: C:\Program Files (x86)\Microsoft Dynamics NAV\100\RoleTailored Client.

- In the Visual Studio project namespace, create a new interface and add code for the control add in. The code is mentioned below:[ControlAddInExport(“NAVaddin”)]
The name ‘NAVaddin’ will be used while registering the control add-in in Dynamics NAV.
- Now you need to sign the assembly. Navigate to properties->Signing->select Sign the assembly. In the Choose a strong name key file drop down list, select ‘New’. In the Key File name enter an appropriate name and clear the ‘Protect my key file with a password’ check box.
- The next step is to generate a unique public key in Visual Studio for the project as this public key is required while registering the control add-in in Dynamics NAV.
- Navigate to Tools->External Tools.
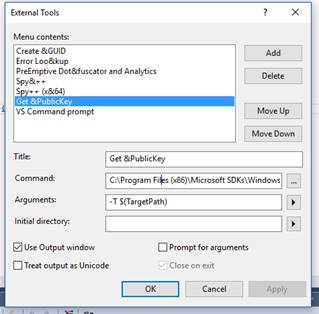
Parameters to be filled are as below:
Title: Get &PublicKey
Command: C:\Program Files (x86)\Microsoft SDKs\Windows\v8.1A\bin\NETFX 4.5.1 Tools\sn.exe
Arguments: Get &PublicKey
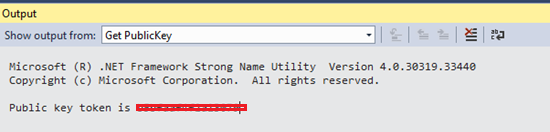
Now, ‘Get PublicKey’ will appear as an option under Tools which on clicking will generate the public key for the project.

After clicking ‘Get PublicKey’->the public key is generated and displayed as below:
- Save and Build the solution. After successful build of the project, the .dll file will be generated.

- Creating the Resource .Zip File.You must create a single .zip file containing manifest and any of the resource files used in Visual Studio. This .zip file has to be used while registering the .dll in Dynamics NAV.

- The next step will be to copy the .dll file to two locations in Dynamics NAV as given below:
- C:\Program Files\Microsoft Dynamics NAV\100\Service\Add-ins
- C:\Program Files (x86)\Microsoft Dynamics NAV\100\RoleTailored Client\Add-ins
- Go to NAV administration and restart NAV services so that the changes are reflected.
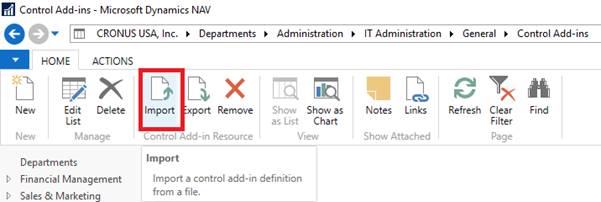
- Navigate to ‘Control Add-ins’ in NAV windows client and create a new Control add-in. Add the same control add-in name which is mentioned is step 2:

Click on ‘Import’ action to import the .zip file containing all the Visual studio resources as created in step 7.
After performing these steps, the client control add-in will be registered in Dynamics NAV and the triggers defined in Visual Studio, if any will be visible in the NAV Development environment if the Control add-in is selected in the properties of the control.
Conclusion:
Using this procedure, you can create complex functionalities in Visual Studio and use the .dll control add-in file in Dynamics NAV. I have created SMS functionality from NAV and Digital Signature functionality in NAV using the above procedure of adding a client control add-in.
